
Grow Mushrooms at Home – imagine harvesting fresh, flavorful mushrooms right from your own kitchen! Forget those expensive grocery store prices and questionable origins. This isn’t just a gardening project; it’s a culinary adventure waiting to happen. For centuries, cultures around the world, from ancient China to the Roman Empire, have revered mushrooms for their unique flavors and medicinal properties. Now, you can tap into that rich history and cultivate your own delicious fungi.
Why should you learn to grow mushrooms at home? Well, beyond the sheer satisfaction of nurturing life, it’s about control. You know exactly what goes into your food, avoiding pesticides and ensuring peak freshness. Plus, it’s incredibly rewarding! This DIY guide will walk you through simple, effective techniques, even if you’ve never gardened before. We’ll cover everything from choosing the right mushroom species to creating the perfect growing environment. Get ready to impress your friends, elevate your cooking, and discover the fascinating world of home-grown mushrooms!
Grow Your Own Gourmet Mushrooms at Home: A Beginner’s Guide
Hey there, fellow fungi fanatics! Ever dreamt of harvesting your own delicious mushrooms right in your kitchen? Well, dream no more! Growing mushrooms at home is surprisingly achievable, even for beginners. It might seem intimidating at first, but with a little patience and the right guidance, you’ll be enjoying fresh, homegrown mushrooms in no time. This guide will walk you through the process, step-by-step, focusing on a simple and effective method using readily available materials. Let’s get started!
Choosing Your Mushroom Variety
Before we dive into the nitty-gritty, let’s talk about which mushrooms are easiest to grow at home. While there are tons of fascinating fungi out there, some are definitely more beginner-friendly than others. Here are a few great options:
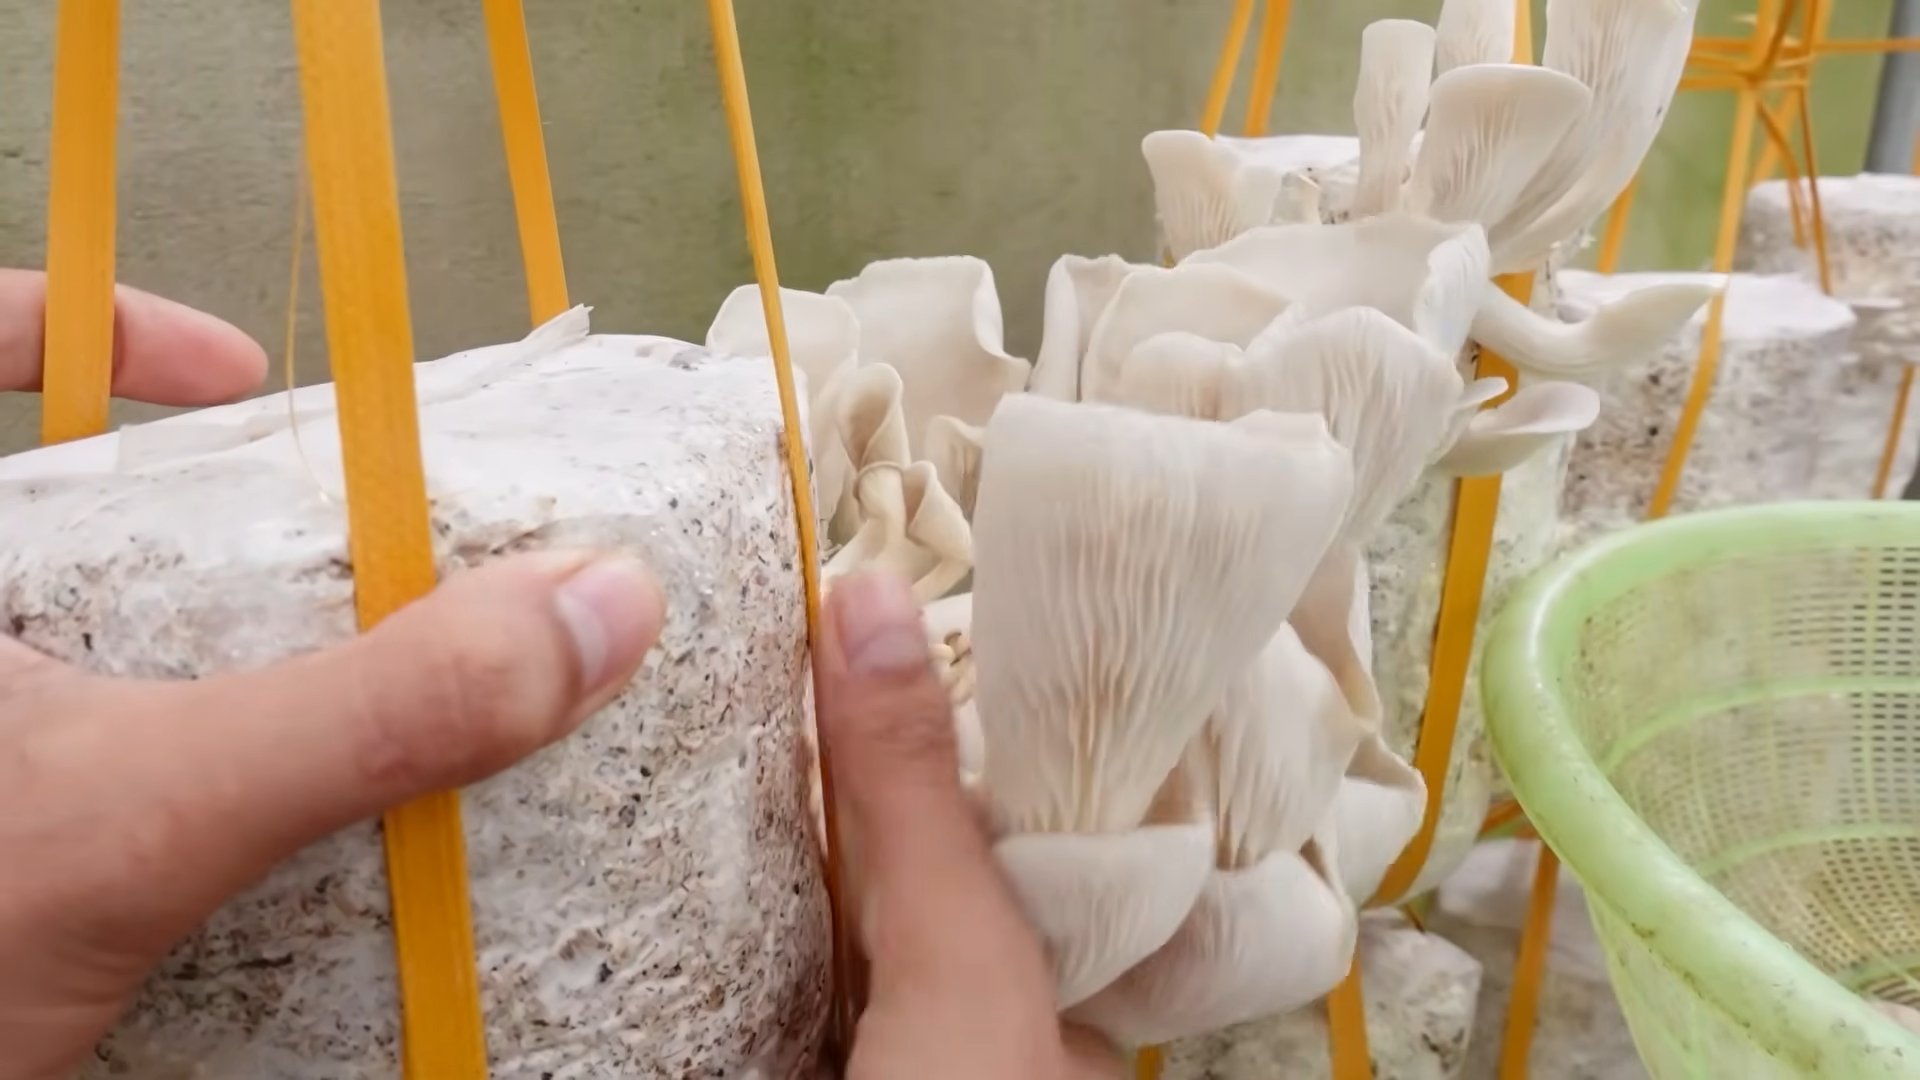
* Oyster Mushrooms (Pleurotus ostreatus): These are arguably the easiest to grow. They’re fast-growing, versatile in the kitchen, and can thrive on a variety of substrates (more on that later!). Plus, they come in a range of colors, from white and grey to pink and yellow!
* Shiitake Mushrooms (Lentinula edodes): A bit more challenging than oysters, but still manageable for beginners. They have a rich, savory flavor and are a popular choice for Asian cuisine.
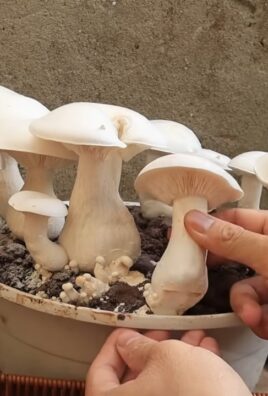
* Lion’s Mane (Hericium erinaceus): Known for its unique appearance and brain-boosting properties, Lion’s Mane is a rewarding mushroom to cultivate. It requires a bit more attention to humidity, but the results are worth it.
For this guide, we’ll focus on growing oyster mushrooms, as they offer the highest chance of success for beginners.
Gathering Your Supplies
Okay, time to assemble your mushroom-growing arsenal! Here’s what you’ll need:
* Oyster Mushroom Spawn: This is essentially the “seed” of your mushrooms. You can purchase it online or from a local mushroom supplier. Make sure to get spawn that’s specifically labeled for oyster mushrooms.
* Substrate: This is the material your mushrooms will grow on. Straw is an excellent choice for oyster mushrooms. You can use wheat straw, oat straw, or even shredded cardboard.
* Heat-Resistant Grow Bags: These bags need to withstand the heat of pasteurization. You can find these online, often sold as mushroom grow bags.
* Large Pot or Container: Big enough to submerge your straw in water.
* Propane Burner or Stovetop: To heat the water for pasteurization.
* Thermometer: To monitor the water temperature.
* Spray Bottle: For misting your mushrooms.
* Well-Ventilated Area: A space with indirect sunlight and good airflow. A basement, garage, or spare room works well.
* Rubbing Alcohol: For sanitizing your work area and tools.
* Gloves: To maintain a sterile environment.
Preparing the Substrate: Pasteurization
This is a crucial step! Pasteurization kills off any competing organisms in the straw, giving your mushroom spawn a head start.
1. Chop the Straw: Cut the straw into smaller pieces, about 2-3 inches long. This makes it easier to pack into the grow bags and allows the mushroom mycelium to colonize it more effectively.
2. Soak the Straw: Fill your large pot or container with water and submerge the chopped straw. Make sure all the straw is completely covered.
3. Heat the Water: Place the pot on your propane burner or stovetop and heat the water to 160-180°F (71-82°C). Use your thermometer to monitor the temperature.
4. Maintain the Temperature: Hold the water at this temperature for 60-90 minutes. This is the pasteurization process. Stir the straw occasionally to ensure even heating.
5. Drain the Straw: After pasteurization, carefully drain the hot water from the straw. Let the straw cool down until it’s cool enough to handle. You want it to be damp, but not dripping wet. Squeeze out any excess water.
Inoculating the Substrate
Now comes the fun part: introducing the mushroom spawn to the prepared substrate!
1. Sanitize Your Work Area: Clean your work surface with rubbing alcohol to minimize contamination.
2. Put on Gloves: Wear gloves to prevent introducing bacteria or fungi to the spawn and substrate.
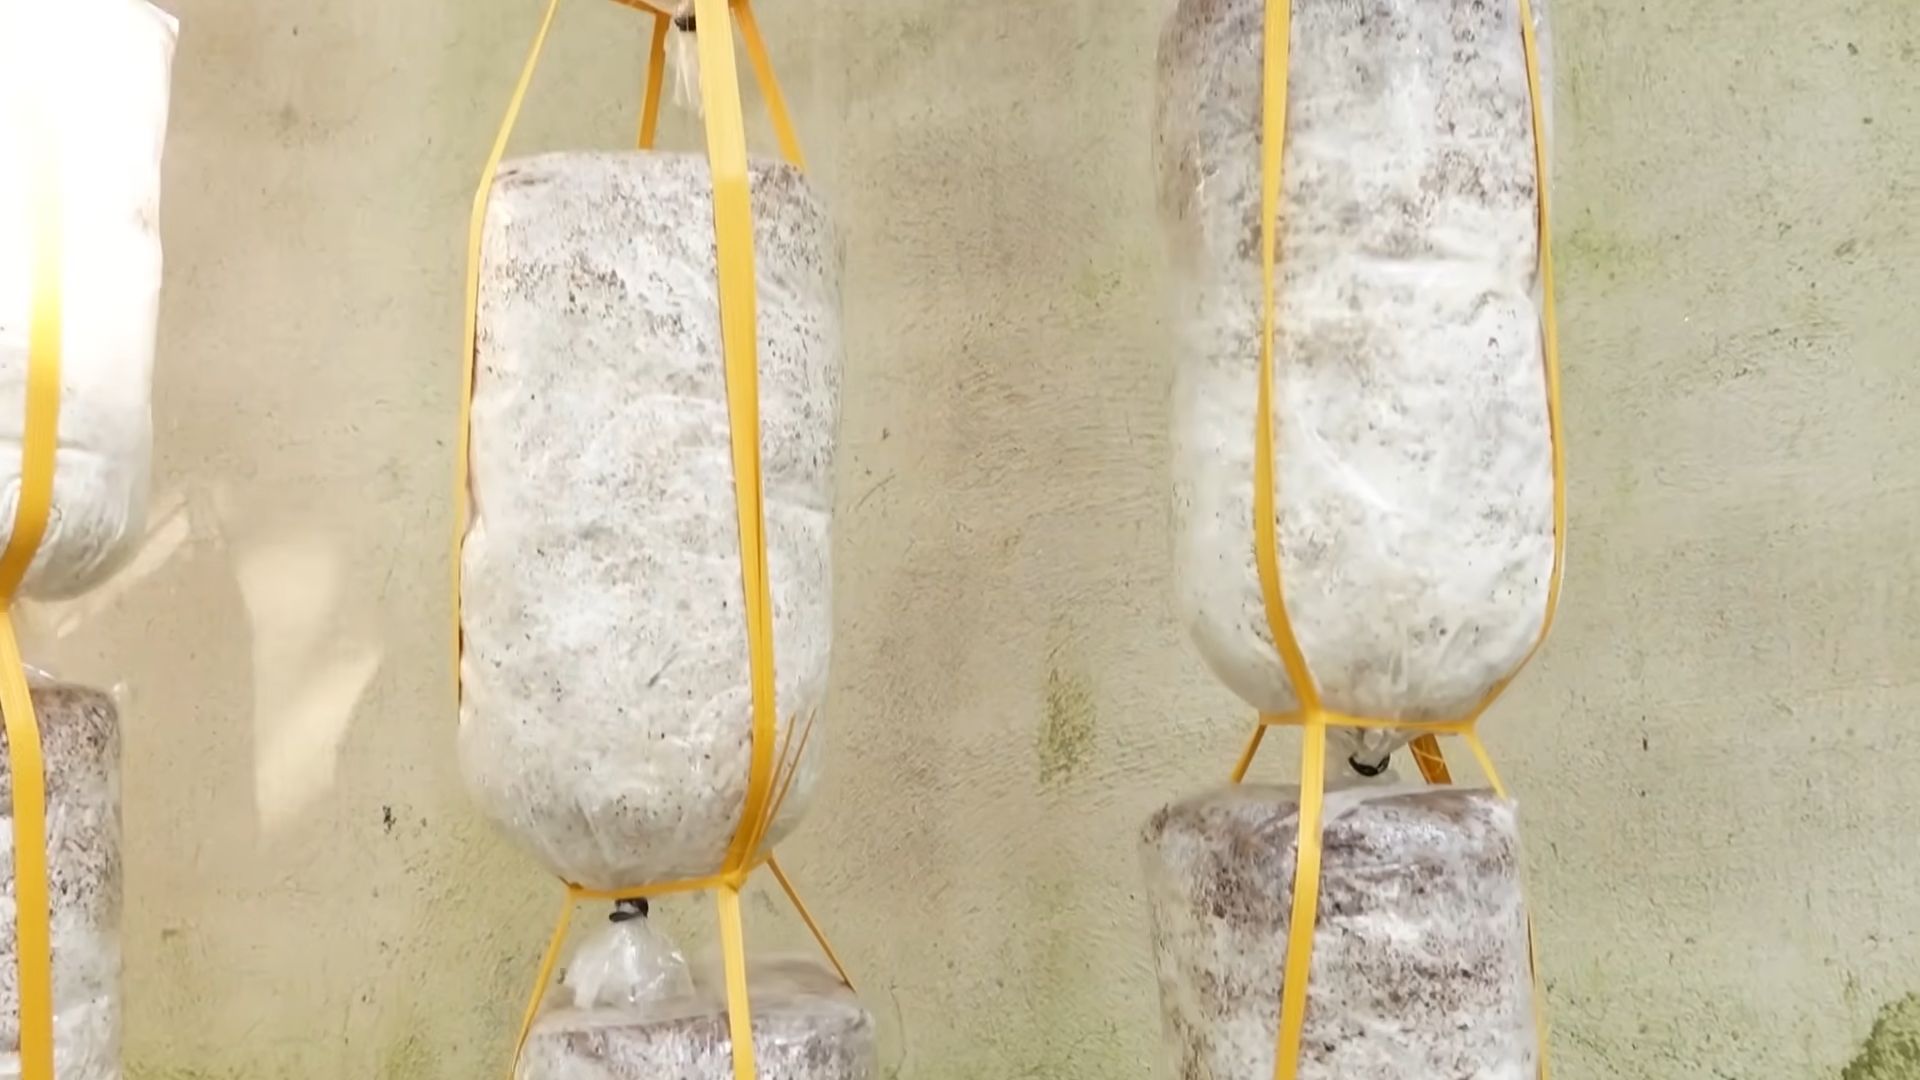
3. Layer the Substrate and Spawn: In your heat-resistant grow bag, create alternating layers of pasteurized straw and mushroom spawn. Start with a layer of straw, then sprinkle a layer of spawn on top. Repeat this process until the bag is full, ending with a layer of straw. Aim for about 10-20% spawn by weight of the straw.
4. Seal the Bag: Close the grow bag tightly. You can use a zip tie, rubber band, or heat sealer.
5. Create Air Exchange Holes: Using a clean nail or knife, poke several small holes (about ¼ inch in diameter) in the bag. These holes will allow for air exchange, which is essential for mushroom growth. Space the holes evenly around the bag.
Incubation: Letting the Mycelium Grow
This is the waiting game! During incubation, the mushroom mycelium (the vegetative part of the fungus) will colonize the straw.
1. Place the Bag in a Dark, Warm Place: Find a spot that’s dark and has a consistent temperature of around 65-75°F (18-24°C). A closet, basement, or spare room works well.
2. Monitor the Bag: Check the bag regularly for signs of contamination. Look for any unusual colors or smells. If you see green, black, or other mold growing, it’s likely contaminated, and you’ll need to discard the bag.
3. Wait for Colonization: Over the next 2-3 weeks, the mycelium will spread throughout the straw. You’ll see white, fuzzy growth covering the substrate. The bag should become almost entirely white.
Fruiting: Time for Mushrooms!
Once the substrate is fully colonized, it’s time to initiate fruiting, which is when the mushrooms start to form.
1. Move the Bag to a Well-Ventilated Area with Indirect Light: Transfer the bag to a location with good airflow and indirect sunlight. Avoid direct sunlight, as it can dry out the mushrooms.
2. Increase Humidity: Oyster mushrooms need high humidity to fruit properly. Mist the bag several times a day with a spray bottle to keep the surface moist. You can also place a humidity dome or plastic bag loosely over the bag to help retain moisture.
3. Cut Slits in the Bag: Using a clean knife, cut slits or X’s in the bag where you want the mushrooms to grow. These openings will provide access to fresh air and encourage fruiting.
4. Maintain Conditions: Continue to mist the bag regularly and ensure good ventilation.
5. Watch for Pinning: After a few days to a week, you should start to see small mushroom “pins” forming at the slits. These are the baby mushrooms!
Harvesting Your Mushrooms
The moment you’ve been waiting for!
1. Harvest When Mature: Harvest the mushrooms when the caps are fully developed but before they start to drop spores. The edges of the caps will start to curl upwards slightly.
2. Twist and Pull: Gently twist and pull the mushrooms from the bag. Try to remove the entire cluster at once.
3. Enjoy Your Harvest! Your freshly grown oyster mushrooms are now ready to be cooked and enjoyed! They’re delicious sautéed, grilled, or added to soups and stews.
Second Flush and Beyond
After harvesting your first flush of mushrooms, you can often get a second (and sometimes even a third) flush from the same bag.
1. Soak the Bag: After harvesting, soak the bag in cold water for 12-24 hours. This rehydrates the substrate and encourages further fruiting.
2. Drain and Return to Fruiting Conditions: Drain the water and return the bag to the well-ventilated area with indirect light and high humidity.
3. Repeat the Process: Continue to mist the bag regularly and wait for the next flush of mushrooms to develop.
Troubleshooting
Even with the best efforts, things can sometimes go wrong. Here are a few common problems and how to address them:
* Contamination: If you see mold or other unusual growth, it’s likely contamination. Unfortunately, there’s not much you can do except discard the bag. To prevent contamination, always sanitize your work area and use sterile techniques.
* Slow Colonization: If the mycelium is slow to colonize the substrate, it could be due to low temperatures or insufficient moisture. Ensure the temperature is within
Conclusion
So, there you have it! Cultivating your own mushrooms at home isn’t just a quirky hobby; it’s a rewarding journey into the fascinating world of fungi. From the satisfaction of nurturing life from simple materials to the unparalleled flavor of freshly harvested mushrooms, the benefits are undeniable. This DIY trick, using readily available materials and straightforward techniques, opens the door to a sustainable and delicious food source right in your own home.
Why is this a must-try? Because it empowers you to take control of your food supply, reduce your reliance on commercially grown produce (often laden with pesticides and transported long distances), and connect with nature in a tangible way. Imagine the pride you’ll feel serving a dish featuring mushrooms you personally cultivated! Beyond the culinary advantages, growing mushrooms at home is an educational experience, offering insights into the intricate processes of decomposition, nutrient cycling, and the vital role fungi play in our ecosystem.
But the adventure doesn’t stop here. Feel free to experiment with different mushroom varieties. Oyster mushrooms are a great starting point due to their resilience and rapid growth, but once you’ve mastered the basics, branch out to shiitake, lion’s mane, or even more exotic species. Each variety offers a unique flavor profile and texture, adding exciting dimensions to your culinary creations.
Consider varying your substrate as well. While straw and coffee grounds are popular choices, you can also explore using hardwood sawdust, cardboard, or even agricultural waste products. Remember to research the specific needs of the mushroom variety you’re growing, as different species thrive in different environments.
Don’t be afraid to get creative with your growing environment. While a dark, humid space is generally ideal, you can adapt your setup to suit your available resources. A repurposed closet, a basement corner, or even a shaded outdoor area can be transformed into a thriving mushroom farm. Just ensure you maintain adequate humidity and ventilation to prevent contamination and promote healthy growth.
We strongly encourage you to embark on this exciting journey of growing mushrooms at home. It’s a relatively low-cost, low-maintenance, and highly rewarding endeavor that will transform the way you think about food and your connection to the natural world.
Once you’ve experienced the joy of harvesting your own homegrown mushrooms, we want to hear about it! Share your successes, challenges, and creative adaptations in the comments below. Let’s build a community of mushroom enthusiasts, sharing knowledge and inspiring each other to cultivate a more sustainable and delicious future. Your experiences, tips, and photos will not only enrich the conversation but also help others overcome any obstacles they may encounter. Let’s spread the word about the magic of growing mushrooms at home and inspire others to embrace this rewarding DIY project. This is your chance to become a mushroom guru!
Frequently Asked Questions (FAQ)
What are the easiest mushrooms to grow at home for beginners?
Oyster mushrooms are widely considered the easiest mushrooms for beginners to cultivate. They are fast-growing, relatively tolerant of varying conditions, and can thrive on a wide range of substrates, including straw, coffee grounds, and even cardboard. Their adaptability makes them an excellent choice for those new to the world of mushroom cultivation. Shiitake mushrooms are another popular option, although they require a bit more patience as they typically take longer to fruit. However, their delicious flavor and versatility make them well worth the effort.
What kind of space do I need to grow mushrooms at home?
The beauty of growing mushrooms at home is that you don’t need a lot of space. A small, dark, and humid area is ideal. A repurposed closet, a basement corner, or even a shaded outdoor area can work well. The key is to maintain consistent humidity levels (around 80-90%) and provide adequate ventilation to prevent the buildup of carbon dioxide. A simple humidity tent made from a plastic bag or a small greenhouse can help create the ideal environment.
What is the best substrate to use for growing mushrooms?
The best substrate depends on the type of mushroom you’re growing. Oyster mushrooms, as mentioned earlier, are very versatile and can thrive on straw, coffee grounds, cardboard, and even agricultural waste products. Shiitake mushrooms typically prefer hardwood sawdust or logs. It’s crucial to research the specific needs of the mushroom variety you’re growing to ensure optimal growth and fruiting. Proper sterilization or pasteurization of the substrate is also essential to prevent contamination from competing molds and bacteria.
How long does it take to grow mushrooms at home?
The time it takes to grow mushrooms varies depending on the species and the growing conditions. Oyster mushrooms are known for their rapid growth and can often be harvested within a few weeks of inoculation. Shiitake mushrooms, on the other hand, can take several months to fruit, especially when grown on logs. Factors such as temperature, humidity, and ventilation also play a significant role in the growth rate.
How do I prevent contamination when growing mushrooms?
Contamination is a common challenge in mushroom cultivation, but there are several steps you can take to minimize the risk. First and foremost, ensure that your substrate is properly sterilized or pasteurized to kill any competing microorganisms. Use sterile techniques when inoculating the substrate with mushroom spawn. Maintain a clean growing environment and avoid introducing potential contaminants. Proper ventilation is also crucial to prevent the buildup of moisture, which can promote the growth of mold and bacteria. Regularly inspect your mushroom cultures for any signs of contamination and remove any affected areas immediately.
What are the signs that my mushrooms are ready to harvest?
The signs that your mushrooms are ready to harvest vary depending on the species. Generally, you should harvest mushrooms when the caps are fully developed but before they start to release spores. For oyster mushrooms, this is typically when the caps are still slightly curled downwards. For shiitake mushrooms, it’s when the caps have fully opened and the edges are starting to flatten out. Harvesting at the right time will ensure the best flavor and texture.
Can I grow mushrooms indoors without any natural light?
Yes, mushrooms do not require natural light to grow. They are fungi, not plants, and they obtain their energy from the substrate they are growing on. However, some indirect light can be beneficial for fruiting, as it helps the mushrooms orient themselves and grow in the right direction. But direct sunlight should be avoided, as it can dry out the mushrooms and inhibit their growth.
What do I do if my mushrooms are not growing?
If your mushrooms are not growing, there could be several reasons. First, check the temperature and humidity levels to ensure they are within the optimal range for the species you are growing. Make sure the substrate is adequately hydrated but not waterlogged. Ensure there is adequate ventilation to prevent the buildup of carbon dioxide. If you suspect contamination, carefully inspect the cultures for any signs of mold or bacteria. If all else fails, consider re-inoculating the substrate with fresh mushroom spawn.
Is it safe to eat mushrooms that I grow at home?
Yes, it is generally safe to eat mushrooms that you grow at home, provided that you have correctly identified the species and followed proper cultivation techniques. It’s crucial to only grow edible mushroom varieties and to avoid consuming any mushrooms that you are unsure about. If you are new to mushroom cultivation, it’s best to start with a well-known and easily identifiable species like oyster mushrooms. Always cook your homegrown mushrooms thoroughly before eating them.
How can I use coffee grounds to grow mushrooms?
Coffee grounds are a great substrate for growing certain types of mushrooms, especially oyster mushrooms. They are rich in nutrients and have already been pasteurized during the brewing process. To use coffee grounds, collect them from your local coffee shop or your own coffee maker. Mix the coffee grounds with a small amount of straw or sawdust to improve drainage and aeration. Sterilize the mixture by heating it in a microwave or oven. Once cooled, inoculate the substrate with mushroom spawn and follow the same growing instructions as you would for other substrates.
Leave a Comment