
Grow onions at home, and unlock a world of fresh, flavorful possibilities right in your backyard! Have you ever imagined snipping fresh green onions for your salad or pulling up a perfectly formed bulb for your favorite soup, all without leaving your property? This isn’t just a dream; it’s an achievable reality with a few simple tricks and a little DIY spirit.
Onions have been cultivated for thousands of years, with evidence suggesting their use dates back to ancient Egypt. They were even revered as symbols of eternity! Today, while we might not be worshipping them, we certainly appreciate their culinary versatility. But let’s face it, store-bought onions can sometimes lack that vibrant, fresh taste. Plus, who knows what kind of chemicals they’ve been exposed to?
That’s where this DIY guide comes in. I’m going to show you some easy and effective methods to grow onions at home, regardless of your gardening experience or space limitations. Whether you have a sprawling garden or just a sunny windowsill, you can enjoy the satisfaction of harvesting your own delicious onions. Say goodbye to bland, store-bought produce and hello to the incredible flavor of homegrown goodness! This article is packed with tips and tricks to help you succeed, from choosing the right varieties to protecting your precious plants from pests. Let’s get started!
Zwiebeln selbst ziehen: Dein umfassender DIY-Guide für eine reiche Ernte
Hallo Gartenfreunde! Habt ihr euch jemals gefragt, wie es wäre, eure eigenen Zwiebeln anzubauen? Es ist einfacher als ihr denkt und unglaublich befriedigend. In diesem Artikel zeige ich euch Schritt für Schritt, wie ihr zu Hause erfolgreich Zwiebeln ziehen könnt – egal ob im Garten, auf dem Balkon oder sogar in Töpfen auf der Fensterbank. Lasst uns loslegen!
Was du für den Zwiebelanbau brauchst
Bevor wir starten, hier eine Liste der Dinge, die du benötigst:
* Zwiebelsamen oder Steckzwiebeln: Steckzwiebeln sind einfacher für Anfänger, da sie schneller wachsen. Samen bieten jedoch eine größere Sortenvielfalt.
* Geeignete Erde: Eine gut durchlässige, nährstoffreiche Erde ist ideal. Du kannst spezielle Gemüseerde kaufen oder deine eigene Mischung herstellen.
* Behälter oder Gartenbeet: Je nachdem, wo du anbauen möchtest, brauchst du Töpfe, Pflanzkästen oder ein vorbereitetes Beet im Garten.
* Gießkanne oder Schlauch: Für die regelmäßige Bewässerung.
* Dünger: Ein organischer Dünger wie Kompost oder Hornspäne hilft den Zwiebeln beim Wachsen.
* Gartengeräte: Spaten, Harke, Pflanzkelle (je nach Bedarf).
* Geduld: Zwiebeln brauchen Zeit zum Wachsen!
Zwiebeln aus Samen ziehen: Der detaillierte Prozess
Zwiebeln aus Samen zu ziehen, erfordert etwas mehr Geduld, aber es lohnt sich, um die Vielfalt der Sorten zu entdecken.
Aussaat im Haus (Vorziehen)
1. Der richtige Zeitpunkt: Beginne mit der Aussaat im Haus etwa 8-10 Wochen vor dem letzten erwarteten Frost. In Deutschland ist das meistens im Februar oder März.
2. Die Vorbereitung: Fülle kleine Anzuchttöpfe oder eine Anzuchtschale mit Anzuchterde. Drücke die Erde leicht an.
3. Die Aussaat: Verteile die Zwiebelsamen gleichmäßig auf der Erde. Bedecke sie dann mit einer dünnen Schicht Erde (ca. 0,5 cm).
4. Die Bewässerung: Befeuchte die Erde vorsichtig mit einer Sprühflasche. Die Erde sollte feucht, aber nicht nass sein.
5. Der Standort: Stelle die Anzuchttöpfe an einen hellen, warmen Ort. Eine Temperatur von 18-20°C ist ideal.
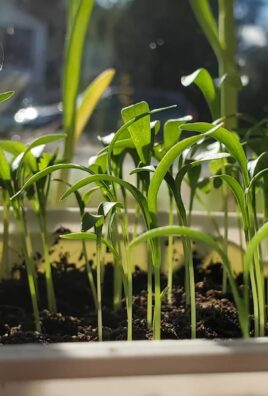
6. Die Pflege: Halte die Erde feucht und lüfte die Anzuchtschale regelmäßig, um Schimmelbildung zu vermeiden. Nach einigen Tagen sollten die ersten Keimlinge erscheinen.
7. Das Pikieren: Sobald die Zwiebelpflänzchen etwa 5-7 cm groß sind und mehrere Blätter haben, kannst du sie pikieren. Das bedeutet, du setzt sie einzeln in größere Töpfe um. Achte darauf, die Wurzeln nicht zu beschädigen.
Aussaat im Freien
1. Der richtige Zeitpunkt: Die Direktsaat im Freien erfolgt, sobald keine Frostgefahr mehr besteht. Das ist in Deutschland meistens ab April oder Mai.
2. Die Vorbereitung: Bereite das Beet vor, indem du die Erde lockerst und von Unkraut befreist. Arbeite Kompost oder Hornspäne in die Erde ein, um sie mit Nährstoffen anzureichern.
3. Die Aussaat: Ziehe flache Rillen in die Erde (ca. 1 cm tief) und verteile die Zwiebelsamen gleichmäßig darin. Bedecke die Samen mit Erde und drücke sie leicht an.
4. Die Bewässerung: Gieße die Erde vorsichtig an.
5. Die Pflege: Halte die Erde feucht und entferne regelmäßig Unkraut. Wenn die Zwiebelpflänzchen zu dicht stehen, kannst du sie vereinzeln (auf ca. 5-10 cm Abstand).
Steckzwiebeln pflanzen: Der einfache Weg zur Zwiebelernte
Steckzwiebeln sind kleine, vorgezogene Zwiebeln, die du direkt in die Erde pflanzen kannst. Sie sind eine tolle Option, wenn du schnell Ergebnisse sehen möchtest.
1. Der richtige Zeitpunkt: Pflanze Steckzwiebeln im Frühjahr (April/Mai), sobald der Boden frostfrei ist. Du kannst sie auch im Herbst (September/Oktober) pflanzen, um im nächsten Jahr eine frühe Ernte zu erzielen.
2. Die Vorbereitung: Bereite das Beet oder die Töpfe vor, indem du die Erde lockerst und von Unkraut befreist. Arbeite Kompost oder Hornspäne in die Erde ein.
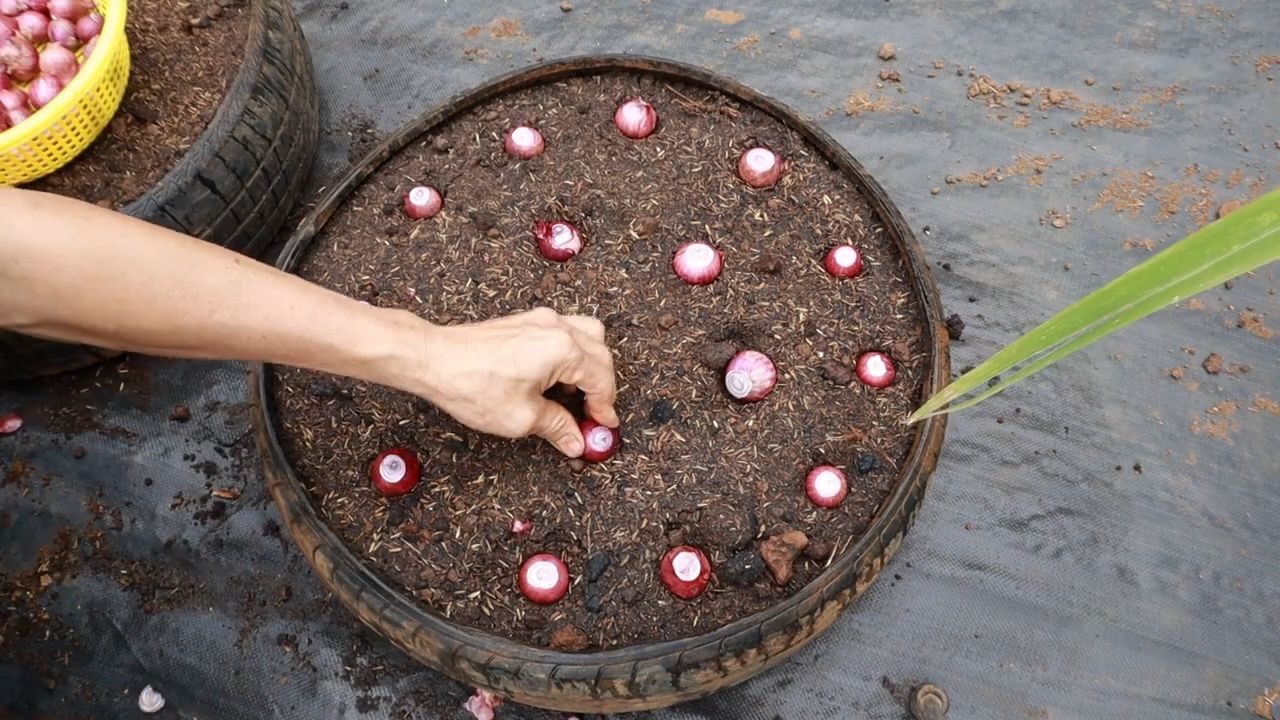
3. Das Pflanzen: Drücke die Steckzwiebeln mit der Spitze nach oben in die Erde. Die Spitze sollte gerade noch aus der Erde herausschauen. Achte auf einen Abstand von ca. 10-15 cm zwischen den Zwiebeln und 20-30 cm zwischen den Reihen.
4. Die Bewässerung: Gieße die Erde nach dem Pflanzen gründlich an.
5. Die Pflege: Halte die Erde feucht und entferne regelmäßig Unkraut.
Die richtige Pflege für gesunde Zwiebeln
Egal ob aus Samen oder Steckzwiebeln gezogen, die richtige Pflege ist entscheidend für eine reiche Ernte.
* Bewässerung: Zwiebeln brauchen regelmäßige Bewässerung, besonders während trockener Perioden. Achte darauf, dass die Erde nicht austrocknet, aber vermeide Staunässe.
* Düngung: Dünge die Zwiebeln regelmäßig mit einem organischen Dünger wie Kompost, Hornspäne oder einem speziellen Gemüsedünger. Beginne mit der Düngung etwa 4-6 Wochen nach dem Pflanzen oder sobald die ersten Blätter erscheinen.
* Unkrautbekämpfung: Unkraut konkurriert mit den Zwiebeln um Nährstoffe und Wasser. Entferne Unkraut regelmäßig, um das Wachstum der Zwiebeln zu fördern.
* Schutz vor Schädlingen und Krankheiten: Zwiebeln können von verschiedenen Schädlingen und Krankheiten befallen werden. Achte auf Anzeichen wie gelbe Blätter, Flecken oder Löcher. Bei Bedarf kannst du biologische Pflanzenschutzmittel einsetzen.
Die Ernte: Wann sind meine Zwiebeln reif?
Die Erntezeit hängt von der Sorte und dem Zeitpunkt der Aussaat oder Pflanzung ab. In der Regel sind Zwiebeln erntereif, wenn das Laub gelb wird und umknickt.
1. Der richtige Zeitpunkt: Warte, bis etwa zwei Drittel des Laubs umgeknickt sind.
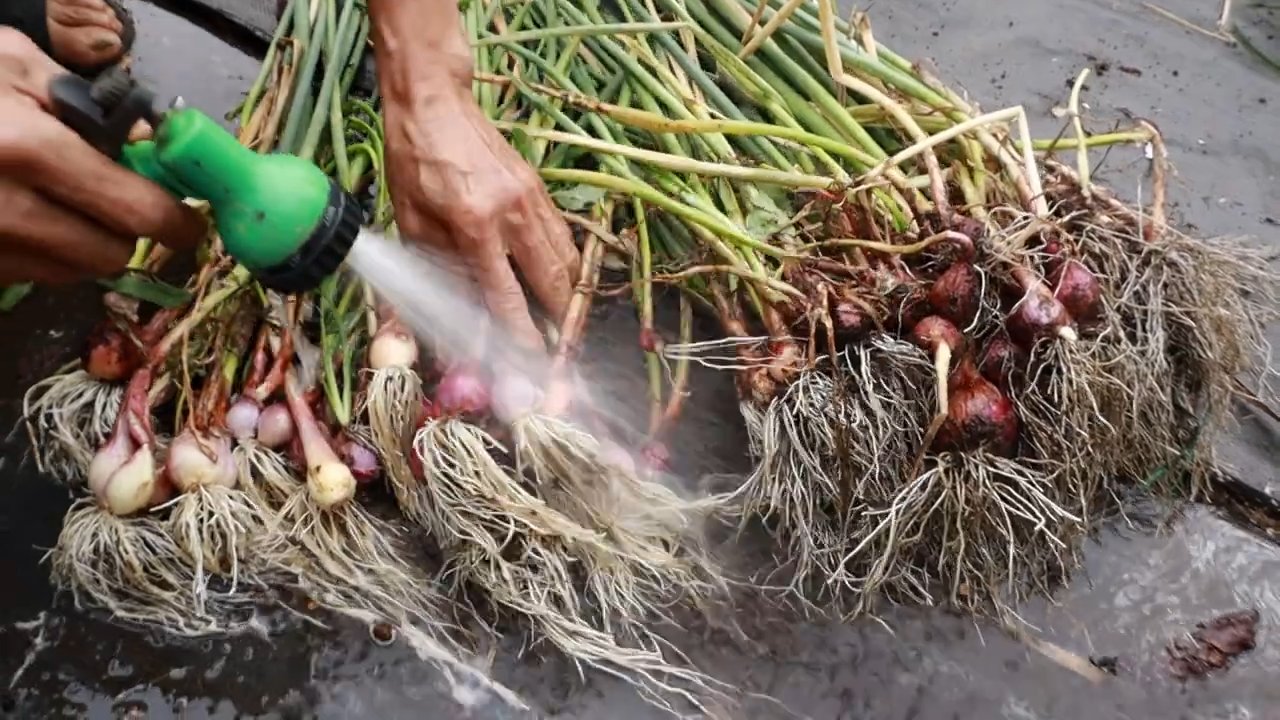
2. Die Ernte: Ziehe die Zwiebeln vorsichtig aus der Erde.
3. Die Trocknung: Lasse die Zwiebeln an einem trockenen, luftigen Ort trocknen. Du kannst sie entweder auf dem Beet liegen lassen (bei trockenem Wetter) oder sie auf einem Gitter oder einer Plane ausbreiten. Die Trocknung dauert in der Regel 2-3 Wochen.
4. Die Lagerung: Sobald die Zwiebeln vollständig getrocknet sind, kannst du das Laub abschneiden (ca. 2-3 cm über der Zwiebel) und die Wurzeln kürzen. Lagere die Zwiebeln an einem kühlen, trockenen und dunklen Ort. Ideal sind Temperaturen zwischen 0 und 5°C.
Häufige Probleme und Lösungen
Auch beim Zwiebelanbau können Probleme auftreten. Hier sind einige häufige Herausforderungen und wie du sie lösen kannst:
* Gelbe Blätter: Gelbe Blätter können verschiedene Ursachen haben, z.B. Wassermangel, Nährstoffmangel oder Schädlingsbefall. Überprüfe die Bewässerung und Düngung und suche nach Schädlingen.
* Kleine Zwiebeln: Kleine Zwiebeln können durch zu dichte Pflanzung, Nährstoffmangel oder Wassermangel verursacht werden. Achte auf den richtigen Pflanzabstand, dünge regelmäßig und gieße ausreichend.
* Schädlinge: Zwiebelfliegen, Lauchmotten und andere Schädlinge können Zwiebeln befallen. Setze bei Bedarf biologische Pflanzenschutzmittel ein oder verwende Kulturschutznetze.
* Krankheiten: Falscher Mehltau und andere Pilzkrank
Conclusion
So, there you have it! Growing onions at home, from simple scraps or seeds, is not just a cost-effective way to ensure a steady supply of this kitchen staple, but also a deeply rewarding experience. Forget those bland, mass-produced onions from the supermarket; imagine the burst of fresh, vibrant flavor you’ll get from onions you nurtured yourself, right in your own backyard or even on your windowsill.
This DIY trick is a must-try for several compelling reasons. First and foremost, it’s incredibly sustainable. By regrowing onion scraps, you’re reducing food waste and minimizing your environmental footprint. Secondly, it’s economical. Think of all the money you’ll save by not having to constantly purchase onions at the grocery store. And finally, it’s empowering. There’s a unique satisfaction that comes from cultivating your own food, knowing exactly where it came from and how it was grown.
But the beauty of growing onions at home lies not just in its practicality, but also in its versatility. Feel free to experiment with different varieties of onions. Try growing red onions for their vibrant color and slightly sweeter flavor, or shallots for their delicate, garlic-like taste. You can even try growing green onions (scallions) indoors in a glass of water for a continuous supply of fresh greens.
Consider these variations to elevate your onion-growing game:
* Vertical Gardening: If you’re short on space, explore vertical gardening options. Onions can thrive in stacked planters or hanging baskets, adding a touch of greenery to your balcony or patio.
* Companion Planting: Pair your onions with companion plants like carrots, chamomile, or rosemary. These plants can help deter pests and improve the overall health of your onion crop.
* Soil Enrichment: Amend your soil with compost or well-rotted manure to provide your onions with the nutrients they need to flourish. A slightly acidic soil pH (around 6.0-6.8) is ideal.
* From Seed to Table: While regrowing from scraps is a great starting point, consider starting onions from seed for a wider selection of varieties and a deeper understanding of the onion life cycle.
Don’t be intimidated if you’re a beginner gardener. Growing onions at home is surprisingly easy, and even if you encounter a few bumps along the way, the learning experience is invaluable. The key is to be patient, observant, and willing to adapt your approach as needed.
So, what are you waiting for? Grab those onion scraps, find a sunny spot, and get ready to embark on your own onion-growing adventure! We’re confident that you’ll be amazed by the results.
We encourage you to try this DIY trick and share your experiences with us. Post photos of your homegrown onions on social media using #HomeGrownOnions and let us know what you learned along the way. We can’t wait to see your success stories! Let’s build a community of home gardeners, one onion at a time.
Frequently Asked Questions (FAQ)
Q: What kind of onions can I regrow from scraps?
A: You can regrow most types of onions from scraps, including yellow onions, white onions, red onions, and even shallots. The key is to use the bottom portion of the onion, where the roots are still attached. Make sure the scrap is firm and healthy, without any signs of rot or mold.
Q: How long does it take to grow onions from scraps?
A: The time it takes to grow onions from scraps can vary depending on several factors, including the variety of onion, the growing conditions, and the size of the scrap. Generally, you can expect to see new green shoots emerging within a week or two. It may take several months to grow a fully mature onion bulb. However, you can harvest the green shoots (scallions) at any time for a fresh, oniony flavor.
Q: What kind of soil is best for growing onions?
A: Onions prefer well-drained, fertile soil that is rich in organic matter. A slightly acidic soil pH (around 6.0-6.8) is ideal. Before planting, amend your soil with compost or well-rotted manure to improve its fertility and drainage. Avoid heavy clay soils, as they can become waterlogged and inhibit onion growth.
Q: How much sunlight do onions need?
A: Onions need at least 6-8 hours of direct sunlight per day to thrive. Choose a sunny location for your onion patch, or if growing indoors, place your onions near a south-facing window. Insufficient sunlight can result in weak, leggy growth and smaller onion bulbs.
Q: How often should I water my onions?
A: Water your onions regularly, especially during dry periods. Keep the soil consistently moist, but avoid overwatering, which can lead to root rot. A good rule of thumb is to water deeply whenever the top inch of soil feels dry to the touch. Reduce watering as the onions mature and the bulbs begin to swell.
Q: What are some common pests and diseases that affect onions?
A: Some common pests that can affect onions include onion maggots, thrips, and aphids. Diseases that can affect onions include onion rot, downy mildew, and purple blotch. To prevent pest and disease problems, practice good sanitation, such as removing weeds and debris from around your onion plants. You can also use organic pest control methods, such as insecticidal soap or neem oil.
Q: Can I grow onions indoors?
A: Yes, you can grow onions indoors, especially green onions (scallions). Simply place the bottom portion of an onion in a glass of water, making sure that the roots are submerged. Place the glass in a sunny location and change the water every few days. You can harvest the green shoots as needed. For growing onion bulbs indoors, you’ll need a larger container filled with well-draining potting mix and plenty of sunlight.
Q: How do I know when my onions are ready to harvest?
A: Onions are typically ready to harvest when the tops begin to turn yellow and fall over. You can also gently dig around the base of the onion to check the size of the bulb. If the bulb is large and firm, it’s likely ready to harvest. Once harvested, cure the onions by laying them out in a dry, well-ventilated place for a week or two. This will help them to develop a papery outer skin and improve their storage life.
Q: Can I store homegrown onions?
A: Yes, you can store homegrown onions for several months if they are properly cured and stored. After curing, store the onions in a cool, dry, and well-ventilated place, such as a basement or pantry. Avoid storing onions near potatoes, as they can cause each other to spoil more quickly. You can also braid the onion tops together and hang them in a cool, dry place.
Q: What are some creative ways to use homegrown onions?
A: The possibilities are endless! Use your homegrown onions in soups, stews, stir-fries, salads, and countless other dishes. Caramelize them for a sweet and savory topping for burgers or pizzas. Pickle them for a tangy condiment. Or simply slice them thinly and add them to your favorite sandwich. The fresh, vibrant flavor of homegrown onions will elevate any dish.
Leave a Comment