
Grow Onions for Nonstop Harvest: Imagine stepping into your garden and effortlessly plucking fresh, flavorful onions whenever you need them. No more last-minute grocery store runs or settling for bland, store-bought varieties! This isn’t just a dream; it’s an achievable reality with a few clever home gardening tricks and DIY techniques.
Onions have been cultivated for thousands of years, with evidence suggesting their use dates back to ancient Egypt and beyond. They weren’t just a culinary staple; they held symbolic and medicinal value, representing eternity and even being used in burial rituals. Today, while we might not be burying onions with our loved ones, their importance in our kitchens remains undeniable.
But let’s face it, growing onions can sometimes feel like a waiting game. You plant them, you water them, and then… you wait. And wait. And sometimes, you’re left with disappointing results. That’s where these DIY tricks come in! I’m going to share some simple, yet effective, hacks that will help you grow onions for nonstop harvest, ensuring a continuous supply of these versatile vegetables throughout the growing season. These aren’t complicated techniques; they’re practical solutions designed to maximize your yield and minimize your effort. Whether you’re a seasoned gardener or just starting out, these tips will empower you to cultivate a thriving onion patch and enjoy the satisfaction of harvesting your own delicious, homegrown onions.
Grow Onions for Nonstop Harvest: My Foolproof DIY Guide
Hey there, fellow gardening enthusiasts! Are you tired of buying onions at the grocery store? Do you dream of having a constant supply of fresh, flavorful onions right in your backyard? Well, you’ve come to the right place! I’m going to share my tried-and-true method for growing onions for a nonstop harvest. This isn’t just about planting onions; it’s about creating a system that keeps you stocked up all year round. Get ready to ditch those store-bought onions and embrace the joy of homegrown goodness!
Understanding the Onion Life Cycle
Before we dive into the nitty-gritty, let’s quickly understand how onions grow. This knowledge is key to achieving that continuous harvest we’re aiming for. Onions are typically biennial, meaning they have a two-year life cycle. However, we usually grow them as annuals, harvesting them in their first year.
* Seed to Sprout: This is where it all begins! Onion seeds germinate and grow into small seedlings.
* Bulb Development: As the plant matures, it starts forming a bulb underground. This is the part we eat!
* Flowering (Bolting): In their second year, onions will flower and produce seeds. We generally want to avoid this in the first year, as it can affect bulb quality.
* Harvest Time: Depending on the variety and your climate, you’ll harvest your onions when the tops start to fall over.
Choosing the Right Onion Varieties
The secret to a continuous harvest lies in selecting onion varieties that mature at different times. This way, you’ll have onions ready to harvest throughout the growing season. Here are some of my favorites:
* Short-Day Onions: These are ideal for warmer climates (zones 7-10) and require about 10-12 hours of daylight to form bulbs. Plant them in the fall or early winter for a spring harvest. Examples include:
* Texas Sweet White: Mild and sweet, perfect for salads and grilling.
* Red Creole: Pungent and flavorful, great for cooking and pickling.
* Intermediate-Day Onions: These need about 12-14 hours of daylight and are suitable for zones 5-7. Plant them in early spring for a summer harvest. Examples include:
* Walla Walla Sweet: Exceptionally sweet and juicy, best eaten fresh.
* Candy Onion: A versatile onion with a mild, sweet flavor.
* Long-Day Onions: These require 14-16 hours of daylight and thrive in cooler climates (zones 3-6). Plant them in early spring for a late summer or fall harvest. Examples include:
* Yellow Spanish: A classic storage onion with a strong flavor.
* Red Brunswick: A beautiful red onion with a mild, sweet taste.
* Bunching Onions (Scallions): These don’t form large bulbs but are harvested for their green tops. You can plant them anytime during the growing season for a continuous supply of fresh greens. Examples include:
* Evergreen Hardy White: A reliable and productive bunching onion.
* Tokyo Long White: A mild and flavorful bunching onion.
Preparing Your Garden Bed
Onions need well-drained, fertile soil to thrive. Here’s how I prepare my garden bed:
1. Choose a Sunny Spot: Onions need at least 6-8 hours of sunlight per day.
2. Amend the Soil: Onions are heavy feeders, so it’s important to enrich the soil with plenty of organic matter. I like to add compost, well-rotted manure, and bone meal.
3. Ensure Good Drainage: Onions don’t like soggy soil. If your soil is heavy clay, amend it with sand or perlite to improve drainage.
4. Check the pH: Onions prefer a soil pH of 6.0-7.0. You can test your soil with a pH meter or a soil testing kit. Adjust the pH as needed with lime (to raise it) or sulfur (to lower it).
5. Create Raised Beds (Optional): Raised beds can improve drainage and warm up the soil faster in the spring.
Starting Onions from Seed (My Preferred Method)
While you can buy onion sets (small, immature bulbs), I prefer starting my onions from seed. It gives me more control over the varieties I grow and is generally more cost-effective.
Starting Seeds Indoors (8-10 Weeks Before Last Frost)
1. Gather Your Supplies: You’ll need onion seeds, seed starting trays or pots, seed starting mix, a spray bottle, and a grow light (optional).
2. Sow the Seeds: Fill your seed starting trays with seed starting mix. Moisten the mix with a spray bottle. Sow the onion seeds about 1/4 inch deep and 1/2 inch apart.
3. Provide Light and Warmth: Place the trays in a warm location (around 70-75°F) and provide plenty of light. A grow light is ideal, but a sunny windowsill can also work.
4. Keep the Soil Moist: Water the seedlings regularly with a spray bottle to keep the soil moist but not soggy.
5. Thin the Seedlings: Once the seedlings have a few true leaves, thin them to about 1 inch apart.
6. Harden Off the Seedlings: About a week before transplanting, gradually expose the seedlings to outdoor conditions. Start by placing them outside for a few hours each day, increasing the time each day.
Direct Sowing (In Warmer Climates)
If you live in a warmer climate with a long growing season, you can direct sow onion seeds into your garden bed.
1. Prepare the Soil: Follow the soil preparation steps outlined above.
2. Sow the Seeds: Sow the onion seeds about 1/4 inch deep and 1/2 inch apart in rows.
3. Water Regularly: Keep the soil moist until the seeds germinate.
4. Thin the Seedlings: Once the seedlings have a few true leaves, thin them to about 1 inch apart.
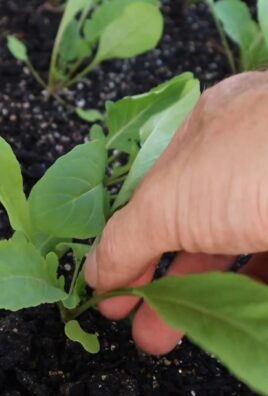
Transplanting Onion Seedlings
Once your onion seedlings are about 4-6 inches tall and the danger of frost has passed, it’s time to transplant them into your garden bed.
1. Prepare the Planting Holes: Dig holes about 4-6 inches apart in rows that are 12-18 inches apart.
2. Carefully Remove the Seedlings: Gently remove the seedlings from the seed starting trays, being careful not to damage the roots.
3. Plant the Seedlings: Place the seedlings in the holes and cover the roots with soil.
4. Water Thoroughly: Water the seedlings well after transplanting.
5. Mulch: Apply a layer of mulch around the onion plants to help retain moisture, suppress weeds, and regulate soil temperature. I like to use straw or shredded leaves.
Caring for Your Onions
Onions require consistent care to thrive. Here’s what I do to keep my onions happy and healthy:
* Watering: Water regularly, especially during dry periods. Onions need about 1 inch of water per week.
* Fertilizing: Fertilize every 2-3 weeks with a balanced fertilizer or a fertilizer specifically formulated for onions.
* Weeding: Keep the garden bed free of weeds, as they can compete with the onions for nutrients and water.
* Pest and Disease Control: Monitor your onions for pests and diseases. Common onion pests include onion maggots and thrips. Common diseases include onion downy mildew and purple blotch. Treat any problems promptly with appropriate organic pest control methods or fungicides.
* Earthing Up: As the onions grow, you can gently mound soil around the base of the bulbs. This helps to support the plants and protect the bulbs from sunburn.
Harvesting Your Onions for a Continuous Supply
This is where the magic happens! By planting different varieties and staggering your planting times, you can enjoy a continuous harvest of fresh onions.
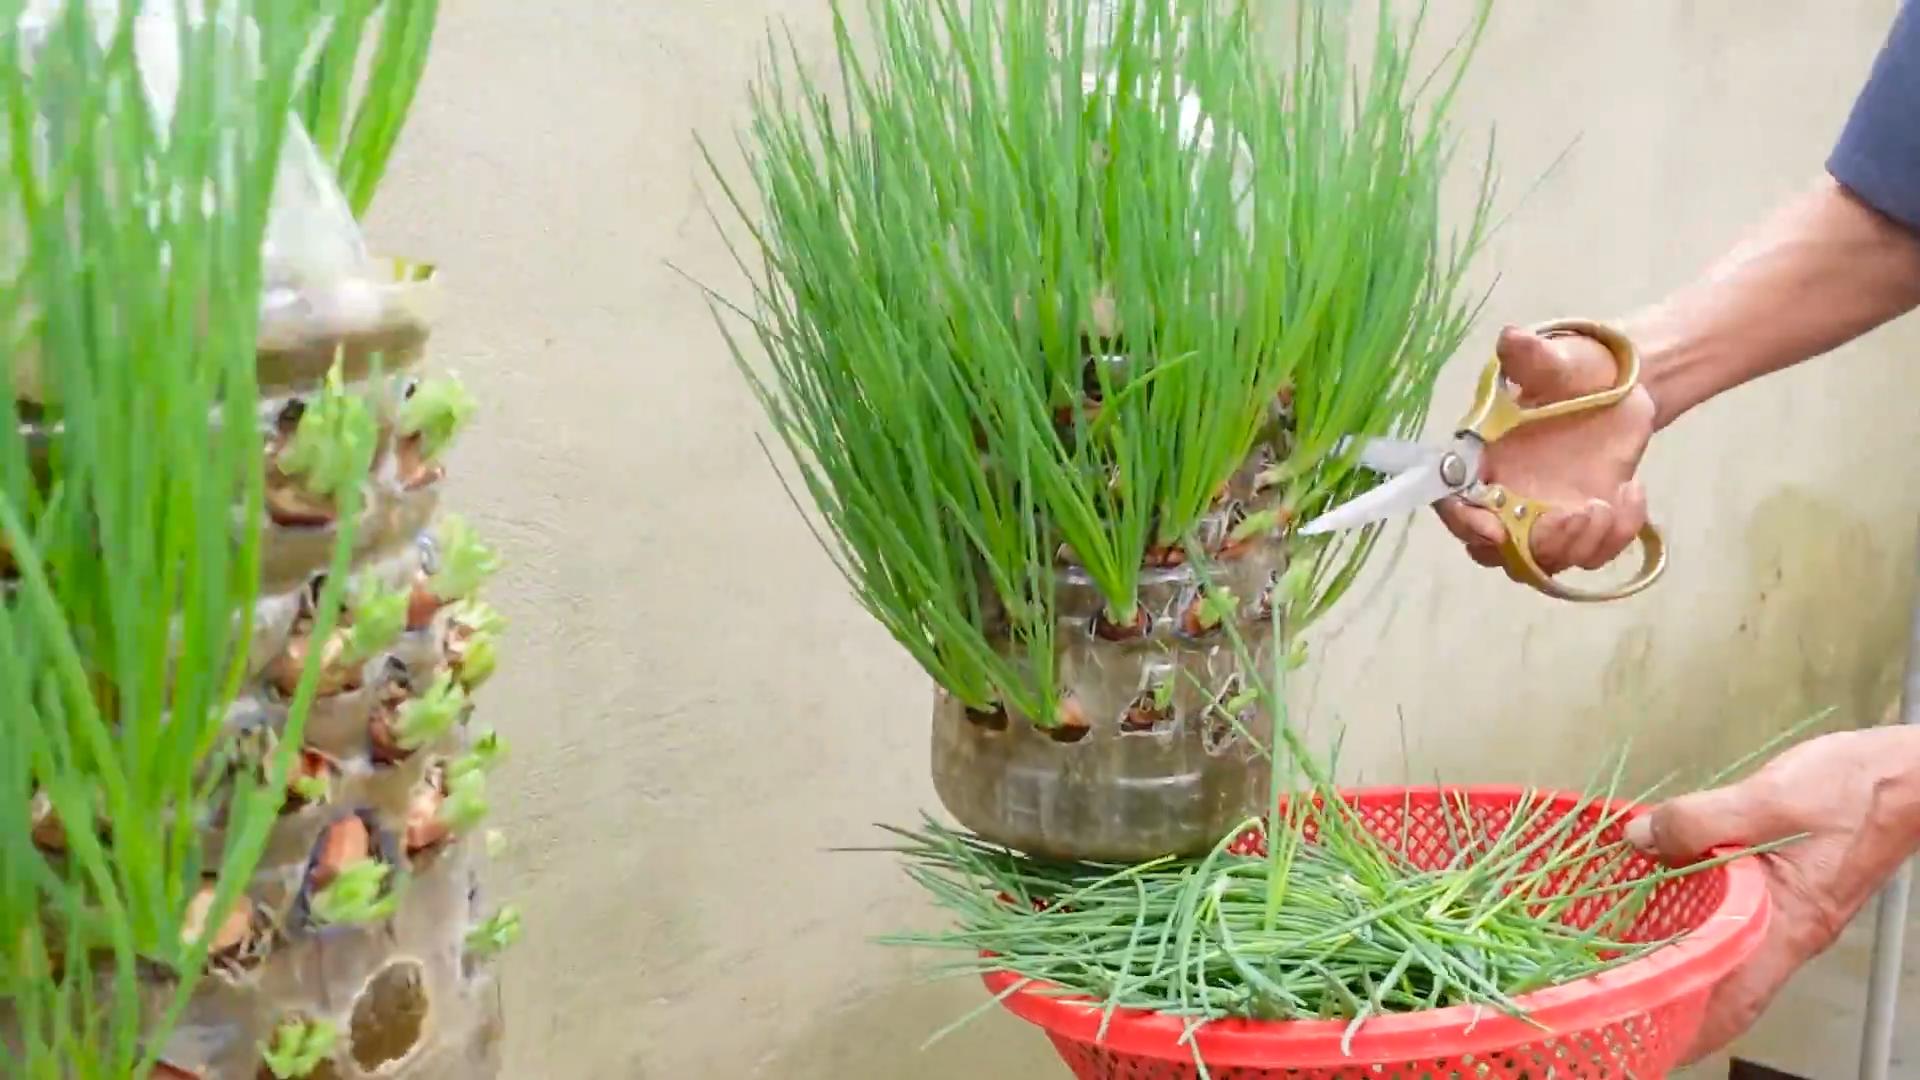
* Harvesting Bunching Onions: You can start harvesting bunching onions as soon as they are large enough to use. Simply snip off the green tops as needed.
* Harvesting Bulb Onions: Bulb onions are ready to harvest when the tops start to fall over. Once about half of the tops have fallen over, you can gently bend the remaining tops to encourage them to dry out.
* Curing Onions: After harvesting, cure the onions by laying them out in a warm, dry, well-ventilated place for 1-2 weeks. This allows the outer layers to dry and helps to prevent rot.
* Storing Onions: Store cured onions in a cool
Conclusion
So, there you have it! Growing onions for a nonstop harvest isn’t just a gardener’s dream; it’s an achievable reality with this simple yet effective DIY trick. We’ve explored how to strategically plant, nurture, and harvest your onions to ensure a continuous supply of these flavorful bulbs throughout the growing season. Forget those frantic trips to the grocery store when you’re halfway through prepping dinner – with this method, fresh onions will always be at your fingertips.
But why is this method a must-try? Beyond the sheer convenience of a constant onion supply, it offers several compelling advantages. Firstly, you’re in complete control of the growing process, ensuring your onions are free from harmful pesticides and chemicals. This is a significant benefit for those prioritizing organic and sustainable gardening practices. Secondly, you’ll experience the unparalleled satisfaction of harvesting your own food, connecting you more deeply with nature and the origins of your meals. And finally, let’s be honest, there’s a certain pride that comes with showcasing your gardening prowess to friends and family!
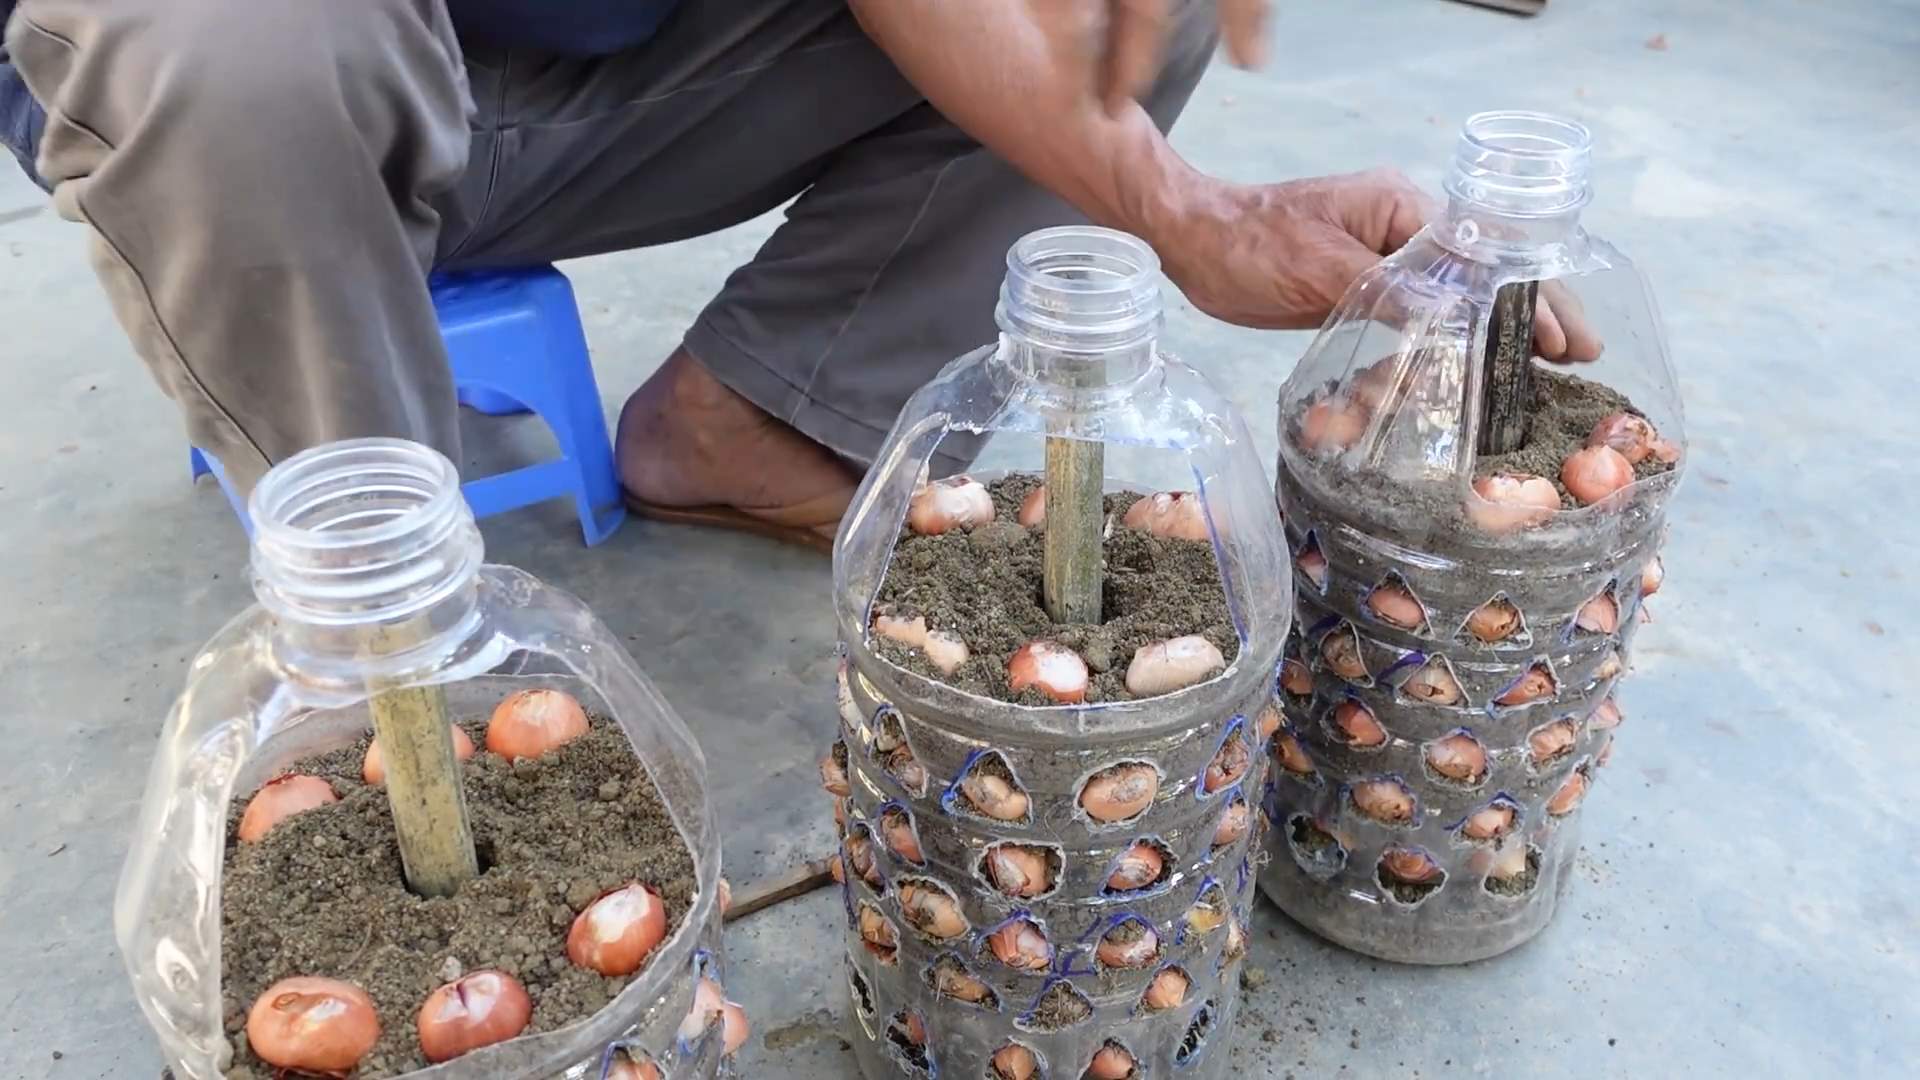
Now, let’s talk variations. While we’ve focused on a general approach, feel free to adapt this method to suit your specific needs and preferences. For example, if you have limited space, consider using containers or raised beds. This allows you to control the soil quality and drainage more effectively. You can also experiment with different onion varieties to find the ones that thrive best in your local climate and offer the flavors you enjoy most. Shallots, red onions, yellow onions, white onions, and even scallions can all be incorporated into your continuous harvest plan. Don’t be afraid to mix and match!
Another exciting variation involves companion planting. Onions are known to deter certain pests, making them excellent companions for other vegetables like carrots, tomatoes, and peppers. By strategically planting these crops together, you can create a mutually beneficial ecosystem in your garden.
Furthermore, consider succession planting within your onion patch. Plant different varieties with varying maturity dates to extend your harvest even further. For instance, you could plant some early-maturing varieties alongside some late-maturing ones, ensuring a steady supply of onions throughout the entire growing season.
This DIY onion growing trick is more than just a gardening technique; it’s a pathway to self-sufficiency, healthier eating, and a deeper connection with nature.
We wholeheartedly encourage you to give this DIY trick a try. Start small, experiment with different varieties and techniques, and most importantly, have fun! Gardening should be a rewarding and enjoyable experience.
Once you’ve had a chance to implement this method, we’d love to hear about your experiences. Share your successes, challenges, and any tips or tricks you’ve discovered along the way. Your feedback will not only help other gardeners but also contribute to our collective knowledge of sustainable gardening practices. So, get your hands dirty, plant those onion sets, and prepare for a nonstop harvest of delicious, homegrown onions! Let us know how your journey to grow onions goes!
Frequently Asked Questions (FAQ)
What type of onions are best for a continuous harvest?
The best type of onions for a continuous harvest depends on your climate and personal preferences. However, some popular choices include:
* **Bunching Onions (Scallions):** These are quick-growing and can be harvested continuously as needed. They don’t form large bulbs but provide a constant supply of green onions.
* **Short-Day Onions:** These varieties, like ‘Granex’ and ‘Texas Supersweet’, are ideal for warmer climates with mild winters. They mature quickly and can be planted in the fall for a spring harvest.
* **Intermediate-Day Onions:** These varieties, such as ‘Candy’ and ‘Walla Walla Sweet’, are suitable for regions with moderate climates. They require a moderate amount of daylight to form bulbs.
* **Long-Day Onions:** These varieties, like ‘Yellow Spanish’ and ‘Redwing’, are best suited for northern climates with long summer days. They need at least 14 hours of daylight to bulb properly.
Experiment with different varieties to find the ones that thrive best in your local climate and offer the flavors you enjoy most.
How often should I water my onions?
Onions require consistent moisture, especially during bulb formation. Water deeply whenever the top inch of soil feels dry to the touch. Avoid overwatering, as this can lead to rot. A good rule of thumb is to water 1-2 inches per week, depending on the weather conditions. Mulching around your onions can help retain moisture and suppress weeds.
What kind of soil is best for growing onions?
Onions prefer well-drained, fertile soil with a pH between 6.0 and 7.0. Amend your soil with compost or other organic matter to improve drainage and fertility. Avoid heavy clay soils, as they can become waterlogged and hinder bulb development. If you have clay soil, consider growing your onions in raised beds or containers.
How do I protect my onions from pests and diseases?
Several pests and diseases can affect onions, including onion maggots, thrips, and fungal diseases like downy mildew. To protect your onions:
* **Practice crop rotation:** Avoid planting onions in the same location year after year.
* **Use row covers:** These can help prevent pests from reaching your plants.
* **Water at the base of the plants:** Avoid wetting the foliage, as this can promote fungal diseases.
* **Remove any infected plants immediately:** This will prevent the disease from spreading.
* **Consider using organic pest control methods:** Neem oil and insecticidal soap can be effective against many common onion pests.
When should I start harvesting my onions?
You can start harvesting green onions (scallions) at any time once they reach a usable size. For bulb onions, wait until the tops begin to fall over. This indicates that the bulbs are mature. Once the tops have fallen over, stop watering and allow the bulbs to dry in the ground for a few days. Then, carefully dig them up and cure them in a warm, dry place for 1-2 weeks before storing.
Can I grow onions in containers?
Yes, you can successfully grow onions in containers. Choose a container that is at least 6-8 inches deep and wide. Use a well-draining potting mix and ensure the container has drainage holes. Water regularly and fertilize every few weeks with a balanced fertilizer. Container-grown onions may require more frequent watering than those grown in the ground.
How do I store my harvested onions?
To store your harvested onions properly, cure them in a warm, dry, well-ventilated place for 1-2 weeks. This allows the outer layers to dry and toughen, preventing rot. Once cured, store your onions in a cool, dry, dark place, such as a basement or pantry. Avoid storing them near potatoes, as they can cause each other to spoil more quickly. Properly stored onions can last for several months.
What fertilizer should I use for growing onions?
Onions are heavy feeders and benefit from regular fertilization. Use a balanced fertilizer with a higher phosphorus content to promote bulb development. You can also amend your soil with compost or other organic matter to provide a slow-release source of nutrients. Fertilize every few weeks during the growing season, following the instructions on the fertilizer label.
How can I prevent my onions from bolting (flowering)?
Bolting occurs when onions are exposed to cold temperatures followed by warm temperatures. This can trigger them to flower prematurely, which reduces bulb size and quality. To prevent bolting:
* **Choose appropriate varieties for your climate:** Some varieties are more prone to bolting than others.
* **Plant at the correct time:** Avoid planting too early in the spring, when temperatures are still fluctuating.
* **Provide consistent moisture:** Water stress can also trigger bolting.
* **Mulch around your plants:** This can help regulate soil temperature.
If your onions do bolt, you can still harvest them, but they may not store as well.
Can I regrow onions from scraps?
Yes, you can regrow onions from scraps. Simply place the root end of a green onion or the bottom of a bulb onion in a glass of water. Make sure the roots are submerged, but the top of the onion is above the water line. Place the glass in a sunny location and change the water every few days. After a few days, you should see new roots and green shoots emerging. Once the roots are well-developed, you can transplant the onion into soil. This method is best for green onions, but you can also regrow bulb onions, although they may not produce as large of a bulb as those grown from seed or sets.
Leave a Comment