
Grow Radish Winter Season? Absolutely! Imagine harvesting crisp, peppery radishes from your own garden, even when the snow is falling outside. It sounds like a dream, right? Well, it doesn’t have to be! This DIY guide is packed with simple, effective tricks to help you enjoy fresh, homegrown radishes all winter long.
Radishes have been cultivated for centuries, with evidence suggesting their presence in ancient Egypt and Greece. They were valued not only for their taste but also for their medicinal properties. Today, the joy of growing your own food, especially something as quick and rewarding as radishes, is experiencing a huge resurgence. But let’s face it, winter gardening can be intimidating.
That’s where these DIY hacks come in. Many gardeners struggle to extend their growing season, especially when it comes to root vegetables. This article will provide you with the knowledge and techniques to successfully grow radish winter season, even if you’re a complete beginner. I’ll share my favorite tips and tricks, from choosing the right varieties to protecting your plants from the cold. Get ready to enjoy the satisfaction of a winter harvest and impress your friends and family with your gardening prowess!
DIY: Growing Radishes Indoors This Winter – A Beginner’s Guide
Hey there, fellow gardening enthusiasts! Winter blues got you down? Missing that fresh, peppery crunch of a homegrown radish? Well, I’ve got some good news: you don’t have to wait until spring! Growing radishes indoors is surprisingly easy and rewarding, even if you’re a complete beginner. I’m going to walk you through everything you need to know to enjoy a vibrant radish harvest right in your own home.
What You’ll Need
Before we dive into the nitty-gritty, let’s gather our supplies. Here’s a checklist of everything you’ll need to successfully grow radishes indoors:
* Radish Seeds: Choose varieties specifically suited for quick growth, like Cherry Belle, French Breakfast, or Easter Egg. These mature quickly and are perfect for indoor growing.
* Containers: You’ll need containers that are at least 6 inches deep. Radishes need room to develop their roots. I prefer using plastic pots with drainage holes, but you can also use repurposed containers like yogurt tubs or plastic storage bins (just make sure to add drainage!).
* Potting Mix: Use a high-quality, well-draining potting mix. Avoid using garden soil, as it can compact and hinder root growth. A mix specifically formulated for vegetables is ideal.
* Grow Lights (Optional but Recommended): While radishes can technically grow near a sunny window, they’ll thrive with supplemental grow lights, especially during the shorter days of winter. LED grow lights are energy-efficient and work wonders.
* Watering Can or Spray Bottle: For gentle and even watering.
* Small Hand Trowel or Spoon: For planting seeds.
* Seed Starting Tray (Optional): If you prefer to start your seeds indoors before transplanting.
* Fertilizer (Optional): A balanced liquid fertilizer can give your radishes a boost, but it’s not strictly necessary.
Getting Started: Planting Your Radish Seeds
Okay, now that we have everything we need, let’s get our hands dirty! This is the most exciting part, in my opinion.
1. Prepare Your Containers: Fill your containers with potting mix, leaving about an inch of space at the top. Gently pat down the soil to remove any large air pockets.
2. Sow the Seeds: Radishes need space to grow, so sow the seeds about 1 inch apart and ½ inch deep. You can use your finger or a small spoon to create the holes.
3. Cover the Seeds: Gently cover the seeds with potting mix and lightly water the soil. You want the soil to be moist, but not soggy.
4. Label Your Containers: It’s always a good idea to label your containers with the date and the variety of radish you planted. This will help you keep track of your progress.
5. Choose a Location: Place your containers in a location that receives at least 6 hours of sunlight per day. If you’re using grow lights, position them about 6-12 inches above the plants.
Caring for Your Radishes: Watering, Lighting, and Thinning
Now that your seeds are planted, it’s time to nurture them and watch them grow! Consistent care is key to a successful radish harvest.
1. Watering: Radishes need consistent moisture to thrive. Water your plants whenever the top inch of soil feels dry to the touch. Avoid overwatering, as this can lead to root rot. I like to use a spray bottle to gently water the seedlings, and then switch to a watering can as they grow larger.
2. Lighting: If you’re using grow lights, make sure they’re positioned correctly and that your plants are receiving enough light. You may need to adjust the height of the lights as your plants grow. If you’re relying on natural sunlight, rotate your containers regularly to ensure that all sides of the plants receive equal light exposure.
3. Thinning: Once your seedlings have emerged and have a few true leaves (the leaves that look like miniature radish leaves), it’s time to thin them out. This is important because it gives the remaining plants enough space to grow. Carefully remove the weaker seedlings, leaving about 2 inches between each plant. Don’t feel bad about pulling them out; you’re doing it for the greater good of the remaining radishes!
4. Fertilizing (Optional): If you want to give your radishes a boost, you can fertilize them every two weeks with a balanced liquid fertilizer. Follow the instructions on the fertilizer label. I usually dilute the fertilizer to half strength to avoid burning the plants.
5. Temperature: Radishes prefer cooler temperatures, ideally between 50°F and 65°F (10°C and 18°C). Avoid placing your containers near heat sources, such as radiators or vents.
Dealing with Pests and Diseases
Thankfully, radishes are relatively pest-resistant, especially when grown indoors. However, it’s still a good idea to keep an eye out for any potential problems.
1. Aphids: These tiny pests can suck the sap from your plants, causing them to weaken and become distorted. If you spot aphids, you can try washing them off with a strong stream of water or using insecticidal soap.
2. Flea Beetles: These small beetles can chew holes in the leaves of your radishes. If you have a flea beetle problem, you can try using row covers to protect your plants or applying diatomaceous earth to the soil.
3. Root Rot: This fungal disease can occur if the soil is too wet. To prevent root rot, make sure your containers have good drainage and avoid overwatering. If you suspect root rot, remove the affected plants and discard them.
Harvesting Your Radishes: The Moment of Truth!
This is the moment you’ve been waiting for! Radishes are typically ready to harvest in about 3-4 weeks, depending on the variety.
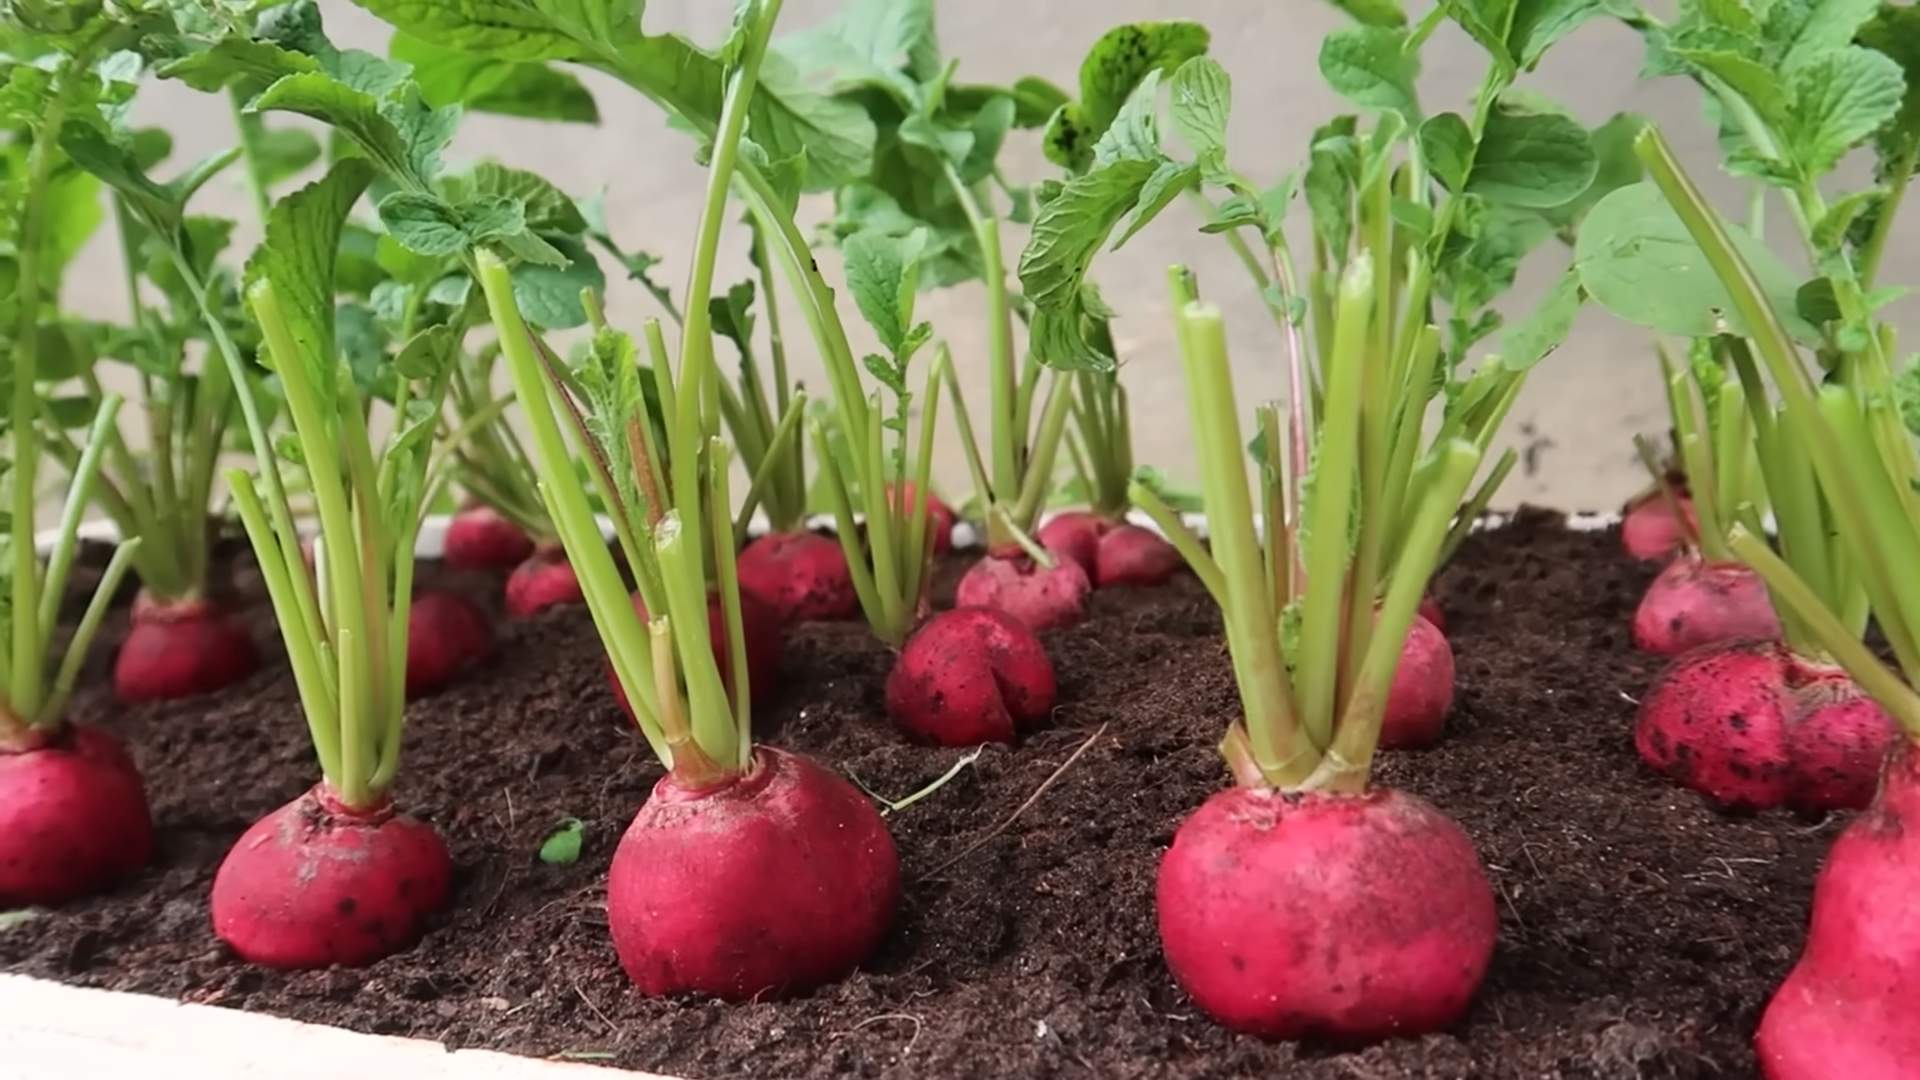
1. Check for Maturity: The best way to tell if your radishes are ready to harvest is to check their size. Most varieties are ready when they’re about 1 inch in diameter. You can also gently brush away some of the soil around the base of the plant to get a better look at the radish.
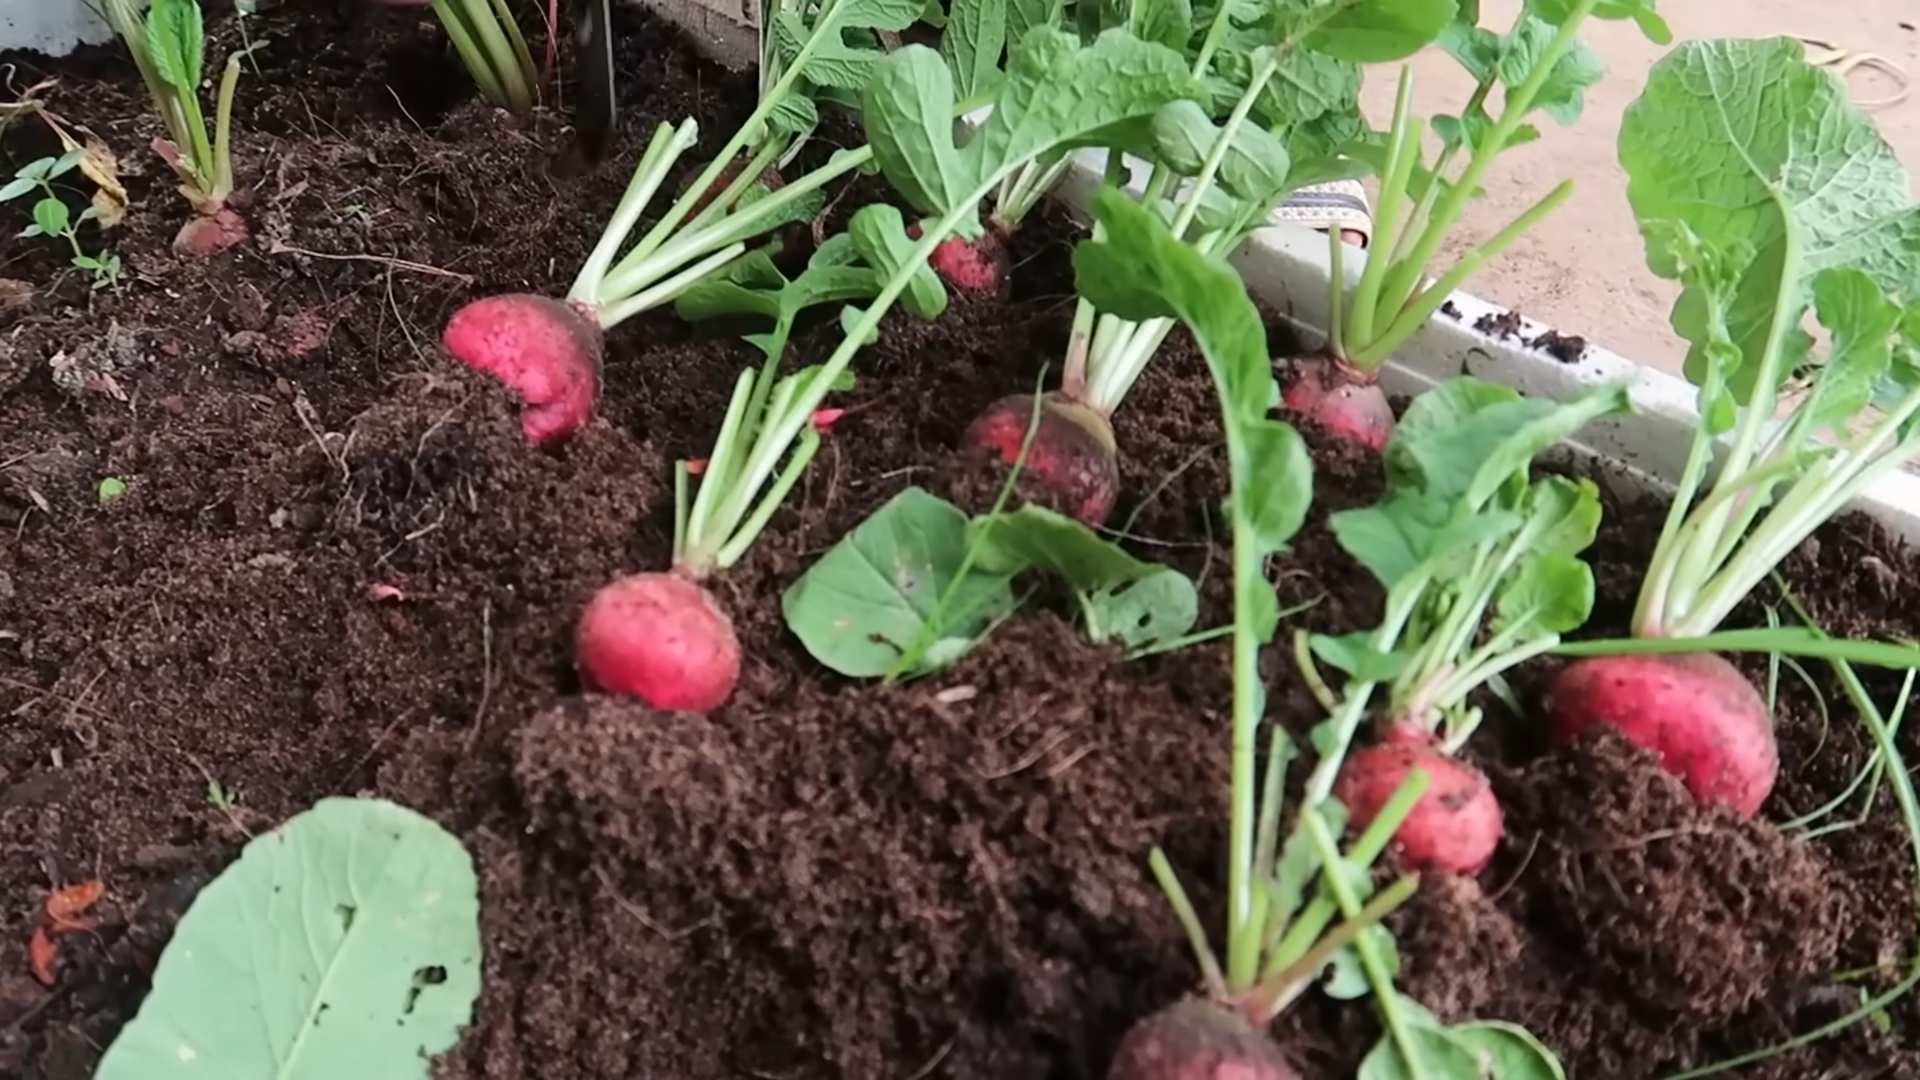
2. Harvesting: To harvest your radishes, gently pull them from the soil. If they’re difficult to pull, you can loosen the soil around them with a small trowel.
3. Enjoy Your Harvest: Once you’ve harvested your radishes, wash them thoroughly and enjoy them fresh! They’re delicious in salads, sandwiches, or as a crunchy snack. You can also roast them or pickle them for a longer shelf life.
Troubleshooting: Common Problems and Solutions
Even with the best care, you might encounter a few challenges along the way. Here are some common problems and how to fix them:
* Radishes are not forming bulbs: This is usually caused by overcrowding, lack of sunlight, or poor soil. Make sure you’ve thinned your plants properly, that they’re receiving enough light, and that you’re using a good-quality potting mix.
* Radishes are cracking: This can be caused by inconsistent watering. Make sure you’re watering your plants regularly and that the soil is consistently moist.
* Radishes are too spicy: This can be caused by hot weather or stress. Try to keep your plants cool and well-watered.
* Leaves are yellowing: This can be caused by overwatering, underwatering, or nutrient deficiencies. Check the soil moisture and adjust your watering accordingly. You may also need to fertilize your plants.
Choosing the Right Radish Variety for Indoor Growing
Not all radishes are created equal, especially when it comes to indoor growing. Some varieties are better suited for containers and shorter growing seasons. Here are a few of my favorites:
* Cherry Belle: This is a classic radish variety that’s known for its quick growth and mild flavor. It’s a great choice for beginners.
* French Breakfast: This radish has a mild, slightly sweet flavor and a crisp texture. It’s also relatively quick to mature.
* Easter Egg: This variety produces radishes in a variety of colors, including red, pink, purple, and white. It’s a fun and colorful addition to any garden.
* Sparkler: Similar to Cherry Belle, but with a white tip. Matures quickly and has a mild flavor.
Extending Your Harvest: Succession Planting
Want to enjoy a continuous supply of radishes throughout the winter? Try succession planting! This involves planting a new batch of seeds every 1-2 weeks. This way, you’ll always have radishes ready to harvest.
1. Plan Your Planting Schedule: Determine how often you want to harvest radishes and plan your planting schedule accordingly.
2. Prepare New Containers: Prepare new containers with potting mix and sow the seeds as described above.
3.
Conclusion
So, there you have it! Growing radishes during the winter season doesn’t have to be a pipe dream. With a little planning, some simple DIY techniques, and a touch of patience, you can enjoy the crisp, peppery bite of homegrown radishes even when the snow is falling. This method, focusing on creating a protected environment, is a game-changer for extending your growing season and enjoying fresh produce year-round.
Why is this DIY trick a must-try? Because it empowers you to take control of your food source, reduces your reliance on store-bought vegetables (often shipped from far away), and connects you with the natural world, even in the depths of winter. Plus, there’s nothing quite like the satisfaction of harvesting something you’ve nurtured from seed to table, especially when everyone else is relying on root vegetables that have been in storage for months.
Don’t be afraid to experiment! Consider different radish varieties. French Breakfast radishes are a classic choice, but Cherry Belle radishes are also reliable and quick to mature. For a spicier kick, try Black Spanish radishes, but be aware they take a bit longer to grow. You can also play around with the soil composition. Adding extra compost or well-rotted manure will provide your radishes with the nutrients they need to thrive. If you’re feeling adventurous, try companion planting. Carrots and lettuce are known to grow well alongside radishes, potentially improving the overall health and yield of your winter garden.
Another variation to consider is the type of protective structure you use. While we’ve focused on cold frames and low tunnels, you could also adapt this technique to a greenhouse or even a sheltered balcony. The key is to provide consistent protection from frost and wind while allowing sufficient sunlight to reach your plants. Remember to monitor the temperature inside your structure and ventilate as needed to prevent overheating.
We are confident that with this DIY approach, you can successfully grow radishes in the winter season. The taste of freshly harvested radishes in the middle of winter is an experience you won’t soon forget.
Now, it’s your turn! We wholeheartedly encourage you to give this DIY radish-growing trick a try. It’s a rewarding project that will bring a touch of spring to your winter months. And most importantly, please share your experiences with us! Let us know what worked, what didn’t, and any variations you tried. Your feedback will help us refine this technique and empower even more gardeners to enjoy fresh radishes year-round. Post your photos and stories on our social media channels using #WinterRadishDIY. We can’t wait to see your successes!
Frequently Asked Questions (FAQ)
Q: What is the best time to start planting radishes for a winter harvest?
A: The ideal time to start planting radishes for a winter harvest depends on your local climate and the specific radish variety you choose. Generally, you should aim to sow your seeds 4-6 weeks before the first expected frost. This allows the radishes enough time to germinate and develop before the coldest weather sets in. Check the seed packet for the specific maturity time of your chosen variety and adjust your planting schedule accordingly. For example, if your first frost typically occurs in late October, you should aim to plant your radish seeds in late September or early October. Remember to factor in the protection offered by your cold frame or low tunnel, as this can extend your growing season by a few weeks.
Q: What kind of soil is best for growing radishes in winter?
A: Radishes thrive in well-drained, loose soil that is rich in organic matter. Before planting, amend your soil with compost or well-rotted manure to improve its fertility and drainage. Avoid heavy clay soils, as they can become waterlogged and hinder radish growth. The ideal soil pH for radishes is between 6.0 and 7.0. You can test your soil pH using a home testing kit or by sending a sample to a local agricultural extension office. If your soil is too acidic, you can add lime to raise the pH. If it’s too alkaline, you can add sulfur to lower the pH. Ensure the soil is free of rocks and debris, as these can interfere with root development.
Q: How often should I water my radishes during the winter months?
A: Watering frequency will depend on the weather conditions and the type of protective structure you are using. Generally, you should water your radishes when the top inch of soil feels dry to the touch. Avoid overwatering, as this can lead to root rot. In cold weather, radishes require less water than they do in warmer weather. Check the soil moisture regularly and adjust your watering schedule accordingly. If you are using a cold frame or low tunnel, be sure to ventilate it regularly to prevent condensation from building up, as this can also contribute to root rot. Water in the morning to allow the foliage to dry before nightfall.
Q: How do I protect my radishes from pests and diseases in winter?
A: While pests and diseases are generally less prevalent in winter, it’s still important to take precautions to protect your radishes. Inspect your plants regularly for signs of pests or diseases. Common radish pests include flea beetles and root maggots. You can deter flea beetles by covering your plants with row covers. Root maggots can be prevented by practicing crop rotation and avoiding planting radishes in the same location year after year. Diseases such as damping-off and root rot can be prevented by ensuring good drainage and avoiding overwatering. If you notice any signs of disease, remove the affected plants immediately to prevent the spread of infection.
Q: How do I know when my radishes are ready to harvest?
A: Radishes are typically ready to harvest within 3-6 weeks of planting, depending on the variety. The best way to determine if your radishes are ready is to check their size. Gently brush away the soil around the top of the radish to see how large it has grown. Most radish varieties are ready to harvest when they are about 1 inch in diameter. You can also harvest a few radishes early to test their flavor and texture. If they are crisp and flavorful, you can begin harvesting the rest of your crop. Don’t leave radishes in the ground for too long, as they can become woody and bitter.
Q: Can I grow radishes in containers during the winter?
A: Yes, growing radishes in containers is an excellent option, especially if you have limited space or want to move your plants indoors during extremely cold weather. Choose a container that is at least 6 inches deep and has drainage holes. Use a well-draining potting mix and follow the same planting and care instructions as you would for growing radishes in the ground. Container-grown radishes may require more frequent watering than those grown in the ground, as the soil in containers tends to dry out more quickly. Place your containers in a sunny location or under grow lights to ensure your radishes receive enough light.
Q: What are some creative ways to use my winter-grown radishes?
A: Beyond the classic salad addition, winter-grown radishes offer a surprising versatility in the kitchen. Try roasting them with a drizzle of olive oil and a sprinkle of salt and pepper for a sweet and savory side dish. Thinly sliced radishes add a peppery crunch to sandwiches and tacos. You can also pickle them for a tangy and refreshing snack. Don’t forget about the radish greens! They are edible and can be used in salads, soups, or stir-fries. Radish greens have a slightly peppery flavor similar to arugula. Get creative and experiment with different ways to incorporate your winter-grown radishes into your meals!


Leave a Comment