
Grow Sprouts at Home and unlock a world of fresh, nutritious goodness right on your kitchen counter! Forget those wilting, overpriced sprouts at the grocery store. I’m going to show you how incredibly easy and rewarding it is to cultivate your own vibrant sprouts, bursting with flavor and packed with vitamins.
Sprouting isn’t some newfangled health fad; it’s an ancient practice! Cultures around the globe have recognized the power of sprouted seeds for centuries. From mung bean sprouts in Asian cuisine to sprouted grains in traditional breads, these tiny powerhouses have been a staple for their concentrated nutrients and digestibility. Think of it as unlocking the sleeping potential within each seed, transforming it into a miniature superfood.
Why should you learn to grow sprouts at home? Well, for starters, it’s incredibly cost-effective. A small bag of seeds can yield a surprising amount of sprouts. Plus, you control the entire process, ensuring they’re grown organically and free from harmful chemicals. But more importantly, in today’s world, where access to fresh, nutrient-rich food can sometimes be a challenge, having a constant supply of homegrown sprouts is a fantastic way to boost your health and add a delicious crunch to your meals. Imagine adding them to salads, sandwiches, stir-fries, or even just snacking on them straight from the jar! I’m excited to share these simple DIY tricks that will have you sprouting like a pro in no time!
Grow Your Own Delicious Sprouts at Home: A Beginner’s Guide
Hey there, fellow food enthusiasts! Ever thought about growing your own food, but felt intimidated by gardening? Well, I’ve got the perfect solution for you: sprouting! It’s incredibly easy, requires minimal space, and you get fresh, nutritious sprouts in just a few days. I’m going to walk you through everything you need to know to become a sprouting pro.
What are Sprouts and Why Should You Grow Them?
Sprouts are basically germinated seeds. When a seed starts to grow, it releases all sorts of amazing nutrients, making sprouts incredibly healthy. They’re packed with vitamins, minerals, enzymes, and antioxidants. Plus, they add a delightful crunch and fresh flavor to salads, sandwiches, soups, and just about anything else you can imagine!
Growing your own sprouts is also super economical and environmentally friendly. You’re reducing your reliance on store-bought produce, minimizing packaging waste, and knowing exactly where your food comes from.
Choosing Your Seeds
Not all seeds are created equal when it comes to sprouting. You need to make sure you’re using seeds specifically intended for sprouting. These are usually labeled as “sprouting seeds” and are guaranteed to be free from harmful bacteria and chemicals. Avoid using seeds meant for planting in the garden, as they may be treated with fungicides or other substances that you definitely don’t want to eat.
Here are some popular and easy-to-grow sprouting seeds:
* **Alfalfa:** These have a mild, slightly grassy flavor and are great in salads.
* **Broccoli:** Broccoli sprouts are packed with sulforaphane, a powerful antioxidant. They have a slightly peppery taste.
* **Radish:** Radish sprouts have a spicy, zesty flavor that adds a kick to any dish.
* **Mung Beans:** These are the classic sprouts you often see in Asian cuisine. They’re mild and crunchy.
* **Lentils:** Lentil sprouts are hearty and have a slightly nutty flavor.
* **Fenugreek:** These sprouts have a unique, slightly bitter flavor and are often used in Indian cuisine.
* **Clover:** Clover sprouts are mild and sweet, perfect for adding a delicate touch to salads.
Always buy your sprouting seeds from a reputable source to ensure their quality and safety.
Equipment You’ll Need
The beauty of sprouting is that you don’t need a lot of fancy equipment. Here’s what I recommend:
* **Sprouting Jar:** A wide-mouth mason jar works perfectly. You can also buy specialized sprouting jars with built-in screens.
* **Sprouting Lid or Cheesecloth:** You’ll need something to cover the jar and allow for drainage. A sprouting lid is ideal, but a piece of cheesecloth secured with a rubber band works just as well.
* **Water:** Clean, filtered water is best.
* **A Dark Place:** Sprouts prefer to germinate in the dark. A cupboard or drawer works great.
* **A Tray or Bowl:** To catch any excess water that drains from the jar.
The Sprouting Process: Step-by-Step
Okay, let’s get down to the nitty-gritty! Here’s how to sprout your own seeds at home:
Phase 1: Soaking
1. **Measure Your Seeds:** Start with a small amount of seeds. For a quart-sized jar, I usually use 1-2 tablespoons of small seeds like alfalfa or broccoli, or 1/4 – 1/2 cup of larger seeds like lentils or mung beans. Remember, they’ll expand quite a bit!
2. **Rinse the Seeds:** Place the seeds in your sprouting jar and rinse them thoroughly with cool water. This removes any debris or dust.
3. **Soak the Seeds:** Add enough cool water to the jar to completely cover the seeds, plus a few inches extra. The seeds will absorb a lot of water during soaking.
4. **Soaking Time:** The soaking time varies depending on the type of seed. Here’s a general guideline:
* Alfalfa: 4-8 hours
* Broccoli: 4-8 hours
* Radish: 4-8 hours
* Mung Beans: 8-12 hours
* Lentils: 8-12 hours
* Fenugreek: 6-8 hours
* Clover: 4-8 hours
5. **Place in a Dark Place:** Cover the jar with your sprouting lid or cheesecloth and secure it. Place the jar in a dark, room-temperature place.
Phase 2: Rinsing and Draining
This is the most important part of the sprouting process! You need to rinse and drain your sprouts regularly to keep them moist and prevent mold growth.
1. **Drain the Soaking Water:** After the soaking period, drain all the water from the jar.
2. **Rinse Thoroughly:** Rinse the sprouts with cool water, making sure to get all the seeds wet.
3. **Drain Again:** Drain all the water as thoroughly as possible. This is crucial! You don’t want the sprouts sitting in water.
4. **Invert the Jar:** Invert the jar at a 45-degree angle in a bowl or tray. This allows any excess water to drain out and provides good air circulation.
5. **Repeat the Process:** Repeat the rinsing and draining process 2-3 times per day. I usually do it in the morning, afternoon, and evening.
Phase 3: Growing and Greening
1. **Continue Rinsing and Draining:** Continue rinsing and draining your sprouts 2-3 times per day for the next few days. You’ll start to see tiny sprouts emerging from the seeds.
2. **Greening (Optional):** Once the sprouts have reached your desired length (usually 3-5 days), you can expose them to indirect sunlight for a day or two to allow them to “green up.” This will increase their chlorophyll content and give them a more vibrant color. Be careful not to expose them to direct sunlight, as this can dry them out.
3. **Final Rinse:** Give the sprouts a final rinse before harvesting.
Harvesting and Storing Your Sprouts
1. **Harvesting:** Once the sprouts have reached your desired length and color, they’re ready to harvest.
2. **Final Rinse:** Give them one last thorough rinse.
3. **Drain Well:** Drain the sprouts as thoroughly as possible.
4. **Storage:** Store the sprouts in a clean, airtight container in the refrigerator. They should last for up to a week. I like to line the container with a paper towel to absorb any excess moisture.
Important Tip: Make sure your sprouts are completely dry before storing them to prevent mold growth.
Troubleshooting: Common Sprouting Problems and Solutions
Even with the best intentions, sometimes things can go wrong. Here are some common sprouting problems and how to fix them:
* **Mold:** Mold is the biggest enemy of sprouts. It’s usually caused by insufficient rinsing and draining, or by using contaminated seeds. If you see mold, discard the entire batch of sprouts. To prevent mold, make sure you’re rinsing and draining your sprouts thoroughly 2-3 times per day, and always use high-quality sprouting seeds.
* **Rotting:** Rotting is similar to mold and is also caused by excessive moisture. The sprouts will smell bad and look slimy. Discard the batch and make sure you’re draining the sprouts properly in future batches.
* **Slow Growth:** Slow growth can be caused by several factors, including low temperature, poor air circulation, or old seeds. Make sure your sprouts are in a room-temperature environment with good air circulation. If you suspect your seeds are old, try using a fresh batch.
* **Uneven Sprouting:** Uneven sprouting can be caused by uneven soaking or rinsing. Make sure all the seeds are thoroughly soaked and rinsed.
Beyond the Basics: Experimenting with Flavors
Once you’ve mastered the basic sprouting process, you can start experimenting with different flavors and techniques.
* **Sprout Blends:** Try mixing different types of seeds together to create your own unique sprout blends. For example, you could combine alfalfa, radish, and broccoli sprouts for a spicy and nutritious mix.
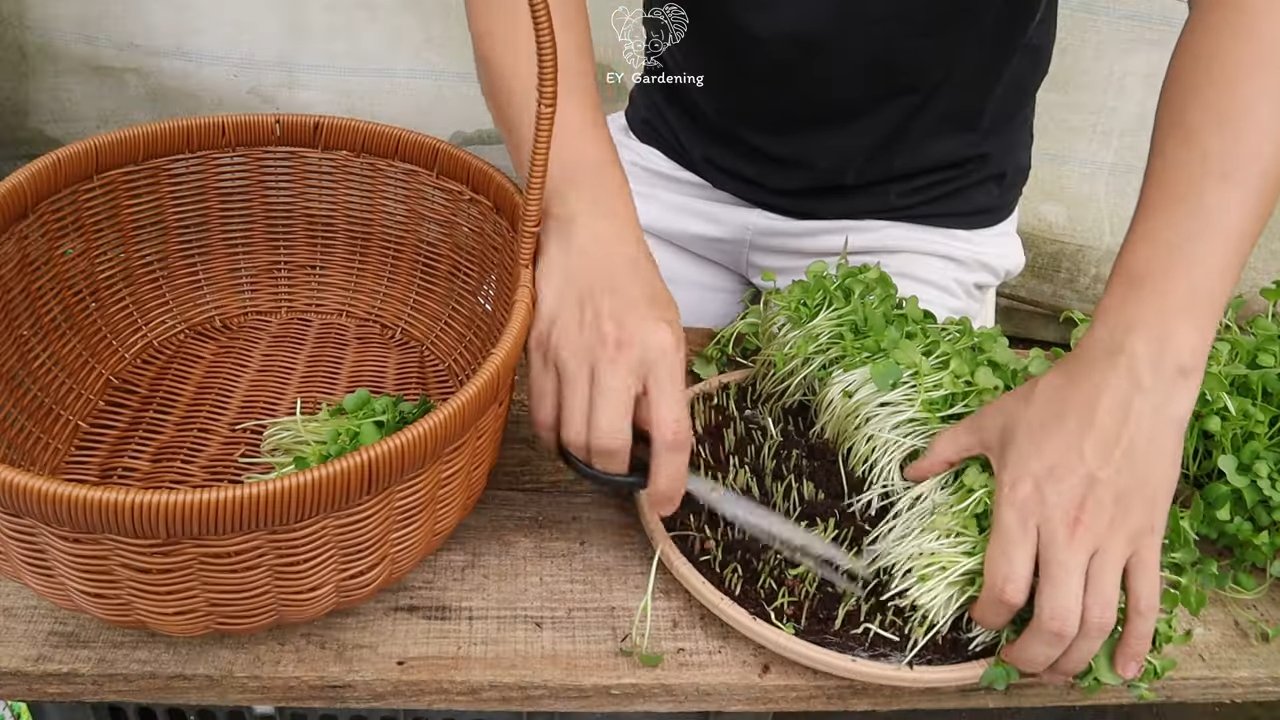
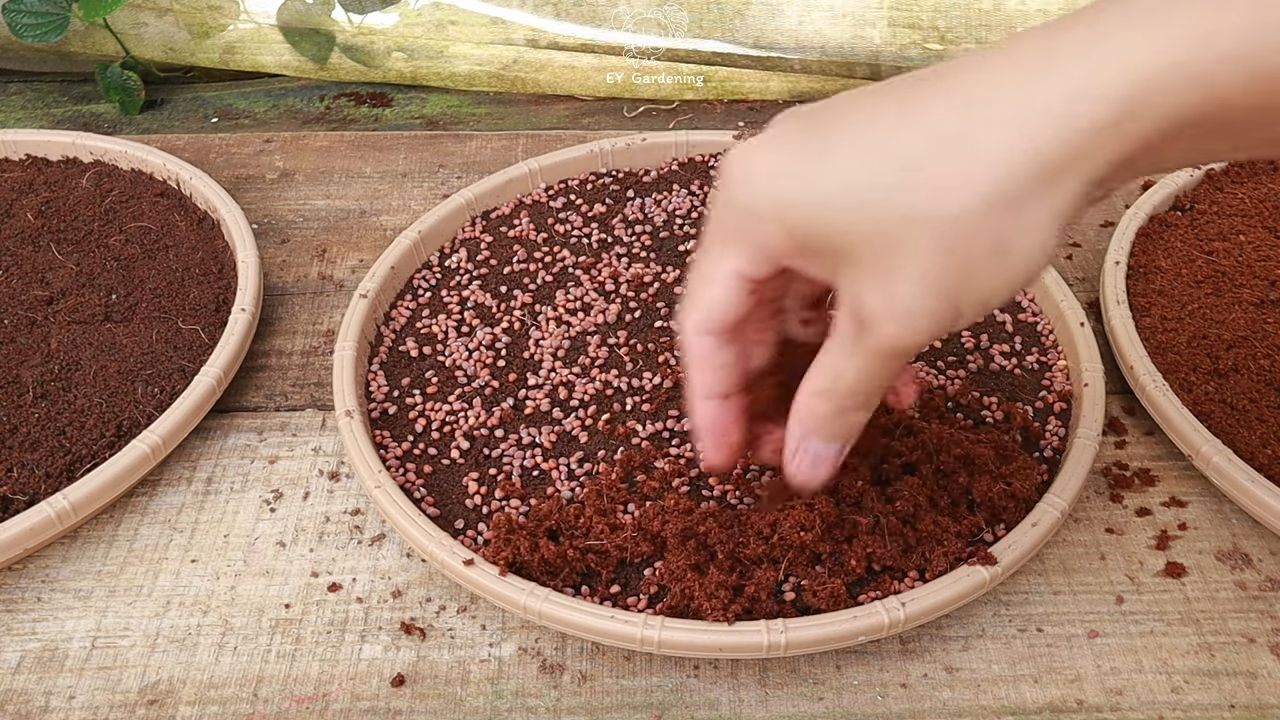
* **Sprouting in Soil:** For some sprouts, like sunflower and pea shoots, you can try sprouting them in soil for a more substantial harvest.
* **Hydroponic Sprouting:** If you’re feeling adventurous, you can explore hydroponic sprouting systems, which use nutrient-rich water to grow sprouts without soil.
Enjoy Your Homegrown Sprouts!
And there you have it! You’re now equipped with the knowledge and skills to grow your own delicious and nutritious sprouts at home. It’s a rewarding and easy way to add fresh, healthy food to your diet. So, grab some sprouting seeds, get your jar ready, and start sprouting! Happy sprouting!
Conclusion
So, there you have it! Growing your own sprouts at home is not just a fun project; it’s a gateway to fresher, healthier, and more flavorful meals. We’ve walked you through the simple steps, highlighting the ease and affordability of this rewarding endeavor. Forget those expensive, pre-packaged sprouts from the grocery store that often lack vibrancy and freshness. With this DIY method, you’re in complete control, ensuring the highest quality and nutritional value in every bite.
Why is this DIY trick a must-try? Because it empowers you to cultivate a miniature garden right in your kitchen, providing a constant supply of nutrient-rich greens. Sprouts are packed with vitamins, minerals, and enzymes, offering a significant boost to your overall well-being. Plus, the satisfaction of nurturing something from seed to sprout is incredibly fulfilling. It’s a tangible connection to nature, even within the confines of your home.
But the benefits don’t stop there. Growing your own sprouts is also an environmentally conscious choice. You’re reducing your reliance on commercially grown produce, which often involves long-distance transportation and resource-intensive farming practices. By embracing this DIY approach, you’re contributing to a more sustainable food system.
Ready to experiment? Consider these variations to personalize your sprouting journey. Try different types of seeds, such as alfalfa, broccoli, radish, mung beans, or lentils. Each variety offers a unique flavor profile and nutritional composition. You can also experiment with different sprouting containers, from mason jars to specialized sprouting trays. The key is to find what works best for you and your space.
For a spicy kick, try radish or mustard sprouts. For a mild, nutty flavor, go for alfalfa or clover. Mung bean sprouts are a classic choice for Asian-inspired dishes, while lentil sprouts add a hearty texture to salads and soups. The possibilities are endless!
Don’t be intimidated by the process. It’s surprisingly simple, and even if you encounter a few hiccups along the way, you’ll quickly learn and adapt. Remember to rinse your sprouts regularly to prevent mold growth and ensure optimal freshness. And be patient – sprouting takes time, but the rewards are well worth the wait.
We wholeheartedly encourage you to give this DIY trick a try. It’s a simple, affordable, and incredibly rewarding way to enhance your diet and connect with nature. Once you experience the joy of harvesting your own fresh sprouts, you’ll never go back to store-bought again.
So, grab your seeds, your jar, and your enthusiasm, and embark on your sprouting adventure today! And most importantly, we want to hear about your experience. Share your successes, your challenges, and your favorite ways to enjoy your homegrown sprouts in the comments below. Let’s build a community of sprout enthusiasts and inspire others to embrace this simple yet powerful DIY trick. Let us know what kind of grow sprouts at home methods you tried and what worked best for you!
Frequently Asked Questions (FAQ)
What types of seeds are best for sprouting?
The best seeds for sprouting are those specifically labeled for sprouting or microgreens. These seeds have been tested for germination rates and are free from harmful bacteria. Popular choices include alfalfa, broccoli, radish, clover, mung beans, lentils, and sunflower seeds. Avoid using seeds intended for planting in the garden, as they may be treated with chemicals that are not safe for consumption. Always purchase your seeds from a reputable source to ensure quality and safety.
How long does it take for sprouts to grow?
The sprouting time varies depending on the type of seed. Generally, most sprouts will be ready to harvest within 3 to 7 days. Alfalfa and clover sprouts typically take 5 to 7 days, while radish and broccoli sprouts may be ready in as little as 3 to 5 days. Mung bean sprouts usually take 2 to 3 days. Keep in mind that these are just estimates, and the actual sprouting time may vary depending on environmental factors such as temperature and humidity.
How often should I rinse my sprouts?
Rinsing your sprouts is crucial for preventing mold growth and maintaining freshness. You should rinse your sprouts at least twice a day, preferably in the morning and evening. Use cool, clean water and ensure that all the seeds are thoroughly rinsed. After rinsing, drain the sprouts well to prevent them from sitting in excess water. Proper rinsing is essential for successful sprouting.
What is the best way to store sprouts?
Once your sprouts are ready to harvest, rinse them thoroughly and drain them well. Store them in a clean, airtight container in the refrigerator. Sprouts are best consumed within a few days of harvesting, but they can typically last up to a week if stored properly. To maintain freshness, you can place a paper towel in the container to absorb excess moisture.
What if my sprouts start to smell bad?
A foul odor is a sign that your sprouts may be contaminated with bacteria or mold. If you notice a bad smell, discard the sprouts immediately. Do not consume them, as they could make you sick. To prevent this from happening, ensure that you are rinsing your sprouts regularly and thoroughly, and that you are using clean sprouting equipment.
Can I grow sprouts without a special sprouting jar?
Yes, you can grow sprouts without a special sprouting jar. A mason jar with a mesh lid or cheesecloth secured with a rubber band works just as well. You can also use a colander or a sprouting tray. The key is to provide adequate drainage and ventilation to prevent mold growth.
Are there any risks associated with eating sprouts?
While sprouts are generally safe to eat, there is a small risk of bacterial contamination. This is because sprouts are grown in warm, moist conditions, which are also ideal for bacterial growth. To minimize this risk, purchase your seeds from a reputable source, rinse your sprouts thoroughly, and store them properly. Pregnant women, young children, and individuals with weakened immune systems should exercise extra caution and may want to cook sprouts before consuming them.
How can I use sprouts in my meals?
Sprouts are incredibly versatile and can be used in a variety of dishes. Add them to salads, sandwiches, wraps, and soups for a boost of flavor and nutrition. They can also be used as a garnish for tacos, stir-fries, and other dishes. Some people even enjoy eating sprouts on their own as a snack. Get creative and experiment with different ways to incorporate sprouts into your diet.
What do I do if my sprouts aren’t growing?
If your sprouts aren’t growing, there could be several reasons. First, make sure that your seeds are viable and specifically intended for sprouting. Second, ensure that you are providing adequate moisture and ventilation. Third, check the temperature – sprouts typically grow best in a warm environment (around 70-75°F). If you’ve addressed these factors and your sprouts still aren’t growing, try starting with a fresh batch of seeds.
Can I grow sprouts in direct sunlight?
While sprouts need light to develop chlorophyll and turn green, direct sunlight can be too intense and can dry them out. It’s best to grow sprouts in a well-lit area, but away from direct sunlight. Indirect sunlight or artificial light is ideal.

Leave a Comment