
Grow Sweet Potatoes at Home – imagine harvesting a bounty of vibrant, earthy sweet potatoes right from your own backyard! Forget those bland, store-bought spuds; we’re diving into the wonderful world of homegrown goodness. For centuries, sweet potatoes have been a staple in diets across the globe, from their origins in Central and South America to their widespread cultivation in Asia and Africa. They’re not just delicious; they’re packed with nutrients, making them a healthy and rewarding addition to any meal.
But why should you bother growing them yourself? Well, for starters, you get to control exactly what goes into your food, avoiding harmful pesticides and ensuring peak freshness. Plus, there’s something incredibly satisfying about nurturing a plant from slip to harvest. Many people find the process of growing their own food therapeutic and a great way to connect with nature. And let’s be honest, who wouldn’t want to impress their friends and family with a homemade sweet potato pie made with ingredients they grew themselves?
This DIY guide is your one-stop shop for mastering the art of growing sweet potatoes at home, even if you have limited space or experience. I’ll walk you through every step, from sprouting slips to harvesting your sweet potato treasure. Get ready to roll up your sleeves and discover the joy of homegrown sweet potatoes!

Growing Sweet Potatoes at Home: A DIY Guide
Okay, so you want to grow sweet potatoes at home? Awesome! It’s totally doable, and honestly, there’s nothing quite like digging up your own homegrown sweet potatoes. They taste amazing, and it’s a really rewarding experience. This guide will walk you through everything you need to know, from sprouting slips to harvesting your bounty. Let’s get started!
What You’ll Need
Before we dive in, let’s gather our supplies. Here’s a list of what you’ll need to successfully grow sweet potatoes:
* Sweet Potatoes: Obviously! Choose organic sweet potatoes if possible, as they’re less likely to be treated with sprout inhibitors.
* Glass Jars or Containers: For sprouting the slips.
* Toothpicks: To suspend the sweet potatoes in the water.
* Potting Soil: A well-draining mix is crucial.
* Gardening Gloves: To protect your hands.
* Shovel or Garden Fork: For planting and harvesting.
* Fertilizer (Optional): A balanced fertilizer can boost growth.
* Raised Beds or Garden Space: Sweet potatoes need plenty of room to spread.
* Mulch (Optional): To help retain moisture and suppress weeds.
* Watering Can or Hose: For regular watering.
Sprouting Sweet Potato Slips
The first step in growing sweet potatoes is sprouting the “slips.” These are the little shoots that will eventually become your sweet potato plants. This process takes a few weeks, so be patient!
1. Prepare the Sweet Potatoes: Wash your sweet potatoes thoroughly to remove any dirt or debris.
2. Insert Toothpicks: Insert toothpicks around the middle of each sweet potato. These will act as supports to suspend the potato in the water. Space them evenly so the potato is stable.
3. Suspend in Water: Fill your glass jars or containers with water. Place the sweet potatoes in the jars, pointy end down, so that the bottom half is submerged in water. Make sure the toothpicks are resting on the rim of the jar, holding the potato in place.
4. Find a Sunny Spot: Place the jars in a warm, sunny location. A windowsill is perfect.
5. Change the Water Regularly: Change the water every few days to prevent mold and keep the water fresh.
6. Wait for Slips to Sprout: After a few weeks, you should start to see small sprouts (slips) emerging from the sweet potatoes. These will grow into leafy shoots. Keep the water level consistent and be patient. It can take anywhere from 4 to 8 weeks for the slips to be ready for planting.
7. Encourage Root Growth (Optional): Once the slips are a few inches long, you can gently twist them off the sweet potato. Place the slips in a glass of water to encourage root growth before planting. This isn’t strictly necessary, but it can give them a head start.
Preparing the Garden Bed
Sweet potatoes need well-drained soil and plenty of sunlight. Before planting, it’s important to prepare your garden bed properly.
1. Choose a Sunny Location: Select a spot in your garden that receives at least 6-8 hours of direct sunlight per day.
2. Prepare the Soil: Sweet potatoes prefer loose, well-drained soil. Amend the soil with compost or other organic matter to improve drainage and fertility. If your soil is heavy clay, consider building raised beds.
3. Create Mounds or Ridges: Sweet potatoes grow best in mounds or ridges. This helps with drainage and allows the roots to spread easily. Create mounds that are about 8-12 inches high and 12-18 inches wide. Space the mounds about 3 feet apart.
4. Fertilize (Optional): If your soil is lacking in nutrients, you can add a balanced fertilizer before planting. Follow the instructions on the fertilizer package.
Planting the Sweet Potato Slips
Now for the fun part – planting your sweet potato slips!
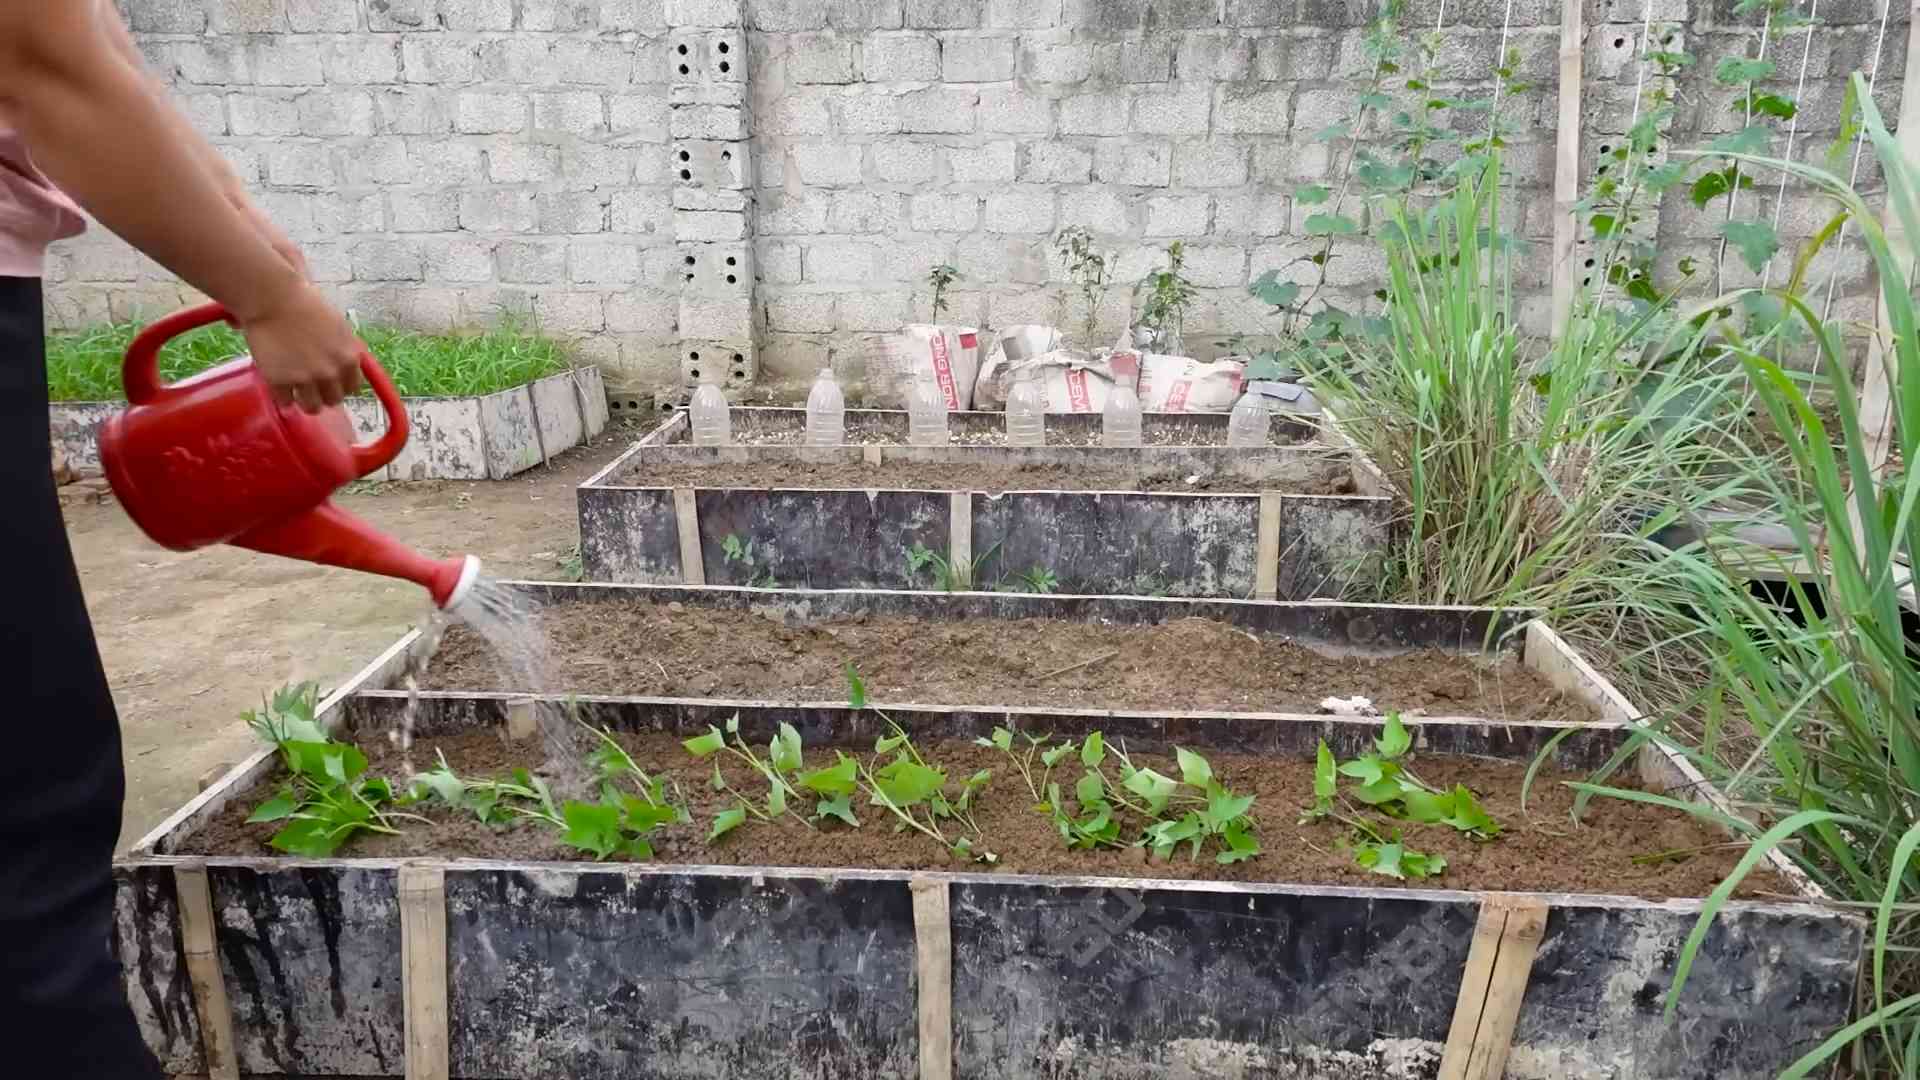
1. Water the Soil: Before planting, water the soil thoroughly to ensure it’s moist.
2. Plant the Slips: Gently dig a small hole in the top of each mound. Plant the sweet potato slips about 4-6 inches deep, burying the stem up to the first set of leaves.
3. Space the Slips: Space the slips about 12-18 inches apart on each mound.
4. Water Again: After planting, water the slips again to help them settle in.
5. Mulch (Optional): Apply a layer of mulch around the plants to help retain moisture, suppress weeds, and regulate soil temperature. Straw, hay, or wood chips work well.
Caring for Your Sweet Potato Plants
Once your sweet potato slips are planted, it’s important to provide them with the proper care to ensure a bountiful harvest.
1. Water Regularly: Sweet potatoes need consistent moisture, especially during the first few weeks after planting. Water deeply whenever the soil feels dry to the touch. Avoid overwatering, as this can lead to root rot.
2. Weed Control: Keep the garden bed free of weeds, as they can compete with the sweet potato plants for nutrients and water. Hand-pull weeds regularly or use a hoe to cultivate the soil.
3. Fertilize (Optional): If your plants are not growing vigorously, you can apply a balanced fertilizer every few weeks. Follow the instructions on the fertilizer package. Avoid over-fertilizing, as this can lead to excessive vine growth and fewer sweet potatoes.
4. Vine Management: Sweet potato vines can spread quite a bit. If they start to encroach on other plants, you can prune them back. You can also lift the vines occasionally to prevent them from rooting at the nodes, which can divert energy away from the sweet potatoes.
5. Pest Control: Sweet potatoes are generally resistant to pests, but they can sometimes be affected by aphids, flea beetles, or sweet potato weevils. Inspect your plants regularly for signs of pests and take action if necessary. Insecticidal soap or neem oil can be effective for controlling many common pests. For sweet potato weevils, consider using row covers to protect your plants.
Harvesting Your Sweet Potatoes
The moment you’ve been waiting for! Harvesting sweet potatoes is a rewarding experience, but it’s important to do it at the right time.
1. Timing is Key: Sweet potatoes are typically ready to harvest about 90-120 days after planting. The best time to harvest is before the first frost, as frost can damage the sweet potatoes.
2. Look for Signs of Maturity: The leaves of the sweet potato plants will start to turn yellow and brown when they are ready to harvest.
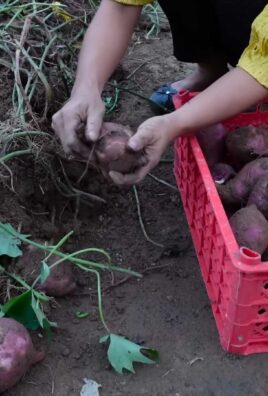
3. Dig Carefully: Use a shovel or garden fork to carefully dig around the mounds, being careful not to damage the sweet potatoes. Start digging a few feet away from the plant to avoid accidentally cutting into the potatoes.
4. Lift the Potatoes: Gently lift the sweet potatoes from the soil. Brush off any excess dirt.
5. Curing the Sweet Potatoes: Curing is an important step in the harvesting process. It helps to heal any cuts or bruises on the sweet potatoes and improves their flavor and storage life. To cure sweet potatoes, place them in a warm, humid location (80-85°F and 85-90% humidity) for about 7-10 days. A greenhouse or a warm, sunny room with a humidifier works well.
6. Store Properly: After curing, store the sweet potatoes in a cool, dry, and well-ventilated location (55-60°F). Avoid storing them in the refrigerator, as this can cause them to develop a hard core. Properly cured and stored sweet potatoes can last for several months.
Troubleshooting
Even with the best planning, things can sometimes go wrong. Here are a few common problems you might encounter when growing sweet potatoes and how to fix them:
* Slips Not Sprouting: If your slips aren’t sprouting, make sure the sweet potatoes are in a warm, sunny location and that the water is changed regularly. Sometimes, it just takes time. Also, ensure you’re using organic sweet potatoes, as non-organic ones may be treated to prevent sprouting.
* Yellowing Leaves: Yellowing leaves can indicate a nutrient deficiency. Try fertilizing with a balanced fertilizer. It could also be a sign of overwatering, so make sure the soil is well-draining.
* Small Sweet Potatoes: Small sweet potatoes can be caused by poor soil, insufficient sunlight, or overcrowding. Make sure your soil is well-amended with compost, that your plants are getting enough sunlight, and that they are spaced properly.
* Pest Problems: Regularly inspect your plants for pests and take action if necessary. Insecticidal soap or neem oil can be effective for controlling many common pests.
Enjoy
Conclusion
So, there you have it! Growing sweet potatoes at home is not only achievable, but it’s also incredibly rewarding. Forget those bland, store-bought sweet potatoes; imagine sinking your teeth into a freshly harvested, vibrant orange sweet potato that you nurtured from sprout to table. The difference in flavor and texture is simply undeniable. This DIY trick transforms your gardening experience, offering a sustainable and delicious alternative to relying solely on grocery stores.
Why is this a must-try? Because it empowers you to control the quality and origin of your food. You know exactly what went into growing your sweet potatoes – no mystery chemicals or long-distance transportation. Plus, it’s a fantastic way to connect with nature and learn about the life cycle of plants. The satisfaction of harvesting your own food is a feeling that’s hard to beat.
But the fun doesn’t stop there! Feel free to experiment with different varieties of sweet potatoes. Beauregard, with its classic orange flesh, is a reliable choice, but why not try a Japanese sweet potato with its purple skin and creamy white interior? Or perhaps a Garnet sweet potato, known for its deep red hue and moist texture? The possibilities are endless!
Consider growing your sweet potatoes in raised beds for improved drainage, especially if you have heavy clay soil. You can also add compost or well-rotted manure to the soil to boost its fertility and provide your sweet potatoes with the nutrients they need to thrive. For those with limited space, growing sweet potatoes in large containers is a viable option. Just make sure the containers are at least 20 gallons in size and have adequate drainage holes.
Don’t be afraid to get creative with your sweet potato vines! They’re not just for growing potatoes; they’re also beautiful ornamental plants. Train them to climb a trellis or let them cascade over the edges of a container for a stunning visual display. You can even harvest the sweet potato leaves and use them in salads or stir-fries. They’re packed with nutrients and have a mild, spinach-like flavor.
This DIY method for growing sweet potatoes at home is more than just a gardening project; it’s an investment in your health, your well-being, and your connection to the natural world. It’s a chance to learn new skills, enjoy the fruits (or rather, the roots!) of your labor, and share your bounty with friends and family.
So, what are you waiting for? Grab a sweet potato, some water, and a few toothpicks, and get started on your sweet potato growing adventure today! We’re confident that you’ll be amazed by the results. And once you’ve harvested your first crop, we’d love to hear about your experience. Share your photos, tips, and stories in the comments below. Let’s build a community of sweet potato enthusiasts and inspire others to grow their own food! We are eager to see your success with growing sweet potatoes at home!
Frequently Asked Questions (FAQ)
What is the best time to start growing sweet potatoes at home?
The ideal time to start your sweet potato slips (sprouts) is about 8-10 weeks before the last expected frost in your area. This usually falls around late winter or early spring. You want to give the slips enough time to develop strong roots before transplanting them outdoors. If you live in a warmer climate with a longer growing season, you can start them a bit later. The key is to ensure that the soil temperature is consistently above 65°F (18°C) when you transplant the slips. Starting early indoors gives you a head start and maximizes your chances of a bountiful harvest.
How long does it take for sweet potatoes to grow?
Sweet potatoes typically take between 90 and 120 days to mature, depending on the variety and growing conditions. Factors like sunlight, soil fertility, and watering frequency can all influence the growth rate. You’ll know your sweet potatoes are ready to harvest when the vines start to yellow and die back. It’s best to harvest them before the first frost, as frost can damage the potatoes and affect their storage life. Gently dig around the plants to avoid bruising the potatoes, and cure them in a warm, humid place for about a week to improve their flavor and storage potential.
What kind of soil is best for growing sweet potatoes?
Sweet potatoes thrive in well-drained, sandy loam soil. This type of soil allows for good aeration and drainage, which is crucial for preventing root rot. Avoid heavy clay soils, as they can become waterlogged and hinder the development of the potatoes. If you have clay soil, amend it with plenty of organic matter, such as compost or well-rotted manure, to improve its drainage and fertility. Sweet potatoes prefer a slightly acidic soil pH, ideally between 6.0 and 6.5. You can test your soil pH with a simple soil testing kit and adjust it accordingly with lime or sulfur.
How much sunlight do sweet potatoes need?
Sweet potatoes need at least 6-8 hours of direct sunlight per day to grow properly. Sunlight is essential for photosynthesis, the process by which plants convert sunlight into energy. Without enough sunlight, your sweet potato plants will be weak and spindly, and they won’t produce as many potatoes. Choose a sunny location in your garden for your sweet potato patch, and make sure that the plants are not shaded by trees or buildings. If you’re growing sweet potatoes in containers, place them in a spot that receives plenty of sunlight throughout the day.
How often should I water sweet potatoes?
Sweet potatoes need consistent moisture, especially during the early stages of growth. Water deeply and regularly, especially during dry spells. Aim to keep the soil consistently moist but not waterlogged. Once the plants are established, you can reduce the watering frequency slightly, but still make sure the soil doesn’t dry out completely. A good rule of thumb is to water when the top inch of soil feels dry to the touch. Avoid overhead watering, as this can promote fungal diseases. Instead, water at the base of the plants, using a soaker hose or drip irrigation system.
Can I grow sweet potatoes in containers?
Yes, you can absolutely grow sweet potatoes in containers! This is a great option for gardeners with limited space or those who want to grow sweet potatoes on a patio or balcony. Choose a large container, at least 20 gallons in size, with adequate drainage holes. Fill the container with a well-draining potting mix amended with compost or other organic matter. Plant your sweet potato slips in the container, spacing them about 12 inches apart. Water regularly and fertilize with a balanced fertilizer every few weeks. Place the container in a sunny location that receives at least 6-8 hours of direct sunlight per day.
How do I cure sweet potatoes after harvesting?
Curing sweet potatoes is essential for improving their flavor and storage life. After harvesting, gently brush off any excess soil and allow the potatoes to dry in a warm, humid place for about a week. The ideal curing conditions are a temperature of 80-85°F (27-29°C) and a humidity level of 80-90%. You can achieve these conditions by placing the potatoes in a well-ventilated room with a humidifier or by covering them with a damp cloth. Curing allows the starches in the sweet potatoes to convert to sugars, making them sweeter and more flavorful. It also helps to heal any minor cuts or bruises on the potatoes, preventing them from rotting during storage. After curing, store the sweet potatoes in a cool, dry, and dark place, such as a basement or pantry.
Are sweet potato leaves edible?
Yes, sweet potato leaves are edible and nutritious! They have a mild, spinach-like flavor and can be used in salads, stir-fries, soups, and other dishes. Sweet potato leaves are a good source of vitamins A and C, as well as fiber and antioxidants. Harvest the leaves when they are young and tender, and avoid eating leaves that have been treated with pesticides or herbicides. You can also blanch the leaves before cooking to reduce any bitterness. Sweet potato leaves are a versatile and delicious addition to your diet, and they’re a great way to make the most of your sweet potato plants.


Leave a Comment