
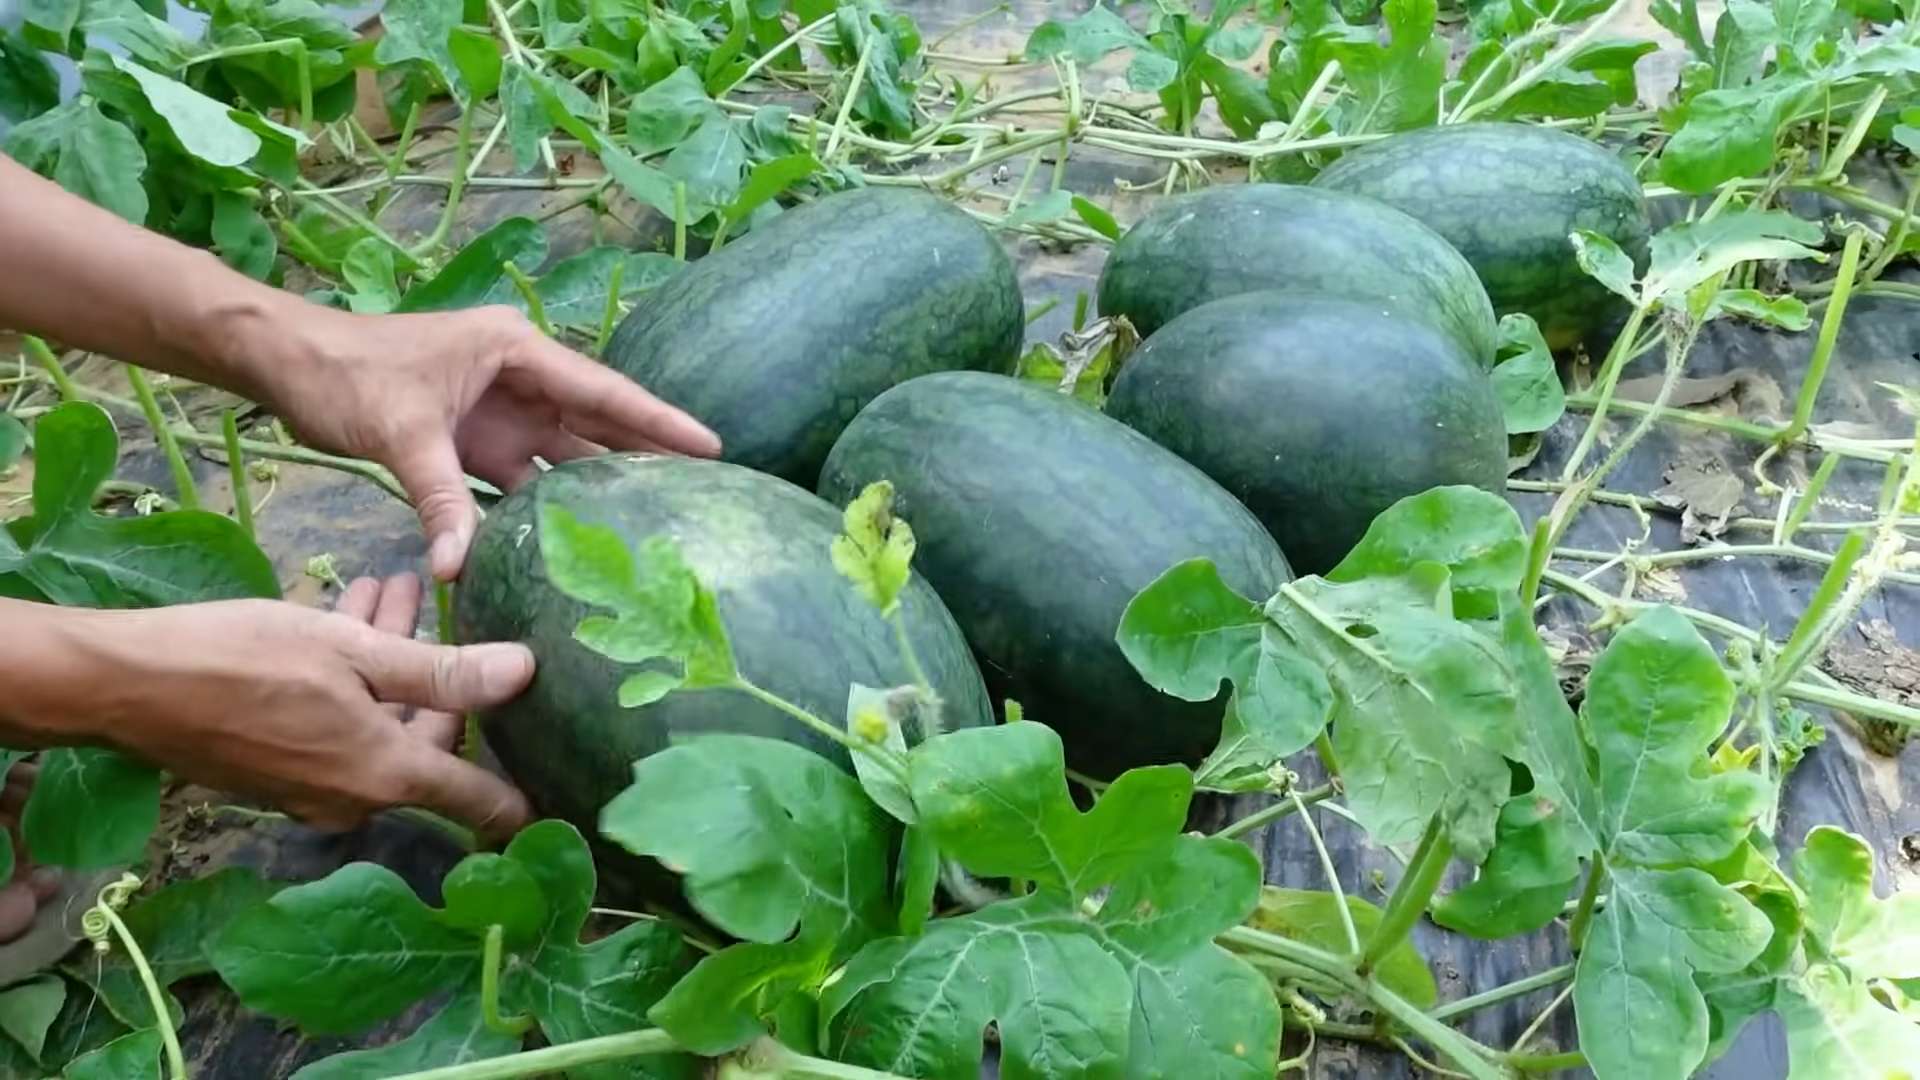
Grow Watermelons Backyard DIY: Ever dreamt of biting into a juicy, homegrown watermelon, bursting with flavor and sunshine? I know I have! There’s something incredibly satisfying about nurturing a tiny seed into a sprawling vine that yields such a delicious reward. But let’s be honest, the thought of growing watermelons can seem a little daunting, especially if you’re working with limited space.
Watermelons have a rich history, dating back thousands of years to Africa, where they were prized for their hydrating properties in arid climates. Over time, they’ve spread across the globe, becoming a symbol of summer and backyard barbecues. But you don’t need a sprawling farm to enjoy this summer treat.
That’s where this Grow Watermelons Backyard DIY guide comes in! I’m going to share some simple, yet effective, tricks and hacks that will help you cultivate your own watermelons, even if you only have a small backyard, patio, or balcony. We’ll cover everything from choosing the right variety for your space to maximizing your yield with clever DIY techniques. Imagine the bragging rights – and the delicious watermelon – you’ll have to share with friends and family! So, grab your gardening gloves, and let’s get started on this exciting journey to homegrown watermelon goodness!
Growing Strawberries From Seed: A Comprehensive DIY Guide
Okay, strawberry lovers, gather ’round! I know what you’re thinking: growing strawberries from seed? Isn’t that, like, *really* hard? Well, it can be a bit more involved than buying a starter plant, but trust me, the satisfaction of nurturing those tiny seeds into juicy, red berries is totally worth it. Plus, you get access to varieties you might never find at your local nursery. So, let’s dive in!
Why Grow Strawberries From Seed?
Before we get our hands dirty, let’s quickly touch on why you might want to embark on this adventure.
* Variety: As I mentioned, you’ll have access to a wider range of strawberry varieties, including heirloom and alpine types.
* Cost-Effective: Seeds are generally cheaper than established plants, especially if you’re planning a large strawberry patch.
* Control: You have complete control over the growing process from the very beginning, ensuring your plants are healthy and strong.
* Satisfaction: Seriously, there’s nothing quite like eating a strawberry you grew from a tiny seed!
What You’ll Need
Alright, let’s get our supplies together. Here’s what you’ll need to successfully grow strawberries from seed:
* Strawberry Seeds: Choose a variety that suits your climate and taste preferences. Reputable seed suppliers are your best bet.
* Seed Starting Trays or Pots: I prefer seed starting trays with a clear humidity dome, but small pots work too.
* Seed Starting Mix: This is crucial! Don’t use regular potting soil; it’s too heavy. Seed starting mix is light and airy.
* Spray Bottle: For gentle watering.
* Grow Lights (Optional but Recommended): Strawberries need a lot of light, especially when starting indoors.
* Heat Mat (Optional but Helpful): Germination is faster and more consistent with bottom heat.
* Small Containers for Transplanting: Once your seedlings are big enough, you’ll need to move them to larger containers.
* Potting Soil: For transplanting into larger containers.
* Fertilizer: A balanced liquid fertilizer diluted to half strength.
* Patience: Seriously, this is key! Growing strawberries from seed takes time.
Phase 1: Stratification (The Cold Treatment)
This is a crucial step for many strawberry varieties. Stratification mimics the natural winter conditions that strawberry seeds need to break dormancy.
1. Gather Your Supplies: You’ll need your strawberry seeds, a small airtight container (like a zip-top bag or a small plastic container), and some slightly moistened paper towels or vermiculite.
2. Moisten the Medium: Lightly dampen the paper towels or vermiculite. They should be moist but not soaking wet. You don’t want the seeds to rot.
3. Place Seeds in Medium: Spread the strawberry seeds evenly on the moistened paper towel or vermiculite.
4. Seal and Label: Place the paper towel or vermiculite with the seeds into the airtight container. Label the container with the date and the strawberry variety. This is important if you’re growing multiple varieties!
5. Refrigerate: Place the container in your refrigerator for 4-6 weeks. The ideal temperature is around 35-40°F (2-4°C).
6. Check Periodically: Check the container every week or so to make sure the paper towel or vermiculite is still moist. If it’s drying out, lightly mist it with water.
Phase 2: Sowing the Seeds
Now that our seeds have had their winter nap, it’s time to wake them up and get them growing!
1. Prepare Your Seed Starting Trays or Pots: Fill your seed starting trays or pots with seed starting mix. Gently tap the trays or pots to settle the mix.
2. Moisten the Seed Starting Mix: Lightly moisten the seed starting mix with your spray bottle. Again, you want it moist, not soaking wet.
3. Sow the Seeds: Carefully remove the seeds from the refrigerator. Gently sprinkle the seeds on the surface of the seed starting mix. Strawberry seeds are tiny, so don’t bury them too deep. Just press them lightly into the surface.
4. Cover Lightly (Optional): Some people recommend lightly covering the seeds with a very thin layer of vermiculite or seed starting mix. This can help retain moisture. I’ve had success both with and without covering them, so it’s up to you.
5. Mist with Water: Gently mist the surface of the seed starting mix with water.
6. Cover with Humidity Dome (If Using): If you’re using a seed starting tray with a humidity dome, place the dome on top. This will help create a humid environment that’s ideal for germination.
7. Place Under Grow Lights or in a Sunny Location: Place the seed starting trays or pots under grow lights or in a sunny location. Strawberries need at least 12-14 hours of light per day. If you’re using grow lights, position them a few inches above the trays or pots.
8. Use a Heat Mat (Optional): If you’re using a heat mat, place the seed starting trays or pots on the heat mat. The ideal temperature for germination is around 70-75°F (21-24°C).
Phase 3: Germination and Early Care
This is where the magic happens! Keep a close eye on your seeds and provide them with the care they need to thrive.
1. Monitor Moisture Levels: Check the seed starting mix daily to make sure it’s still moist. If it’s drying out, gently mist it with water. Be careful not to overwater, as this can lead to damping off, a fungal disease that can kill seedlings.
2. Ventilate (If Using a Humidity Dome): If you’re using a humidity dome, ventilate it daily by lifting the dome for a few minutes. This will help prevent fungal growth.
3. Be Patient: Germination can take anywhere from 1-4 weeks, so don’t get discouraged if you don’t see anything happening right away.
4. Thin Seedlings (If Necessary): Once the seedlings have emerged and have a few true leaves (the leaves that look like miniature strawberry leaves), you may need to thin them out. If you have multiple seedlings growing in the same cell or pot, carefully remove the weaker ones, leaving only the strongest seedling.
5. Fertilize (After True Leaves Appear): Once the seedlings have a few true leaves, you can start fertilizing them with a balanced liquid fertilizer diluted to half strength. Fertilize every 1-2 weeks.
Phase 4: Transplanting
Once your seedlings are big enough, it’s time to move them to larger containers.
1. Prepare Your Containers: Fill your small containers with potting soil.
2. Gently Remove Seedlings: Carefully remove the seedlings from the seed starting trays or pots. Use a small spoon or fork to gently loosen the soil around the seedlings. Be careful not to damage the roots.
3. Transplant Seedlings: Make a small hole in the potting soil in the new container. Gently place the seedling in the hole and cover the roots with soil.
4. Water Thoroughly: Water the transplanted seedlings thoroughly.
5. Place Under Grow Lights or in a Sunny Location: Place the transplanted seedlings under grow lights or in a sunny location.
6. Continue to Fertilize: Continue to fertilize the seedlings every 1-2 weeks with a balanced liquid fertilizer diluted to half strength.
Phase 5: Hardening Off
Before you can plant your strawberry plants outdoors, you need to “harden them off.” This process gradually acclimates the plants to outdoor conditions.
1. Start Slowly: Begin by placing the plants outdoors in a sheltered location for just a few hours each day.
2. Gradually Increase Exposure: Gradually increase the amount of time the plants spend outdoors each day, over a period of 1-2 weeks.
3. Protect from Extreme Weather: Protect the plants from extreme weather conditions, such as strong winds, heavy rain, and frost.
4. Monitor for Stress: Watch the plants closely for signs of stress, such as wilting or leaf burn. If you see any signs of stress, bring the plants back indoors and reduce the amount of time they spend outdoors.
Phase 6: Planting Outdoors
Finally, the moment we’ve been waiting for! It’s time to plant your strawberry plants in their permanent home.
1. Choose a Sunny Location: Strawberries need at least 6-8 hours of sunlight per day.
2. Prepare the Soil: Strawberries prefer well-drained soil that is rich in
Conclusion
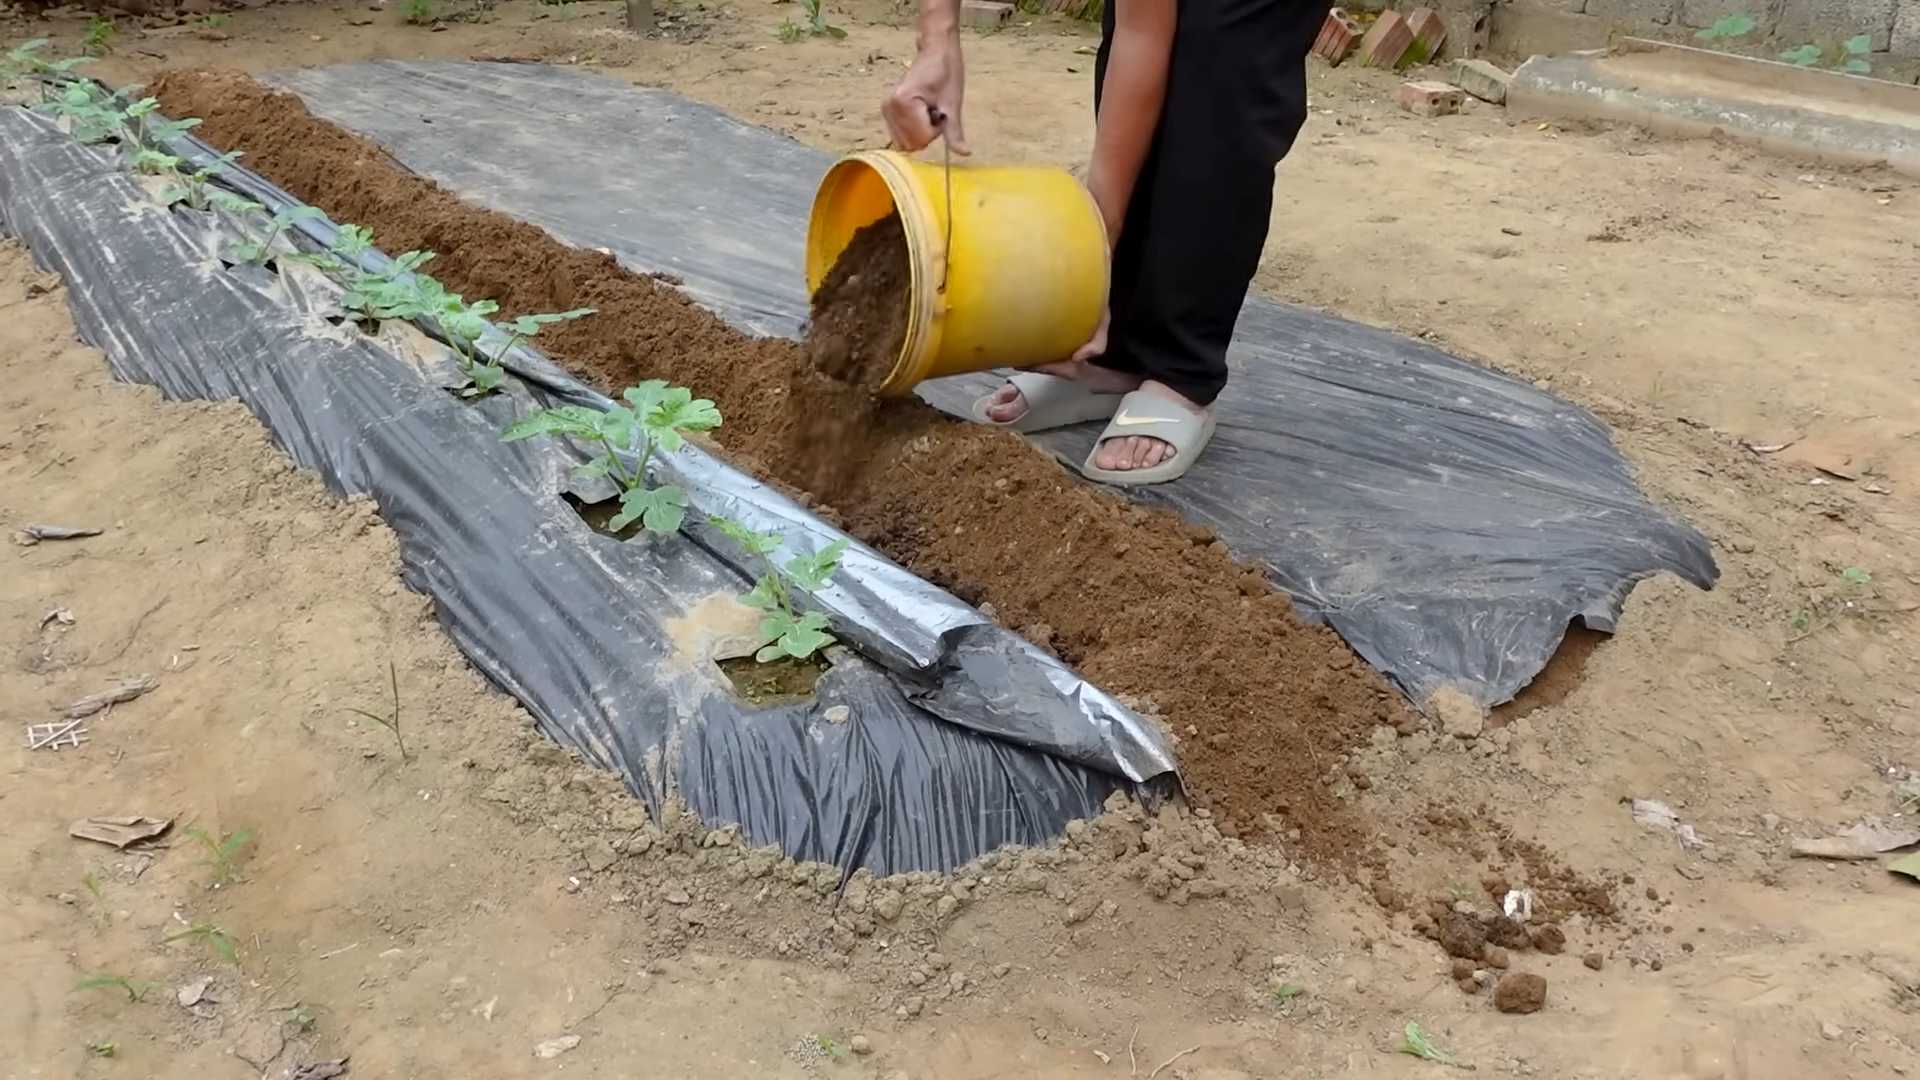
So, there you have it! Growing watermelons in your backyard isn’t just a pipe dream; it’s an achievable reality with a little know-how and the right approach. This DIY method, focusing on maximizing space and sunlight, offers a fantastic way to enjoy the sweet, juicy reward of homegrown watermelons without needing acres of land. We’ve walked you through the essential steps, from seed selection and soil preparation to trellising and pest control, providing a comprehensive guide to ensure your success.
Why is this DIY trick a must-try? Because it empowers you to take control of your food source, enjoy the unparalleled flavor of freshly picked produce, and experience the satisfaction of nurturing a plant from seed to harvest. Store-bought watermelons simply can’t compare to the vibrant taste and texture of a watermelon you’ve grown yourself. Plus, you’ll know exactly what went into growing it, avoiding potentially harmful pesticides and ensuring a truly organic treat.
But the beauty of this DIY approach lies in its adaptability. Feel free to experiment with different watermelon varieties. Perhaps you’d like to try growing a smaller, personal-sized watermelon like Sugar Baby, or maybe you’re feeling adventurous and want to cultivate a yellow-fleshed variety. Consider companion planting to further enhance your garden’s ecosystem. Marigolds can deter pests, while basil can improve the flavor of your watermelons.
Don’t be afraid to adjust the trellising method to suit your specific needs and space. If you have a sturdy fence, you can train your watermelon vines along it. Or, if you’re short on space, you can even try growing watermelons in large containers, ensuring they have adequate drainage and support. Remember to adjust your watering schedule based on your local climate and soil conditions.
The key to successful grow watermelons backyard DIY lies in observation and responsiveness. Pay close attention to your plants, noting any signs of stress or disease. Adjust your watering, fertilizing, and pest control strategies as needed. And most importantly, don’t give up! Growing watermelons can be challenging, but the reward is well worth the effort.
We are confident that with this guide, you’ll be well on your way to enjoying delicious, homegrown watermelons. So, grab your seeds, prepare your soil, and get ready to embark on this exciting gardening adventure. We encourage you to try this DIY trick and share your experience with us. Let us know what varieties you’re growing, what challenges you’ve faced, and what successes you’ve celebrated. Share your photos and tips in the comments below. Together, we can create a community of backyard watermelon growers and inspire others to experience the joy of homegrown produce. Happy gardening!
Frequently Asked Questions (FAQ)
What is the best time to start watermelon seeds indoors?
The ideal time to start watermelon seeds indoors is about 4-6 weeks before the last expected frost in your area. This gives the seedlings a head start and allows them to establish a strong root system before being transplanted outdoors. Check your local weather forecasts and gardening resources to determine the average last frost date for your region. Starting too early can result in leggy, weak seedlings, while starting too late may shorten your growing season and reduce your yield.
How much sunlight do watermelons need?
Watermelons are sun-loving plants and require at least 6-8 hours of direct sunlight per day to thrive. Choose a planting location that receives full sun throughout the day. If you live in a particularly hot climate, providing some afternoon shade can help prevent the watermelons from getting sunburned. Insufficient sunlight can lead to poor fruit development and reduced sweetness.
What kind of soil is best for growing watermelons?
Watermelons prefer well-drained, sandy loam soil that is rich in organic matter. The soil should have a pH between 6.0 and 6.8. Before planting, amend the soil with compost, aged manure, or other organic materials to improve drainage, fertility, and water retention. Avoid heavy clay soils, as they can become waterlogged and inhibit root growth. If you have clay soil, consider growing watermelons in raised beds or containers.
How often should I water my watermelon plants?
Watermelon plants need consistent moisture, especially during fruit development. Water deeply and regularly, aiming to keep the soil consistently moist but not waterlogged. Water at the base of the plants to avoid wetting the foliage, which can increase the risk of fungal diseases. During hot, dry weather, you may need to water daily. Reduce watering as the fruits ripen to prevent them from cracking.
When should I fertilize my watermelon plants?
Fertilize watermelon plants at planting time and again when the vines begin to run and when the fruits start to set. Use a balanced fertilizer with equal amounts of nitrogen, phosphorus, and potassium. Avoid over-fertilizing with nitrogen, as this can promote excessive vine growth at the expense of fruit production. You can also supplement with organic fertilizers such as compost tea or fish emulsion.
How do I know when my watermelons are ripe?
Determining when a watermelon is ripe can be tricky, but there are several indicators to look for. The tendril closest to the fruit should be brown and dry. The underside of the watermelon, where it rests on the ground, should be yellow or cream-colored. When you thump the watermelon, it should sound hollow and deep. The skin should be dull rather than shiny. With practice, you’ll develop a feel for when your watermelons are perfectly ripe.
What are some common pests and diseases that affect watermelons?
Common pests that affect watermelons include aphids, squash bugs, cucumber beetles, and vine borers. Diseases include powdery mildew, fusarium wilt, and anthracnose. Monitor your plants regularly for signs of pests or diseases and take action promptly. Use organic pest control methods such as insecticidal soap, neem oil, or row covers. Choose disease-resistant watermelon varieties and practice good garden hygiene to prevent diseases.
Can I grow watermelons in containers?
Yes, you can grow watermelons in containers, but you’ll need to choose a large container (at least 20 gallons) and select a compact watermelon variety such as Sugar Baby or Bush Sugar Baby. Use a well-draining potting mix and provide adequate support for the vines. Water container-grown watermelons more frequently than those grown in the ground, as the soil in containers tends to dry out quickly. Fertilize regularly to provide the necessary nutrients.
How do I trellis my watermelon vines?
Trellising watermelon vines helps to save space, improve air circulation, and prevent fruit rot. Use a sturdy trellis that can support the weight of the watermelons. Train the vines to grow up the trellis, tying them loosely with twine or fabric strips. As the watermelons develop, you may need to provide additional support by using slings made of netting or fabric to cradle the fruits.
What are some tips for increasing watermelon sweetness?
To increase watermelon sweetness, ensure that your plants receive plenty of sunlight and water. Avoid over-fertilizing with nitrogen. Allow the watermelons to ripen fully on the vine before harvesting. Reduce watering as the fruits ripen to concentrate the sugars. Some gardeners also recommend pinching off the growing tips of the vines to encourage the plant to focus its energy on fruit production.

Leave a Comment