
Growing Blueberries at Home can seem like a daunting task, conjuring images of sprawling farms and specialized equipment. But what if I told you that cultivating these antioxidant-rich gems is entirely achievable, even in the smallest of spaces? Forget the grocery store prices and embrace the satisfaction of harvesting your own juicy blueberries right from your backyard or balcony!
Blueberries have a rich history, deeply intertwined with Native American cultures who not only consumed them as a vital food source but also utilized them for medicinal purposes. Passed down through generations, knowledge of blueberry cultivation has evolved, making it easier than ever for us to enjoy these delicious berries.
In today’s fast-paced world, knowing how to grow your own food, especially something as nutritious as blueberries, offers a sense of control and connection to nature. Plus, let’s be honest, who wouldn’t want a constant supply of fresh, organic blueberries for smoothies, muffins, or simply enjoying by the handful? This DIY guide will equip you with simple yet effective tricks and hacks to successfully growing blueberries at home, regardless of your gardening experience. We’ll cover everything from choosing the right variety to mastering the art of acidic soil, ensuring a bountiful harvest year after year. Get ready to transform your space into a blueberry paradise!

Unlocking Onion Secrets: Growing Bigger, Better Onions with Unusual Methods
Hey there, fellow gardening enthusiasts! I’m always on the lookout for ways to boost my garden’s yield, and onions are a staple in my kitchen. So, I’ve been experimenting with some unconventional onion-growing methods, and I’m excited to share what I’ve learned. Forget the same old planting routine – let’s dive into some techniques that can seriously level up your onion game!
Section 1: The “Onion Tower” Technique: Vertical Gardening for Maximum Yield
This method is perfect if you’re short on space or just want to try something different. It’s all about maximizing vertical space to grow more onions in a smaller footprint.
What you’ll need:
* A large, sturdy container (think a large pot, a repurposed plastic bin, or even a section of drainage pipe). The taller, the better, but at least 2 feet is ideal.
* Well-draining potting mix. Onions love rich soil!
* Onion sets or seedlings. Choose your favorite varieties!
* Drill with a large drill bit (around 2-3 inches in diameter).
* Landscape fabric or burlap.
* Scissors or a utility knife.
* Watering can or hose.
* Slow-release fertilizer (optional, but recommended).
Step-by-step instructions:
1. Prepare the Container: If you’re using a container without drainage holes, drill some at the bottom. This is crucial to prevent waterlogging, which onions hate.
2. Cut Planting Holes: This is where the magic happens! Using your drill, create holes evenly spaced around the sides of your container. Space them about 6-8 inches apart, both vertically and horizontally. The number of holes will depend on the size of your container.
3. Line the Container (Optional): I like to line the inside of my container with landscape fabric or burlap. This helps to prevent the soil from washing out through the holes when watering. Cut the fabric to fit the inside of the container, leaving some extra at the top to fold over.
4. Add Soil: Start filling the container with your well-draining potting mix. Fill it up to the level of the first row of holes.
5. Plant the First Row: Gently insert your onion sets or seedlings into the holes, making sure the roots are pointing inwards and downwards. Backfill with soil, ensuring the base of the onion is just covered.
6. Repeat the Process: Continue adding soil, creating new rows of holes, and planting onions until you reach the top of the container.
7. Top it Off: Once you reach the top, plant a few more onions directly into the soil on the surface of the container.
8. Water Thoroughly: Give your onion tower a good watering, allowing the water to drain out of the bottom.
9. Fertilize (Optional): Incorporate a slow-release fertilizer into the topsoil to provide your onions with a steady supply of nutrients.
10. Maintain and Monitor: Keep the soil consistently moist, but not waterlogged. Monitor for pests and diseases, and address them promptly. Rotate the container regularly to ensure even sunlight exposure.
Section 2: The “Water Bottle Greenhouse” Method: Early Start for Bigger Bulbs
This technique is all about giving your onion seedlings a head start, especially if you live in a cooler climate with a shorter growing season. It creates a mini-greenhouse effect, protecting the seedlings from harsh weather and promoting faster growth.
What you’ll need:
* Empty plastic water bottles (2-liter bottles work best).
* Scissors or a utility knife.
* Seed starting mix.
* Onion seeds.
* Spray bottle with water.
* Sunny windowsill or grow lights.
Step-by-step instructions:
1. Prepare the Water Bottles: Cut the bottom off the water bottles, about 2-3 inches from the base. This will create a small container with a lid.
2. Fill with Seed Starting Mix: Fill each water bottle container with seed starting mix, leaving about half an inch of space at the top.
3. Sow the Onion Seeds: Sprinkle a few onion seeds onto the surface of the soil in each container. Gently press them down into the soil.
4. Water Gently: Use a spray bottle to mist the soil with water. You want to moisten the soil without overwatering it.
5. Create the Greenhouse Effect: Place the top half of the water bottle (the part with the cap) over the bottom half, creating a mini-greenhouse. Leave the cap slightly open for ventilation.
6. Provide Light: Place the water bottle greenhouses on a sunny windowsill or under grow lights. Onions need plenty of light to thrive.
7. Monitor and Water: Check the soil moisture regularly. If the soil feels dry, mist it with water. Make sure the soil doesn’t dry out completely.
8. Ventilate: As the seedlings grow, gradually increase the ventilation by opening the cap further or removing it completely for short periods. This will help to harden off the seedlings.
9. Transplant: Once the seedlings are a few inches tall and the weather is warm enough, transplant them into your garden.
Section 3: The “Epsom Salt Boost” Method: Magnesium for Onion Growth
Epsom salt (magnesium sulfate) can work wonders for onions. Magnesium is essential for chlorophyll production, which is crucial for photosynthesis and overall plant growth. It can also help onions absorb other nutrients more effectively.
What you’ll need:
* Epsom salt.
* Watering can or hose.
* Measuring spoon.
Step-by-step instructions:
1. Dissolve the Epsom Salt: Mix 1 tablespoon of Epsom salt per gallon of water. Stir well until the Epsom salt is completely dissolved.
2. Water the Onions: Use the Epsom salt solution to water your onions every 2-3 weeks.
3. Foliar Spray (Optional): You can also use the Epsom salt solution as a foliar spray. Pour the solution into a spray bottle and mist the leaves of your onions in the early morning or late evening. Avoid spraying during the hottest part of the day.
4. Observe the Results: Keep an eye on your onions. You should notice that they are greener, healthier, and growing more vigorously.
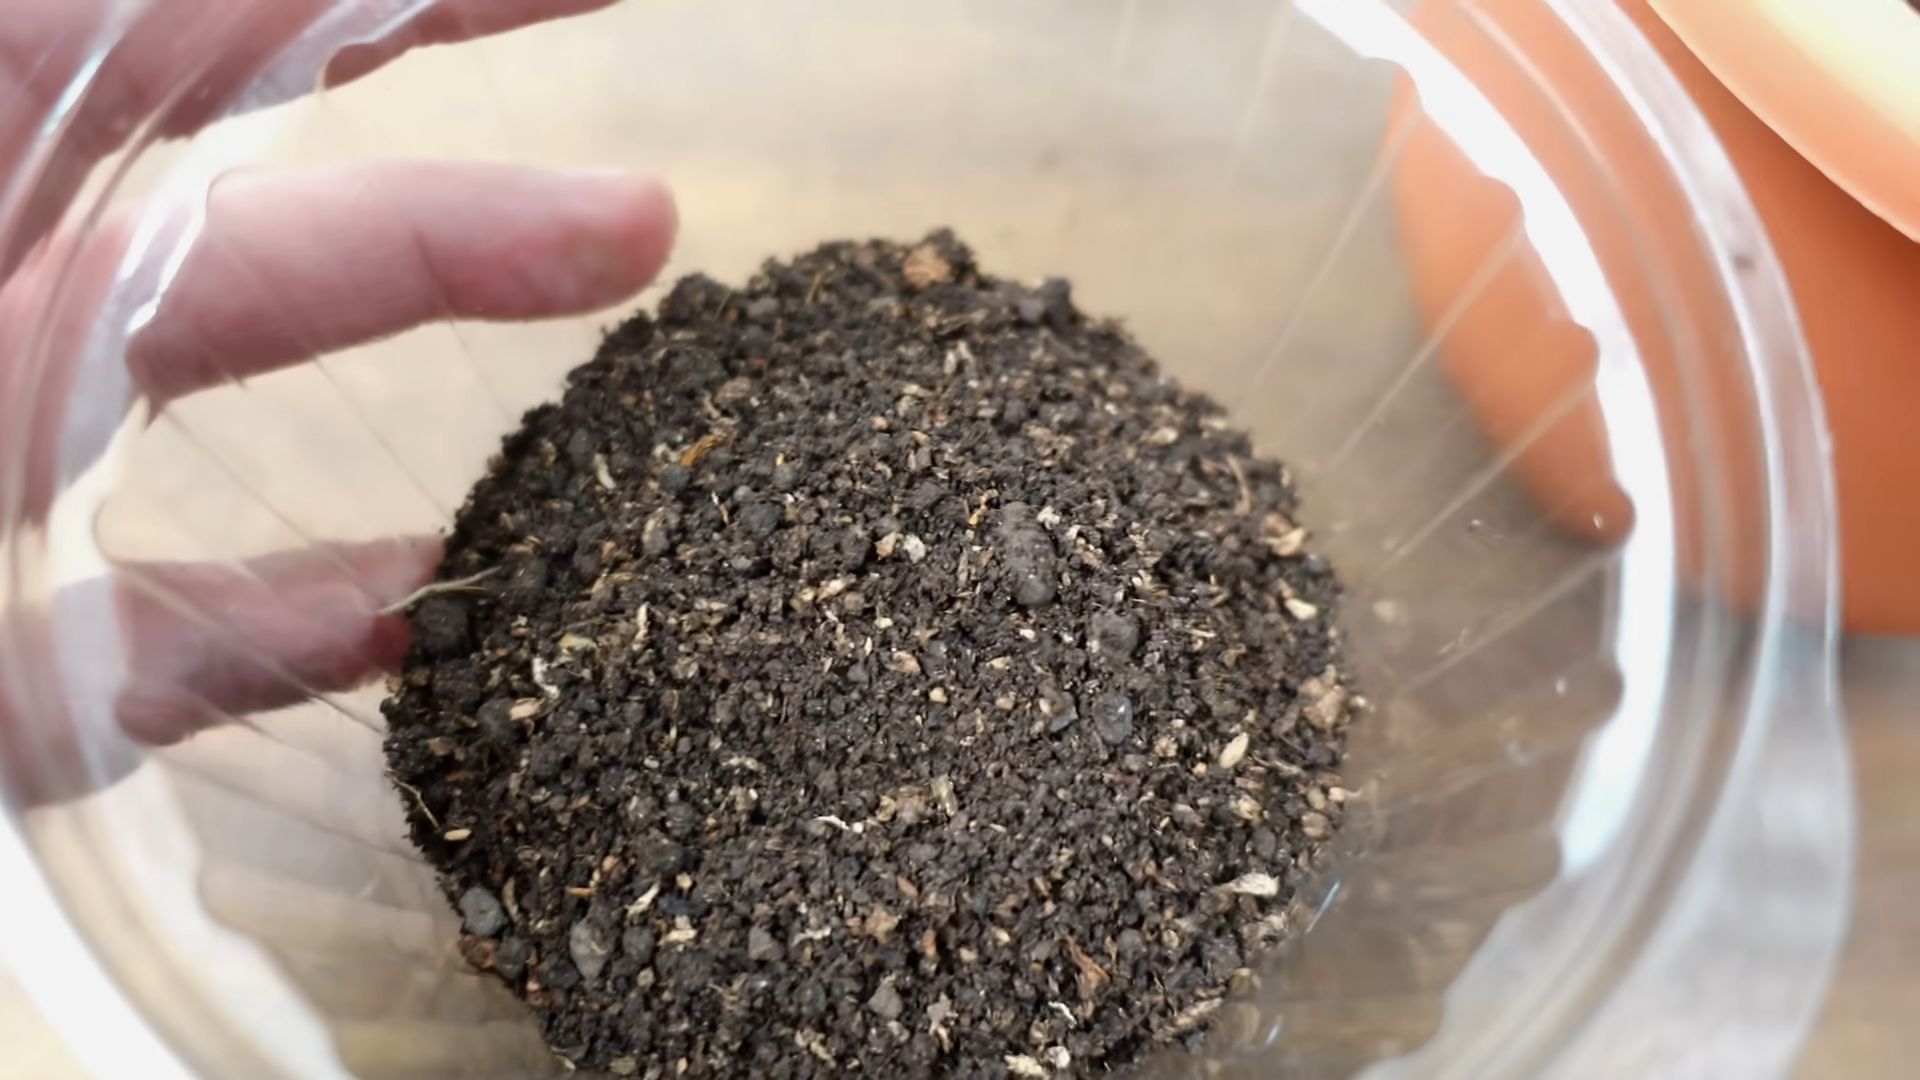
Section 4: The “Coffee Grounds Amendment” Method: Nitrogen Rich Soil
Coffee grounds are a fantastic source of nitrogen, which is a vital nutrient for onion growth. They also improve soil drainage and aeration, creating a healthier environment for your onions to thrive.
Hey there, fellow gardening enthusiasts! I’m always on the lookout for ways to boost my garden’s yield, and onions are a staple in my kitchen. So, I’ve been experimenting with some unconventional onion-growing methods, and I’m excited to share what I’ve learned. Forget the same old planting routine – let’s dive into some techniques that can seriously level up your onion game!
Section 1: The “Onion Tower” Technique: Vertical Gardening for Maximum Yield
This method is perfect if you’re short on space or just want to try something different. It’s all about maximizing vertical space to grow more onions in a smaller footprint.
What you’ll need:
* A large, sturdy container (think a large pot, a repurposed plastic bin, or even a section of drainage pipe). The taller, the better, but at least 2 feet is ideal.
* Well-draining potting mix. Onions love rich soil!
* Onion sets or seedlings. Choose your favorite varieties!
* Drill with a large drill bit (around 2-3 inches in diameter).
* Landscape fabric or burlap.
* Scissors or a utility knife.
* Watering can or hose.
* Slow-release fertilizer (optional, but recommended).
Step-by-step instructions:
1. Prepare the Container: If you’re using a container without drainage holes, drill some at the bottom. This is crucial to prevent waterlogging, which onions hate.
2. Cut Planting Holes: This is where the magic happens! Using your drill, create holes evenly spaced around the sides of your container. Space them about 6-8 inches apart, both vertically and horizontally. The number of holes will depend on the size of your container.
3. Line the Container (Optional): I like to line the inside of my container with landscape fabric or burlap. This helps to prevent the soil from washing out through the holes when watering. Cut the fabric to fit the inside of the container, leaving some extra at the top to fold over.
4. Add Soil: Start filling the container with your well-draining potting mix. Fill it up to the level of the first row of holes.
5. Plant the First Row: Gently insert your onion sets or seedlings into the holes, making sure the roots are pointing inwards and downwards. Backfill with soil, ensuring the base of the onion is just covered.
6. Repeat the Process: Continue adding soil, creating new rows of holes, and planting onions until you reach the top of the container.
7. Top it Off: Once you reach the top, plant a few more onions directly into the soil on the surface of the container.
8. Water Thoroughly: Give your onion tower a good watering, allowing the water to drain out of the bottom.
9. Fertilize (Optional): Incorporate a slow-release fertilizer into the topsoil to provide your onions with a steady supply of nutrients.
10. Maintain and Monitor: Keep the soil consistently moist, but not waterlogged. Monitor for pests and diseases, and address them promptly. Rotate the container regularly to ensure even sunlight exposure.
Section 2: The “Water Bottle Greenhouse” Method: Early Start for Bigger Bulbs
This technique is all about giving your onion seedlings a head start, especially if you live in a cooler climate with a shorter growing season. It creates a mini-greenhouse effect, protecting the seedlings from harsh weather and promoting faster growth.
What you’ll need:
* Empty plastic water bottles (2-liter bottles work best).
* Scissors or a utility knife.
* Seed starting mix.
* Onion seeds.
* Spray bottle with water.
* Sunny windowsill or grow lights.
Step-by-step instructions:
1. Prepare the Water Bottles: Cut the bottom off the water bottles, about 2-3 inches from the base. This will create a small container with a lid.
2. Fill with Seed Starting Mix: Fill each water bottle container with seed starting mix, leaving about half an inch of space at the top.
3. Sow the Onion Seeds: Sprinkle a few onion seeds onto the surface of the soil in each container. Gently press them down into the soil.
4. Water Gently: Use a spray bottle to mist the soil with water. You want to moisten the soil without overwatering it.
5. Create the Greenhouse Effect: Place the top half of the water bottle (the part with the cap) over the bottom half, creating a mini-greenhouse. Leave the cap slightly open for ventilation.
6. Provide Light: Place the water bottle greenhouses on a sunny windowsill or under grow lights. Onions need plenty of light to thrive.
7. Monitor and Water: Check the soil moisture regularly. If the soil feels dry, mist it with water. Make sure the soil doesn’t dry out completely.
8. Ventilate: As the seedlings grow, gradually increase the ventilation by opening the cap further or removing it completely for short periods. This will help to harden off the seedlings.
9. Transplant: Once the seedlings are a few inches tall and the weather is warm enough, transplant them into your garden.
Section 3: The “Epsom Salt Boost” Method: Magnesium for Onion Growth
Epsom salt (magnesium sulfate) can work wonders for onions. Magnesium is essential for chlorophyll production, which is crucial for photosynthesis and overall plant growth. It can also help onions absorb other nutrients more effectively.
What you’ll need:
* Epsom salt.
* Watering can or hose.
* Measuring spoon.
Step-by-step instructions:
1. Dissolve the Epsom Salt: Mix 1 tablespoon of Epsom salt per gallon of water. Stir well until the Epsom salt is completely dissolved.
2. Water the Onions: Use the Epsom salt solution to water your onions every 2-3 weeks.
3. Foliar Spray (Optional): You can also use the Epsom salt solution as a foliar spray. Pour the solution into a spray bottle and mist the leaves of your onions in the early morning or late evening. Avoid spraying during the hottest part of the day.
4. Observe the Results: Keep an eye on your onions. You should notice that they are greener, healthier, and growing more vigorously.
Section 4: The “Coffee Grounds Amendment” Method: Nitrogen Rich Soil
Coffee grounds are a fantastic source of nitrogen, which is a vital nutrient for onion growth. They also improve soil drainage and aeration, creating a healthier environment for your onions to thrive.
What you’ll need:
* Used coffee grounds.
* Compost or other organic matter (optional).
Step-by-step instructions:
1. Collect Coffee Grounds: Save your used coffee grounds. Make sure they are cool and dry before using them.
2. Amend the Soil: Before planting your onions, amend the soil with coffee grounds. You can mix them directly into the soil or add them to your compost pile.
3. Side-Dress the Onions: Once your onions are planted, you can side-dress them with coffee grounds. Sprinkle a thin layer of coffee grounds around the base of the plants, being careful not to touch the stems.
4. Water Thoroughly: Water the onions after applying the coffee grounds to help them break down and release their nutrients.
5. Repeat Regularly: Reapply coffee grounds every few weeks throughout the growing season.
Section 5: The “Companion Planting Power” Method: Natural Pest Control and Growth Boost
Companion planting involves growing different plants together that benefit each other. Certain plants can deter pests, attract beneficial insects, or improve soil conditions for onions.
Beneficial Companion Plants for Onions:
* Carrots: Carrots repel onion flies, and onions repel carrot root flies. It’s a win-win!
* Chamomile: Chamomile attracts beneficial insects and can improve the flavor of onions.
* Marigolds: Marigolds deter nematodes and other soil pests.
* Summer Savory: Summer savory repels onion flies.
* Lettuce: Lettuce provides ground cover, helping to retain moisture and suppress weeds.
Step-by-step instructions:
1. Choose Your Companions: Select the companion plants that best suit your needs and growing conditions.
2. Plant Strategically: Plant the companion plants near your onions. You can interplant them in the same row or plant them in adjacent rows.
3. Observe the Interactions: Pay attention to how the plants are interacting with each other. Make sure the companion plants are not shading the onions or competing for resources.
4. Adjust as Needed: If you notice any problems, such as overcrowding or pest
Conclusion
So, there you have it! Growing blueberries at home, while it might seem daunting at first, is an incredibly rewarding experience that yields delicious, antioxidant-rich fruit right in your backyard. We’ve covered everything from understanding the specific soil requirements of these acid-loving plants to choosing the right varieties for your climate and providing the necessary care throughout the growing season.
But why is this DIY trick a must-try? Simply put, fresh, homegrown blueberries are unlike anything you can find in the store. The flavor is more intense, the texture is firmer, and you have the satisfaction of knowing exactly where your food came from and how it was grown. Plus, blueberry bushes are beautiful additions to any garden, offering lovely spring blossoms and vibrant fall foliage.
Beyond the basic steps, there are plenty of ways to customize your blueberry-growing experience. Consider experimenting with different mulches, such as pine needles or oak leaves, to further acidify the soil. You could also try companion planting with other acid-loving plants like azaleas or rhododendrons to create a thriving ecosystem. For those with limited space, growing blueberries in containers is a fantastic option, allowing you to enjoy fresh berries even on a small balcony or patio. You can even explore different blueberry varieties beyond the standard highbush and rabbiteye, such as the smaller, more compact lowbush varieties.
Don’t be afraid to get your hands dirty and embrace the learning process. Growing blueberries at home is a journey, and there will be challenges along the way. But with a little patience, dedication, and the knowledge you’ve gained from this guide, you’ll be well on your way to harvesting a bountiful crop of delicious blueberries year after year.
We wholeheartedly encourage you to give this DIY project a try. Imagine the joy of picking your own sun-ripened blueberries and using them in your favorite recipes, from muffins and pancakes to smoothies and pies. The possibilities are endless!
And most importantly, we want to hear about your experiences! Share your successes, your challenges, and any tips or tricks you’ve discovered along the way in the comments below. Let’s create a community of blueberry enthusiasts and learn from each other. Happy growing!
Frequently Asked Questions (FAQs)
What type of soil is best for growing blueberries?
Blueberries are acid-loving plants, meaning they thrive in soil with a pH between 4.5 and 5.5. This is significantly more acidic than most garden soils. Before planting, it’s crucial to test your soil’s pH using a soil testing kit, which you can find at most garden centers. If your soil is too alkaline, you’ll need to amend it with sulfur or peat moss to lower the pH. Incorporating organic matter, such as compost or well-rotted manure, will also improve drainage and provide essential nutrients. Remember, good drainage is just as important as soil acidity, as blueberries don’t like to sit in soggy soil.
How often should I water my blueberry bushes?
Blueberry bushes need consistent moisture, especially during the growing season. Aim to water deeply at least once a week, or more often during hot, dry weather. The goal is to keep the soil consistently moist but not waterlogged. A good rule of thumb is to check the soil moisture a few inches below the surface. If it feels dry to the touch, it’s time to water. Mulching around the base of the plants will help retain moisture and suppress weeds. During the dormant season (winter), reduce watering frequency, but still ensure the soil doesn’t completely dry out.
What kind of fertilizer should I use for blueberries?
Use a fertilizer specifically formulated for acid-loving plants, such as azalea or rhododendron fertilizer. These fertilizers contain ammonium sulfate or other ingredients that help maintain the soil’s acidity. Avoid fertilizers that contain nitrates, as blueberries don’t utilize them efficiently. Fertilize in early spring, just before new growth begins, and again in late spring or early summer. Follow the instructions on the fertilizer package carefully, as over-fertilizing can damage the plants. Organic options include using composted manure or blood meal, but be sure to monitor the soil pH regularly.
When is the best time to plant blueberry bushes?
The best time to plant blueberry bushes is in early spring or late fall, when the plants are dormant. This gives them time to establish their root systems before the heat of summer or the cold of winter sets in. When planting, dig a hole that is twice as wide as the root ball and just as deep. Gently loosen the roots before placing the plant in the hole. Backfill with amended soil, making sure the top of the root ball is level with the ground. Water thoroughly after planting.
How do I prune blueberry bushes?
Pruning is essential for maintaining the health and productivity of blueberry bushes. The best time to prune is in late winter or early spring, before new growth begins. Remove any dead, damaged, or crossing branches. Also, prune out some of the older, less productive canes to encourage new growth. For young plants, focus on shaping the bush and removing any low-growing branches that touch the ground. For mature plants, aim to remove about one-third of the oldest canes each year. This will help improve air circulation, sunlight penetration, and fruit production.
How do I protect my blueberries from birds?
Birds love blueberries just as much as we do, so protecting your crop is crucial. The most effective method is to cover your blueberry bushes with netting. Choose a netting with small holes to prevent birds from getting caught. Drape the netting over the bushes and secure it to the ground with stakes or clips. You can also use bird-scaring devices, such as reflective tape or scarecrows, but these are often less effective than netting. Another option is to plant your blueberries in a location that is less accessible to birds, such as near a building or under a tree.
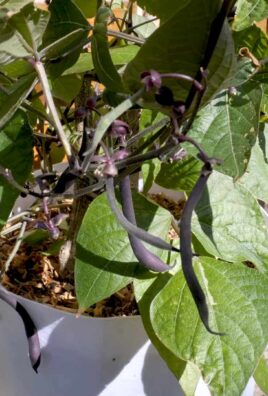
Can I grow blueberries in containers?
Yes, growing blueberries in containers is a great option for those with limited space or poor soil conditions. Choose a large container, at least 20 gallons in size, with good drainage holes. Use a potting mix specifically formulated for acid-loving plants. Dwarf or compact blueberry varieties are best suited for container growing. Water regularly and fertilize as needed. Container-grown blueberries may need to be protected from extreme temperatures during the winter.
What are some common blueberry pests and diseases?
Blueberries can be susceptible to various pests and diseases, including aphids, spider mites, blueberry maggot, and fungal diseases like powdery mildew and botrytis blight. Regularly inspect your plants for signs of infestation or disease. Treat any problems promptly with appropriate insecticides or fungicides. Good cultural practices, such as proper pruning, watering, and fertilization, can help prevent many pest and disease problems.
How long does it take for blueberry bushes to produce fruit?
It typically takes 2-3 years for blueberry bushes to start producing a significant amount of fruit. However, you may get a small harvest in the first year or two after planting. Be patient and continue to provide proper care, and your blueberry bushes will reward you with abundant harvests for many years to come.
What are the different types of blueberries?
There are several different types of blueberries, each with its own characteristics and growing requirements. Highbush blueberries are the most common type and are well-suited for many climates. Rabbiteye blueberries are more heat-tolerant and are a good choice for southern regions. Lowbush blueberries are smaller and more compact and are often grown in colder climates. Half-high blueberries are a cross between highbush and lowbush varieties and offer a good balance of size and cold hardiness. Choose a variety that is well-suited for your climate and growing conditions.


Leave a Comment