
Growing Brussel Sprouts Pots might sound intimidating, but trust me, it’s totally achievable, even if you’re a beginner gardener like I once was! Have you ever dreamt of strolling into your backyard and harvesting fresh, vibrant Brussel sprouts for a delicious and healthy meal? Well, dream no more! This DIY guide is packed with simple tricks and hacks that will transform your patio or balcony into a mini Brussel sprout farm.
Brussel sprouts, those miniature cabbages, have a fascinating history. Believed to have originated in Brussels, Belgium (hence the name!), they’ve been cultivated since the 13th century. For centuries, they’ve been a staple in European cuisine, prized for their nutritional value and unique flavor. But let’s be honest, store-bought Brussel sprouts can sometimes be a bit… underwhelming. That’s where the magic of growing your own comes in!
Why should you bother with growing Brussel Sprouts Pots yourself? Because the taste difference is incredible! Freshly harvested Brussel sprouts are sweeter, more tender, and packed with flavor that you just can’t find in the supermarket. Plus, it’s incredibly rewarding to nurture a plant from seed to harvest. This DIY guide will show you how to overcome common challenges, choose the right pot size, and provide the optimal conditions for your Brussel sprouts to thrive. Get ready to impress your friends and family with your homegrown goodness!
Growing Brussels Sprouts in Pots: A Comprehensive DIY Guide
Hey there, fellow gardening enthusiasts! I’m so excited to share my tried-and-true method for growing delicious Brussels sprouts right in pots. Forget thinking you need acres of land – with a little know-how, you can enjoy these mini cabbages even on a small balcony or patio. Let’s dive in!
Choosing the Right Pot and Variety
First things first, you’ll need to select the right pot and Brussels sprouts variety. This is crucial for success, so don’t skip this step!
* Pot Size: Brussels sprouts need room to grow, both above and below the soil. I recommend a pot that’s at least 12 inches in diameter and 12 inches deep, but bigger is always better. A 15-gallon pot is ideal for one plant. Remember, these guys get tall!
* Material: Plastic, terracotta, or even fabric pots will work. Just make sure your pot has drainage holes. Brussels sprouts hate sitting in soggy soil.
* Variety Selection: Not all Brussels sprouts varieties are created equal, especially for container gardening. Look for compact or dwarf varieties. Some of my favorites include ‘Redarling’, ‘Long Island Improved’, and ‘Jade Cross’. These varieties tend to be more manageable in pots.
Preparing the Soil
Brussels sprouts are heavy feeders, meaning they need a nutrient-rich soil to thrive. I’ve found that a well-draining potting mix amended with compost works wonders.
* Potting Mix: Start with a high-quality, soilless potting mix. This will provide good drainage and aeration.
* Compost: Mix in about 1/3 compost to the potting mix. Compost adds essential nutrients and improves soil structure.
* Slow-Release Fertilizer: I like to add a slow-release fertilizer to the mix as well. This provides a steady supply of nutrients throughout the growing season. Look for a fertilizer specifically formulated for vegetables.
* pH Level: Brussels sprouts prefer a slightly acidic to neutral soil pH (around 6.0 to 7.0). You can test your soil pH with a simple soil testing kit. If your soil is too acidic, you can amend it with lime.
Planting Your Brussels Sprouts
Now for the fun part – planting! You can either start your Brussels sprouts from seed or purchase transplants from a local nursery. I usually opt for transplants because it saves time and effort.
* Starting from Seed: If you’re starting from seed, sow the seeds indoors about 6-8 weeks before the last expected frost. Plant the seeds about 1/2 inch deep in seed-starting trays. Keep the soil moist and warm. Once the seedlings have a few true leaves, you can transplant them into individual pots.
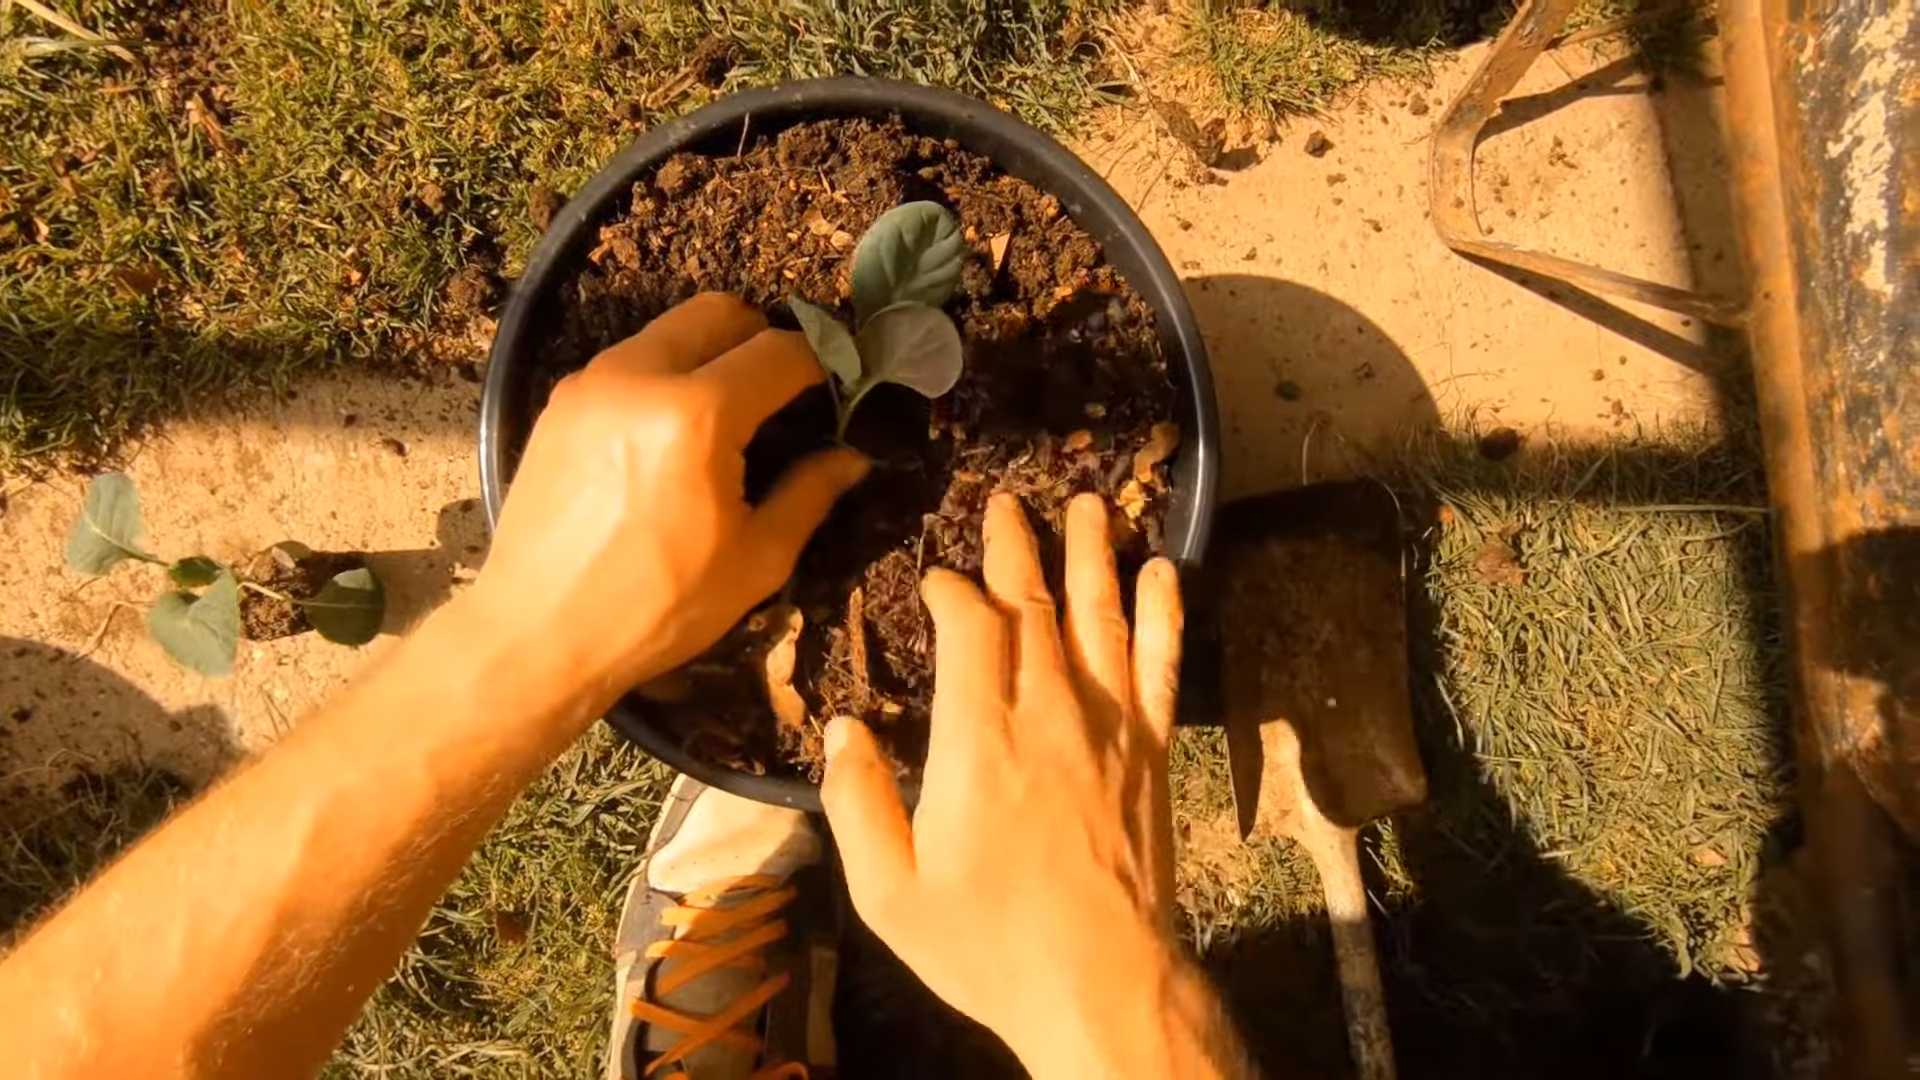
* Transplanting: When transplanting, dig a hole in the center of your pot that’s large enough to accommodate the root ball. Gently remove the Brussels sprouts plant from its container and loosen the roots slightly. Place the plant in the hole and backfill with soil. Make sure the top of the root ball is level with the soil surface.
* Spacing: If you’re planting multiple Brussels sprouts in a large container, space them at least 18 inches apart.
* Watering: Water the newly planted Brussels sprouts thoroughly.
Caring for Your Brussels Sprouts
Brussels sprouts require consistent care to produce a bountiful harvest. Here’s what you need to know:
* Sunlight: Brussels sprouts need at least 6 hours of sunlight per day. Place your pots in a sunny location. If you don’t have enough sunlight, you can supplement with grow lights.
* Watering: Water regularly, especially during hot, dry weather. The soil should be consistently moist, but not soggy. Check the soil moisture by sticking your finger into the soil. If the top inch feels dry, it’s time to water.
* Fertilizing: Brussels sprouts are heavy feeders, so you’ll need to fertilize them regularly. I recommend using a liquid fertilizer every 2-3 weeks. Look for a fertilizer that’s high in nitrogen, phosphorus, and potassium.
* Pest Control: Brussels sprouts are susceptible to a variety of pests, including aphids, cabbage worms, and flea beetles. Inspect your plants regularly for signs of pests. You can control pests with insecticidal soap, neem oil, or Bacillus thuringiensis (Bt).
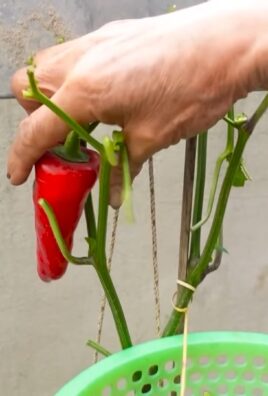
* Supporting the Plant: As your Brussels sprouts plant grows taller, it may need support. You can use a stake or tomato cage to keep the plant from falling over.
* Removing Yellowing Leaves: As the plant matures, the lower leaves may start to yellow and die. Remove these leaves to improve air circulation and prevent disease.
Dealing with Common Problems
Even with the best care, you may encounter some problems while growing Brussels sprouts. Here are some common issues and how to address them:
* Aphids: These tiny pests can suck the sap from your Brussels sprouts plants, causing them to weaken and become distorted. You can control aphids with insecticidal soap or neem oil.
* Cabbage Worms: These green caterpillars can devour the leaves of your Brussels sprouts plants. You can control cabbage worms with Bacillus thuringiensis (Bt).
* Flea Beetles: These tiny beetles can chew small holes in the leaves of your Brussels sprouts plants. You can control flea beetles with insecticidal soap or neem oil.
* Clubroot: This fungal disease can cause the roots of your Brussels sprouts plants to become swollen and distorted. To prevent clubroot, make sure your soil is well-draining and has a pH of 7.0 or higher. You can also treat the soil with lime.
* Buttoning: This occurs when the Brussels sprouts form small, loose heads instead of tight, compact sprouts. Buttoning can be caused by a variety of factors, including stress, lack of nutrients, and high temperatures. To prevent buttoning, make sure your plants are getting enough sunlight, water, and fertilizer.
Harvesting Your Brussels Sprouts
The moment you’ve been waiting for! Brussels sprouts are typically ready to harvest about 90-100 days after planting.
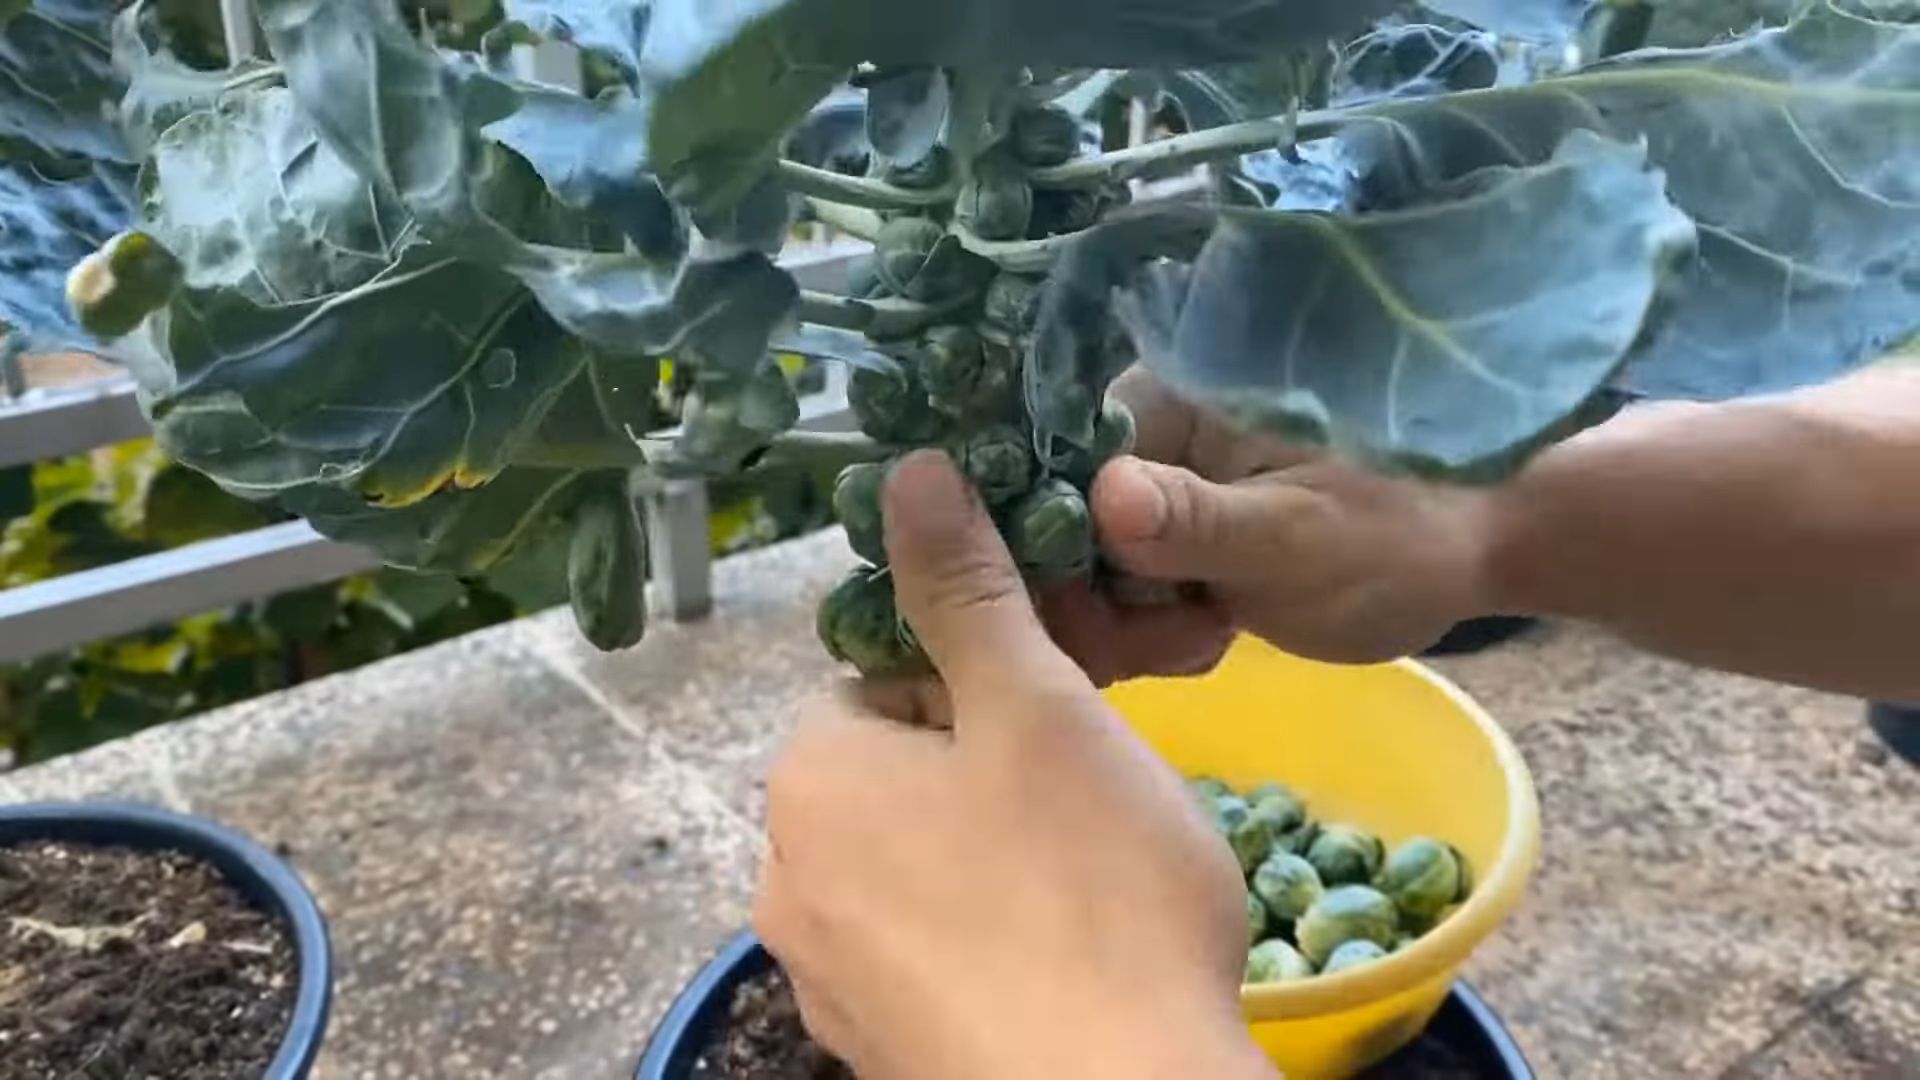
* When to Harvest: The sprouts are ready to harvest when they are firm, green, and about 1-2 inches in diameter. The lower sprouts will mature first.
* How to Harvest: To harvest, simply twist the sprouts off the stem. Start with the lower sprouts and work your way up. You can harvest the sprouts over a period of several weeks.
* After Harvesting: After harvesting the sprouts, you can remove the top of the plant to encourage the remaining sprouts to mature.
Extending the Harvest
Want to keep those Brussels sprouts coming? Here are a few tips for extending the harvest:
* Succession Planting: Plant new Brussels sprouts every few weeks to ensure a continuous harvest.
* Cold Frames: Protect your Brussels sprouts from frost with a cold frame. This will allow you to harvest them later in the season.
* Overwintering: In mild climates, you can overwinter your Brussels sprouts plants. Simply cut back the plant to about 6 inches and cover it with mulch. The plant will regrow in the spring.
Extra Tips and Tricks
Here are a few extra tips and tricks that I’ve learned over the years:
* Companion Planting: Plant Brussels sprouts with companion plants like rosemary, thyme, and chamomile. These herbs can help repel pests and attract beneficial insects.
* Mulching: Mulch around your Brussels sprouts plants to help retain moisture and suppress weeds.
* Watering in the Morning: Water your Brussels sprouts plants in the morning to allow the foliage to dry before nightfall. This will help prevent fungal diseases.
* Rotating Crops: Don’t plant Brussels sprouts in the same spot year after year. Rotate your crops to prevent soilborne diseases.
Enjoying Your Homegrown Brussels Sprouts
Congratulations! You’ve successfully grown Brussels sprouts in pots. Now it’s time to enjoy the fruits (or rather, vegetables) of your labor.
* Storage: Store your harvested Brussels sprouts in the refrigerator for up to a week.
* Cooking: Brussels sprouts can be cooked in a variety of ways, including roasting, steaming, sautéing, and grilling.
* Recipes: There are countless Brussels sprouts recipes available online. Experiment with different recipes to find your favorites. I personally love roasting them with balsamic vinegar and bacon!
Growing Brussels sprouts in pots is a rewarding experience. With a little patience and effort, you can enjoy fresh, homegrown Brussels sprouts all season long. Happy gardening!
Conclusion
So, there you have it! Growing Brussel sprouts in pots is not only achievable, but it can also be incredibly rewarding. We’ve walked through the steps, from selecting the right pot size and soil to providing the necessary sunlight and nutrients. But why should you bother with this DIY project?
Simply put, growing Brussel sprouts in pots offers a level of control and convenience that in-ground gardening often lacks. You can move your plants to chase the sun, protect them from unexpected frosts, and even bring them indoors during particularly harsh weather. This is especially beneficial for those with limited garden space, poor soil conditions, or a desire to keep a closer eye on their precious sprouts.
Beyond the practical advantages, there’s a certain satisfaction that comes from nurturing your own food from seed to harvest. Imagine the pride you’ll feel serving up a dish of freshly picked, homegrown Brussel sprouts, knowing you cultivated them yourself, right on your patio or balcony. The taste difference alone is worth the effort – homegrown Brussel sprouts tend to be sweeter and less bitter than those you find in the store.
But don’t stop there! Feel free to experiment with different varieties of Brussel sprouts. ‘Long Island Improved’ is a classic choice, but you might also try ‘Redarling’ for a vibrant color or ‘Jade Cross’ for its disease resistance. You can also play around with companion planting. Consider adding some marigolds to your pots to deter pests, or plant some thyme or rosemary nearby to attract beneficial insects.
And speaking of pests, keep a watchful eye out for common Brussel sprout adversaries like aphids and cabbage worms. Regular inspections and prompt action are key to keeping your plants healthy and productive. Organic pest control methods, such as insecticidal soap or Bacillus thuringiensis (Bt), are generally effective and safe for use on edible plants.
Ultimately, the success of your potted Brussel sprouts depends on your dedication and attention to detail. But with a little effort and the right knowledge, you can enjoy a bountiful harvest of these nutritious and delicious vegetables, even without a traditional garden.
We wholeheartedly encourage you to give this DIY trick a try. It’s a fantastic way to connect with nature, learn new skills, and enjoy the fruits (or rather, vegetables) of your labor. And once you’ve harvested your first batch of homegrown Brussel sprouts, we’d love to hear about your experience! Share your tips, tricks, and photos in the comments below. Let’s build a community of potted Brussel sprout enthusiasts and inspire others to get their hands dirty! Let us know if this **growing Brussel sprouts pots** method worked for you.
Frequently Asked Questions (FAQ)
What is the best pot size for growing Brussel sprouts?
A pot that is at least 12 inches in diameter and 12 inches deep is recommended for growing a single Brussel sprout plant. However, a larger pot, such as a 15-gallon container, will provide even more room for the roots to grow and will help to retain moisture. The larger the pot, the more stable the plant will be, especially as the sprouts develop and add weight. Make sure the pot has adequate drainage holes to prevent waterlogging.
What type of soil is best for growing Brussel sprouts in pots?
Brussel sprouts thrive in well-draining, fertile soil that is rich in organic matter. A good potting mix for Brussel sprouts should consist of a blend of compost, peat moss (or coconut coir), and perlite or vermiculite. The compost provides essential nutrients, the peat moss or coconut coir helps to retain moisture, and the perlite or vermiculite improves drainage. You can also add a slow-release fertilizer to the potting mix to provide a steady supply of nutrients throughout the growing season. Aim for a soil pH between 6.0 and 7.5.
How much sunlight do Brussel sprouts need when grown in pots?
Brussel sprouts require at least 6 hours of direct sunlight per day to thrive. Choose a location for your pots that receives full sun for most of the day. If you live in a particularly hot climate, you may need to provide some afternoon shade to prevent the plants from overheating. If you don’t have a sunny spot, you can supplement with grow lights. Rotate the pots regularly to ensure that all sides of the plant receive adequate sunlight.
How often should I water Brussel sprouts grown in pots?
Water your Brussel sprouts regularly, especially during hot, dry weather. The soil should be kept consistently moist, but not waterlogged. Check the soil moisture by sticking your finger about an inch into the soil. If the soil feels dry, it’s time to water. Water deeply, until water drains out of the drainage holes. Avoid overhead watering, as this can lead to fungal diseases. Consider using a soaker hose or drip irrigation to deliver water directly to the roots.
How do I fertilize Brussel sprouts grown in pots?
Brussel sprouts are heavy feeders and require regular fertilization to produce a good crop. Start by incorporating a slow-release fertilizer into the potting mix at planting time. Then, supplement with a liquid fertilizer every 2-3 weeks throughout the growing season. Choose a fertilizer that is high in nitrogen, phosphorus, and potassium (NPK). You can also add compost tea or fish emulsion to provide additional nutrients. Avoid over-fertilizing, as this can lead to excessive foliage growth and fewer sprouts.
How do I protect Brussel sprouts from pests and diseases?
Regularly inspect your plants for signs of pests and diseases. Common pests that attack Brussel sprouts include aphids, cabbage worms, and flea beetles. You can control these pests with organic methods, such as insecticidal soap, Bacillus thuringiensis (Bt), or neem oil. Diseases that can affect Brussel sprouts include clubroot, black rot, and downy mildew. To prevent these diseases, choose disease-resistant varieties, practice crop rotation, and avoid overhead watering. Ensure good air circulation around the plants by spacing them adequately.
When are Brussel sprouts ready to harvest?
Brussel sprouts are typically ready to harvest about 90-100 days after planting. The sprouts should be firm, green, and about 1-2 inches in diameter. Start harvesting from the bottom of the plant and work your way up. Twist or cut the sprouts off the stem. You can harvest the entire plant at once, or you can harvest the sprouts gradually as they mature. After harvesting, store the sprouts in the refrigerator for up to a week.
Can I grow Brussel sprouts in pots indoors?
While it’s possible to grow Brussel sprouts indoors, it can be challenging. Brussel sprouts require a lot of sunlight, so you’ll need to provide supplemental lighting with grow lights. You’ll also need to ensure good air circulation and maintain a consistent temperature. Indoor growing is more suitable for starting seedlings before transplanting them outdoors. If you do attempt to grow Brussel sprouts indoors, choose a compact variety and provide the best possible growing conditions.
What are some good companion plants for Brussel sprouts in pots?
Companion planting can help to deter pests, attract beneficial insects, and improve the overall health of your Brussel sprouts. Some good companion plants for Brussel sprouts include:
* Marigolds: Deter nematodes and other pests.
* Nasturtiums: Attract aphids away from the Brussel sprouts.
* Thyme and Rosemary: Attract beneficial insects like ladybugs and lacewings.
* Dill: Attracts beneficial insects and deters cabbage moths.
* Garlic and Onions: Repel many common pests.
Can I overwinter Brussel sprouts in pots?
In mild climates, you can overwinter Brussel sprouts in pots. In colder climates, you’ll need to protect the plants from frost. You can move the pots to a sheltered location, such as a garage or shed, or you can cover the plants with a frost blanket. Water the plants sparingly during the winter months. Overwintering Brussel sprouts can result in an earlier harvest the following spring.
Leave a Comment