
Growing cauliflower and broccoli can seem daunting, I know! But trust me, with a few clever tricks and a little DIY spirit, you can harvest your own delicious, homegrown cruciferous vegetables right in your backyard. Forget those expensive, sometimes lackluster, supermarket heads – imagine the satisfaction of serving up a vibrant, flavorful cauliflower cheese or a perfectly steamed broccoli side dish, all grown with your own two hands.
For centuries, these nutritional powerhouses have been cultivated across the globe. From the ancient Romans who prized cauliflower for its delicate flavor to the Italian farmers who perfected broccoli cultivation, these vegetables have a rich history. But let’s be honest, even with centuries of knowledge, getting them to thrive in your own garden can feel like a challenge. Pests, diseases, and unpredictable weather can all throw a wrench in your plans.
That’s where these DIY tricks and hacks come in! I’m going to share some simple, effective strategies that will help you overcome common obstacles and maximize your yield. Whether you’re a seasoned gardener or just starting out, these tips will empower you to successfully growing cauliflower and broccoli. So, grab your gardening gloves, and let’s get started on creating your own thriving vegetable patch!
Growing Cauliflower and Broccoli: A DIY Guide for the Home Gardener
Hey there, fellow garden enthusiasts! I’m so excited to share my tried-and-true methods for growing cauliflower and broccoli right in your own backyard. These cruciferous vegetables can seem a bit intimidating at first, but trust me, with a little planning and care, you’ll be harvesting delicious, homegrown goodness in no time. Let’s dive in!
Choosing Your Varieties
Before we even think about planting, let’s talk about choosing the right varieties for your climate and preferences. This is a crucial step, so don’t skip it!
* Cauliflower:
* Snowball Y Improved: A classic, reliable variety that produces medium-sized, pure white heads. It’s relatively easy to grow and matures in about 70-80 days.
* Graffiti: If you’re feeling adventurous, try this vibrant purple cauliflower! It adds a pop of color to your garden and your plate. Matures in around 75 days.
* Cheddar: This variety produces orange heads and is packed with extra Vitamin A. It’s a fun and nutritious choice, maturing in about 68 days.
* Broccoli:
* Waltham 29: A popular heirloom variety known for its large, dark green heads and excellent flavor. Matures in about 85 days.
* Packman: A fast-maturing variety that’s great for succession planting. It produces medium-sized heads in about 50-55 days.
* DiCicco: Another reliable heirloom variety that produces a large central head followed by numerous side shoots, extending your harvest. Matures in about 48 days for the main head.
Remember to check your local climate and growing season when selecting your varieties. Some varieties are better suited for cooler weather, while others can tolerate warmer temperatures.
Starting Your Seeds (or Buying Transplants)
You have two options here: starting your own seeds indoors or buying transplants from a local nursery. I personally prefer starting my own seeds because it gives me more control over the process and allows me to choose from a wider variety of cultivars.
Starting Seeds Indoors:
This is my preferred method, especially if you live in an area with a short growing season.
1. Timing is Key: Start your cauliflower and broccoli seeds about 4-6 weeks before the last expected frost in your area. This will give them a head start before transplanting them outdoors.
2. Gather Your Supplies: You’ll need seed starting trays or small pots, a seed starting mix (I recommend a peat-based mix), a spray bottle, and a heat mat (optional, but helpful).
3. Sow the Seeds: Fill your trays or pots with the seed starting mix and moisten it thoroughly. Sow the seeds about ¼ inch deep and gently cover them with more mix.
4. Provide Warmth and Light: Place the trays or pots on a heat mat (if using) and cover them with a humidity dome or plastic wrap to create a humid environment. Keep the soil consistently moist but not soggy. Once the seeds germinate (usually within 5-10 days), remove the humidity dome and place the seedlings under grow lights or in a sunny window.
5. Thin the Seedlings: Once the seedlings have their first true leaves (the second set of leaves), thin them out so that only one strong seedling remains in each cell or pot.
6. Harden Off the Seedlings: About a week before transplanting, gradually acclimate the seedlings to outdoor conditions by exposing them to increasing amounts of sunlight and fresh air each day. This process is called “hardening off” and helps prevent transplant shock.
Buying Transplants:
If you don’t have the time or space to start your own seeds, buying transplants is a perfectly acceptable option.
1. Choose Healthy Transplants: Look for transplants that are healthy, vigorous, and free from pests and diseases. Avoid plants that are root-bound or have yellowing leaves.
2. Handle with Care: Gently remove the transplants from their containers and handle them carefully to avoid damaging the roots.
Preparing the Garden Bed
Cauliflower and broccoli are heavy feeders, so it’s essential to prepare the garden bed properly before planting.
1. Choose a Sunny Location: These vegetables need at least 6 hours of direct sunlight per day.
2. Amend the Soil: Amend the soil with plenty of compost or well-rotted manure to improve drainage and fertility. Cauliflower and broccoli prefer a slightly acidic soil with a pH of 6.0-7.0. You can test your soil pH with a soil testing kit and amend it accordingly.
3. Ensure Good Drainage: Make sure the soil drains well to prevent root rot. If your soil is heavy clay, consider adding sand or other drainage amendments.
4. Consider Raised Beds: Raised beds are an excellent option for growing cauliflower and broccoli, as they provide good drainage and allow you to control the soil quality.
Transplanting Your Seedlings
Now for the exciting part – getting those little plants into the ground!
1. Timing is Crucial: Transplant your seedlings outdoors after the last expected frost and when the soil has warmed up to at least 60°F (15°C).
2. Spacing: Space cauliflower plants 18-24 inches apart and broccoli plants 12-18 inches apart. This will give them enough room to grow and develop properly.
3. Planting Depth: Dig holes that are slightly larger than the root balls of the seedlings. Gently remove the seedlings from their containers and place them in the holes, making sure the top of the root ball is level with the soil surface.
4. Water Thoroughly: Water the transplants thoroughly after planting to help them settle in.
5. Mulch: Apply a layer of mulch around the plants to help retain moisture, suppress weeds, and regulate soil temperature. I like to use straw or shredded leaves.
Caring for Your Plants
Once your cauliflower and broccoli plants are in the ground, it’s important to provide them with the care they need to thrive.
1. Watering: Water regularly, especially during dry periods. Aim to keep the soil consistently moist but not soggy. Water deeply and less frequently, rather than shallowly and often.
2. Fertilizing: Fertilize your plants every 2-3 weeks with a balanced fertilizer or a fertilizer specifically formulated for vegetables. Follow the instructions on the fertilizer package.
3. Weeding: Keep the garden bed free of weeds, as they can compete with your plants for nutrients and water. Hand-pull weeds regularly or use a hoe to cultivate the soil.
4. Pest Control: Keep an eye out for common pests such as cabbage worms, aphids, and flea beetles. You can control these pests with organic methods such as hand-picking, insecticidal soap, or Bacillus thuringiensis (Bt).
5. Sun Protection for Cauliflower: When the cauliflower head starts to form, you may need to blanch it to prevent it from turning yellow. To blanch the head, simply tie the outer leaves together over the head with twine or rubber bands. This wi
Hey there, fellow garden enthusiasts! I’m so excited to share my tried-and-true methods for growing cauliflower and broccoli right in your own backyard. These cruciferous vegetables can seem a bit intimidating at first, but trust me, with a little planning and care, you’ll be harvesting delicious, homegrown goodness in no time. Let’s dive in!
Choosing Your Varieties
Before we even think about planting, let’s talk about choosing the right varieties for your climate and preferences. This is a crucial step, so don’t skip it!
* Cauliflower:
* Snowball Y Improved: A classic, reliable variety that produces medium-sized, pure white heads. It’s relatively easy to grow and matures in about 70-80 days.
* Graffiti: If you’re feeling adventurous, try this vibrant purple cauliflower! It adds a pop of color to your garden and your plate. Matures in around 75 days.
* Cheddar: This variety produces orange heads and is packed with extra Vitamin A. It’s a fun and nutritious choice, maturing in about 68 days.
* Broccoli:
* Waltham 29: A popular heirloom variety known for its large, dark green heads and excellent flavor. Matures in about 85 days.
* Packman: A fast-maturing variety that’s great for succession planting. It produces medium-sized heads in about 50-55 days.
* DiCicco: Another reliable heirloom variety that produces a large central head followed by numerous side shoots, extending your harvest. Matures in about 48 days for the main head.
Remember to check your local climate and growing season when selecting your varieties. Some varieties are better suited for cooler weather, while others can tolerate warmer temperatures.
Starting Your Seeds (or Buying Transplants)
You have two options here: starting your own seeds indoors or buying transplants from a local nursery. I personally prefer starting my own seeds because it gives me more control over the process and allows me to choose from a wider variety of cultivars.
Starting Seeds Indoors:
This is my preferred method, especially if you live in an area with a short growing season.
1. Timing is Key: Start your cauliflower and broccoli seeds about 4-6 weeks before the last expected frost in your area. This will give them a head start before transplanting them outdoors.
2. Gather Your Supplies: You’ll need seed starting trays or small pots, a seed starting mix (I recommend a peat-based mix), a spray bottle, and a heat mat (optional, but helpful).
3. Sow the Seeds: Fill your trays or pots with the seed starting mix and moisten it thoroughly. Sow the seeds about ¼ inch deep and gently cover them with more mix.
4. Provide Warmth and Light: Place the trays or pots on a heat mat (if using) and cover them with a humidity dome or plastic wrap to create a humid environment. Keep the soil consistently moist but not soggy. Once the seeds germinate (usually within 5-10 days), remove the humidity dome and place the seedlings under grow lights or in a sunny window.
5. Thin the Seedlings: Once the seedlings have their first true leaves (the second set of leaves), thin them out so that only one strong seedling remains in each cell or pot.
6. Harden Off the Seedlings: About a week before transplanting, gradually acclimate the seedlings to outdoor conditions by exposing them to increasing amounts of sunlight and fresh air each day. This process is called “hardening off” and helps prevent transplant shock.
Buying Transplants:
If you don’t have the time or space to start your own seeds, buying transplants is a perfectly acceptable option.
1. Choose Healthy Transplants: Look for transplants that are healthy, vigorous, and free from pests and diseases. Avoid plants that are root-bound or have yellowing leaves.
2. Handle with Care: Gently remove the transplants from their containers and handle them carefully to avoid damaging the roots.
Preparing the Garden Bed
Cauliflower and broccoli are heavy feeders, so it’s essential to prepare the garden bed properly before planting.
1. Choose a Sunny Location: These vegetables need at least 6 hours of direct sunlight per day.
2. Amend the Soil: Amend the soil with plenty of compost or well-rotted manure to improve drainage and fertility. Cauliflower and broccoli prefer a slightly acidic soil with a pH of 6.0-7.0. You can test your soil pH with a soil testing kit and amend it accordingly.
3. Ensure Good Drainage: Make sure the soil drains well to prevent root rot. If your soil is heavy clay, consider adding sand or other drainage amendments.
4. Consider Raised Beds: Raised beds are an excellent option for growing cauliflower and broccoli, as they provide good drainage and allow you to control the soil quality.
Transplanting Your Seedlings
Now for the exciting part – getting those little plants into the ground!
1. Timing is Crucial: Transplant your seedlings outdoors after the last expected frost and when the soil has warmed up to at least 60°F (15°C).
2. Spacing: Space cauliflower plants 18-24 inches apart and broccoli plants 12-18 inches apart. This will give them enough room to grow and develop properly.
3. Planting Depth: Dig holes that are slightly larger than the root balls of the seedlings. Gently remove the seedlings from their containers and place them in the holes, making sure the top of the root ball is level with the soil surface.
4. Water Thoroughly: Water the transplants thoroughly after planting to help them settle in.
5. Mulch: Apply a layer of mulch around the plants to help retain moisture, suppress weeds, and regulate soil temperature. I like to use straw or shredded leaves.
Caring for Your Plants
Once your cauliflower and broccoli plants are in the ground, it’s important to provide them with the care they need to thrive.
1. Watering: Water regularly, especially during dry periods. Aim to keep the soil consistently moist but not soggy. Water deeply and less frequently, rather than shallowly and often.
2. Fertilizing: Fertilize your plants every 2-3 weeks with a balanced fertilizer or a fertilizer specifically formulated for vegetables. Follow the instructions on the fertilizer package.
3. Weeding: Keep the garden bed free of weeds, as they can compete with your plants for nutrients and water. Hand-pull weeds regularly or use a hoe to cultivate the soil.
4. Pest Control: Keep an eye out for common pests such as cabbage worms, aphids, and flea beetles. You can control these pests with organic methods such as hand-picking, insecticidal soap, or Bacillus thuringiensis (Bt).
5. Sun Protection for Cauliflower: When the cauliflower head starts to form, you may need to blanch it to prevent it from turning yellow. To blanch the head, simply tie the outer leaves together over the head with twine or rubber bands. This will block sunlight and keep the head white.
Harvesting Your Bounty
The moment you’ve been waiting for! Harvesting your homegrown cauliflower and broccoli is incredibly rewarding.
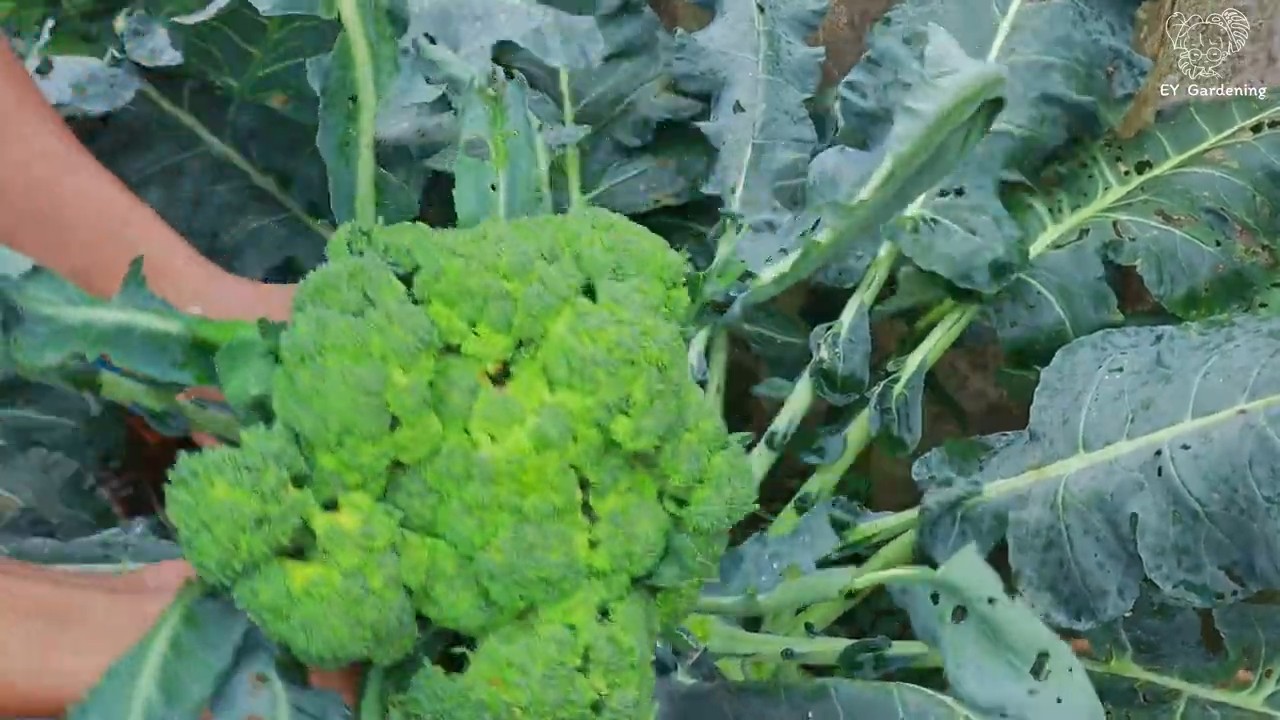
1. Cauliflower: Harvest cauliflower when the head is firm, compact, and about 6-8 inches in diameter. Use a sharp knife to cut the head from the plant, leaving a few leaves attached to protect the head.
2. Broccoli: Harvest broccoli when the central head is tight and the florets are still green. Cut the head from the plant, leaving several inches of stem. The plant will then produce side shoots, which you can harvest later.
3. Timing is Important: Don’t wait too long to harvest, as the heads can become loose and the florets can start to open.
4. Enjoy Your Harvest: Enjoy your fresh cauliflower and broccoli in salads, stir-fries, soups, or roasted as a side dish. They’re also great for freezing or pickling.
Troubleshooting Common Problems
Even with the best care, you may encounter some problems along the way. Here are a few common issues and how to address them:
* Cabbage Worms: These green caterpillars can quickly devour your cauliflower and broccoli leaves. Hand-pick them off the plants or spray with Bacillus thuringiensis (Bt).
* Aphids: These small, sap-sucking insects can weaken your plants. Spray them with insecticidal soap or blast them off with a strong stream of water.
* Clubroot: This soilborne disease can cause stunted growth and swollen roots. Prevent clubroot by amending the soil with lime to raise the pH and practicing crop rotation.
* Buttoning: This occurs when cauliflower heads form prematurely and remain small. It can be caused
Conclusion
So, there you have it! Mastering the art of growing cauliflower and broccoli at home isn’t just about saving money; it’s about connecting with your food, enjoying unparalleled freshness, and experiencing the sheer joy of nurturing something from seed to table. We’ve explored the key steps, from selecting the right varieties and preparing the soil to warding off pests and harvesting your bounty.
But why is this DIY trick a must-try? Simply put, the flavor of homegrown cauliflower and broccoli is incomparable to anything you’ll find in the supermarket. The subtle sweetness, the crisp texture, and the vibrant color are all amplified when you harvest these vegetables at their peak ripeness, just moments before you cook them. Plus, you have complete control over the growing process, ensuring that your produce is free from harmful pesticides and chemicals.
Beyond the basic techniques we’ve covered, there’s a world of variations to explore. Consider experimenting with different cauliflower varieties, such as purple or orange cauliflower, for a visually stunning and nutritionally diverse harvest. For broccoli, try sprouting broccoli, which produces tender shoots and florets over a longer period. You can also adapt your growing methods to suit your specific climate and growing conditions. If you live in a warmer region, choose heat-tolerant varieties and provide shade during the hottest part of the day. If you have limited space, consider growing cauliflower and broccoli in containers or raised beds.
Don’t be intimidated by the prospect of growing your own vegetables. While it may seem daunting at first, with a little patience and attention, you’ll be rewarded with a bountiful harvest of delicious and nutritious cauliflower and broccoli. Remember to start small, learn from your mistakes, and most importantly, have fun!
We wholeheartedly encourage you to give this DIY trick a try. Imagine the satisfaction of serving a meal featuring cauliflower and broccoli that you grew yourself. Picture the pride you’ll feel as you share your homegrown produce with family and friends. And think of the health benefits you’ll reap from consuming fresh, organic vegetables.
Growing cauliflower and broccoli is more than just a gardening project; it’s an investment in your health, your well-being, and your connection to the natural world. So, grab your seeds, prepare your soil, and get ready to embark on a rewarding journey of homegrown goodness.
We’re eager to hear about your experiences! Share your tips, tricks, and triumphs in the comments below. Let’s create a community of passionate gardeners who are dedicated to growing their own delicious and nutritious cauliflower and broccoli. What varieties did you choose? What challenges did you face? What successes did you celebrate? Your insights will help other aspiring gardeners learn and grow. Let’s cultivate a thriving community of homegrown cauliflower and broccoli enthusiasts!
Frequently Asked Questions (FAQ)
What are the best cauliflower and broccoli varieties to grow for beginners?
For beginners, choosing disease-resistant and relatively easy-to-grow varieties is key. For cauliflower, consider ‘Snowball Y Improved’ or ‘Early White Hybrid.’ These varieties are known for their reliability and consistent head production. For broccoli, ‘Waltham 29’ and ‘Packman’ are excellent choices. They are relatively quick to mature and produce good-sized heads. Remember to check your local climate and growing season to select varieties that are well-suited to your region. Local nurseries can provide valuable recommendations based on your specific area.
How much sunlight do cauliflower and broccoli need?
Cauliflower and broccoli are sun-loving plants and require at least 6 hours of direct sunlight per day. More sunlight is even better, especially in cooler climates. Insufficient sunlight can lead to leggy plants with small, underdeveloped heads. If you’re growing in a partially shaded area, try to maximize the amount of sunlight your plants receive by positioning them strategically or using reflective surfaces to bounce light onto them.
What kind of soil is best for growing cauliflower and broccoli?
Cauliflower and broccoli thrive in well-drained, fertile soil that is rich in organic matter. The ideal soil pH is between 6.0 and 7.0. Before planting, amend your soil with compost, well-rotted manure, or other organic materials to improve its fertility and drainage. If your soil is heavy clay, consider adding sand or perlite to improve drainage. A soil test can help you determine the pH and nutrient levels of your soil and guide you in making necessary amendments.
How often should I water cauliflower and broccoli?
Cauliflower and broccoli need consistent moisture to thrive. Water deeply and regularly, especially during dry periods. Aim to keep the soil consistently moist but not waterlogged. A good rule of thumb is to water when the top inch of soil feels dry to the t
So, there you have it! Mastering the art of growing cauliflower and broccoli at home isn’t just about saving money; it’s about connecting with your food, enjoying unparalleled freshness, and experiencing the sheer joy of nurturing something from seed to table. We’ve explored the key steps, from selecting the right varieties and preparing the soil to warding off pests and harvesting your bounty.
But why is this DIY trick a must-try? Simply put, the flavor of homegrown cauliflower and broccoli is incomparable to anything you’ll find in the supermarket. The subtle sweetness, the crisp texture, and the vibrant color are all amplified when you harvest these vegetables at their peak ripeness, just moments before you cook them. Plus, you have complete control over the growing process, ensuring that your produce is free from harmful pesticides and chemicals.
Beyond the basic techniques we’ve covered, there’s a world of variations to explore. Consider experimenting with different cauliflower varieties, such as purple or orange cauliflower, for a visually stunning and nutritionally diverse harvest. For broccoli, try sprouting broccoli, which produces tender shoots and florets over a longer period. You can also adapt your growing methods to suit your specific climate and growing conditions. If you live in a warmer region, choose heat-tolerant varieties and provide shade during the hottest part of the day. If you have limited space, consider growing cauliflower and broccoli in containers or raised beds.
Don’t be intimidated by the prospect of growing your own vegetables. While it may seem daunting at first, with a little patience and attention, you’ll be rewarded with a bountiful harvest of delicious and nutritious cauliflower and broccoli. Remember to start small, learn from your mistakes, and most importantly, have fun!
We wholeheartedly encourage you to give this DIY trick a try. Imagine the satisfaction of serving a meal featuring cauliflower and broccoli that you grew yourself. Picture the pride you’ll feel as you share your homegrown produce with family and friends. And think of the health benefits you’ll reap from consuming fresh, organic vegetables.
Growing cauliflower and broccoli is more than just a gardening project; it’s an investment in your health, your well-being, and your connection to the natural world. So, grab your seeds, prepare your soil, and get ready to embark on a rewarding journey of homegrown goodness.
We’re eager to hear about your experiences! Share your tips, tricks, and triumphs in the comments below. Let’s create a community of passionate gardeners who are dedicated to growing their own delicious and nutritious cauliflower and broccoli. What varieties did you choose? What challenges did you face? What successes did you celebrate? Your insights will help other aspiring gardeners learn and grow. Let’s cultivate a thriving community of homegrown cauliflower and broccoli enthusiasts!
Frequently Asked Questions (FAQ)
What are the best cauliflower and broccoli varieties to grow for beginners?
For beginners, choosing disease-resistant and relatively easy-to-grow varieties is key. For cauliflower, consider ‘Snowball Y Improved’ or ‘Early White Hybrid.’ These varieties are known for their reliability and consistent head production. For broccoli, ‘Waltham 29’ and ‘Packman’ are excellent choices. They are relatively quick to mature and produce good-sized heads. Remember to check your local climate and growing season to select varieties that are well-suited to your region. Local nurseries can provide valuable recommendations based on your specific area.
How much sunlight do cauliflower and broccoli need?
Cauliflower and broccoli are sun-loving plants and require at least 6 hours of direct sunlight per day. More sunlight is even better, especially in cooler climates. Insufficient sunlight can lead to leggy plants with small, underdeveloped heads. If you’re growing in a partially shaded area, try to maximize the amount of sunlight your plants receive by positioning them strategically or using reflective surfaces to bounce light onto them.
What kind of soil is best for growing cauliflower and broccoli?
Cauliflower and broccoli thrive in well-drained, fertile soil that is rich in organic matter. The ideal soil pH is between 6.0 and 7.0. Before planting, amend your soil with compost, well-rotted manure, or other organic materials to improve its fertility and drainage. If your soil is heavy clay, consider adding sand or perlite to improve drainage. A soil test can help you determine the pH and nutrient levels of your soil and guide you in making necessary amendments.
How often should I water cauliflower and broccoli?
Cauliflower and broccoli need consistent moisture to thrive. Water deeply and regularly, especially during dry periods. Aim to keep the soil consistently moist but not waterlogged. A good rule of thumb is to water when the top inch of soil feels dry to the touch. Mulching around your plants can help retain moisture and suppress weeds. Drip irrigation is an efficient way to deliver water directly to the roots of your plants.
What are some common pests and diseases that affect cauliflower and broccoli, and how can I control them?
Common pests that affect cauliflower and broccoli include cabbage worms, aphids, flea beetles, and cabbage root maggots. Common diseases include clubroot, black rot, and downy mildew. To control pests, you can use row covers to protect your plants, handpick pests off the plants, or use organic insecticides such as Bacillus thuringiensis (Bt) for cabbage worms or insecticidal soap for aphids. To prevent diseases, practice crop rotation, ensure good air circulation, and avoid overhead watering. If diseases do occur, remove infected plants promptly and treat with appropriate fungicides.
When is the best time to harvest cauliflower and broccoli?
Harvest cauliflower when the head is firm, compact, and white (or the color of the variety you are growing). The head should be about 6-8 inches in diameter. Harvest broccoli when the florets are tight and green, before they start to open and turn yellow. Cut the main head with a sharp knife, leaving a few inches of stem. Side shoots will often develop after the main head is harvested, providing you with additional harvests.
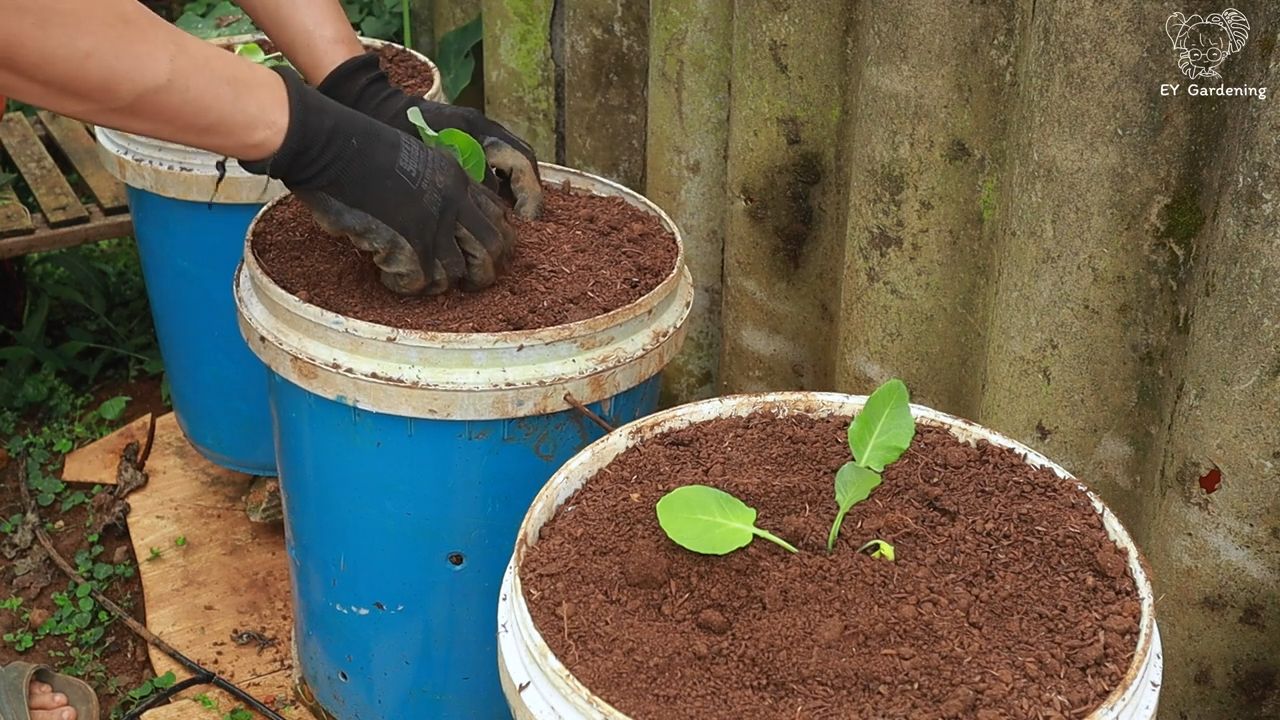
Can I grow cauliflower and broccoli in containers?
Yes, you can grow cauliflower and broccoli in containers, but you’ll need to choose large containers (at least 5 gallons) to accommodate their root systems. Use a high-quality potting mix and ensure that the containers have good drainage. Water and fertilize regularly, as container-grown plants tend to dry out and deplete nutrients more quickly than those grown in the ground.
How do I prevent cauliflower from turning yellow?
Cauliflower heads can turn yellow if they are exposed to too much sunlight. To prevent this, you can blanch the heads by tying the outer leaves together over the developing head when it reaches about 3 inches in diameter. This will shield the head from the sun and keep it white.
What fertilizer should I use for cauliflower and broccoli?
Cauliflower and broccoli are heavy feeders and benefit from regular fertilization. Use a balanced fertilizer (e.g., 10-10-10) at planting time and then side-dress with a nitrogen-rich fertilizer every few weeks during the growing season. You can also use organic fertilizers such as compost tea or fish emulsion.
How can I store cauliflower and broccoli after harvesting?
Store cauliflower and broccoli in the refrigerator. Wrap them loosely in plastic wrap or place them in a perforated plastic bag. They will typically last for about a week in the refrigerator. You can also freeze cauliflower and broccoli for longer storage. Blanch them in boiling water for a few minutes, then cool them in ice water before freezing.

Leave a Comment