
Growing habanero peppers easily can seem daunting, but trust me, it’s more achievable than you think! Have you ever dreamed of adding a fiery kick to your homemade salsa or spicing up your favorite dishes with the intense heat of a habanero? I know I have! For centuries, these little dynamos have been a staple in Central American cuisine, adding a vibrant flavor and a serious punch to everything from stews to sauces. Their cultivation dates back thousands of years, and they hold a special place in culinary traditions around the world.
But let’s be honest, sometimes getting those peppers to thrive in your own backyard can feel like a real challenge. That’s why I’m so excited to share these simple, yet effective, DIY tricks and hacks that will help you unlock the secrets to growing habanero peppers easily, even if you don’t have a green thumb! We’ll cover everything from seed starting to pest control, ensuring you have a bountiful harvest of these flavorful peppers.
Why do you need these DIY tricks? Because store-bought habaneros can be expensive and sometimes lack the freshness and flavor of homegrown ones. Plus, there’s nothing quite like the satisfaction of nurturing a plant from seed to harvest and enjoying the fruits (or peppers!) of your labor. So, get ready to roll up your sleeves and let’s dive into the world of habanero pepper cultivation!
Growing Habanero Peppers: My Foolproof Guide for Fiery Success
Hey fellow spice lovers! I’m so excited to share my tried-and-true method for growing habanero peppers. Trust me, even if you think you have a black thumb, you can totally do this! I’ve simplified the process into easy-to-follow steps, so you’ll be harvesting your own fiery peppers in no time.
Getting Started: Seeds, Soil, and Sunshine
Before we dive into the nitty-gritty, let’s gather our supplies and understand the basics. Habaneros are tropical plants, so they need warmth and plenty of sunlight.
* Seeds: You can buy habanero seeds online or at your local garden center. I personally prefer starting with seeds because it gives me more control over the entire process.
* Seed Starting Mix: Don’t use regular garden soil for starting seeds. It’s too heavy and can harbor diseases. Opt for a light and airy seed starting mix.
* Seed Starting Trays or Pots: I like using seed starting trays with a humidity dome, but small pots work just as well.
* Grow Lights (Optional but Recommended): If you don’t have a super sunny window, grow lights will give your seedlings the boost they need.
* Potting Soil: Once your seedlings are big enough, you’ll need potting soil for transplanting. Choose a well-draining mix.
* Fertilizer: A balanced fertilizer (like 10-10-10) is great for young plants. Later, you can switch to a fertilizer higher in phosphorus to encourage flowering and fruiting.
* Pots or Garden Bed: Decide where you’ll be growing your peppers. Pots should be at least 5 gallons in size. If you’re planting in the ground, make sure the soil is well-draining.
* Watering Can or Hose: Essential for keeping your plants hydrated!
* Gloves: Trust me, you’ll want gloves when handling habaneros, especially when harvesting.
* Patience: Habaneros take their time, so be patient and enjoy the process!
Phase 1: Starting Your Seeds Indoors
Habaneros have a long growing season, so starting them indoors is crucial, especially if you live in a cooler climate. I usually start my seeds about 8-10 weeks before the last expected frost.
1. Prepare Your Seed Starting Trays: Fill your seed starting trays or pots with seed starting mix. Gently tamp down the soil.
2. Sow the Seeds: Plant 2-3 seeds per cell or pot, about 1/4 inch deep.
3. Water Gently: Water the soil gently using a spray bottle or watering can with a fine rose. You don’t want to dislodge the seeds.
4. Cover and Provide Warmth: Cover the trays with a humidity dome or plastic wrap to create a humid environment. Place the trays in a warm location (around 80-85°F). A heat mat can be really helpful here.
5. Wait for Germination: Germination can take anywhere from 1-3 weeks, so be patient. Keep the soil consistently moist but not soggy.
6. Provide Light: Once the seedlings emerge, remove the humidity dome and place them under grow lights or in a sunny window. If using a window, rotate the trays regularly to prevent the seedlings from leaning towards the light.
7. Thin the Seedlings: Once the seedlings have their first true leaves (the second set of leaves that appear after the initial seed leaves), thin them to one seedling per cell or pot. Choose the strongest, healthiest-looking seedling and snip off the others at the soil line.
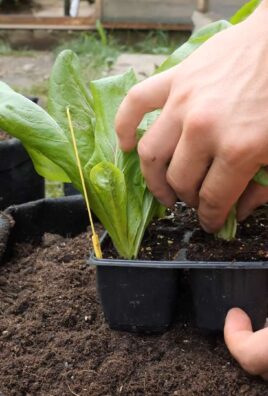
Phase 2: Transplanting and Hardening Off
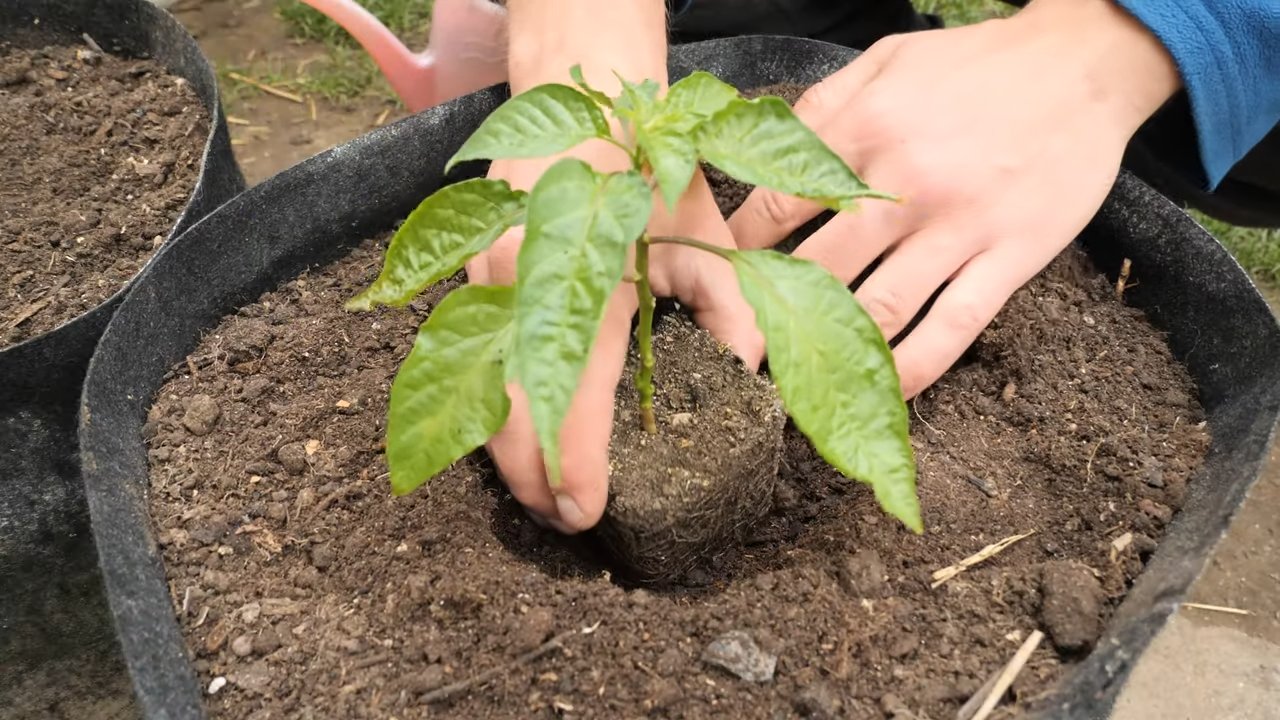
Once your seedlings have grown a bit and the weather outside is warm enough, it’s time to transplant them to their final growing location. But before you do that, you need to “harden them off.” This process gradually acclimates the seedlings to outdoor conditions, preventing transplant shock.
1. Start Hardening Off: About a week or two before you plan to transplant, start hardening off your seedlings. Place them outside in a sheltered location for a few hours each day, gradually increasing the amount of time they spend outdoors. Protect them from direct sunlight and strong winds.
2. Prepare Your Pots or Garden Bed: While you’re hardening off your seedlings, prepare your pots or garden bed. If using pots, choose ones that are at least 5 gallons in size. If planting in the ground, make sure the soil is well-draining and amend it with compost or other organic matter.
3. Transplant the Seedlings: Once the seedlings are hardened off and the danger of frost has passed, it’s time to transplant them. Gently remove the seedlings from their trays or pots, being careful not to damage the roots.
4. Planting Depth: Plant the seedlings at the same depth they were growing in their original containers.
5. Spacing: If planting in the ground, space the plants about 18-24 inches apart.
6. Water Thoroughly: After transplanting, water the seedlings thoroughly.
7. Mulch (Optional): Add a layer of mulch around the plants to help retain moisture and suppress weeds.
Phase 3: Caring for Your Habanero Plants
Now that your habanero plants are in their final growing location, it’s time to provide them with the care they need to thrive.
1. Watering: Water your plants regularly, especially during hot, dry weather. Habaneros like consistently moist soil, but avoid overwatering, which can lead to root rot. I usually water deeply when the top inch of soil feels dry.
2. Fertilizing: Fertilize your plants every 2-3 weeks with a balanced fertilizer. Once the plants start to flower, switch to a fertilizer that is higher in phosphorus to encourage fruit production.
3. Sunlight: Habaneros need at least 6-8 hours of sunlight per day.
4. Pruning (Optional): Pruning can help improve air circulation and encourage bushier growth. You can pinch off the tips of the branches to encourage side branching.
5. Pest Control: Keep an eye out for pests like aphids, spider mites, and whiteflies. You can control these pests with insecticidal soap or neem oil.
6. Support (Optional): As your plants grow and produce peppers, they may need support to prevent the branches from breaking. You can use stakes or cages to support the plants.
Phase 4: Harvesting Your Fiery Bounty
The moment you’ve been waiting for! Harvesting your own habanero peppers is incredibly rewarding.
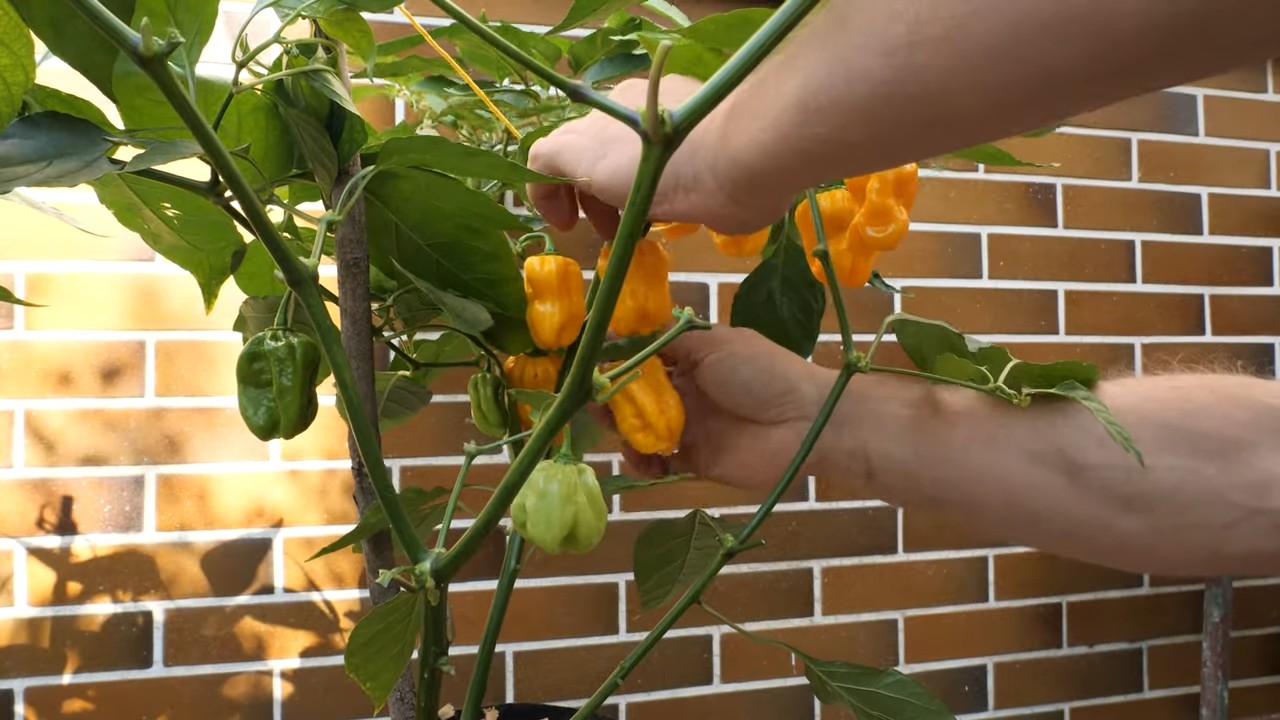
1. When to Harvest: Habaneros are typically ready to harvest about 80-100 days after transplanting. The peppers will turn from green to orange or red when they are ripe.
2. How to Harvest: Use gloves when harvesting habaneros, as the capsaicin oil can irritate your skin. Cut the peppers from the plant using pruning shears or scissors.
3. Handling with Care: Be careful when handling habaneros, as they are very hot! Avoid touching your eyes or face after handling them.
4. Storage: You can store habaneros in the refrigerator for several weeks. You can also dry them, freeze them, or pickle them.
Troubleshooting Tips
Even with the best care, you might encounter some challenges along the way. Here are a few common problems and how to fix them:
* Yellowing Leaves: This could be a sign of overwatering, underwatering, or nutrient deficiency. Check the soil moisture and adjust your watering accordingly. Fertilize your plants with a balanced fertilizer.
* Blossom Drop: This is when the flowers fall off the plant without producing fruit. It can be caused by temperature stress (too hot or too cold), inconsistent watering, or lack of pollination. Make sure your plants are getting enough water and protect them from extreme temperatures. You can also try hand-pollinating the flowers.
* Pest Infestations: Keep an eye out for pests and treat them promptly with insecticidal soap or neem oil.
My Favorite Habanero Uses
Now that you have a bounty of habaneros, what do you do with them? Here are a few of my favorite uses:
* Hot Sauce: Of course! Homemade hot sauce is the perfect way to showcase the flavor and heat of habaneros.
* Salsa: Add a few diced habaneros to your favorite salsa recipe for a fiery kick.
* Infused Oil: Infuse olive oil with habaneros for a spicy cooking oil.
* Pickled Peppers: Pickled habaneros are a delicious and versatile condiment.
* Dried Peppers: Dry your habaneros and grind them into a powder
Conclusion
So, there you have it! Growing habanero peppers easily doesn’t have to be a daunting task reserved for seasoned gardeners. With a little patience, the right techniques, and a dash of dedication, you can cultivate your own fiery harvest right at home. We’ve demystified the process, breaking it down into manageable steps that anyone can follow, regardless of their gardening experience.
Why is this DIY approach a must-try? Because it puts you in control. You know exactly what goes into nurturing your plants, avoiding harmful chemicals and ensuring the freshest, most flavorful habaneros possible. Imagine the satisfaction of adding your own home-grown heat to your favorite dishes, knowing you nurtured those peppers from seed to table. Plus, it’s significantly more cost-effective than constantly buying habaneros from the store, especially if you’re a chili enthusiast!
But the benefits extend beyond just cost and control. Gardening, in general, is a therapeutic activity. It connects you with nature, reduces stress, and provides a sense of accomplishment. Growing habaneros adds an extra layer of excitement, knowing you’re cultivating something that packs a serious punch.
Looking to experiment? Consider these variations:
* **Hydroponic Habaneros:** For those with limited space or a desire for a more controlled environment, hydroponic systems can be a fantastic alternative.
* **Container Gardening:** If you don’t have a garden, don’t worry! Habaneros thrive in containers, making them perfect for balconies, patios, or even indoor growing with the right lighting.
* **Different Varieties:** While we’ve focused on the classic habanero, there are many other varieties to explore, each with its unique flavor profile and heat level. Try growing chocolate habaneros, scotch bonnets, or even the notoriously fiery ghost pepper if you’re feeling adventurous!
* **Companion Planting:** Enhance your habanero’s growth by planting beneficial companions like basil, which repels pests, or carrots, which improve soil drainage.
We’re confident that with the knowledge you’ve gained, you’re well-equipped to embark on your habanero-growing journey. Don’t be afraid to experiment, adapt the techniques to your specific environment, and most importantly, have fun!
Now, we want to hear from you! Give this DIY trick a try and share your experiences in the comments below. What challenges did you face? What successes did you celebrate? What unique variations did you discover? Your insights will not only help other aspiring habanero growers but also contribute to a thriving community of chili enthusiasts. Let’s grow together!
Frequently Asked Questions (FAQ)
1. How long does it take to grow habanero peppers from seed?
Growing habanero peppers from seed requires patience. Generally, it takes anywhere from 80 to 100 days from transplanting seedlings to harvesting mature peppers. The germination process itself can take 1 to 3 weeks, so starting seeds indoors 6 to 8 weeks before the last expected frost is crucial. Remember that these are estimates, and the actual time can vary depending on environmental factors like temperature, sunlight, and soil quality.
2. What are the ideal growing conditions for habanero peppers?
Habanero peppers thrive in warm climates with plenty of sunlight. They need at least 6-8 hours of direct sunlight per day. The ideal temperature range is between 70°F and 85°F (21°C and 29°C). The soil should be well-draining and rich in organic matter. Maintaining consistent moisture is also important, but avoid overwatering, which can lead to root rot. A slightly acidic soil pH of around 6.0 to 6.8 is optimal.
3. How often should I water my habanero pepper plants?
Watering frequency depends on several factors, including the climate, soil type, and the size of the plant. As a general rule, water deeply when the top inch of soil feels dry to the touch. During hot and dry periods, you may need to water more frequently, perhaps even daily. Avoid letting the soil dry out completely, as this can stress the plants and reduce fruit production. Conversely, avoid overwatering, which can lead to root rot. Using a moisture meter can help you determine the moisture level of the soil accurately.
4. What kind of fertilizer should I use for habanero peppers?
Habanero peppers benefit from regular fertilization, especially during the growing season. A balanced fertilizer with an NPK ratio (nitrogen, phosphorus, potassium) of 5-10-10 or 10-10-10 is a good starting point. Nitrogen promotes leafy growth, phosphorus supports root development and flowering, and potassium enhances fruit production. Avoid fertilizers with excessive nitrogen, as this can lead to lush foliage but fewer peppers. You can also supplement with organic fertilizers like compost tea or fish emulsion. Apply fertilizer according to the manufacturer’s instructions, typically every 2-3 weeks.
5. How do I protect my habanero pepper plants from pests and diseases?
Preventing pests and diseases is crucial for a successful habanero harvest. Regularly inspect your plants for signs of infestation or disease, such as aphids, spider mites, or fungal infections. Use organic pest control methods like insecticidal soap, neem oil, or introducing beneficial insects like ladybugs. Ensure good air circulation around the plants to prevent fungal diseases. Avoid overhead watering, which can create a humid environment that promotes fungal growth. If you notice any diseased leaves or peppers, remove them promptly to prevent the spread of infection. Crop rotation can also help prevent soilborne diseases.
6. When is the best time to harvest habanero peppers?
Habanero peppers are typically ready to harvest when they reach their mature color, which can range from green to orange, red, or even chocolate brown, depending on the variety. The peppers should feel firm and slightly waxy to the touch. Use pruning shears or scissors to cut the peppers from the plant, leaving a small stem attached. Wear gloves when handling habanero peppers, as the capsaicin oil can irritate the skin.
7. Can I grow habanero peppers indoors?
Yes, you can grow habanero peppers indoors, but it requires providing the right conditions. Ensure the plants receive at least 6-8 hours of direct sunlight per day, either through a sunny window or with the help of grow lights. Use a well-draining potting mix and a container that is at least 5 gallons in size. Maintain a consistent temperature and humidity level. Pollinate the flowers manually by gently shaking the plants or using a small brush to transfer pollen from one flower to another.
8. Are habanero peppers safe to eat?
Habanero peppers are safe to eat in moderation. They are known for their intense heat, so it’s important to handle them with care and start with small amounts. The capsaicin in habanero peppers can cause a burning sensation, so avoid touching your eyes or face after handling them. If you accidentally ingest too much capsaicin, drinking milk or eating dairy products can help neutralize the burning sensation. People with certain medical conditions, such as ulcers or gastrointestinal problems, should consult with their doctor before consuming habanero peppers.
9. How do I store habanero peppers?
Habanero peppers can be stored in several ways. Fresh peppers can be stored in the refrigerator for up to a week. For longer storage, you can dry them, pickle them, or freeze them. To dry habanero peppers, string them together and hang them in a well-ventilated area until they are completely dry. Pickled habanero peppers can be stored in the refrigerator for several months. To freeze habanero peppers, wash and dry them thoroughly, then place them in a freezer-safe bag or container.
10. What are some creative ways to use habanero peppers in cooking?
Habanero peppers can add a fiery kick to a wide variety of dishes. Use them sparingly in salsas, sauces, marinades, and stews. Add a small amount of minced habanero to chili, curries, or stir-fries. Infuse olive oil with habanero peppers for a spicy cooking oil. Make habanero-infused vinegar for a flavorful condiment. Experiment with different combinations to find your favorite ways to incorporate habanero peppers into your culinary creations. Remember to always taste as you go and adjust the amount of habanero to your desired level of heat.
Leave a Comment