
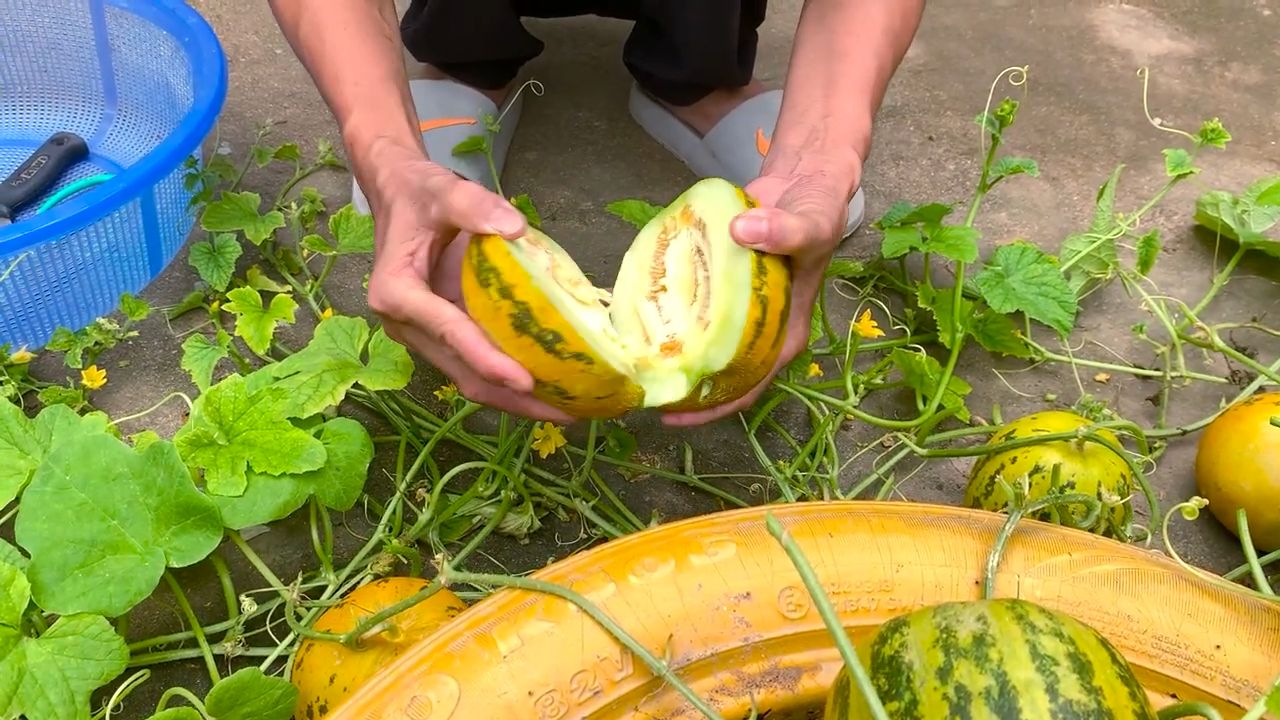
Growing Melons Backyard doesn’t have to be a pipe dream! Imagine biting into a juicy, sun-ripened melon, bursting with flavor, knowing you nurtured it from seed to table, right in your own backyard. For centuries, melons have been cultivated across cultures, from the ancient Egyptians who revered them as symbols of prosperity to the vibrant watermelons enjoyed at summer picnics today. The sweet taste of success is within your reach!
But let’s be honest, the thought of growing melons backyard can feel a little intimidating. Maybe you’ve heard they’re finicky, require tons of space, or are just plain difficult to grow. That’s where this DIY guide comes in! I’m here to debunk those myths and share simple, effective tricks and hacks that will transform your backyard into a melon haven, no matter the size.
In this article, I’ll walk you through everything you need to know, from choosing the right melon varieties for your climate to creating the perfect soil conditions and warding off pesky pests. Forget complicated gardening jargon and endless research – I’m breaking it all down into easy-to-follow steps that even a complete beginner can master. So, grab your gardening gloves, and let’s get ready to enjoy the sweet rewards of homegrown melons!
Growing Delicious Melons in Your Backyard: A DIY Guide
Hey there, fellow gardening enthusiasts! I’m so excited to share my tried-and-true method for growing juicy, flavorful melons right in your own backyard. Forget those bland supermarket melons – with a little effort and these simple steps, you’ll be enjoying homegrown goodness all summer long!
Choosing the Right Melon Variety
Before we even think about digging, let’s talk about melon varieties. Not all melons are created equal, and some are definitely better suited for home gardens than others. Consider your climate, space, and personal preferences when making your choice.
* Watermelons: These are the kings of summer! Look for “Sugar Baby” (compact and early), “Crimson Sweet” (classic flavor), or “Black Diamond” (large and impressive).
* Cantaloupes: A classic choice. “Athena” and “Hales Best Jumbo” are reliable and disease-resistant.
* Honeydew Melons: Known for their smooth, pale green flesh. “Honeycrisp” is a popular and productive variety.
* Specialty Melons: Don’t be afraid to experiment! Consider Galia melons (sweet and aromatic) or Charentais melons (intensely flavorful).
Important Considerations:
* Days to Maturity: This tells you how long it takes from planting to harvest. Choose varieties that fit your growing season.
* Vine Size: Some melons have sprawling vines that need lots of space. Consider bush varieties if you have limited room.
* Disease Resistance: Look for varieties that are resistant to common melon diseases like powdery mildew and fusarium wilt.
Preparing Your Melon Patch
Melons are sun-loving, hungry plants, so proper soil preparation is crucial for success.
* Sunlight: Melons need at least 6-8 hours of direct sunlight per day. Choose a location that gets plenty of sun.
* Soil: Melons thrive in well-drained, fertile soil with a pH of 6.0-6.8.
* Soil Testing: I highly recommend getting your soil tested to determine its nutrient levels and pH. Your local extension office can provide information on soil testing services.
* Amending the Soil: Based on your soil test results, amend the soil with compost, aged manure, or other organic matter to improve drainage, fertility, and water retention. I usually add a generous amount of compost – about 4-6 inches worked into the top 12 inches of soil.
* Raised Beds (Optional): If you have heavy clay soil or poor drainage, consider growing melons in raised beds. This will improve drainage and warm the soil more quickly in the spring.
Starting Melon Seeds (Indoors or Direct Sowing)
You have two options for starting your melon plants: starting seeds indoors or direct sowing them in the garden.
* Starting Seeds Indoors: This gives you a head start on the growing season, especially in cooler climates.
* When to Start: Start seeds 4-6 weeks before the last expected frost.
* Containers: Use peat pots or biodegradable containers to minimize root disturbance when transplanting.
* Soil: Use a seed-starting mix that is light and well-draining.
* Planting: Sow seeds about ½ inch deep.
* Watering: Keep the soil consistently moist but not soggy.
* Light: Provide plenty of light, either with a grow light or a sunny windowsill.
* Hardening Off: Before transplanting, gradually acclimate the seedlings to outdoor conditions by exposing them to increasing amounts of sunlight and wind over a period of 7-10 days.
* Direct Sowing: This is a simpler option, but it requires warmer soil temperatures.
* When to Sow: Sow seeds after the last expected frost, when the soil temperature is at least 70°F (21°C).
* Planting: Sow seeds about 1 inch deep.
* Spacing: Space seeds according to the variety’s recommendations.
* Watering: Keep the soil consistently moist until the seedlings emerge.
Transplanting Melon Seedlings (If Starting Indoors)
Once your seedlings have developed a few true leaves and the weather has warmed up, it’s time to transplant them into the garden.
1. Choose a Cloudy Day: Transplanting on a cloudy day will help reduce stress on the seedlings.
2. Prepare the Planting Holes: Dig holes that are slightly larger than the root balls of the seedlings.
3. Add Compost: Add a handful of compost to each planting hole.
4. Gently Remove Seedlings: Carefully remove the seedlings from their containers, being careful not to damage the roots. If using peat pots, you can plant the entire pot.
5. Plant Seedlings: Place the seedlings in the planting holes and backfill with soil.
6. Water Thoroughly: Water the seedlings thoroughly after planting.
7. Mulch: Apply a layer of mulch around the plants to help retain moisture, suppress weeds, and regulate soil temperature. I like to use straw or shredded leaves.
Caring for Your Melon Plants
Once your melon plants are established, it’s important to provide them with the care they need to thrive.
1. Watering: Melons need consistent moisture, especially during fruit development. Water deeply and regularly, aiming for about 1-2 inches of water per week. Avoid overhead watering, which can promote fungal diseases. Drip irrigation is an excellent option.
2. Fertilizing: Melons are heavy feeders. Fertilize them every 2-3 weeks with a balanced fertilizer or a fertilizer specifically formulated for fruits and vegetables. Follow the instructions on the fertilizer label. I like to use a liquid fertilizer diluted to half strength.
3. Weeding: Keep the melon patch free of weeds, which can compete with the plants for nutrients and water. Hand-pull weeds or use a hoe to cultivate the soil.
4. Pest Control: Keep an eye out for common melon pests like aphids, squash bugs, and cucumber beetles. Use organic pest control methods like insecticidal soap or neem oil to control these pests.
5. Disease Control: Melons are susceptible to fungal diseases like powdery mildew and fusarium wilt. Prevent these diseases by providing good air circulation, avoiding overhead watering, and choosing disease-resistant varieties. If you notice signs of disease, treat the plants with a fungicide.
6. Pruning (Optional): Some gardeners prune melon vines to encourage fruit production. Remove any suckers (side shoots) that grow from the base of the plant. You can also pinch off the tips of the vines to encourage branching.
7. Supporting the Fruit (Optional): For larger melon varieties, you may need to support the fruit to prevent it from rotting on the ground. Use slings made of netting or fabric to support the melons.
Pollination: Helping Your Melons Set Fruit
Melons rely on pollinators, primarily bees, to set fruit.
* Attracting Pollinators: Plant flowers that attract bees and other pollinators near your melon patch. Some good choices include sunflowers, zinnias, and lavender.
* Hand-Pollination (If Necessary): If you’re not seeing a lot of bee activity, you may need to hand-pollinate your melon flowers.
* Identify Male and Female Flowers: Male flowers have a long, thin stem, while female flowers have a small, immature melon behind the flower.
* Pollinate in the Morning: Pollinate the flowers in the morning, when they are most receptive.
* Transfer Pollen: Use a small paintbrush or cotton swab to transfer pollen from the male flower to the female flower.
Harvesting Your Melons: The Sweet Reward
Knowing when to harvest your melons is key to enjoying their peak flavor.
* Watermelons:
* Thump Test: A ripe watermelon will sound hollow when thumped.
* Ground Spot: The ground spot (the area where the melon rested on the ground) will turn from white to yellow.
* Tendril: The tendril closest to the melon will turn brown and dry.
* Cantaloupes:
* Aroma: A ripe cantaloupe will have a sweet, musky aroma.
* Stem Slip: The stem will easily slip from the melon when it’s ripe.
* Color: The skin will turn from green to tan or orange.
* Honeydew Melons:
* Aroma: A ripe honeydew melon will have a slightly sweet aroma.
* Blossom End: The blossom end (the opposite end from the stem) will be slightly soft.
* Color:

Conclusion
So, there you have it! Mastering the art of growing melons in your backyard is not only achievable but also incredibly rewarding. We’ve explored the essential steps, from selecting the right varieties and preparing the soil to providing adequate support and protecting your precious fruits from pests and diseases. But the real magic lies in this simple yet effective DIY trick: the sugar boost.
Why is this DIY trick a must-try? Because it’s the secret weapon to unlocking the full potential of your melon patch. It’s the difference between a good melon and a truly exceptional one – bursting with sweetness, flavor, and that satisfying juicy texture we all crave. This method is cost-effective, using ingredients you likely already have in your kitchen. It’s also environmentally friendly, avoiding harsh chemicals and relying on natural processes to enhance the fruit’s natural sugars.
Beyond the basic sugar solution, feel free to experiment with variations. Consider adding a pinch of Epsom salts to the mixture for an extra boost of magnesium, which can further enhance sweetness and overall plant health. You could also try using molasses instead of granulated sugar for a richer, more complex flavor profile. Remember to always monitor your plants closely and adjust the frequency and concentration of the solution as needed.
Growing melons in your backyard is more than just a gardening project; it’s an experience. It’s about connecting with nature, nurturing life, and reaping the delicious rewards of your hard work. And with this DIY sugar boost trick, you’re guaranteed to elevate your melon-growing game to a whole new level.
We wholeheartedly encourage you to try this DIY trick and witness the incredible difference it makes. Don’t be afraid to experiment, adapt, and personalize the method to suit your specific growing conditions and preferences. And most importantly, share your experiences with us! We’d love to hear about your successes, challenges, and any unique variations you discover along the way. Let’s build a community of melon-growing enthusiasts, sharing knowledge and inspiring each other to cultivate the sweetest, most flavorful melons imaginable. So, get out there, get your hands dirty, and get ready to enjoy the fruits (literally!) of your labor. Happy growing!
Frequently Asked Questions (FAQ)
What exactly does the sugar solution do for my melons?
The sugar solution provides an extra boost of carbohydrates to the developing melons. While melon plants naturally produce sugars through photosynthesis, supplementing with a sugar solution, especially during the fruit-ripening stage, can significantly increase the sugar content within the fruit. This results in a sweeter, more flavorful melon with a more intense aroma. Think of it as giving your melons a little extra energy to pack on the sweetness.
When is the best time to apply the sugar solution?
The optimal time to start applying the sugar solution is when the melons are nearing maturity, typically about two to three weeks before you expect to harvest them. You’ll notice signs of ripening, such as a change in color, a softening of the rind, and a sweet aroma emanating from the fruit. Avoid applying the solution too early, as it may not be as effective and could potentially attract unwanted pests.
How often should I apply the sugar solution?
A general guideline is to apply the sugar solution once a week during the ripening period. However, you can adjust the frequency based on your observations. If you notice that your melons are already exceptionally sweet, you can reduce the frequency to once every two weeks. Conversely, if your melons seem to be lacking sweetness, you can increase the frequency to twice a week. Always monitor your plants closely and adjust accordingly.
What type of sugar should I use for the solution?
Plain white granulated sugar is the most readily available and effective option for the sugar solution. Avoid using artificial sweeteners, as they will not provide the same benefits. You can also experiment with other natural sugars, such as brown sugar or molasses, but be aware that these may impart a slightly different flavor to the melons.
Can I use too much sugar in the solution?
Yes, it’s important to use the correct concentration of sugar in the solution. Too much sugar can actually dehydrate the plant and attract pests. Stick to the recommended ratio of one tablespoon of sugar per gallon of water. More is not always better in this case.
How do I apply the sugar solution to my melon plants?
The best way to apply the sugar solution is to water the base of the plant, ensuring that the roots are thoroughly saturated. Avoid spraying the solution directly onto the leaves or fruit, as this can attract pests and potentially cause fungal diseases. Focus on delivering the solution directly to the root system, where it can be absorbed and transported to the developing melons.
Will this DIY trick work for all types of melons?
Yes, this DIY trick can be beneficial for most types of melons, including watermelons, cantaloupes, honeydew melons, and muskmelons. However, the degree of improvement may vary depending on the specific variety and growing conditions. Experiment with different varieties and see which ones respond best to the sugar boost.
Are there any potential downsides to using the sugar solution?
While the sugar solution is generally safe and effective, there are a few potential downsides to be aware of. As mentioned earlier, using too much sugar can attract pests and potentially dehydrate the plant. It’s also important to ensure that the solution is applied properly to avoid fungal diseases. Always monitor your plants closely and adjust your approach as needed.
What other factors contribute to growing sweet melons?
While the sugar solution can certainly enhance sweetness, it’s important to remember that other factors also play a crucial role in growing delicious melons. These include:
* **Sunlight:** Melons need plenty of sunlight (at least 6-8 hours per day) to produce sugars through photosynthesis.
* **Water:** Adequate watering is essential, especially during the fruit-ripening stage.
* **Soil:** Well-drained soil that is rich in organic matter is ideal for growing melons.
* **Nutrients:** Providing your plants with the necessary nutrients, such as phosphorus and potassium, can also contribute to sweetness.
* **Variety:** Some melon varieties are naturally sweeter than others. Choose varieties that are known for their sweetness and flavor.
What if I don’t have a backyard? Can I still grow melons?
Absolutely! While growing melons in a backyard garden is ideal, you can also grow them in containers on a patio or balcony. Choose smaller melon varieties that are well-suited for container gardening. Ensure that your containers are large enough to accommodate the plants’ root systems and provide adequate drainage. You may also need to provide additional support for the vines as they grow.
Leave a Comment