
Growing Potatoes Indoors might sound like a whimsical dream, but trust me, it’s a surprisingly achievable and rewarding project! Forget waiting for the perfect spring weather; you can cultivate your own spuds right in the comfort of your home. For centuries, potatoes have been a staple food source, sustaining communities across the globe. From the Andean highlands where they originated to the bustling cities of today, potatoes have proven their resilience and adaptability.
But why bother growing them indoors? Well, imagine the satisfaction of harvesting fresh, homegrown potatoes whenever you need them. No more last-minute grocery store runs! Plus, it’s a fantastic way to extend your growing season, especially if you live in an area with harsh winters. I’ve found that growing potatoes indoors is also a brilliant educational activity for kids, teaching them about plant life cycles and where their food comes from.
This DIY guide is packed with simple, step-by-step instructions and clever hacks to ensure your indoor potato garden thrives. We’ll cover everything from choosing the right potato variety to providing optimal lighting and watering. Get ready to roll up your sleeves and embark on this exciting horticultural adventure – you’ll be amazed at what you can grow!
Growing Potatoes Indoors: A Spud-tacular DIY Guide!
Okay, so you want to grow potatoes indoors? Awesome! I’m here to tell you it’s totally doable, and honestly, it’s a really rewarding experience. Imagine harvesting your own fresh potatoes right from your living room! This guide will walk you through every step, from choosing the right potatoes to dealing with potential pests. Let’s get digging (pun intended!).
Choosing Your Seed Potatoes
First things first, you can’t just grab any old potato from the grocery store. Those are often treated to prevent sprouting, which is exactly what we *want* them to do! You need seed potatoes.
* What are Seed Potatoes? Seed potatoes are specifically grown for planting. They’re certified disease-free and are ready to sprout. You can find them at garden centers, nurseries, or online retailers.
* Variety is the Spice of Life (and Potatoes!): Consider what kind of potatoes you like to eat. Red potatoes, Yukon Golds, Russets – the choice is yours! Different varieties have different growing times and yields, so do a little research. I personally love Yukon Golds for their creamy texture.
* Size Matters (Sort Of): You don’t need huge seed potatoes. Smaller ones, about the size of a golf ball or slightly larger, are perfect. You can even cut larger seed potatoes into pieces, making sure each piece has at least one “eye” (that little bud where a sprout will emerge).
Sprouting Your Seed Potatoes (Chitting)
This is a crucial step to give your potatoes a head start. It’s called “chitting,” and it basically encourages those little eyes to sprout before you plant them.
* Why Chit? Chitting results in faster growth, earlier harvests, and often, a bigger yield. Plus, it’s fun to watch those little sprouts emerge!
* The Chitting Process:
1. Find a Bright, Cool Spot: A windowsill or a well-lit room with a temperature around 60-70°F (15-21°C) is ideal. Avoid direct sunlight, which can dry them out.
2. Egg Cartons or Trays: Place your seed potatoes in egg cartons or trays, with the end containing the most “eyes” facing upwards.
3. Patience is a Virtue: It usually takes a few weeks for the sprouts to appear. Mist them lightly with water occasionally to prevent them from drying out.
4. Turning for Even Growth: Rotate the potatoes every few days to ensure even sprout growth.
Preparing Your Growing Container and Soil
Now, let’s get our hands dirty! Choosing the right container and soil is essential for healthy potato growth.
* Container Size: Potatoes need room to grow, both above and below the soil. A 10-gallon container is a good starting point for one or two seed potatoes. The bigger, the better, really. Think large buckets, trash cans (with drainage holes!), or even grow bags.
* Drainage is Key: Make sure your container has plenty of drainage holes. Potatoes hate sitting in soggy soil, which can lead to rot.
* Soil Mix: Use a well-draining potting mix. A mix of equal parts potting soil, compost, and perlite or vermiculite works wonders. The compost provides nutrients, while the perlite or vermiculite improves drainage and aeration. I like to add a little bit of bone meal to the mix as well, for extra phosphorus.
* Layering Technique: Don’t fill the container completely with soil at the beginning. We’ll be adding more soil as the potato plants grow. This is called “hilling,” and it encourages more potato production.
Planting Your Sprouted Seed Potatoes
Alright, the moment we’ve been waiting for! Time to get those potatoes in the ground (or, well, in the container).
1. Fill the Container: Fill your container about one-third full with your prepared soil mix.
2. Planting Depth: Place your sprouted seed potatoes on top of the soil, with the sprouts facing upwards. Space them about 8-12 inches apart if you’re planting more than one in the same container.
3. Cover with Soil: Cover the seed potatoes with about 4-6 inches of soil.
4. Water Gently: Water the soil gently until it’s moist but not soggy.
5. Location, Location, Location: Place your container in a sunny location. Potatoes need at least 6-8 hours of sunlight per day. If you don’t have enough natural light, you might need to supplement with grow lights.
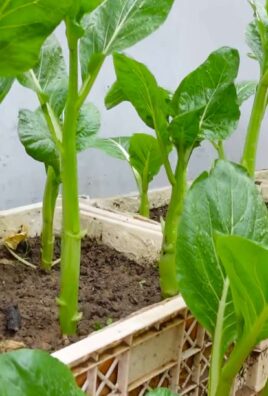
Caring for Your Indoor Potato Plants
Now comes the ongoing care. Potatoes are relatively easy to grow, but they do need some attention.
* Watering: Water regularly, keeping the soil consistently moist but not waterlogged. Check the soil moisture by sticking your finger about an inch deep. If it feels dry, it’s time to water.
* Fertilizing: Feed your potato plants every few weeks with a balanced liquid fertilizer. Follow the instructions on the fertilizer package. I like to use a fertilizer that’s specifically formulated for vegetables.
* Hilling: As the potato plants grow, add more soil to the container, covering the stems. This encourages the plants to produce more potatoes along the buried stems. Continue hilling until the container is almost full.
1. When to Hill: When the stems are about 6-8 inches tall, add a few inches of soil.
2. How to Hill: Gently mound the soil around the stems, leaving a few inches of the top leaves exposed.
3. Repeat: Repeat this process every few weeks until the container is almost full.
* Pest Control: Keep an eye out for pests like aphids, spider mites, and potato beetles. If you spot any pests, treat them with insecticidal soap or neem oil. I prefer to use organic pest control methods whenever possible.
* Supporting the Plants: As the plants grow taller, they might need some support. You can use stakes or a tomato cage to keep them from falling over.
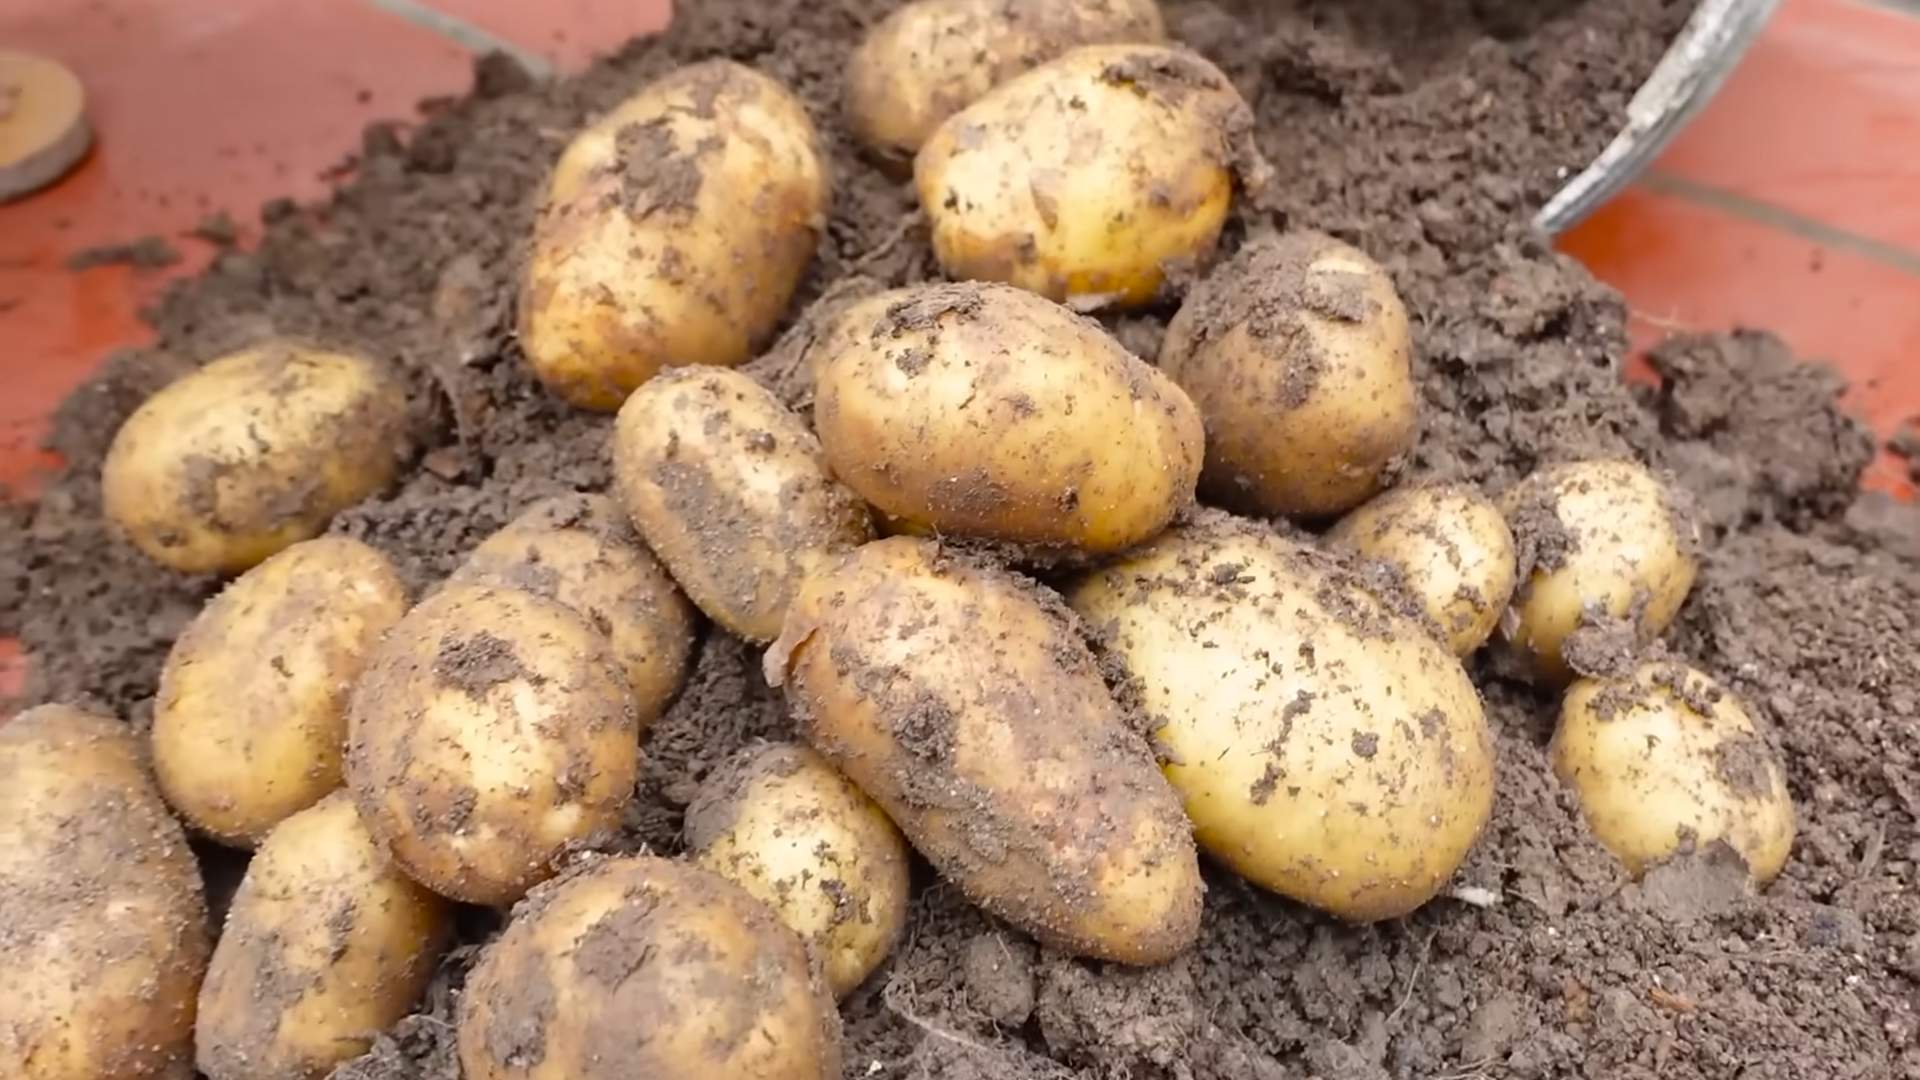
Harvesting Your Indoor Potatoes
The most exciting part! Harvesting your own homegrown potatoes!
* When to Harvest: Potatoes are usually ready to harvest about 70-90 days after planting, depending on the variety. You’ll know they’re ready when the plants start to flower and the foliage begins to yellow and die back.
* The “Feel” Test: You can also gently dig around in the soil to check the size of the potatoes. If they’re big enough for your liking, it’s time to harvest.
* Harvesting Methods:
1. The Gentle Approach: Carefully dig around the base of the plant with your hands or a small trowel, being careful not to damage the potatoes.
2. The Dump and Sort: You can also dump the entire contents of the container onto a tarp and sort through the soil to find the potatoes. This is a bit messier, but it’s a good way to make sure you get every last potato.
* Curing Your Potatoes: After harvesting, cure your potatoes for a week or two in a cool, dark, and well-ventilated place. This helps to toughen the skins and prevent them from rotting.
* Storage: Store your cured potatoes in a cool, dark, and dry place. They should last for several months.
Troubleshooting Common Problems
Even with the best care, you might encounter some problems along the way. Here are a few common issues and how to deal with them:
* Leggy Plants: If your plants are tall and spindly, they’re probably not getting enough light. Move them to a sunnier location or supplement with grow lights.
* Yellowing Leaves: Yellowing leaves can be a sign of overwatering, underwatering, or nutrient deficiency. Check the soil moisture and adjust your watering schedule accordingly. Fertilize regularly with a balanced fertilizer.
* Potato Blight: Potato blight is a fungal disease that can cause brown spots on the leaves and tubers. Prevent blight by providing good air circulation and avoiding overhead watering. If you spot blight, remove the affected leaves and treat the plants with a fungicide.
* Pests: As mentioned earlier, keep an eye out for pests and treat them promptly with insecticidal soap or neem oil.
Tips for Success
Here are a few extra tips to help you grow the best indoor potatoes possible:
* Rotate Your Crops: If you’re growing potatoes in the same container year after year, rotate your crops to prevent soilborne diseases.
* Use Organic Soil Amendments: Add organic soil amendments like compost, worm castings, and bone meal to improve soil fertility and drainage.
* Don’t Overwater: Overwatering is one of the most common mistakes people make when growing potatoes indoors. Make sure the soil is well

Conclusion
So, there you have it! Growing potatoes indoors isn’t just a quirky gardening experiment; it’s a surprisingly rewarding way to bring a touch of the outdoors inside, even if you’re short on space or live in a climate that isn’t exactly potato-friendly year-round. We’ve walked through the process, from selecting the right seed potatoes to harvesting your very own homegrown spuds. But why should you actually *do* it?
The answer is multifaceted. First and foremost, it’s incredibly satisfying. There’s something deeply fulfilling about nurturing a plant from a humble seed potato to a bountiful harvest. Witnessing the entire life cycle unfold before your eyes, from the first sprouts emerging from the soil to the eventual flowering and the swelling of the potatoes beneath, is a truly captivating experience. It connects you to the natural world in a way that simply buying potatoes from the grocery store never could.
Beyond the sheer enjoyment, growing potatoes indoors offers practical benefits. You have complete control over the growing environment, minimizing the risk of pests and diseases that can plague outdoor gardens. You can also extend the growing season, enjoying fresh, homegrown potatoes even in the dead of winter. And let’s not forget the taste! Homegrown potatoes, harvested at their peak ripeness, boast a flavor that is far superior to anything you’ll find in a supermarket. They’re sweeter, earthier, and simply more delicious.
But the real magic lies in the versatility of this DIY project. Feel free to experiment with different potato varieties. Russets are great for baking, Yukon Golds are perfect for mashed potatoes, and red potatoes are ideal for boiling or roasting. You can also try different growing containers. While we’ve focused on using large pots or grow bags, you could also repurpose old buckets or even create a vertical potato tower for a truly unique and space-saving display.
Consider adding companion plants to your potato containers. Marigolds can help deter pests, while basil can improve the flavor of your potatoes. You can also experiment with different fertilizers to see which ones produce the best results.
Don’t be afraid to get creative and personalize your indoor potato garden!
And remember, the key to success is patience and observation. Pay close attention to your plants, water them regularly, and provide them with plenty of sunlight. With a little care and attention, you’ll be rewarded with a bountiful harvest of delicious, homegrown potatoes.
We wholeheartedly encourage you to give this DIY trick a try. It’s a fun, educational, and rewarding experience that will bring a touch of the garden into your home. And once you’ve harvested your first crop of homegrown potatoes, we’d love to hear about your experience! Share your photos, tips, and tricks in the comments below. Let’s build a community of indoor potato growers and inspire others to discover the joy of growing their own food. So, grab some seed potatoes, get your hands dirty, and start growing! You might just surprise yourself with what you can achieve. This method of growing potatoes indoors is a game changer for urban gardeners.
Frequently Asked Questions (FAQ)
What kind of potatoes should I use for growing indoors?
The best potatoes for indoor growing are “seed potatoes,” which are potatoes specifically grown to be planted. You can find these at garden centers or online retailers. Choose varieties that mature relatively quickly, such as Yukon Gold, Red Pontiac, or fingerling potatoes. Avoid using potatoes from the grocery store, as they may have been treated to prevent sprouting. If you absolutely must use grocery store potatoes, look for organic varieties that haven’t been treated. Make sure they have “eyes” (small buds) that are starting to sprout.
How much sunlight do indoor potatoes need?
Potatoes need at least 6-8 hours of direct sunlight per day to thrive. If you don’t have a sunny window, you’ll need to supplement with grow lights. LED grow lights are a great option because they are energy-efficient and don’t produce excessive heat. Position the grow lights a few inches above the plants and adjust them as the plants grow taller. Rotate the plants regularly to ensure that all sides receive adequate light.
What kind of soil should I use?
Use a well-draining potting mix that is rich in organic matter. A mix of equal parts potting soil, compost, and perlite or vermiculite is ideal. Avoid using garden soil, as it can be too heavy and may contain pests or diseases. The soil should be slightly acidic, with a pH of around 6.0 to 6.5.
How often should I water my indoor potato plants?
Water your potato plants regularly, keeping the soil consistently moist but not waterlogged. Check the soil moisture by sticking your finger about an inch into the soil. If it feels dry, it’s time to water. Avoid overwatering, as this can lead to root rot. Ensure that your container has drainage holes to allow excess water to escape.
How do I “hill” my potato plants indoors?
“Hilling” is the process of adding more soil to the container as the potato plants grow. This encourages the plants to produce more potatoes along the stems. As the plants grow taller, add more soil to the container, burying the lower part of the stems. Repeat this process several times throughout the growing season.
When are my indoor potatoes ready to harvest?
Potatoes are typically ready to harvest about 70-90 days after planting. You’ll know they’re ready when the plants start to flower and the foliage begins to yellow and die back. You can harvest “new potatoes” (small, immature potatoes) earlier by carefully digging around the base of the plant. For larger, more mature potatoes, wait until the foliage has completely died back before harvesting.
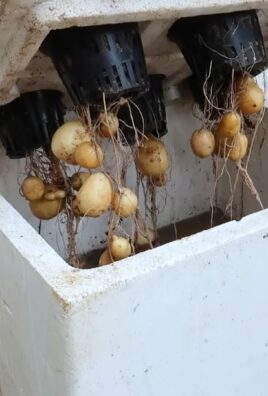
How do I harvest my indoor potatoes?
To harvest your potatoes, gently tip the container over and carefully remove the soil. You should find a cluster of potatoes growing around the roots. Brush off any excess soil and store the potatoes in a cool, dark, and dry place.
What are some common problems with growing potatoes indoors?
Some common problems with growing potatoes indoors include pests, diseases, and nutrient deficiencies. Pests such as aphids and spider mites can be controlled with insecticidal soap or neem oil. Diseases such as blight and root rot can be prevented by using well-draining soil and avoiding overwatering. Nutrient deficiencies can be addressed by fertilizing the plants with a balanced fertilizer.
Can I grow potatoes indoors in a small space?
Yes, you can grow potatoes indoors even in a small space. Choose a compact potato variety and use a smaller container. Vertical potato towers are also a great option for maximizing space.
Can I reuse the soil from my potato container?
It’s generally not recommended to reuse the soil from your potato container, as it may contain pests or diseases. However, if you choose to reuse the soil, be sure to sterilize it first by baking it in the oven at 200 degrees Fahrenheit for 30 minutes. You should also amend the soil with fresh compost and fertilizer before replanting.
What kind of fertilizer should I use for indoor potatoes?
Use a balanced fertilizer with an NPK ratio of 10-10-10 or 14-14-14. Apply the fertilizer according to the package directions. You can also supplement with organic fertilizers such as compost tea or fish emulsion. Avoid over-fertilizing, as this can lead to excessive foliage growth and fewer potatoes.
My potato plants are growing tall and leggy. What should I do?
Tall and leggy potato plants are usually a sign of insufficient light. Move your plants to a sunnier location or supplement with grow lights. You can also prune the plants to encourage bushier growth.
Can I grow potatoes indoors year-round?
Yes, you can grow potatoes indoors year-round, provided you have adequate light and temperature control. You may need to adjust your watering and fertilizing schedule depending on the season.
How do I store my harvested potatoes?
Store your harvested potatoes in a cool, dark, and dry place, such as a basement or pantry. Avoid storing them in the refrigerator, as this can cause them to develop a sweet taste. Potatoes should last for several months if stored properly.

Leave a Comment