
Growing Potatoes No Soil? Sounds like magic, right? Well, maybe not magic, but definitely a clever gardening hack that will have you harvesting spuds in no time, without ever getting your hands dirty! For centuries, humans have toiled in the earth, coaxing life from the soil. From the ancient Incas, who first cultivated potatoes high in the Andes, to modern-day farmers, the connection between soil and sustenance has been undeniable. But what if I told you there’s a way to bypass the traditional digging and weeding, and still enjoy the satisfaction of growing your own potatoes?
That’s where this DIY guide comes in. In today’s busy world, who has the time (or the back strength!) for extensive gardening? This method of growing potatoes no soil is perfect for apartment dwellers, those with limited mobility, or anyone simply looking for a fun and easy gardening project. Imagine the look on your friends’ faces when you tell them you grew potatoes in a bag, a bucket, or even a tire stack! Not only is it a conversation starter, but it’s also a fantastic way to reduce your carbon footprint by growing your own food. So, ditch the dirt and let’s dive into the wonderful world of soilless potato growing!
Growing Potatoes in a Bag: A Soil-Free Adventure!
Hey there, fellow gardening enthusiasts! Ever dreamt of harvesting a mountain of potatoes without all the digging and backache? Well, get ready to ditch the traditional garden bed because today, I’m going to walk you through a super fun and surprisingly easy method: growing potatoes in a bag, completely soil-free! This method is perfect for small spaces, balconies, or anyone who wants to try something a little different. Trust me, it’s incredibly rewarding to watch those spuds multiply right before your eyes.
What You’ll Need
Before we dive in, let’s gather our supplies. Don’t worry, you probably already have most of these lying around:
* A large, sturdy bag: Think burlap sacks, heavy-duty garbage bags (the black ones work great!), or even those reusable shopping bags. The bigger, the better – aim for at least 20 gallons. The bag needs to be able to hold a good amount of growing medium and the developing potatoes.
* Seed potatoes: These are potatoes specifically grown for planting. You can find them at your local garden center or online. Choose a variety you love to eat! I personally love Yukon Gold for their buttery flavor.
* Growing medium: This is where the “no soil” part comes in! We’ll be using a mix of coco coir, peat moss, and perlite. This combination provides excellent drainage and aeration, which potatoes love. You can also use a soilless potting mix specifically designed for containers.
* Fertilizer: Potatoes are heavy feeders, so we’ll need to provide them with some extra nutrients. A slow-release fertilizer formulated for vegetables is ideal. Alternatively, you can use a liquid fertilizer every few weeks.
* Watering can or hose: Essential for keeping your potatoes hydrated.
* Scissors or a knife: For cutting drainage holes in the bag.
* A sunny spot: Potatoes need at least 6-8 hours of sunlight per day.
* Optional: A tray or saucer to place under the bag to catch excess water.
Preparing Your Seed Potatoes
This step is crucial for getting a head start on your potato crop.
1. Chitting (Sprouting) Your Potatoes: A few weeks before you plan to plant, place your seed potatoes in a cool, bright location (but not direct sunlight). You’ll notice small “eyes” or sprouts starting to emerge. This process, called chitting, encourages early growth and stronger plants. You can place them in egg cartons or a shallow box.
2. Cutting Large Seed Potatoes: If your seed potatoes are large (bigger than an egg), you can cut them into smaller pieces, ensuring each piece has at least 2-3 eyes. Let the cut pieces dry for a day or two to callous over. This helps prevent rotting. I usually cut mine into pieces about the size of a golf ball.
Setting Up Your Potato Bag
Now for the fun part – building our potato paradise!
1. Prepare the Bag: If you’re using a garbage bag, fold down the top edges a few times to create a sturdy rim. This will help the bag maintain its shape as you add the growing medium.
2. Create Drainage: Using your scissors or knife, poke several drainage holes in the bottom of the bag. This is essential to prevent waterlogging, which can rot your potatoes. I usually make about 6-8 holes.
3. Mix Your Growing Medium: In a large container or wheelbarrow, combine your coco coir, peat moss, and perlite in a 1:1:1 ratio. Moisten the mixture thoroughly before adding it to the bag. It should be damp, but not soggy.
4. Add the First Layer: Pour about 4-6 inches of the growing medium into the bottom of the bag. This will be the foundation for your potato plants.
5. Plant Your Seed Potatoes: Place your seed potato pieces (or whole seed potatoes if they’re small) on top of the growing medium, with the eyes facing upwards. Space them about 8-10 inches apart. If you’re using a very large bag, you can plant more potatoes.
6. Cover the Potatoes: Cover the seed potatoes with another 4-6 inches of the growing medium. Gently pat it down.
7. Water Thoroughly: Water the bag thoroughly until water drains out of the drainage holes. This will help settle the growing medium and ensure the potatoes have access to moisture.
Caring for Your Potato Plants
Now that your potatoes are planted, it’s time to nurture them and watch them grow!
1. Sunlight: Place your bag in a location that receives at least 6-8 hours of sunlight per day. Potatoes thrive in sunny conditions.
2. Watering: Keep the growing medium consistently moist, but not waterlogged. Water when the top inch or two feels dry to the touch. The frequency of watering will depend on the weather and the type of bag you’re using. Burlap bags tend to dry out faster than plastic bags.
3. Fertilizing: If you’re using a slow-release fertilizer, mix it into the growing medium according to the package directions. If you’re using a liquid fertilizer, apply it every 2-3 weeks, following the instructions on the label. I like to use a balanced fertilizer with an NPK ratio of around 10-10-10.
4. Hilling: This is the key to maximizing your potato harvest! As the potato plants grow, they will develop stems and leaves. When the stems reach about 6-8 inches tall, add more growing medium to the bag, covering the stems up to the bottom set of leaves. This encourages the plants to produce more potatoes along the buried stems. Repeat this process every few weeks until the bag is almost full. This is why it’s important to start with a large bag!
5. Pest Control: Keep an eye out for common potato pests like aphids, potato beetles, and flea beetles. If you spot any pests, you can try hand-picking them off the plants or using an organic insecticide like neem oil.
6. Monitoring: Regularly check the moisture level of the growing medium and adjust your watering schedule as needed. Also, monitor the plants for any signs of disease or nutrient deficiencies. Yellowing leaves can indicate a lack of nutrients, while brown spots can be a sign of disease.
Harvesting Your Potatoes
The moment we’ve all been waiting for!
1. When to Harvest: You can start harvesting “new potatoes” (small, tender potatoes) about 2-3 weeks after the plants flower. To harvest new potatoes, carefully reach into the bag and pull out a few potatoes from the top layer. Be careful not to disturb the rest of the plants. For a full harvest of mature potatoes, wait until the plants start to die back and the foliage turns yellow or brown. This usually takes about 80-100 days from planting.
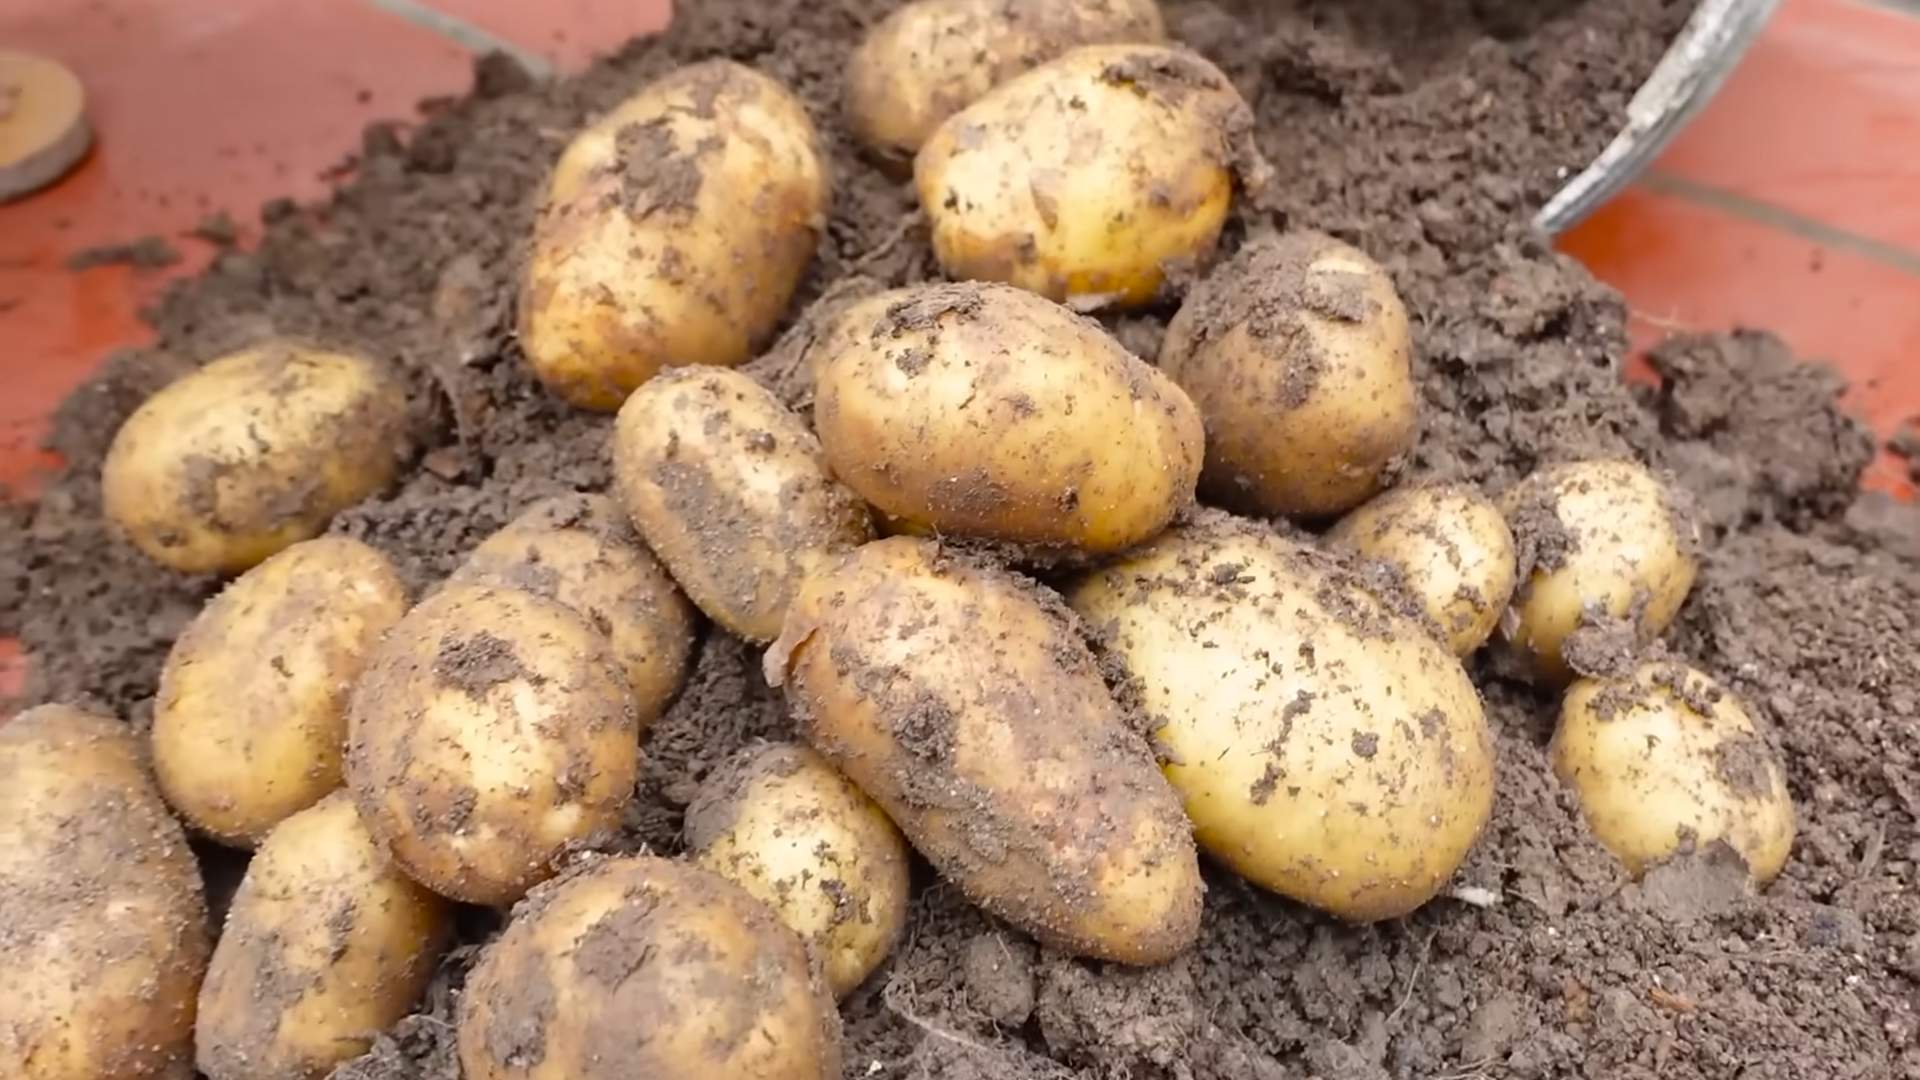
2. Harvesting: Once the plants have died back, it’s time to empty the bag and collect your bounty! Simply tip the bag over and gently sift through the growing medium to find the potatoes. You’ll be amazed at how many potatoes you can grow in a single bag!
3. Curing: After harvesting, cure your potatoes by spreading them out in a cool, dark, and well-ventilated place for about a week. This will help them develop a thicker skin and improve their storage life.
4. Storing: Store your cured potatoes in a cool, dark, and dry place, such as a root cellar or a cool pantry. Avoid storing them in the refrigerator, as this can cause them to develop a sweet taste.
Troubleshooting Tips
* Yellowing Leaves: This could indicate a nutrient deficiency. Try fertilizing with a balanced fertilizer.
* Wilting Plants: This could be due to underwatering or overwatering. Check the moisture level of the growing medium and adjust your watering schedule accordingly.
* Rotting Potatoes: This is usually caused by overwatering or poor drainage. Make sure your bag has adequate drainage holes and avoid overwatering.
* Small Potatoes: This could be due to a lack of sunlight or nutrients. Make sure your plants are getting enough sunlight and fertilize regularly.
Why I Love This Method
Growing potatoes in a bag is not only fun and easy, but it also offers several advantages:
* Space-saving: Perfect for small gardens, balconies, or patios.
* Easy harvesting: No more digging! Simply tip the bag over to harvest your potatoes.
* Control over soil conditions: You can create the perfect growing environment for your potatoes by using a soilless mix.
* Reduced risk of soilborne diseases: Growing in a bag eliminates the risk of soilborne diseases that can affect potatoes.
* Fun and educational: A great project for kids and adults alike!
So, there you have it! Everything you need to know to

Conclusion
So, there you have it! Growing potatoes without soil might seem like a gardening paradox, but it’s a surprisingly simple and rewarding experience. This method, often referred to as container gardening or potato towers, offers a fantastic alternative for those with limited space, poor soil conditions, or simply a desire to try something new and exciting in their garden.
Why is this DIY trick a must-try? First and foremost, it’s incredibly space-efficient. You can grow a substantial amount of potatoes in a relatively small area, making it perfect for apartment balconies, patios, or even small backyards. Secondly, it simplifies the harvesting process. No more digging through mounds of dirt, hoping to unearth hidden treasures. With this method, you can easily access your potatoes as they mature, ensuring a continuous supply of fresh produce. Thirdly, it offers better control over the growing environment. You can easily monitor moisture levels, nutrient availability, and pest infestations, leading to healthier and more productive plants.
But the benefits don’t stop there. Growing potatoes without soil is also a fantastic educational opportunity, especially for children. It allows them to witness the entire growth cycle of a potato, from sprouting to harvesting, in a clear and engaging way. It fosters a sense of connection to nature and encourages healthy eating habits.
Ready to take your potato growing to the next level? Consider these variations:
* Vertical Potato Towers: Use stacked tires, wooden pallets, or even repurposed plastic containers to create a vertical growing structure. This maximizes space and adds a visually appealing element to your garden.
* Hydroponic Potatoes: Explore the world of hydroponics by growing your potatoes in a nutrient-rich water solution. This method requires more specialized equipment but can result in faster growth and higher yields.
* Different Potato Varieties: Experiment with different potato varieties to discover your favorites. From Yukon Gold to Russet Burbank, each variety offers a unique flavor and texture.
* Companion Planting: Plant companion plants like marigolds or basil around your potato containers to deter pests and attract beneficial insects.
Ultimately, the key to success with this method is consistent watering, proper fertilization, and careful monitoring of your plants. Don’t be afraid to experiment and adapt the technique to suit your specific environment and preferences.
We wholeheartedly encourage you to try this DIY trick and experience the joy of harvesting your own homegrown potatoes. It’s a fun, educational, and rewarding project that will transform your gardening experience. And most importantly, don’t forget to share your experiences with us! We’d love to hear about your successes, challenges, and any tips you’ve discovered along the way. Share your photos and stories on social media using #SoilFreePotatoes and let’s inspire others to embrace this innovative gardening technique. Happy growing!
Frequently Asked Questions (FAQ)
What exactly does “growing potatoes without soil” mean?
It means you’re using an alternative growing medium instead of traditional garden soil. This could be a mix of compost, peat moss, coco coir, or even just straw. The key is to provide the potatoes with the necessary nutrients and moisture without the constraints of heavy soil. The most common method involves layering the growing medium in a container as the potato plant grows, gradually burying the stem and encouraging more potato formation along the buried portion.
What kind of container is best for growing potatoes without soil?
The ideal container should be large enough to accommodate the growing potato plant and the developing tubers. A container that is at least 2 feet in diameter and 2-3 feet deep is generally recommended. Good options include:
* Large plastic bins: These are readily available and relatively inexpensive. Make sure to drill drainage holes in the bottom.
* Grow bags: These fabric bags are breathable and allow for good drainage.
* Wooden crates or barrels: These add a rustic touch to your garden.
* Stacked tires: An unconventional but effective option, especially for creating a potato tower.
* Purpose-built potato planters: These are designed specifically for growing potatoes in containers and often have a harvest window for easy access.
What is the best growing medium to use?
A well-draining and nutrient-rich growing medium is crucial. A good mix might include:
* Compost: Provides essential nutrients and improves drainage.
* Peat moss or coco coir: Helps retain moisture.
* Perlite or vermiculite: Improves aeration and drainage.
* Well-rotted manure: Adds extra nutrients.
A common recipe is equal parts compost, peat moss (or coco coir), and perlite. You can also purchase pre-made potting mixes specifically designed for vegetables.
How often should I water my potatoes grown without soil?
Potatoes grown in containers tend to dry out faster than those grown in the ground. Water deeply whenever the top inch of the growing medium feels dry to the touch. Avoid overwatering, as this can lead to root rot. The frequency of watering will depend on the weather conditions, the size of your container, and the type of growing medium you’re using. A good rule of thumb is to check the moisture level daily, especially during hot and dry periods.
What kind of fertilizer do potatoes need when grown without soil?
Potatoes are heavy feeders and require a steady supply of nutrients. Use a balanced fertilizer with an NPK ratio of around 10-10-10 or 14-14-14. You can use a slow-release granular fertilizer at planting time or a liquid fertilizer every 2-3 weeks. Follow the instructions on the fertilizer packaging carefully to avoid over-fertilizing, which can damage the plants. Organic options like compost tea or fish emulsion can also be used.
How do I know when to harvest my potatoes?
The timing of the harvest depends on the potato variety and your personal preference. Generally, you can start harvesting “new potatoes” (small, tender potatoes) a few weeks after the plants flower. To harvest new potatoes, carefully reach into the container and remove a few tubers without disturbing the rest of the plant. For mature potatoes, wait until the foliage starts to die back and turn yellow or brown. This indicates that the potatoes have reached their full size and are ready to be harvested. Simply tip the container over and carefully collect the potatoes.
What are some common pests and diseases that affect potatoes grown without soil?
While growing potatoes without soil can reduce the risk of some soilborne diseases, they are still susceptible to certain pests and diseases. Common problems include:
* Potato beetles: Handpick them off the plants or use an organic insecticide like neem oil.
* Aphids: Spray them with insecticidal soap or a strong stream of water.
* Fungal diseases: Ensure good air circulation and avoid overwatering. Use a fungicide if necessary.
* Blight: This is a serious disease that can quickly destroy potato plants. Choose blight-resistant varieties and monitor your plants closely.
Can I reuse the growing medium from my potato container?
Yes, you can reuse the growing medium, but it’s important to amend it with fresh compost and fertilizer before planting again. This will replenish the nutrients that were used by the previous crop. You may also want to sterilize the growing medium to kill any potential pests or diseases. This can be done by baking it in the oven at 180°F (82°C) for 30 minutes or by solarizing it in a black plastic bag for several weeks.
Is growing potatoes without soil organic?
It can be! Whether or not your soil-free potato growing is organic depends on the materials you use. If you use organic compost, organic fertilizers, and avoid synthetic pesticides, then your potatoes will be organically grown. Be sure to check the labels of any products you use to ensure they are certified organic.
What if my potato plants don’t flower?
Not all potato varieties flower, and even those that do may not flower consistently. The absence of flowers doesn’t necessarily mean that your plants aren’t producing potatoes. Focus on providing the plants with adequate sunlight, water, and nutrients, and you should still be able to harvest a good crop. You can gently feel around in the growing medium to check for developing tubers.
Leave a Comment