
Growing Rainbow Chard in Pots: Unleash a burst of color and nutrition right on your patio! Imagine stepping outside and harvesting vibrant, jewel-toned leaves for your salads, stir-fries, or even just to admire. This isn’t just about growing vegetables; it’s about creating a living piece of art.
For centuries, leafy greens like chard have been a staple in Mediterranean diets, prized for their health benefits and versatility. While traditionally grown in sprawling gardens, modern life often calls for more compact solutions. That’s where the magic of container gardening comes in! I’ve found that growing Rainbow Chard in pots is surprisingly easy and incredibly rewarding, even if you only have a small balcony or sunny windowsill.
Why should you try this DIY project? Well, for starters, store-bought chard can be expensive and often lacks the freshness of homegrown produce. Plus, there’s something deeply satisfying about nurturing a plant from seed to table. But beyond the practical benefits, growing your own Rainbow Chard is a fantastic way to connect with nature, reduce your carbon footprint, and add a splash of beauty to your everyday life. So, let’s dive in and discover the secrets to successfully cultivating this vibrant vegetable in containers!

Growing Vibrant Rainbow Chard in Pots: A DIY Guide
Hey there, fellow gardening enthusiasts! I’m so excited to share my experience with growing rainbow chard in pots. It’s not only incredibly rewarding to harvest your own fresh greens, but rainbow chard adds a splash of color to your patio or balcony. Trust me, even if you’re a beginner, you can totally nail this!
Choosing the Right Pot and Soil
Before we get our hands dirty, let’s talk about the essentials. The right pot and soil are crucial for healthy chard.
* Pot Size: Aim for a pot that’s at least 12 inches in diameter and 12 inches deep. This gives the chard roots plenty of room to grow. Remember, chard can get pretty big!
* Drainage: Make sure your pot has drainage holes. Chard doesn’t like soggy feet, so good drainage is a must.
* Soil: Use a high-quality potting mix. Avoid using garden soil directly in pots, as it can compact and hinder drainage. I personally love using a mix that’s specifically formulated for vegetables. It usually contains a good balance of nutrients and organic matter.
Sowing the Seeds or Transplanting Seedlings
You have two options here: starting from seeds or buying seedlings. Both work great!
* Starting from Seeds: This is the more economical option, and it’s super satisfying to watch your plants grow from tiny seeds.
* Transplanting Seedlings: If you’re short on time or want a head start, seedlings are the way to go.
Step-by-Step Instructions: From Seed to Harvest
Alright, let’s get down to the nitty-gritty!
Sowing Seeds (If Starting from Seed)
1. Prepare the Pot: Fill your pot with potting mix, leaving about an inch of space at the top. Gently pat down the soil.
2. Sow the Seeds: Sprinkle the chard seeds evenly over the surface of the soil. You can sow them quite densely, as you’ll thin them out later.
3. Cover the Seeds: Lightly cover the seeds with about ¼ inch of soil.
4. Water Gently: Water the soil gently using a watering can with a rose attachment or a spray bottle. You want to moisten the soil without disturbing the seeds.
5. Keep it Moist: Keep the soil consistently moist until the seeds germinate. You can cover the pot with plastic wrap to help retain moisture, but be sure to remove it once the seedlings emerge.
6. Find a Sunny Spot: Place the pot in a sunny location. Chard needs at least 6 hours of sunlight per day.
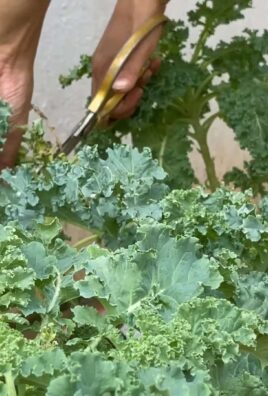
7. Thin the Seedlings: Once the seedlings have a few true leaves (the leaves that look like miniature chard leaves), thin them out, leaving the strongest seedlings about 4-6 inches apart. Don’t just pull them out; gently snip them off at the base with scissors to avoid disturbing the roots of the remaining seedlings.
Transplanting Seedlings (If Using Seedlings)
1. Prepare the Pot: Fill your pot with potting mix, leaving about an inch of space at the top.
2. Make Holes: Dig holes in the soil that are large enough to accommodate the root balls of the seedlings. Space the holes about 4-6 inches apart.
3. Remove Seedlings from Trays: Gently remove the seedlings from their trays. If the roots are tightly bound, gently loosen them with your fingers.
4. Plant the Seedlings: Place the seedlings in the holes and gently backfill with soil. Make sure the top of the root ball is level with the surrounding soil.
5. Water Thoroughly: Water the seedlings thoroughly after planting.
6. Find a Sunny Spot: Place the pot in a sunny location.
Caring for Your Rainbow Chard
Now that your chard is planted, it’s time to give it some TLC!
* Watering: Water your chard regularly, especially during hot, dry weather. The soil should be consistently moist, but not waterlogged. Check the soil moisture by sticking your finger about an inch into the soil. If it feels dry, it’s time to water.
* Fertilizing: Chard is a heavy feeder, so it needs regular fertilization. I like to use a liquid fertilizer diluted to half strength every two weeks. You can also use a slow-release fertilizer at planting time.
* Sunlight: As I mentioned before, chard needs at least 6 hours of sunlight per day. If you live in a very hot climate, you might want to provide some afternoon shade to prevent the leaves from scorching.
* Weeding: Keep your pot free of weeds. Weeds compete with the chard for nutrients and water.
* Pest Control: Chard is relatively pest-resistant, but it can be susceptible to aphids, slugs, and snails. Check your plants regularly for pests and take action if you see any. You can usually control aphids with a strong spray of water. For slugs and snails, you can use beer traps or handpick them off the plants.
* Mulching: Add a layer of mulch around the base of the plants to help retain moisture, suppress weeds, and regulate soil temperature. Straw, wood chips, or shredded leaves work well.
Harvesting Your Rainbow Chard
This is the best part! You can start harvesting your chard leaves when they are about 6 inches long.
* Harvesting Technique: Harvest the outer leaves first, leaving the inner leaves to continue growing. This is called “cut and come again” harvesting, and it allows you to harvest chard continuously for several months.
* How to Harvest: Use a sharp knife or scissors to cut the leaves off at the base of the plant.
* When to Harvest: Harvest in the morning, when the leaves are crisp and fresh.
* Storage: Store harvested chard leaves in the refrigerator for up to a week.
Troubleshooting
Even with the best care, you might encounter some problems. Here are a few common issues and how to deal with them:
* Yellowing Leaves: This could be a sign of overwatering, underwatering, or nutrient deficiency. Check the soil moisture and adjust your watering accordingly. If the soil is dry, water more frequently. If the soil is soggy, water less frequently. You can also try fertilizing with a balanced fertilizer.
* Holes in Leaves: This is usually caused by slugs or snails. Check your plants for these pests and take action to control them.
* Stunted Growth: This could be caused by a number of factors, including poor soil, lack of sunlight, or pest infestation. Make sure your chard is planted in a high-quality potting mix, receiving at least 6 hours of sunlight per day, and free of pests.
* Bolting: Bolting is when the plant starts to produce flowers and seeds. This usually happens when the weather gets hot. Once a plant bolts, the leaves become bitter. To prevent bolting, try to keep your chard well-watered and shaded during hot weather. You can also choose bolt-resistant varieties.
Choosing Rainbow Chard Varieties
There are several beautiful rainbow chard varieties to choose from, each with its own unique color combination. Some popular options include:
* Bright Lights: This is a classic rainbow chard variety with stems in a mix of red, yellow, orange, pink, and white.
* Five Color Silverbeet: As the name suggests, this variety features stems in five different colors: red, pink, yellow, orange, and white.
* Fordhook Giant: While not technically a “rainbow” chard, Fordhook Giant is a reliable and productive variety with dark green leaves and white stems. It’s a great option if you’re looking for a more traditional chard.
Enjoying Your Harvest
Now that you’ve harvested your beautiful rainbow chard, it’s time to enjoy it! Chard is a versatile vegetable that can be used in a variety of dishes. Here are a few ideas:
* Sautéed Chard: Sauté chard with garlic and olive oil for a simple and delicious side dish.
* Chard in Soups and Stews: Add chopped chard to soups and stews for extra nutrients and flavor.
* Chard in Salads: Use young, tender chard leaves in salads.
* Chard in Frittatas and Quiches: Add chopped chard to frittatas and quiches.
* Chard in Smoothies: Blend chard leaves into smoothies for a healthy boost.
Growing rainbow chard in pots is a fun and rewarding experience. With a little care and attention, you can enjoy a continuous harvest of fresh, colorful greens right on your patio or balcony. Happy gardening!

Conclusion
So, there you have it! Growing rainbow chard in pots isn’t just a gardening project; it’s an invitation to bring vibrant color and nutritious greens right to your doorstep. We’ve walked through the simple steps, from selecting the right pot and soil to nurturing your chard plants and harvesting their beautiful leaves. But why is this DIY trick a must-try?
Firstly, the sheer visual appeal of rainbow chard is undeniable. Imagine a balcony or patio bursting with the jewel-toned stems of red, orange, yellow, and pink chard. It’s a living work of art that adds a touch of whimsy and sophistication to any space. Beyond aesthetics, growing your own chard guarantees access to fresh, organic produce. You’ll know exactly where your food comes from and how it was grown, free from harmful pesticides and herbicides. This is especially important for those conscious about healthy eating and sustainable living.
Furthermore, growing rainbow chard in pots is incredibly convenient, especially for those with limited garden space. Whether you have a sprawling backyard or a tiny apartment balcony, you can enjoy the benefits of homegrown chard. It’s also a fantastic way to introduce children to the joys of gardening and teach them about where their food comes from. The fast growth rate of chard makes it a rewarding project for young gardeners, providing quick results and a sense of accomplishment.
Looking for variations? Consider companion planting. Marigolds, for example, can help deter pests, while basil can enhance the flavor of your chard. You can also experiment with different pot sizes and materials. Terracotta pots are classic and allow for good drainage, while plastic pots are lightweight and retain moisture well. For a more rustic look, try using repurposed containers like old buckets or wooden crates.
Don’t be afraid to get creative with your chard recipes! Use the leaves in salads, stir-fries, soups, or even as a substitute for spinach in your favorite dishes. The stems can be sautéed, pickled, or added to vegetable stocks for extra flavor and nutrients.
Growing rainbow chard in pots is more than just a gardening trend; it’s a sustainable, healthy, and visually stunning way to enhance your life. We wholeheartedly encourage you to give it a try. The process is simple, the rewards are plentiful, and the satisfaction of harvesting your own homegrown chard is truly unparalleled.
So, grab a pot, some soil, and a packet of rainbow chard seeds, and embark on this exciting gardening adventure. We’re confident that you’ll be delighted with the results. And most importantly, we want to hear about your experience! Share your photos, tips, and recipes with us in the comments below. Let’s create a community of rainbow chard enthusiasts and inspire others to embrace the joys of homegrown goodness. Happy gardening!
Frequently Asked Questions (FAQ)
What is the best size pot for growing rainbow chard?
A pot that is at least 12 inches in diameter and 12 inches deep is generally recommended for growing rainbow chard. This size allows ample space for the roots to develop and provides enough soil to retain moisture and nutrients. If you plan to grow multiple chard plants in the same pot, opt for a larger container, such as a 15-18 inch pot, to ensure each plant has sufficient room to thrive. Remember that adequate drainage is crucial, so ensure your pot has drainage holes at the bottom.
What type of soil is best for rainbow chard?
Rainbow chard thrives in well-draining, fertile soil that is rich in organic matter. A good potting mix for chard should consist of a blend of compost, peat moss or coco coir, and perlite or vermiculite. Compost provides essential nutrients and improves soil structure, while peat moss or coco coir helps retain moisture. Perlite or vermiculite enhances drainage and aeration. You can also amend your potting mix with slow-release fertilizer to provide a steady supply of nutrients throughout the growing season. Avoid using heavy clay soils, as they can become waterlogged and inhibit root growth.
How often should I water my rainbow chard plants?
Water your rainbow chard plants regularly, especially during hot and dry weather. The soil should be kept consistently moist but not waterlogged. Check the soil moisture by sticking your finger about an inch deep into the soil. If it feels dry, it’s time to water. Water deeply, allowing the water to drain out of the drainage holes at the bottom of the pot. Avoid overhead watering, as this can lead to fungal diseases. Instead, water at the base of the plant. During cooler weather, you may need to water less frequently.
How much sunlight does rainbow chard need?
Rainbow chard requires at least 6 hours of sunlight per day to thrive. Choose a location that receives full sun for optimal growth. If you live in a hot climate, providing some afternoon shade can help prevent the leaves from scorching. If you are growing chard indoors, place it near a sunny window or use grow lights to supplement natural light. Insufficient sunlight can result in leggy growth and reduced leaf production.
What are some common pests and diseases that affect rainbow chard?
Rainbow chard can be susceptible to several pests and diseases, including aphids, slugs, snails, leaf miners, and fungal diseases like powdery mildew. Regularly inspect your plants for signs of infestation or disease. Aphids can be controlled with insecticidal soap or neem oil. Slugs and snails can be handpicked or trapped using beer traps. Leaf miners can be removed by pinching off affected leaves. To prevent fungal diseases, ensure good air circulation around your plants and avoid overhead watering. If necessary, use a fungicide to control fungal infections.
When and how should I harvest rainbow chard?
You can begin harvesting rainbow chard leaves when they are about 6-8 inches long. Harvest the outer leaves first, leaving the inner leaves to continue growing. Use a sharp knife or scissors to cut the leaves near the base of the plant. Avoid pulling the leaves, as this can damage the plant. Regular harvesting encourages continued leaf production. You can harvest chard throughout the growing season, from spring to fall.
Can I grow rainbow chard indoors?
Yes, you can grow rainbow chard indoors, provided you have a sunny location or use grow lights. Choose a pot that is at least 12 inches in diameter and 12 inches deep. Use a well-draining potting mix and water regularly. Ensure your plants receive at least 6 hours of light per day. Indoor-grown chard may not grow as large as outdoor-grown chard, but you can still enjoy a continuous supply of fresh leaves.
Is rainbow chard a cut-and-come-again crop?
Yes, rainbow chard is a cut-and-come-again crop, meaning you can harvest the outer leaves repeatedly while allowing the inner leaves to continue growing. This allows you to enjoy a continuous supply of fresh chard throughout the growing season. Regular harvesting also encourages the plant to produce more leaves.
How do I store harvested rainbow chard?
Harvested rainbow chard can be stored in the refrigerator for up to a week. Wrap the leaves in a damp paper towel and place them in a plastic bag or container. You can also blanch and freeze chard for longer storage. To blanch chard, boil the leaves for 2-3 minutes, then immediately transfer them to an ice bath to stop the cooking process. Drain the leaves and freeze them in freezer bags or containers.
Can I eat the stems of rainbow chard?
Yes, the stems of rainbow chard are edible and can be cooked in a variety of ways. They have a slightly different texture and flavor than the leaves, but they are equally nutritious. You can sauté the stems with garlic and olive oil, add them to soups or stews, or pickle them for a tangy treat. The stems may take longer to cook than the leaves, so it’s best to cook them separately.
Leave a Comment