
Growing Water Spinach, also known as Ong Choy or Kang Kong, might seem like an exotic culinary adventure best left to professional farmers, but I’m here to tell you that this delicious and nutritious leafy green is surprisingly easy to cultivate right in your own backyard! Forget those expensive grocery store trips – imagine stepping outside and harvesting fresh, vibrant water spinach whenever you crave it.
Water spinach has a rich history, deeply rooted in Asian cuisine for centuries. From stir-fries to soups, its versatility has made it a staple in countless dishes. But beyond its culinary appeal, growing your own water spinach offers a fantastic connection to nature and a sense of accomplishment that’s hard to beat.
Why should you try this DIY project? Well, for starters, commercially grown produce often travels long distances, losing freshness and nutritional value along the way. By growing water spinach at home, you’re ensuring a constant supply of the freshest, most flavorful greens possible. Plus, you get the satisfaction of knowing exactly what goes into your food – no harmful pesticides or hidden chemicals! This guide will provide you with simple, step-by-step instructions and clever hacks to make growing water spinach a breeze, even if you’re a complete beginner. Get ready to transform your garden (or even your balcony!) into a thriving water spinach oasis!
Growing Water Spinach (Kangkong) at Home: A DIY Guide
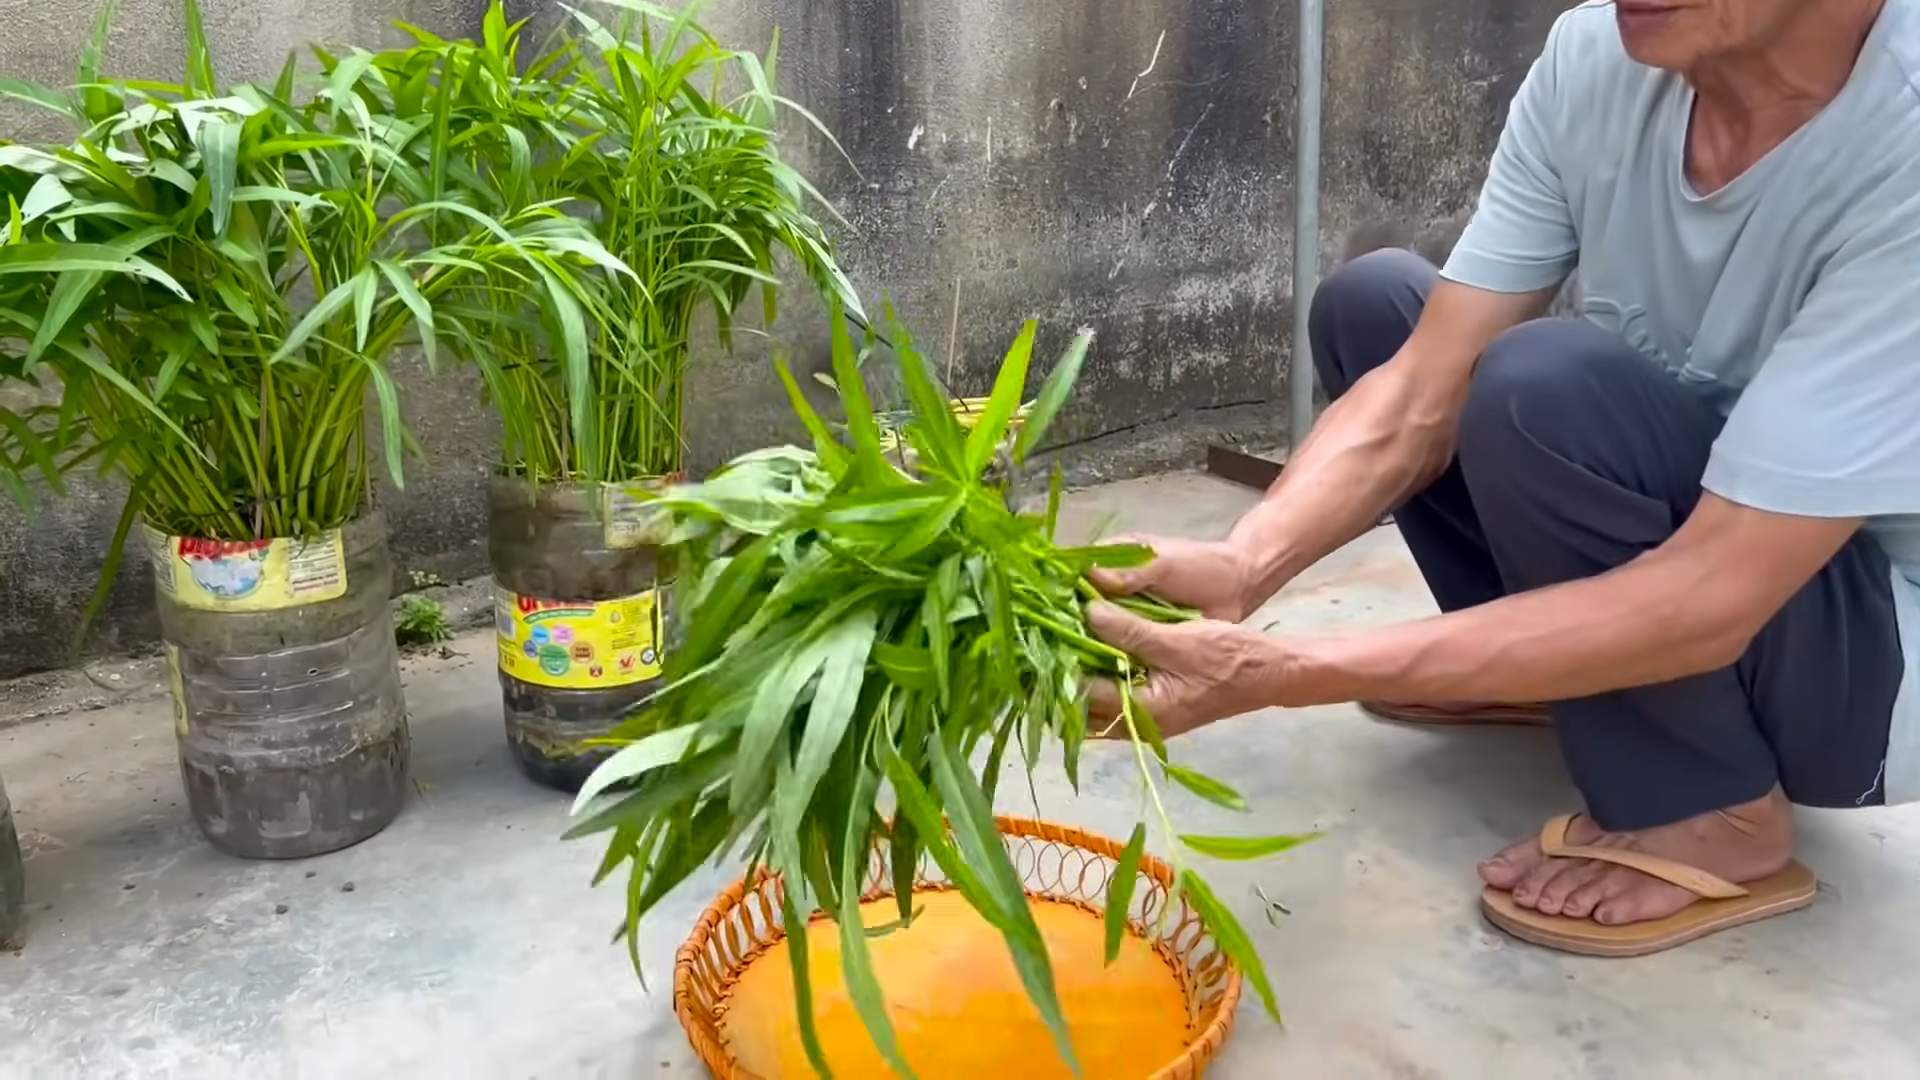
Hey there, fellow gardening enthusiasts! I’m so excited to share my experience with growing water spinach, also known as kangkong, right in my backyard. It’s surprisingly easy, incredibly rewarding, and you get a constant supply of fresh, delicious greens. Trust me, once you taste homegrown kangkong, you’ll never go back to the store-bought stuff!
This guide will walk you through everything you need to know, from choosing the right container to harvesting your bountiful crop. Let’s get started!
What You’ll Need
Before we dive into the nitty-gritty, let’s gather our supplies. Here’s a checklist of everything you’ll need to successfully grow water spinach at home:
* Water Spinach Seeds or Cuttings: You can find seeds online or at your local garden center. Cuttings from mature plants work great too, and are often easier to get started with.
* A Large Container or Tub: Kangkong loves water, so a container without drainage holes is ideal. A plastic tub, a large bucket, or even a kiddie pool will work perfectly. Aim for something at least 12 inches deep and wide.
* Potting Soil or Garden Soil: While kangkong thrives in water, it still needs some soil to anchor its roots and provide nutrients. Regular potting soil or garden soil will do the trick.
* Compost or Organic Fertilizer: To give your kangkong a boost, mix in some compost or organic fertilizer into the soil. This will provide essential nutrients for healthy growth.
* Water: Obviously! You’ll need plenty of water to keep your kangkong happy and hydrated. Tap water is fine, but rainwater is even better.
* Sunlight: Kangkong needs at least 6 hours of sunlight per day to thrive. Choose a sunny spot in your garden or on your balcony.
* Optional:
* Aquatic Fertilizer: If you want to go the extra mile, you can use aquatic fertilizer specifically designed for water plants.
* Netting or Mesh: To protect your kangkong from pests like snails or caterpillars.
Step-by-Step Instructions: Planting Your Kangkong
Now that we have all our supplies, let’s get our hands dirty and plant some kangkong!
1. Prepare Your Container:
* First, clean your container thoroughly to remove any dirt or debris.
* If your container has drainage holes, you’ll need to seal them. You can use waterproof tape, silicone sealant, or even a plastic liner.
* Add a layer of soil to the bottom of the container, about 4-6 inches deep.
* Mix in compost or organic fertilizer into the soil. This will provide essential nutrients for your kangkong.
* Level the soil surface and gently pat it down.
2. Planting Seeds:
* If you’re using seeds, soak them in water for 24 hours before planting. This will help them germinate faster.
* Sow the seeds about 1/2 inch deep and 1-2 inches apart.
* Gently cover the seeds with soil and water thoroughly.
* Keep the soil moist but not waterlogged.
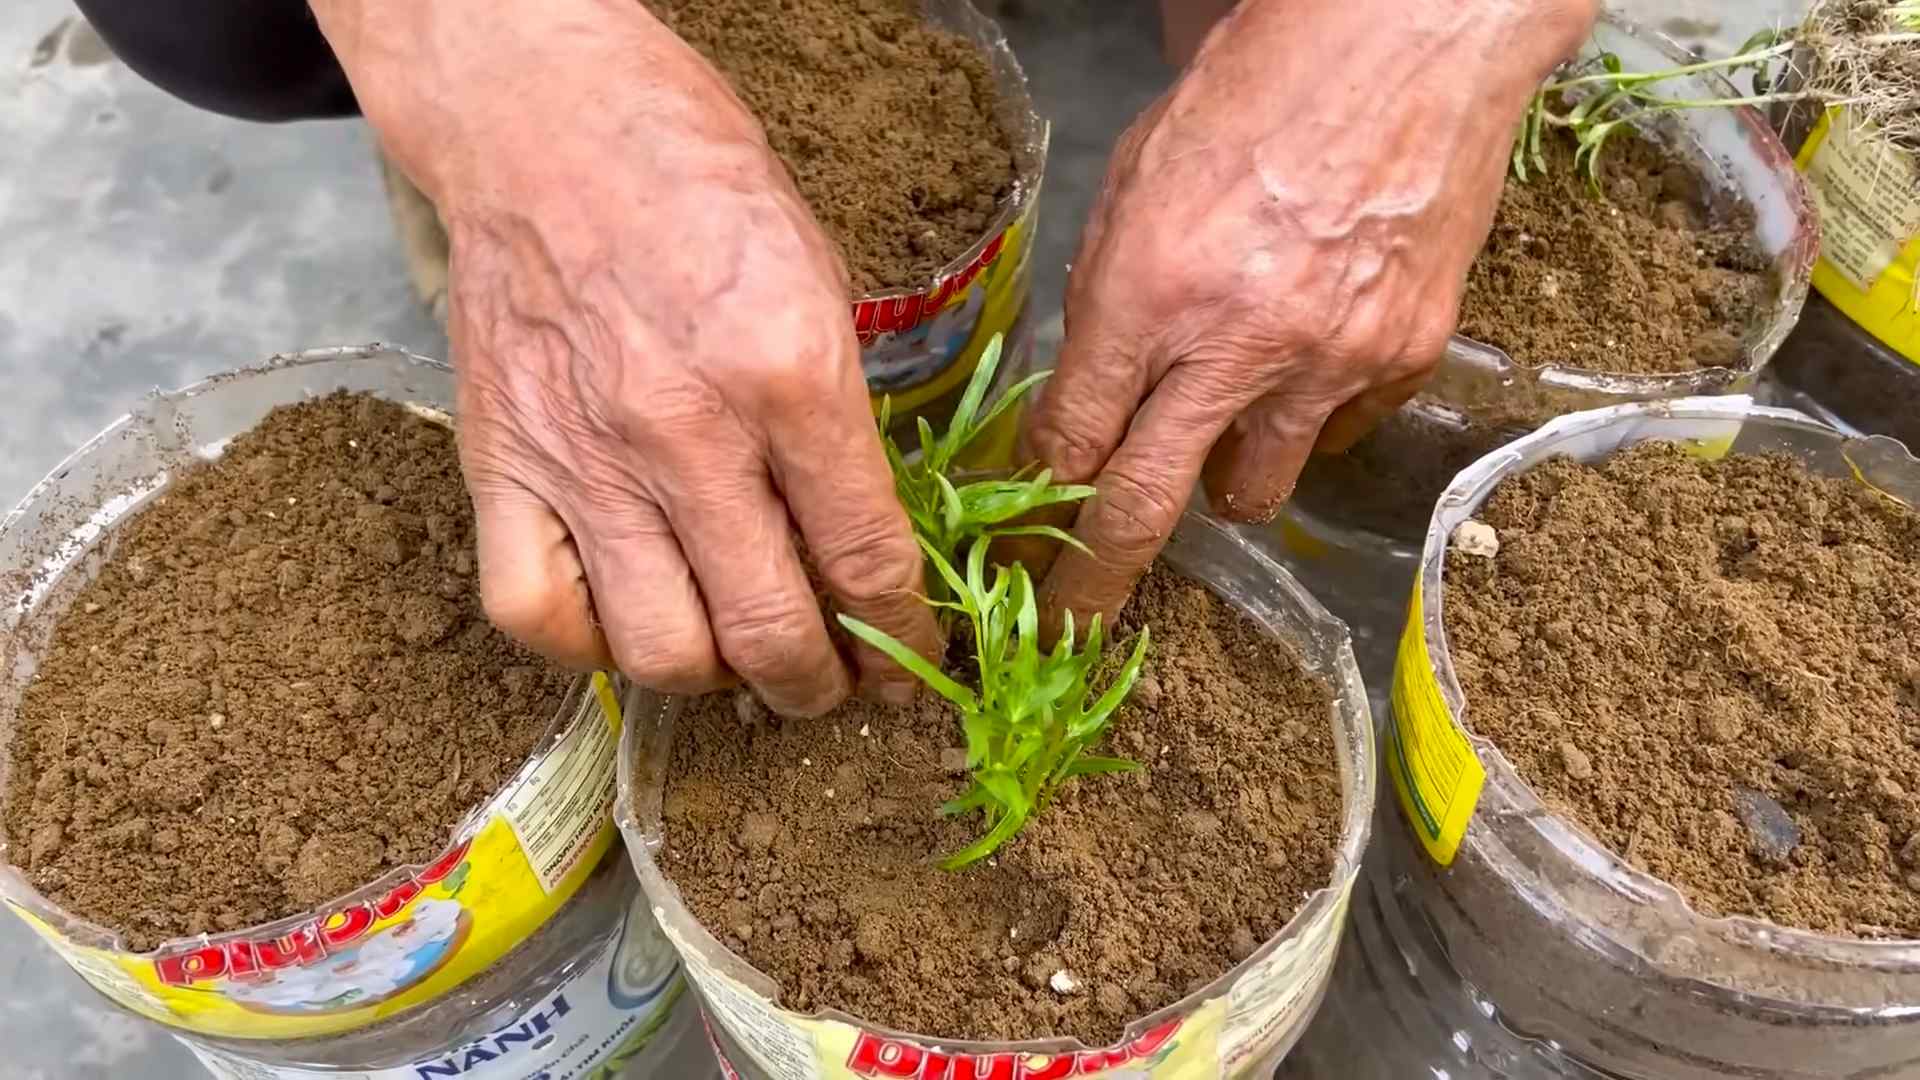
3. Planting Cuttings:
* If you’re using cuttings, choose healthy stems that are about 6-8 inches long.
* Remove the leaves from the bottom 2 inches of the stem.
* Insert the cuttings into the soil, about 2 inches deep.
* Space the cuttings about 2-3 inches apart.
* Water thoroughly and keep the soil moist.
4. Adding Water:
* Once you’ve planted your seeds or cuttings, it’s time to add water.
* Fill the container with water until it’s about 2-3 inches above the soil surface.
* The water level should be maintained at this level throughout the growing season.
5. Finding the Perfect Spot:
* Place your container in a sunny location that receives at least 6 hours of sunlight per day.
* Kangkong loves warm weather, so make sure the temperature is consistently above 60°F (15°C).
* If you live in a colder climate, you can grow kangkong indoors under grow lights.
Caring for Your Kangkong
Now that your kangkong is planted, it’s time to provide it with the care it needs to thrive. Here’s what you need to do:
1. Watering:
* Kangkong loves water, so it’s important to keep the water level consistent.
* Check the water level daily and add water as needed.
* In hot weather, you may need to add water more frequently.
* Avoid letting the soil dry out completely.
2. Fertilizing:
* Kangkong is a heavy feeder, so it needs regular fertilization.
* Fertilize every 2-3 weeks with a balanced liquid fertilizer or aquatic fertilizer.
* Follow the instructions on the fertilizer package.
* You can also add compost tea to the water to provide additional nutrients.
3. Pest Control:
* Kangkong is relatively pest-resistant, but it can be susceptible to snails, caterpillars, and aphids.
* Inspect your plants regularly for pests.
* If you find any pests, you can remove them by hand or use an organic insecticide.
* Netting or mesh can also be used to protect your kangkong from pests.
4. Pruning:
* Pruning your kangkong will encourage bushier growth and more leaves.
* Pinch off the tips of the stems regularly.
* You can also remove any yellow or damaged leaves.
Harvesting Your Kangkong
The best part of growing your own kangkong is harvesting your fresh, delicious greens! Here’s how to do it:
1. When to Harvest:
* You can start harvesting your kangkong about 4-6 weeks after planting.
* The leaves should be about 6-8 inches long.
* Harvest in the morning for the best flavor.
2. How to Harvest:
* Use scissors or a sharp knife to cut the stems about 2-3 inches above the water level.
* Leave a few leaves on the plant so it can continue to grow.
* You can harvest kangkong multiple times throughout the growing season.
3. Storing Your Harvest:
* Wash your kangkong thoroughly after harvesting.
* Store it in a plastic bag in the refrigerator for up to a week.
* You can also freeze kangkong for longer storage.
Troubleshooting Common Problems
Even with the best care, you might encounter some problems while growing kangkong. Here are some common issues and how to fix them:
* Yellowing Leaves: This could be a sign of nutrient deficiency. Try fertilizing more frequently or adding compost tea to the water. It could also be a sign of overwatering, so make sure the soil isn’t waterlogged.
* Slow Growth: This could be due to lack of sunlight or nutrients. Make sure your kangkong is getting at least 6 hours of sunlight per day and fertilize regularly.
* Pests: Inspect your plants regularly for pests and take action as needed. Hand-picking, organic insecticides, and netting can all be effective.
* Algae Growth: Algae can sometimes grow in the water. This is usually harmless, but it can be unsightly. You can remove algae by hand or use an algae control product.
Enjoying Your Homegrown Kangkong
Now that you’ve harvested your kangkong, it’s time to enjoy the fruits (or rather, leaves) of your labor! Kangkong is a versatile vegetable that can be used in a variety of dishes. Here are some ideas:
* Stir-fries: Kangkong is a popular ingredient in stir-fries. It pairs well with garlic, chili peppers, and soy sauce.
* Soups: Add kangkong to soups for a boost of flavor and nutrients.
* Salads: Young, tender kangkong leaves can be used in salads.
* Steamed: Steamed kangkong is a simple and healthy side dish.
* Juices: Kangkong can be added to juices for a nutritional boost.
I personally love stir-frying it with garlic and a little oyster sauce – it’s quick, easy, and incredibly delicious!
Growing water spinach at home is a fun
Conclusion
So, there you have it! Growing your own water spinach, or *kangkong*, is not only surprisingly simple but also incredibly rewarding. Forget those wilted, overpriced bunches at the grocery store. With this straightforward DIY trick, you can have a constant supply of fresh, crisp, and vibrant water spinach right at your fingertips.
Why is this a must-try? Because it’s about more than just saving money. It’s about connecting with your food, understanding where it comes from, and enjoying the unparalleled flavor of homegrown produce. The difference in taste between store-bought and freshly harvested water spinach is truly remarkable. The homegrown variety boasts a delicate sweetness and a satisfying crunch that you simply won’t find elsewhere.
Beyond the superior taste, growing your own water spinach is also a sustainable and eco-friendly choice. You’re reducing your carbon footprint by eliminating transportation and packaging, and you have complete control over the growing process, ensuring that your water spinach is free from harmful pesticides and chemicals.
But the best part? This DIY trick is incredibly versatile. You can adapt it to suit your space and preferences. If you have a large garden, dedicate a small plot to water spinach. If you’re short on space, a container on your balcony or even a large bucket indoors will work just as well.
Here are a few suggestions and variations to get you started:
* Hydroponic Water Spinach: For an even more efficient and space-saving method, consider growing your water spinach hydroponically. This involves suspending the roots in nutrient-rich water without soil.
* Different Varieties: Experiment with different varieties of water spinach. Some varieties have broader leaves, while others have thicker stems. Each variety offers a slightly different flavor and texture.
* Companion Planting: Plant water spinach alongside other compatible vegetables, such as basil or mint, to deter pests and improve growth.
* Succession Planting: To ensure a continuous harvest, plant new seeds every few weeks. This will prevent you from being overwhelmed with a large harvest all at once.
* Water Source: While water spinach thrives in water, be mindful of the water source. If using tap water, let it sit for 24 hours to allow chlorine to dissipate. Rainwater is an excellent alternative.
We are confident that once you try this DIY trick, you’ll be hooked. The satisfaction of harvesting your own fresh water spinach and incorporating it into your favorite dishes is truly unmatched. So, grab some seeds, find a sunny spot, and get ready to experience the joy of growing your own *kangkong*.
Don’t just take our word for it. We encourage you to try this DIY trick and share your experience with us! Post photos of your water spinach garden on social media using #HomegrownKangkong and let us know how it goes. We can’t wait to see your success stories and learn from your experiences. Happy growing! This simple method for **growing water spinach** will change the way you think about fresh produce.
Frequently Asked Questions (FAQ)
What exactly is water spinach, and what does it taste like?
Water spinach, also known as *kangkong*, is a leafy green vegetable popular in Southeast Asian cuisine. It has long, hollow stems and arrow-shaped leaves. The taste is mild and slightly sweet, with a subtle earthy undertone. When cooked, it has a tender yet slightly crunchy texture. It’s often compared to spinach or morning glory, but with a unique flavor profile all its own.
How long does it take for water spinach to grow?
One of the great things about water spinach is its rapid growth rate. Under optimal conditions, you can expect to harvest your first crop in as little as 4-6 weeks after planting. This makes it a very rewarding vegetable to grow, as you’ll see results quickly.
What are the ideal growing conditions for water spinach?
Water spinach thrives in warm, humid environments with plenty of sunlight. It prefers temperatures between 70°F and 85°F (21°C and 29°C). It also needs consistently moist soil or, even better, standing water. A sunny location with at least 6 hours of direct sunlight per day is crucial for healthy growth.
Can I grow water spinach indoors?
Yes, you can absolutely grow water spinach indoors, especially if you live in a climate with cold winters. To grow it indoors, provide it with plenty of light, either from a sunny window or a grow light. Ensure the soil or water is consistently moist, and maintain a warm temperature. A large container or bucket filled with water will work well for indoor cultivation.
What kind of soil is best for growing water spinach?
While water spinach can tolerate a variety of soil types, it prefers rich, well-draining soil that is high in organic matter. A mixture of potting soil, compost, and aged manure is ideal. However, because it thrives in water, you can also grow it directly in water with added nutrients.
How often should I water water spinach?
Water spinach needs consistently moist soil or standing water to thrive. If growing in soil, water it daily, especially during hot weather, to keep the soil consistently damp. If growing in water, ensure the water level is maintained and replenished as needed.
What kind of fertilizer should I use for water spinach?
Water spinach is a heavy feeder and benefits from regular fertilization. Use a balanced liquid fertilizer, such as a 20-20-20, diluted to half strength. Apply the fertilizer every 2-3 weeks during the growing season. You can also add compost or aged manure to the soil to provide a slow-release source of nutrients.
Are there any pests or diseases that affect water spinach?
Water spinach is generally resistant to pests and diseases, but it can occasionally be affected by aphids, spider mites, or fungal diseases. To prevent these problems, ensure good air circulation, avoid overwatering, and inspect your plants regularly. If you notice any pests or diseases, treat them promptly with an appropriate organic pesticide or fungicide.
How do I harvest water spinach?
You can harvest water spinach by cutting the stems about 6 inches above the soil line. This will encourage new growth and allow you to harvest multiple times from the same plant. Harvest the leaves and stems when they are young and tender for the best flavor and texture.
How do I store harvested water spinach?
Harvested water spinach is best used fresh, but it can be stored in the refrigerator for a few days. Wrap the stems and leaves in a damp paper towel and place them in a plastic bag. Store in the crisper drawer of your refrigerator.
Can I eat the seeds of water spinach?
While the leaves and stems of water spinach are commonly eaten, the seeds are not typically consumed. It’s best to stick to eating the leaves and stems, which are the most nutritious and flavorful parts of the plant.
Is water spinach safe to eat?
Water spinach is generally safe to eat when grown in clean water and soil. However, it’s important to avoid growing it in contaminated water, as it can absorb pollutants. Always wash the leaves and stems thoroughly before cooking to remove any dirt or debris. If you have any concerns about the safety of your water source, consider growing your water spinach in a container with clean water.

Leave a Comment