
DIY Plastic Garden: Transform Trash into Treasure and Grow Your Own Green Oasis!
Have you ever looked at a pile of discarded plastic bottles and thought, “There has to be a better use for this?” Well, I have! And that’s exactly what sparked my passion for creating amazing gardens using repurposed plastic. For centuries, humans have cultivated the earth, nurturing life from the soil. But in our modern world, we’re faced with a new challenge: mountains of plastic waste. What if we could combine these two realities – our innate desire to grow and our urgent need to recycle?
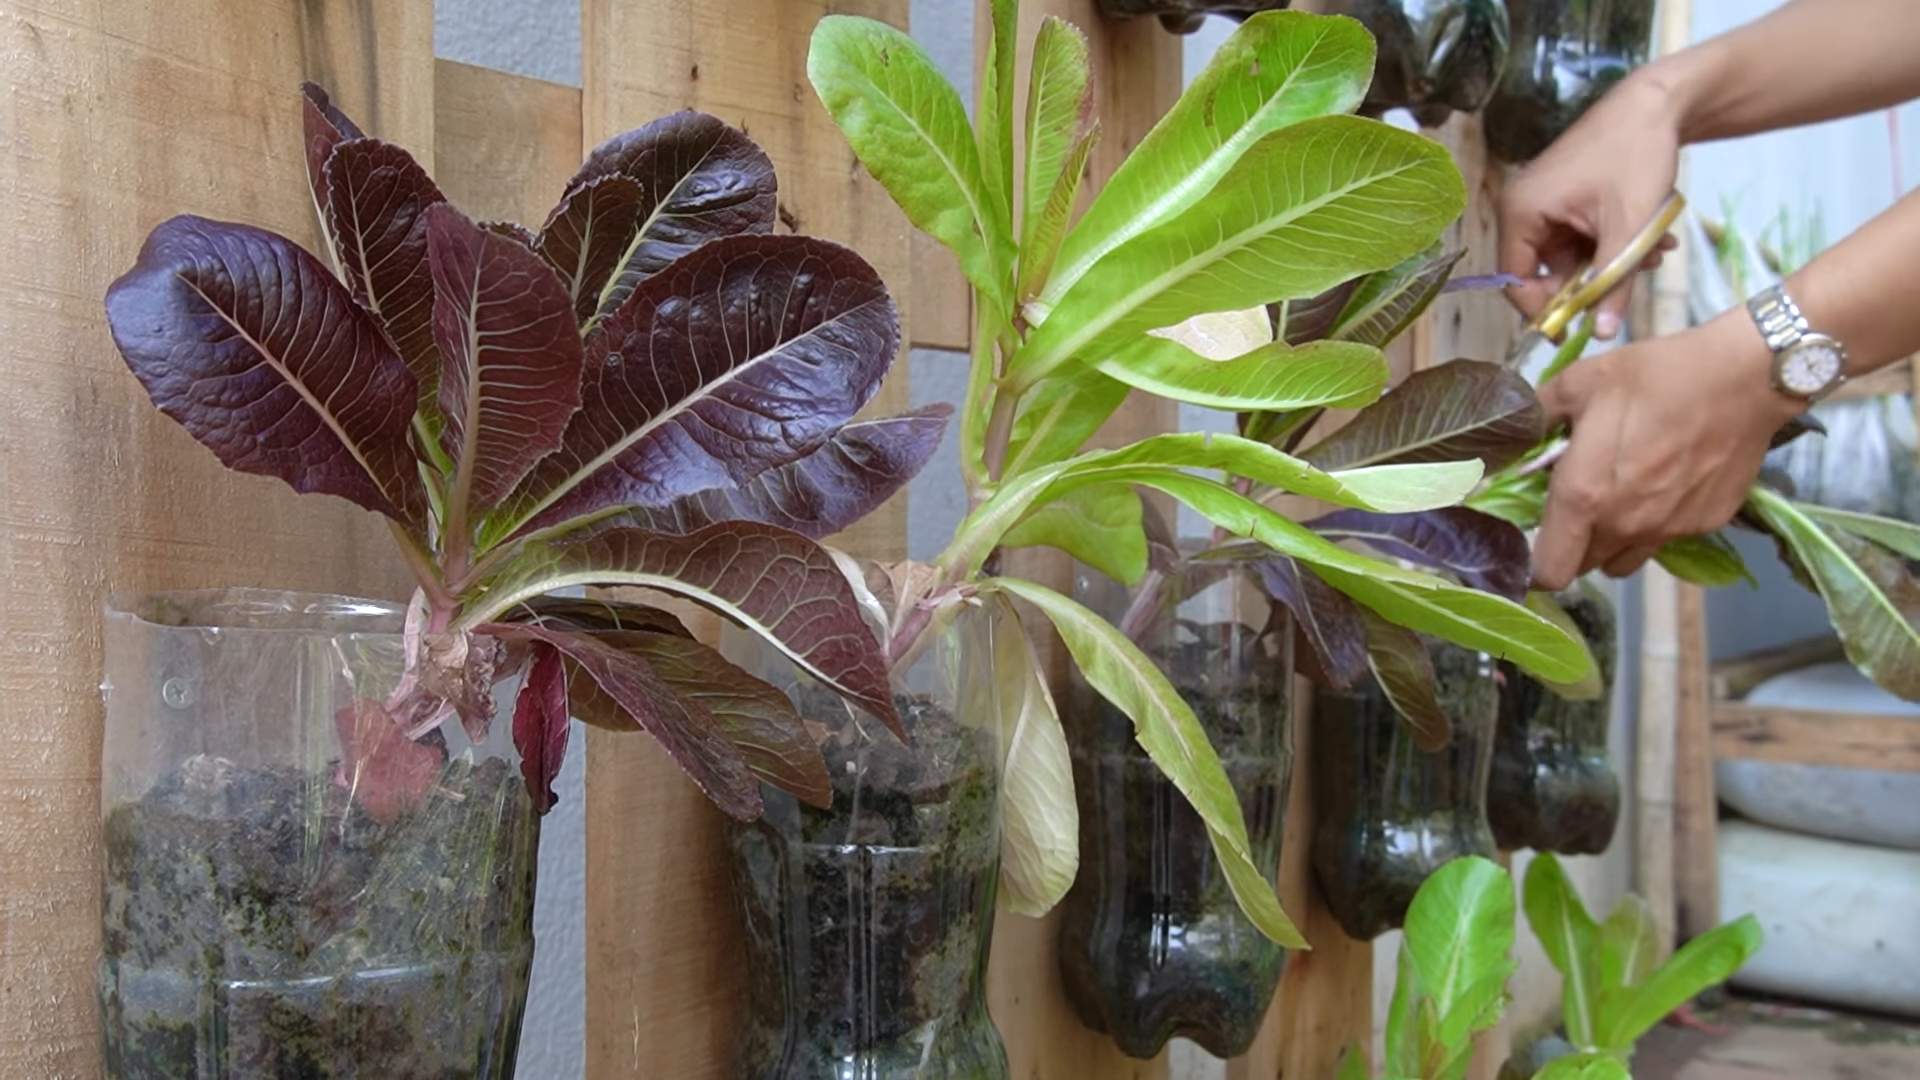
That’s where the magic of a DIY Plastic Garden comes in. It’s not just about saving money (though it definitely helps!), it’s about embracing sustainability and getting creative with what you already have. Imagine transforming old soda bottles into self-watering planters, or using plastic containers to create a vertical herb garden on your balcony. The possibilities are endless!
In this article, I’m going to share some of my favorite DIY tricks and hacks for creating a thriving garden using plastic materials. Whether you’re a seasoned gardener or a complete beginner, you’ll find inspiration and practical tips to get started. So, let’s dive in and discover how to turn trash into treasure, one plastic bottle at a time!
Harvesting Sweet Potatoes Monthly: A DIY Guide to Continuous Crops
Hey there, fellow gardeners! Ever dreamt of having a steady supply of sweet potatoes throughout the growing season instead of one massive harvest at the end? Well, I’m here to tell you it’s totally possible with a little DIY ingenuity and a method I like to call “monthly sweet potato harvesting.” It’s all about strategic planting and careful digging, and I’m going to walk you through every step.
Understanding the Basics: Sweet Potato Growth and Timing
Before we dive into the how-to, let’s quickly cover some sweet potato basics. Sweet potatoes aren’t actually potatoes; they’re root vegetables that thrive in warm weather. They need about 90-120 days to mature, but the beauty of this method is that you don’t need to wait for full maturity to enjoy them. You can harvest smaller, “new” sweet potatoes much earlier.
Key Considerations:
* Climate: This method works best in regions with a long growing season (at least 4-5 months of warm weather).
* Variety: Some sweet potato varieties mature faster than others. Beauregard is a popular choice for its relatively quick maturity.
* Soil: Sweet potatoes love loose, well-drained soil. Amend your soil with compost or well-rotted manure before planting.
* Watering: Consistent watering is crucial, especially during the initial stages of growth.
* Fertilizing: A balanced fertilizer can help boost growth, but avoid excessive nitrogen, which can lead to lush foliage but fewer sweet potatoes.
Planning Your Monthly Harvest: Staggered Planting
The secret to monthly harvesting lies in staggered planting. Instead of planting all your sweet potato slips at once, you’ll plant them in intervals. This ensures that you have sweet potatoes at different stages of development throughout the season.
Here’s the plan:
* Determine your planting window: Figure out the length of your growing season and divide it into monthly intervals. For example, if your growing season is 5 months long, you’ll have 5 planting dates.
* Calculate the number of slips: Decide how many sweet potatoes you want to harvest each month and multiply that by the number of months in your planting window. This will give you the total number of slips you need.
* Order or propagate your slips: You can either purchase sweet potato slips from a nursery or propagate your own from a sweet potato. I personally prefer growing my own slips, it’s a fun project!
Growing Your Own Sweet Potato Slips (Optional but Recommended!)
Growing your own slips is a rewarding experience and saves you money. Here’s how I do it:
1. Choose a healthy sweet potato: Select a sweet potato that’s free from blemishes and has a few “eyes” (small buds) on it.
2. Prepare the sweet potato: You can either suspend the sweet potato in a jar of water, with the bottom half submerged, or bury it horizontally in a container filled with moist potting mix.
3. Provide warmth and light: Place the jar or container in a warm, sunny location.
4. Wait for sprouts: Within a few weeks, sprouts will emerge from the sweet potato.
5. Harvest the slips: Once the sprouts are about 6-8 inches long, gently twist them off the sweet potato.
6. Root the slips: Place the slips in a jar of water until they develop roots (usually within a few days).
7. Plant the rooted slips: Once the roots are about an inch long, they’re ready to be planted in your garden.
Planting Your Sweet Potato Slips: A Step-by-Step Guide
Now for the main event! Here’s how to plant your sweet potato slips for monthly harvesting:
1. Prepare the soil: Choose a sunny spot in your garden with well-drained soil. Amend the soil with compost or well-rotted manure to improve fertility and drainage.
2. Create ridges or mounds: Sweet potatoes grow best in raised beds or mounds. This helps with drainage and makes harvesting easier. I usually make ridges about 8-10 inches high and 12 inches wide.
3. Plant the slips: Space the slips about 12 inches apart along the ridges or mounds. Bury the slips deep enough so that only the top leaves are exposed.
4. Water thoroughly: Water the newly planted slips thoroughly to help them establish roots.
5. Mulch (optional): Mulching around the plants can help retain moisture, suppress weeds, and regulate soil temperature. I like to use straw or hay.
Monthly Harvesting: The Fun Part!
After about 60-75 days from your first planting, you can start harvesting your “new” sweet potatoes. Don’t expect them to be huge; they’ll be smaller and more tender than fully mature sweet potatoes.
1. Locate the plants: Identify the plants from your first planting date.
2. Gently dig around the base: Use a garden fork or trowel to carefully dig around the base of the plant. Be careful not to damage the sweet potatoes.
3. Harvest a few sweet potatoes: Gently lift a few sweet potatoes from the soil. You can harvest as many or as few as you need.
4. Leave the rest to grow: Leave the remaining sweet potatoes in the ground to continue growing.
5. Repeat monthly: Repeat this process each month, harvesting from the plants that were planted approximately 60-75 days prior.
Curing and Storing Your Sweet Potatoes
While you can eat “new” sweet potatoes fresh from the garden, curing them will improve their flavor and storage life.
1. Gently clean the sweet potatoes: Brush off any excess soil, but don’t wash them.
2. Cure the sweet potatoes: Place the sweet potatoes in a warm, humid place (80-85°F and 85-90% humidity) for about 7-10 days. This can be done in a well-ventilated room with a humidifier or in a greenhouse.
3. Store the cured sweet potatoes: After curing, store the sweet potatoes in a cool, dry, and dark place (55-60°F). Avoid storing them in the refrigerator, as this can cause them to develop a hard core.
Troubleshooting: Common Issues and Solutions
Even with the best planning, you might encounter some challenges along the way. Here are some common issues and how to address them:
* Pests: Sweet potatoes can be susceptible to pests like sweet potato weevils and flea beetles. Use organic pest control methods like neem oil or insecticidal soap.
* Diseases: Common diseases include stem rot and black rot. Choose disease-resistant varieties and practice good crop rotation.
* Poor growth: If your sweet potatoes aren’t growing well, check the soil pH and nutrient levels. Amend the soil as needed.
* Cracked sweet potatoes: This can be caused by inconsistent watering. Water regularly and deeply, especially during dry periods.
Tips for Success: Maximizing Your Monthly Harvest
Here are a few extra tips to help you get the most out of your monthly sweet potato harvest:
* Choose the right variety: Select sweet potato varieties that are well-suited to your climate and have a relatively short maturity time.
* Start with healthy slips: Use high-quality sweet potato slips that are free from diseases and pests.
* Provide adequate water and nutrients: Water your sweet potatoes regularly and fertilize them with a balanced fertilizer.
* Monitor for pests and diseases: Regularly inspect your plants for signs of pests and diseases and take action promptly.
* Experiment with different planting dates: Adjust your planting dates based on your local climate and growing conditions.
Enjoying Your Harvest: Delicious Sweet Potato Recipes
Now that you’re harvesting sweet potatoes monthly, it’s time to get creative in the kitchen! Here are a few of my favorite sweet potato recipes:
* Roasted sweet potatoes: Toss sweet potato cubes with olive oil, salt, pepper, and your favorite herbs, then roast them in the oven until tender and caramelized.
* Sweet potato fries: Cut sweet potatoes into fries, toss them with olive oil and spices, and bake or air fry them until crispy.
* Sweet potato soup: Blend cooked sweet potatoes with broth, spices, and cream for a creamy and comforting soup.
* Sweet potato pie: Use sweet potato puree as the base for a classic sweet potato pie.
* Grilled sweet potatoes: Slice sweet potatoes into planks, brush them with olive oil, and grill them until tender and slightly charred.
So there you have it! My guide to harvesting sweet potatoes monthly. With a little planning and effort, you can enjoy a continuous supply of these delicious and nutritious root vegetables throughout the growing season. Happy gardening!
Conclusion
So, there you have it! Transforming discarded plastic into a thriving garden isn’t just a whimsical idea; it’s a practical, eco-conscious, and surprisingly rewarding endeavor. We’ve explored how to harness the potential of something often considered waste and turn it into a vibrant space for growing herbs, vegetables, flowers, or whatever your green heart desires.
Why is this DIY plastic garden trick a must-try? Because it tackles multiple issues simultaneously. It reduces plastic waste, provides an affordable gardening solution, and allows you to customize your garden to perfectly fit your space and aesthetic preferences. Imagine the satisfaction of nurturing plants in containers you crafted yourself, knowing you’re contributing to a more sustainable future.
But the beauty of this project lies in its adaptability. Feel free to experiment with different types of plastic. Sturdier containers like laundry detergent bottles or large water jugs are excellent for larger plants like tomatoes or peppers. Yogurt cups and smaller bottles are perfect for starting seedlings or growing herbs. Don’t be afraid to get creative with the design! Paint your containers with vibrant colors, add decorative elements, or arrange them in unique patterns to create a truly personalized garden space.
Consider these variations to elevate your DIY plastic garden:
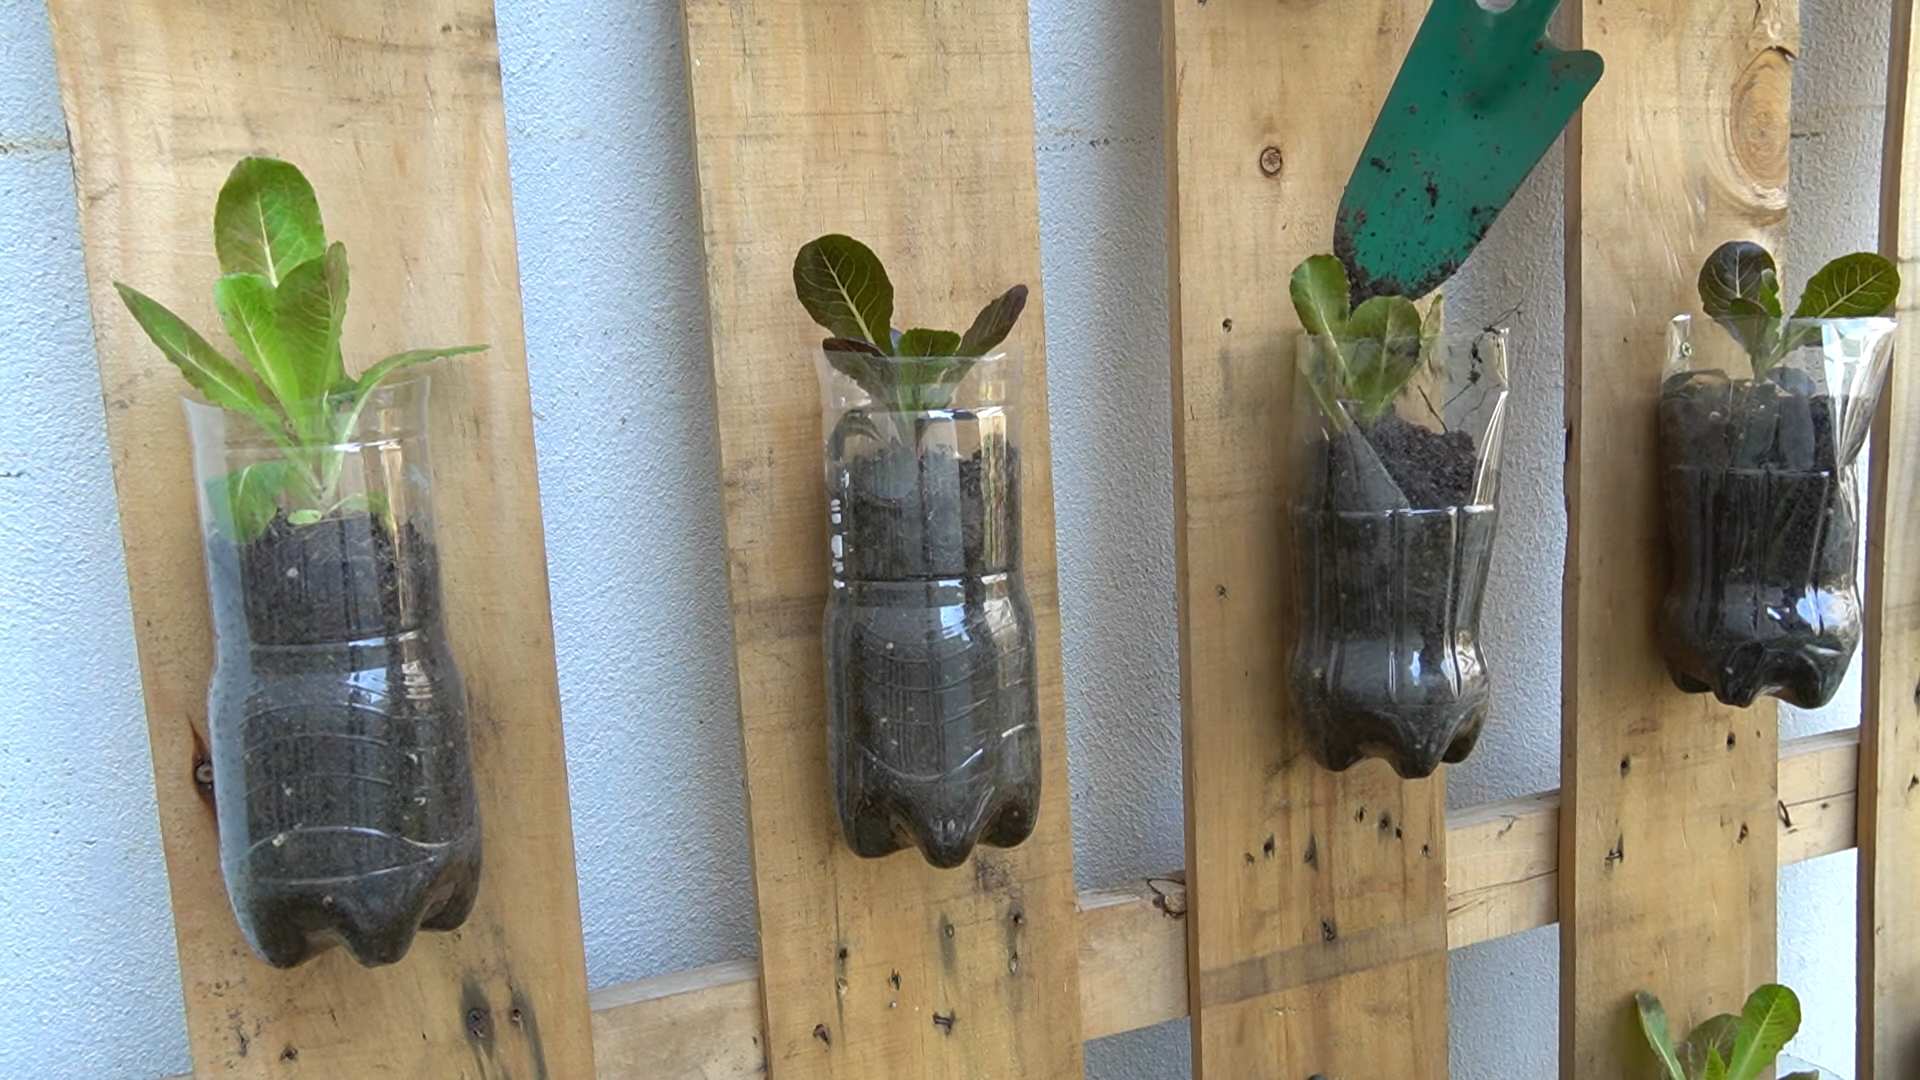
* Vertical Gardening: Stack your plastic containers to create a stunning vertical garden, ideal for small spaces like balconies or patios. Use wire or rope to secure the containers together and create a visually appealing green wall.
* Self-Watering Containers: Modify your plastic containers to create self-watering systems. This is especially helpful for busy gardeners or those living in drier climates. You can achieve this by adding a water reservoir at the bottom of the container, separated from the soil by a barrier like fabric or gravel.
* Herb Spiral: Construct an herb spiral using different sizes of plastic containers. This design maximizes sunlight exposure and creates microclimates suitable for various herbs.
* Indoor Garden: Bring the outdoors in by creating a DIY plastic garden indoors. Use grow lights to supplement natural light and enjoy fresh herbs and vegetables year-round.
The possibilities are truly endless! The key is to embrace the spirit of experimentation and let your creativity guide you.
We wholeheartedly encourage you to embark on this DIY plastic garden adventure. It’s a fantastic way to connect with nature, reduce your environmental impact, and enjoy the fruits (and vegetables!) of your labor.
Once you’ve created your own plastic paradise, we’d love to hear about your experience! Share your photos, tips, and challenges in the comments below. Let’s inspire each other to create a greener, more sustainable world, one plastic container at a time. Your insights could be invaluable to other aspiring DIY gardeners. Don’t hesitate to share what worked, what didn’t, and any innovative solutions you discovered along the way. Together, we can cultivate a community of eco-conscious gardeners who are passionate about transforming waste into something beautiful and productive.
Frequently Asked Questions (FAQ)
What types of plastic are safe to use for gardening?
Ideally, you should use food-grade plastics labeled with recycling codes 2 (HDPE), 4 (LDPE), or 5 (PP). These are generally considered safer for growing edible plants. Avoid plastics labeled with recycling codes 3 (PVC), 6 (PS), or 7 (Other), as they may leach harmful chemicals into the soil. However, even with safe plastics, it’s best to avoid direct contact between the plastic and the edible parts of the plant. Use a good quality potting mix and consider lining the containers with fabric or landscape cloth.
How do I prepare the plastic containers for planting?
First, thoroughly clean the plastic containers with soap and water to remove any residue. Then, drill drainage holes in the bottom of the containers to prevent waterlogging. The number and size of the holes will depend on the size of the container and the type of plants you’re growing. For larger containers, you may also want to add a layer of gravel or pebbles at the bottom to improve drainage. If the containers are dark-colored, consider painting them with a light color to reflect sunlight and prevent the soil from overheating.
What kind of soil should I use in my DIY plastic garden?
Use a high-quality potting mix specifically formulated for container gardening. Avoid using garden soil, as it can become compacted in containers and hinder drainage. Look for a potting mix that contains a blend of peat moss, perlite, and vermiculite. You can also add compost to enrich the soil and provide essential nutrients for your plants.
How often should I water my plants in plastic containers?
The watering frequency will depend on the type of plants you’re growing, the size of the containers, the weather conditions, and the type of potting mix you’re using. Generally, you should water your plants when the top inch of soil feels dry to the touch. Avoid overwatering, as this can lead to root rot. Check the drainage holes to ensure that excess water is draining properly. During hot and dry weather, you may need to water your plants more frequently.
How do I fertilize my plants in a DIY plastic garden?
Container plants require regular fertilization because the nutrients in the potting mix are quickly depleted. Use a balanced liquid fertilizer or slow-release fertilizer according to the package instructions. Fertilize your plants every 2-4 weeks during the growing season. Avoid over-fertilizing, as this can damage your plants.
How do I protect my plants from pests and diseases in a DIY plastic garden?
Regularly inspect your plants for signs of pests or diseases. If you notice any problems, take action immediately. You can use organic pest control methods, such as insecticidal soap or neem oil, to control pests. To prevent diseases, ensure that your plants have good air circulation and avoid overwatering. Remove any dead or diseased leaves promptly.
Can I grow vegetables in plastic containers?
Yes, you can definitely grow vegetables in plastic containers! Choose containers that are large enough to accommodate the mature size of the plants. Some vegetables that thrive in containers include tomatoes, peppers, cucumbers, lettuce, spinach, and herbs. Make sure to provide your vegetable plants with plenty of sunlight, water, and fertilizer.
How do I overwinter my plants in plastic containers?
If you live in a cold climate, you’ll need to protect your plants from frost and freezing temperatures. You can move your containers indoors to a sunny location or a greenhouse. Alternatively, you can insulate the containers by wrapping them with burlap or bubble wrap. Water your plants sparingly during the winter months.
What if my plastic containers are not aesthetically pleasing?
Don’t worry! There are many ways to make your plastic containers more attractive. You can paint them with vibrant colors, decorate them with stencils or mosaics, or cover them with fabric or burlap. You can also arrange the containers in creative ways to create a visually appealing display. Consider grouping different sizes and shapes of containers together to add interest.
Is a DIY plastic garden really sustainable?
Yes, creating a DIY plastic garden is a significant step towards sustainability. By repurposing plastic waste, you’re reducing the amount of plastic that ends up in landfills or oceans. You’re also reducing your carbon footprint by avoiding the purchase of new plastic containers. Furthermore, growing your own food reduces your reliance on commercially grown produce, which often involves long-distance transportation and the use of pesticides and herbicides. While it’s not a perfect solution, it’s a positive step towards a more sustainable lifestyle.
Leave a Comment