
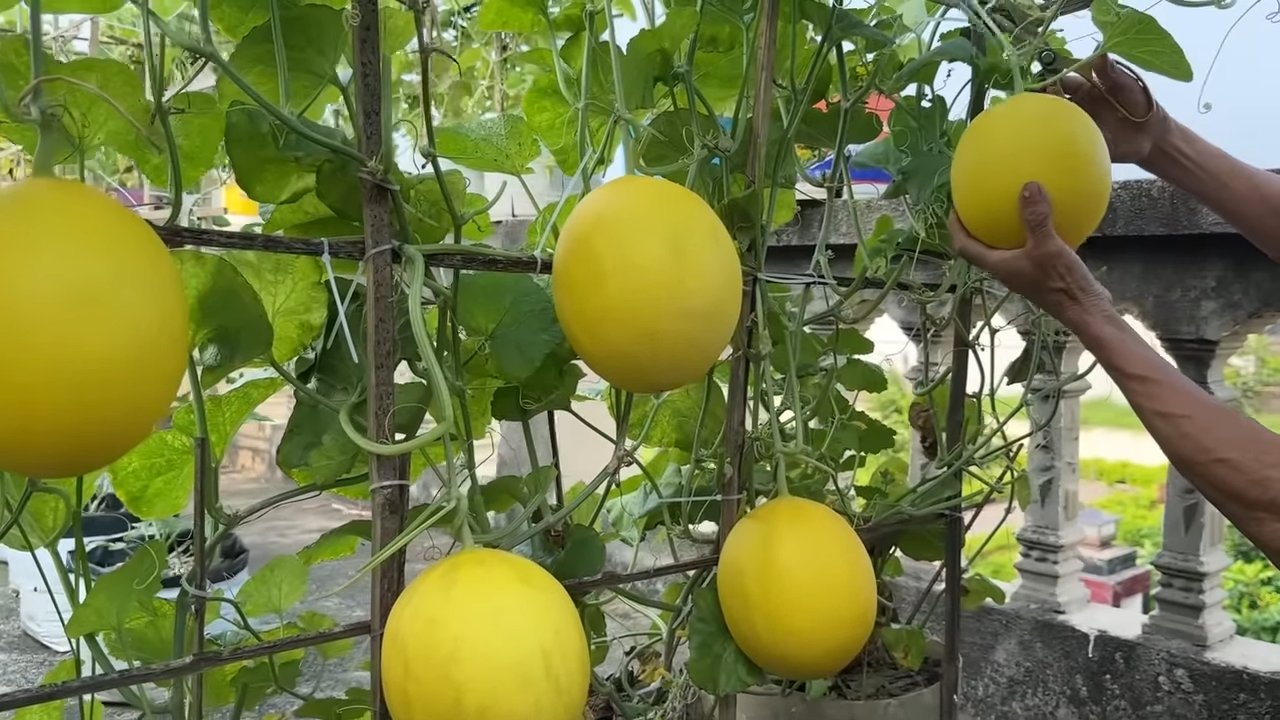
Harvesting Large Melons can feel like winning the lottery in your own backyard! Imagine the sweet, juicy reward after weeks of nurturing those sprawling vines. But knowing *when* and *how* to harvest these giants is crucial to enjoying their full flavor potential. Have you ever brought in a melon, eagerly sliced it open, only to find it bland and disappointing? I know I have, and it’s heartbreaking!
Melons, particularly watermelons, have a rich history, dating back to ancient Africa. They were prized for their hydrating properties in arid climates and have since spread across the globe, becoming a symbol of summer and abundance. Today, growing your own melons is more popular than ever, offering a connection to nature and a delicious, healthy treat.
But let’s be honest, figuring out the perfect time for harvesting large melons isn’t always straightforward. That’s why I’ve put together this guide filled with DIY tricks and hacks to help you confidently pick the ripest, most flavorful melons from your home garden. No more guesswork, no more disappointing slices! I’ll share my tried-and-true methods, from tapping techniques to visual cues, ensuring you enjoy the sweet taste of success with every harvest. Let’s get started and unlock the secrets to melon-growing mastery!
DIY: Building a Melon Support Sling for Bountiful Harvests
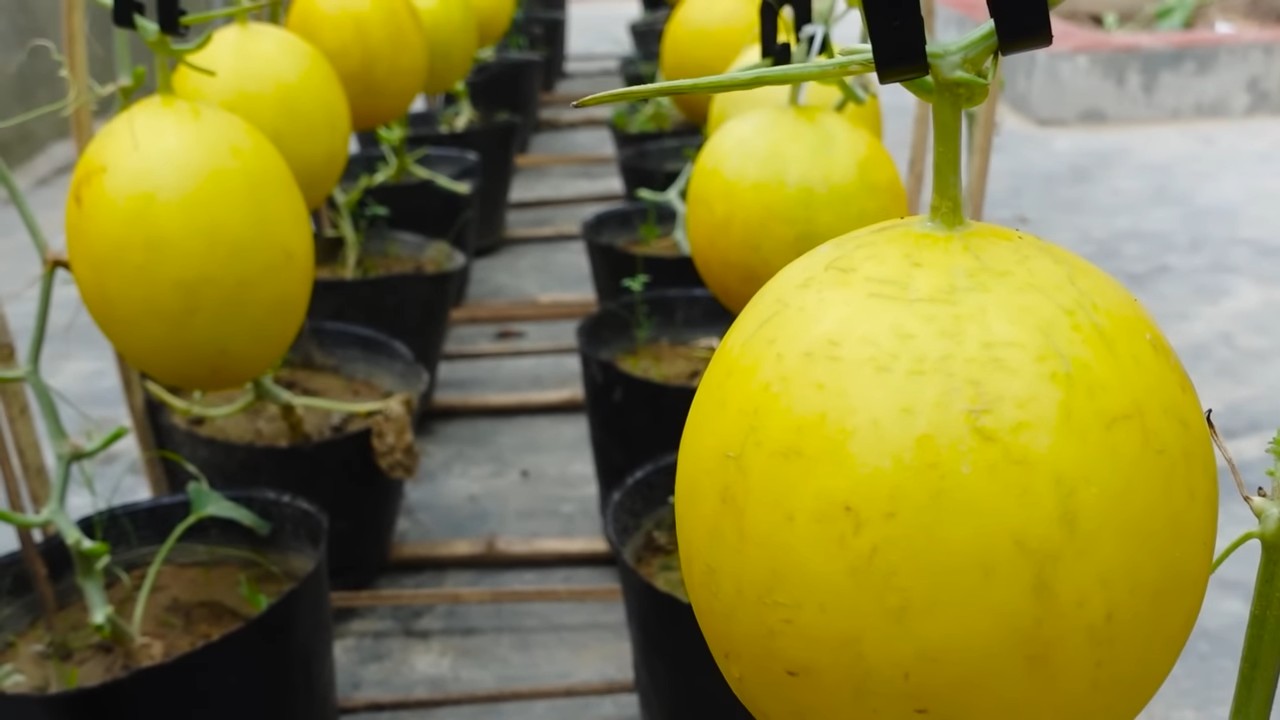
Okay, melon lovers, let’s talk about a problem we all face: those glorious, gigantic melons getting too heavy for their vines! It’s heartbreaking to see a potential prize-winner crack or detach before it’s ripe. But fear not! I’m going to walk you through building a simple, effective melon support sling that will keep your precious fruits safe and sound until harvest time. This project is budget-friendly, uses readily available materials, and is totally customizable to the size of your melons. Let’s get started!
Materials You’ll Need:
* Burlap or Breathable Fabric: Old pillowcases, burlap sacks, or even strong netting work great. Avoid plastic, as it can trap moisture and lead to rot. I personally love burlap for its rustic look and breathability.
* Strong Twine or Rope: Jute twine, sisal rope, or even paracord will do the trick. Make sure it’s strong enough to hold the weight of your melon. I usually opt for jute twine because it’s biodegradable and blends in nicely with the garden.
* Scissors or Utility Knife: For cutting the fabric and twine.
* Measuring Tape or Ruler: To ensure accurate measurements for your sling.
* Needle and Thread (Optional): If you want to reinforce the seams of your fabric sling. A sewing machine is even better if you have one!
* Sturdy Stakes or Branches: To anchor the sling to the ground or a trellis. Bamboo stakes or even pruned branches from your garden work perfectly.
* Safety Pins (Optional): For temporarily holding the fabric in place while you sew or tie it.
Designing Your Melon Sling: Key Considerations
Before we dive into the construction, let’s think about the design. The goal is to create a comfortable “hammock” for your melon that distributes its weight evenly and prevents it from touching the ground.
* Melon Size: Obviously, the size of your melon will dictate the size of your sling. Measure the circumference of your largest melon to get an idea of the fabric needed. Add a few extra inches for seam allowance and wiggle room.
* Vine Support: Consider how the vine is growing. Is it sprawling on the ground, or is it trained up a trellis? This will influence how you attach the sling.
* Breathability: As I mentioned earlier, breathability is key to preventing rot. Choose a fabric that allows air to circulate around the melon.
* Durability: The sling needs to be strong enough to support the weight of the melon as it grows. Reinforce the seams and use strong twine or rope.
Step-by-Step Instructions: Building Your Melon Sling
Okay, now for the fun part! Let’s build that melon sling.
1. Measure and Cut the Fabric:
* First, measure the circumference of your largest melon. Let’s say it’s 24 inches.
* Add about 6 inches to that measurement for seam allowance and wiggle room, so you’ll need a fabric width of 30 inches.
* Determine the desired depth of your sling. A good rule of thumb is about half the circumference of the melon, so in this case, 12 inches. Add a few inches for folding over the edges. Let’s say 15 inches.
* Cut your fabric to the dimensions you calculated (e.g., 30 inches wide by 15 inches deep).
* If you’re using a pillowcase, you might need to cut it open and adjust the size.
2. Prepare the Edges:
* Fold over the edges of the fabric by about 1 inch and iron them flat. This will create a clean, finished edge and prevent fraying.
* If you have a sewing machine, sew along the folded edges to secure them. If not, you can hand-stitch them using a simple running stitch or blanket stitch.
* Alternatively, you can use fabric glue to secure the edges, but sewing is generally more durable.
3. Create the Sling Shape:
* Fold the fabric in half lengthwise, with the right sides facing each other.
* Sew or stitch along the two open sides to create a pouch. Leave the top open.
* Turn the pouch right-side out. You should now have a simple fabric bag.
4. Reinforce the Sling (Optional but Recommended):
* For extra durability, you can reinforce the seams of the sling with a second layer of stitching.
* You can also add extra fabric patches to the corners where the twine or rope will be attached. This will prevent the fabric from tearing under the weight of the melon.
5. Attach the Twine or Rope:
* Cut four pieces of twine or rope, each about 2-3 feet long (adjust the length depending on how high you need to hang the sling).
* Attach one piece of twine to each corner of the sling.
* There are several ways to do this:
* Sewing: Sew the twine securely to the corner of the sling, reinforcing the stitching multiple times.
* Tying: Create a loop in the twine and thread it through the corner of the sling. Tie a secure knot to hold it in place.
* Combining: Sew the twine to the corner and then tie a knot for extra security.
* Make sure the twine is attached securely and can withstand the weight of the melon.
6. Install the Sling:
* Carefully position the sling under the melon, making sure it’s centered and the weight is evenly distributed.
* Tie the ends of the twine to sturdy stakes or branches.
* Adjust the height of the sling so that the melon is supported but not touching the ground.
* Make sure the sling is not too tight, as this can restrict the melon’s growth.
* If the vine is growing on a trellis, you can tie the twine directly to the trellis.
7. Monitor and Adjust:
* As the melon grows, you may need to adjust the sling to accommodate its increasing size and weight.
* Check the twine and fabric regularly for signs of wear and tear.
* Replace the sling if it becomes damaged or weakened.
Alternative Sling Designs:
While the basic fabric sling is a great starting point, here are a few variations you can try:
* Netting Sling: Use strong netting instead of fabric for maximum breathability. This is especially useful in humid climates.
* Macrame Sling: Get creative and make a macrame sling using jute twine or rope. This adds a decorative touch to your garden.
* Upcycled T-Shirt Sling: Cut up an old t-shirt and use the fabric to create a simple sling. This is a great way to recycle old clothing.
* Hammock Style: Create a wider, more hammock-like sling for larger melons. This will provide more support and prevent the melon from rolling.
Troubleshooting Tips:
* Sling is too tight: Loosen the twine or rope to give the melon more room to grow.
* Sling is too loose: Tighten the twine or rope to provide more support.
* Fabric is tearing: Reinforce the seams with extra stitching or fabric patches.
* Twine is breaking: Use stronger twine or rope.
* Melon is still touching the ground: Raise the sling higher.
* Slugs or pests are attacking the melon: Apply a barrier around the base of the sling to deter pests. Copper tape works well for slugs.
Harvesting Your Supported Melon:
When it’s time to harvest your melon, carefully cut it from the vine, leaving a short stem attached. Gently lower the melon from the sling and enjoy the fruits (literally!) of your labor. The sling made harvesting so much easier and prevented any accidental drops or damage.
Final Thoughts:
Building a melon support sling is a simple and rewarding DIY project that can significantly increase your melon harvest. By providing extra support and protection, you can prevent your precious fruits from cracking, rotting, or detaching before they’re ripe. So, gather your materials, get creative, and start building your own melon slings today! Happy gardening!
Conclusion
So, there you have it! Mastering the art of harvesting large melons doesn’t have to be a guessing game. By paying close attention to the visual cues, the sound test, and the tendril check, you can confidently bring in your perfectly ripe melons at their peak of flavor. This DIY trick, honed over years of gardening experience, is a game-changer for anyone serious about enjoying the fruits (literally!) of their labor.
Why is this a must-try? Because nothing beats the satisfaction of biting into a melon you’ve grown yourself, knowing you harvested it at the precise moment of ripeness. Store-bought melons often pale in comparison, picked before their prime to withstand shipping and storage. With this method, you’re guaranteeing yourself the sweetest, juiciest, and most flavorful melon experience possible.
But don’t stop there! Experiment with different melon varieties and see how these techniques apply. Watermelons, cantaloupes, honeydews – each has its nuances, and you’ll become a melon harvesting expert in no time. For example, with watermelons, the ground spot turning a creamy yellow is crucial, while cantaloupes will often slip easily from the vine when ripe. Honeydews, on the other hand, rely more heavily on the blossom end softening and a fragrant aroma.
Consider these variations to further refine your harvesting skills:
* The Sugar Spot Test: Some gardeners swear by looking for a “sugar spot” – a small area on the melon’s rind that appears slightly discolored or sugary. This can indicate a high sugar content and peak ripeness.
* The Float Test (for Watermelons): While not foolproof, some believe a ripe watermelon will float in water due to its increased sugar content and density.
* The Thump Test Refined: Don’t just thump! Listen closely to the resonance. A dull thud often indicates an overripe melon, while a high-pitched, almost metallic sound can mean it’s underripe. You’re looking for a deep, hollow sound.
Ultimately, the best way to master this DIY trick is to practice! Start with a few melons and carefully observe them as they mature. Keep a journal of your observations, noting the date of planting, the size of the melon, the color of the tendril, and the sound it makes when thumped. Over time, you’ll develop an intuitive sense for when your melons are ready to be harvested.
We are confident that this guide will help you achieve melon harvesting success. Don’t be afraid to get your hands dirty and experiment. The reward of a perfectly ripe, homegrown melon is well worth the effort.
So, go ahead and give this DIY trick a try! We’re eager to hear about your experiences. Share your photos, tips, and stories in the comments below. Let’s build a community of melon-loving gardeners who are passionate about harvesting their crops at the peak of perfection. Happy harvesting!
Frequently Asked Questions (FAQ)
What if the tendril is brown and dry, but the melon still seems hard?
This is a common scenario, and it doesn’t necessarily mean the melon is ready. The tendril is a good indicator, but it’s not the only one. If the tendril is brown, but the melon is still firm and the ground spot is still pale, give it a few more days. Continue to monitor the other signs of ripeness, such as the sound test and the overall appearance of the melon. Sometimes, environmental factors can cause the tendril to dry out prematurely.
How do I know if I’ve waited too long to harvest?
An overripe melon will often have a dull sound when thumped, and the rind may feel soft or even slightly mushy in places. The blossom end might also be overly soft and sunken. In some cases, the melon may even start to crack. While an overripe melon is still edible, it won’t have the same crisp texture and sweet flavor as a perfectly ripe one. It’s best to err on the side of caution and harvest a melon that you suspect might be slightly underripe rather than waiting too long.
Can I use these techniques for all types of melons?
Yes, the general principles apply to most types of melons, but there are some nuances. Watermelons rely heavily on the ground spot and the thump test. Cantaloupes are often ready when they slip easily from the vine. Honeydews depend more on the blossom end softening and a fragrant aroma. It’s always a good idea to research the specific characteristics of the melon variety you’re growing to ensure you’re using the most accurate indicators of ripeness.
What’s the best time of day to harvest melons?
The best time to harvest melons is in the morning, after the dew has dried but before the heat of the day sets in. This is when the melons are at their coolest and most hydrated, which will help them retain their freshness and flavor. Avoid harvesting melons in the heat of the afternoon, as they can become stressed and wilted.
How should I store my harvested melons?
Store your harvested melons in a cool, dry place. Whole melons can be stored at room temperature for a few days, but they will last longer if refrigerated. Cut melons should be wrapped tightly in plastic wrap and stored in the refrigerator. They will typically last for 3-5 days.
My melon has a large white spot on the bottom. Is it still okay to eat?
The large white spot is likely the ground spot, where the melon rested on the ground as it grew. A creamy yellow or orange ground spot is a sign of ripeness, but a large, pale white spot may indicate that the melon didn’t receive enough sunlight in that area. While it’s still safe to eat, the flesh in that area may be less sweet and flavorful.
What if I don’t hear a hollow sound when I thump the melon?
If you don’t hear a hollow sound, it could mean the melon is either underripe or overripe. If the sound is high-pitched and almost metallic, it’s likely underripe. If the sound is dull and thudding, it’s likely overripe. You’re looking for a deep, resonant, hollow sound that indicates the melon is perfectly ripe. Practice makes perfect!
How important is the tendril test, really?
The tendril test is a valuable indicator, but it shouldn’t be the only factor you consider. It’s best to use it in conjunction with the other signs of ripeness, such as the ground spot, the sound test, and the overall appearance of the melon. Sometimes, the tendril can dry out prematurely due to environmental factors, so it’s important to look at the whole picture.
Can I use this DIY trick to harvest other fruits and vegetables?
While the specific techniques may not be directly applicable to all fruits and vegetables, the underlying principles of observation and attention to detail can be used to determine the ripeness of many different crops. Pay attention to the color, texture, aroma, and overall appearance of the fruit or vegetable, and research the specific characteristics of the variety you’re growing.
What are some common mistakes people make when harvesting melons?
Some common mistakes include:
* Harvesting too early, before the melon has fully ripened.
* Relying solely on one indicator of ripeness, such as the tendril test.
* Not paying attention to the ground spot.
* Harvesting in the heat of the day.
* Storing melons improperly.
By avoiding these mistakes and following the tips outlined in this guide, you can ensure that you’re harvesting your melons at their peak of flavor and enjoying the fruits of your labor to the fullest. Remember, successful **melon harvesting** is a skill that improves with practice and observation.


Leave a Comment