
Home Vegetable Garden: Imagine stepping outside your back door and picking fresh, sun-ripened tomatoes, crisp lettuce, or fragrant herbs for your dinner. Sounds idyllic, right? Well, it’s more achievable than you might think! For centuries, people have cultivated their own food, from the elaborate kitchen gardens of European royalty to the humble plots tended by families around the world. This connection to the earth, this ability to nurture life and nourish ourselves, is deeply ingrained in our history.
But let’s face it, in today’s busy world, the idea of starting a home vegetable garden can feel overwhelming. Where do you even begin? That’s where this article comes in! I’m going to share some of my favorite DIY tricks and hacks that will make growing your own vegetables easier, more affordable, and way more fun. Whether you have a sprawling backyard or just a sunny balcony, these tips will help you create a thriving garden that provides you with delicious, healthy produce.
Why do you need these DIY tricks? Because gardening shouldn’t be a chore! It should be a rewarding experience that connects you to nature and provides you with fresh, healthy food. These hacks will save you time, money, and frustration, allowing you to focus on the joy of watching your garden grow. So, let’s get our hands dirty and start creating the home vegetable garden of your dreams!

Propagating Plants: A Beginner’s Guide to Multiplying Your Green Friends
Hey plant lovers! Ever wished you could magically have more of your favorite plants without spending a fortune? Well, guess what? You totally can! Plant propagation is the art (and science!) of creating new plants from existing ones. It’s like plant cloning, but way cooler because you’re doing it yourself. June is a fantastic time to propagate many plants, as they’re actively growing and ready to put out new roots. I’m going to walk you through some easy methods to expand your plant collection.
Understanding the Basics of Plant Propagation
Before we dive into the nitty-gritty, let’s cover some essential concepts. Propagation relies on the plant’s ability to regenerate. Different plants have different propagation methods that work best for them. Some are super easy, while others require a bit more finesse. Don’t be discouraged if your first attempt isn’t perfect. Practice makes perfect, and even experienced plant parents have propagation failures!
Here’s a quick rundown of the most common propagation methods we’ll be covering:
* Stem Cuttings: This involves taking a cutting from a stem and encouraging it to grow roots. It’s one of the most versatile methods and works for many popular houseplants.
* Leaf Cuttings: Certain plants, like succulents and snake plants, can be propagated from just a single leaf!
* Division: This method is perfect for plants that grow in clumps, like ZZ plants or snake plants. You simply divide the plant into smaller sections, each with its own roots.
* Water Propagation: Rooting cuttings in water is a simple and effective way to watch the roots develop.
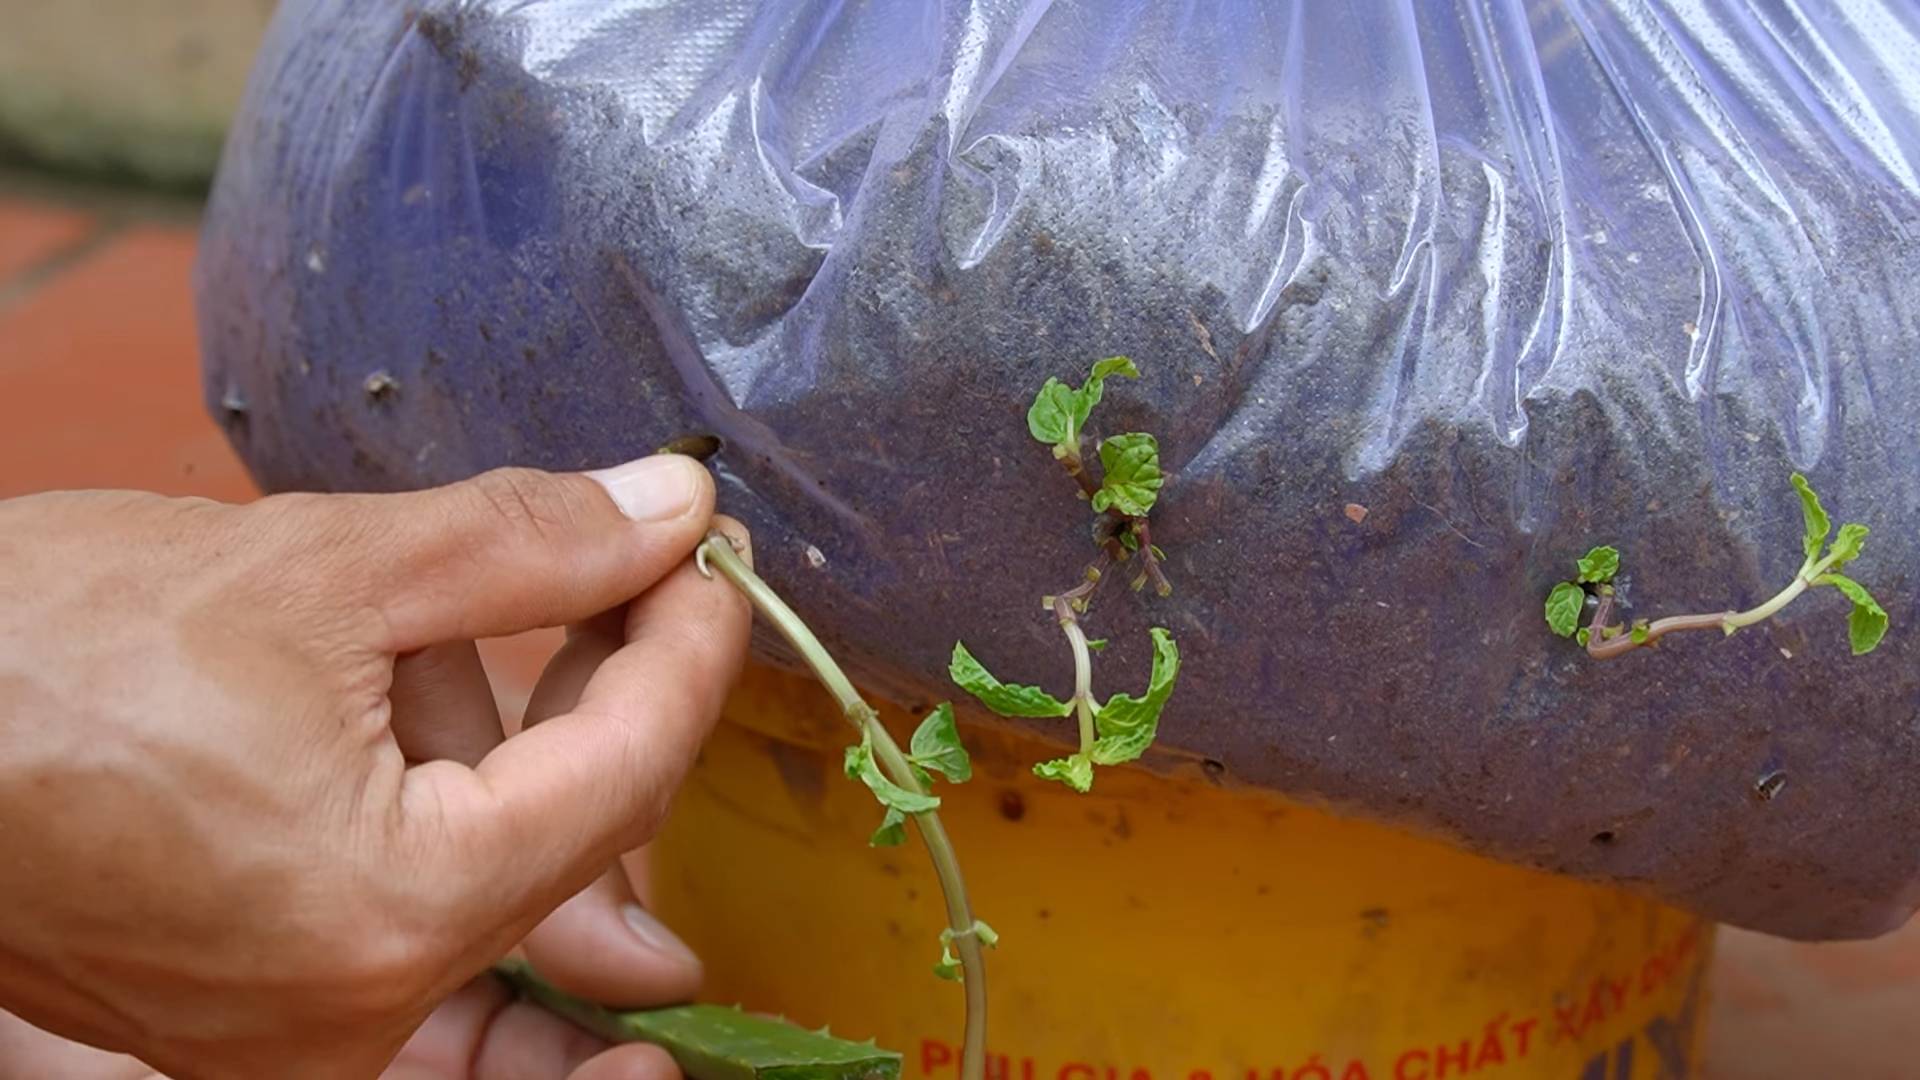
Propagating with Stem Cuttings: The Most Versatile Method
Stem cuttings are my go-to method for propagating many of my favorite plants. It’s relatively easy, and you can often get multiple cuttings from a single plant.
What you’ll need:
* A healthy mother plant
* Sharp, clean pruning shears or a knife (sterilize with rubbing alcohol to prevent disease)
* Rooting hormone (optional, but it can speed up the process)
* A glass or jar for water propagation, or a small pot with well-draining potting mix
* A plastic bag or humidity dome (optional, to create a humid environment)
Step-by-Step Instructions:
1. Choose your cutting: Select a healthy stem with several leaves or nodes (the points where leaves emerge). Avoid stems that are flowering or have signs of disease.
2. Make the cut: Using your clean pruning shears or knife, make a clean cut just below a node. The cutting should be about 4-6 inches long.
3. Prepare the cutting: Remove the leaves from the bottom 1-2 inches of the cutting. This will prevent them from rotting when submerged in water or buried in soil. If the remaining leaves are very large, you can cut them in half to reduce water loss.
4. Apply rooting hormone (optional): Dip the cut end of the stem into rooting hormone powder or liquid. This will encourage root development.
5. Choose your propagation method: You can either propagate in water or directly in soil.
* Water Propagation: Place the cutting in a glass or jar filled with water, ensuring that the bottom nodes are submerged but the leaves are above the water line.
* Soil Propagation: Plant the cutting in a small pot filled with well-draining potting mix. Make a hole in the soil with your finger or a pencil, insert the cutting, and gently firm the soil around it.
6. Provide the right environment:
* Water Propagation: Place the jar in a bright, indirect light location. Change the water every few days to keep it fresh.
* Soil Propagation: Water the soil lightly to keep it moist but not soggy. Place the pot in a bright, indirect light location. You can also cover the pot with a plastic bag or humidity dome to create a humid environment, which will help the cutting retain moisture.
7. Be patient: Root development can take several weeks, depending on the plant species and environmental conditions. For water propagation, you should see roots emerging from the nodes within a few weeks. For soil propagation, you can gently tug on the cutting after a few weeks to see if it has rooted. If you feel resistance, it means roots have formed.
8. Potting up: Once the roots are about an inch or two long (for water propagation) or the cutting has established roots in soil, you can pot it up into a larger pot with well-draining potting mix.
Leaf Cuttings: A Simple Way to Multiply Succulents and More
Leaf cuttings are a fantastic way to propagate succulents like Echeverias, Sedums, and Graptopetalums, as well as some other plants like Snake Plants (Sansevieria). It’s surprisingly easy, and you can get a whole new plant from just a single leaf!
What you’ll need:
* A healthy mother plant
* Clean, sharp knife or pruning shears
* Well-draining potting mix (cactus or succulent mix is ideal)
* A small pot or tray
* Spray bottle with water
Step-by-Step Instructions:
1. Select healthy leaves: Choose plump, healthy leaves from the mother plant. Avoid leaves that are damaged or discolored.
2. Remove the leaves: Gently twist or cut the leaves from the stem. It’s important to get a clean break at the base of the leaf, where it connects to the stem.
3. Callus the leaves: Allow the cut ends of the leaves to callus over for a few days. This will prevent them from rotting when planted. Place the leaves on a dry paper towel in a cool, dry place.
4. Prepare the potting mix: Fill a small pot or tray with well-draining potting mix.
5. Plant the leaves: There are two ways to plant the leaves:
* Lay them on the soil: Simply lay the calloused leaves on top of the soil.
* Insert the cut end into the soil: Gently insert the calloused end of the leaf into the soil, about 1/4 inch deep.
6. Provide the right environment: Place the pot or tray in a bright, indirect light location. Mist the soil lightly with water every few days to keep it slightly moist.
7. Be patient: Root and new plantlet development can take several weeks or even months. You should start to see tiny roots emerging from the cut end of the leaf, followed by small plantlets.
8. Potting up: Once the plantlets are large enough to handle, you can gently separate them from the mother leaf and pot them up into individual pots.
Division: Multiplying Clumping Plants with Ease
Division is a great way to propagate plants that grow in clumps, such as ZZ plants, snake plants, peace lilies, and ferns. It’s a relatively simple process that involves separating the plant into smaller sections, each with its own roots and foliage.
What you’ll need:
* A healthy, mature clumping plant
* A sharp knife or garden spade
* Pots of appropriate size for the divisions
* Well-draining potting mix
Step-by-Step Instructions:
1. Prepare the plant: Water the plant thoroughly a day or two before dividing it. This will help to loosen the soil and make it easier to separate the roots.
2. Remove the plant from its pot: Gently remove the plant from its pot. If the roots are tightly bound, you may need to loosen them with your fingers or a garden fork.
3. Divide the plant: Examine the root ball and identify natural divisions. Use a sharp knife or garden spade to carefully separate the plant into smaller sections, ensuring that each section has its own roots and foliage.
4. Pot up the divisions: Plant each division in a pot of appropriate size, using well-draining potting mix.
5. Water and care: Water the newly potted divisions thoroughly and place them in a bright, indirect light location. Keep the soil moist but not soggy until the plants are established.
Water Propagation: Watching Roots Grow in Real Time
Water propagation is a simple and satisfying method for rooting cuttings. It allows you to see the roots develop, which can be very rewarding.
What you’ll need:
* A healthy mother plant
* Sharp, clean pruning shears or a knife
* A glass or jar
* Water
Step-by-Step Instructions:
1. Take a cutting: Select a healthy stem cutting from the mother plant, as described in the stem cutting section above.
2. Prepare the cutting: Remove the leaves from the bottom 1-2 inches of the cutting.
3. Place the cutting in water: Place the cutting in a glass or jar filled
Conclusion
So, there you have it! Transforming your outdoor space into a thriving home vegetable garden isn’t just a whimsical dream; it’s an achievable reality with a little planning, effort, and the right approach. We’ve explored the fundamental steps, from selecting the perfect location and preparing the soil to choosing the right vegetables and providing ongoing care. But why is embarking on this journey a must-try?
Firstly, the taste. There’s simply no comparison between a store-bought tomato and one ripened on the vine in your own garden. The burst of flavor, the vibrant colors, and the satisfying crunch are unparalleled. You’ll rediscover the true essence of vegetables, free from the waxes and preservatives often found in commercially grown produce.
Secondly, the health benefits are undeniable. You control exactly what goes into your garden, ensuring that your vegetables are free from harmful pesticides and herbicides. You’ll be nourishing your body with nutrient-rich food, contributing to a healthier lifestyle for you and your family.
Thirdly, the therapeutic value is immense. Gardening is a fantastic stress reliever. The act of nurturing plants, getting your hands dirty, and witnessing the miracle of growth can be incredibly calming and rewarding. It’s a chance to disconnect from the digital world and reconnect with nature.
Fourthly, the cost savings can be significant. While there’s an initial investment in seeds, soil, and tools, you’ll quickly recoup those costs by reducing your grocery bills. Plus, you’ll have a constant supply of fresh, organic vegetables right at your doorstep.
Fifthly, the educational opportunity is invaluable. Gardening is a wonderful way to teach children about where their food comes from, the importance of healthy eating, and the wonders of the natural world. It’s a hands-on learning experience that they’ll cherish for years to come.
But the benefits don’t stop there. A home vegetable garden enhances the beauty of your property, attracts beneficial insects and pollinators, and reduces your carbon footprint. It’s a sustainable and eco-friendly way to live.
Ready to take your garden to the next level? Consider these variations:
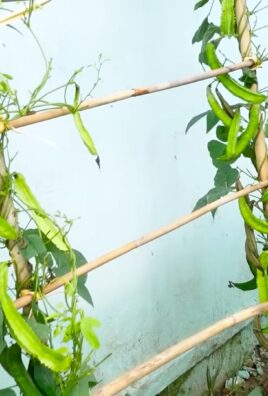
* **Vertical Gardening:** If you’re short on space, explore vertical gardening techniques using trellises, hanging baskets, or stacked planters. This is a great way to maximize your yield in a small area.
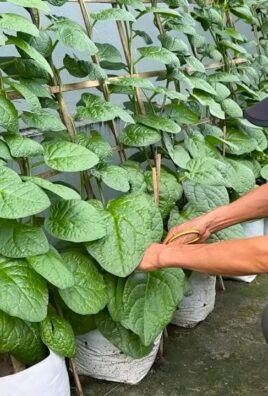
* **Container Gardening:** For those with limited outdoor space or mobility issues, container gardening is an excellent option. You can grow a wide variety of vegetables in pots on your patio, balcony, or even indoors.
* **Companion Planting:** Research companion planting to learn which vegetables grow well together. For example, tomatoes and basil are a classic pairing that benefits both plants.
* **Succession Planting:** Extend your harvest season by planting vegetables in succession. Plant a new batch of seeds every few weeks to ensure a continuous supply of fresh produce.
* **Hydroponics:** For the tech-savvy gardener, hydroponics offers a soil-less growing method that can produce impressive results.
Don’t be afraid to experiment and find what works best for you and your local climate. Every garden is unique, and the learning process is part of the fun.
We encourage you to embrace the joy of growing your own food. Start small, be patient, and don’t be discouraged by setbacks. The rewards of a thriving home vegetable garden are well worth the effort.
Now, it’s your turn! We’d love to hear about your experiences. Share your tips, successes, and challenges in the comments below. Let’s create a community of passionate gardeners who are dedicated to growing their own healthy and delicious food. Show us your pictures and tell us what you are growing in your home vegetable garden!
Frequently Asked Questions (FAQ)
What is the best time of year to start a home vegetable garden?
The best time to start a home vegetable garden depends on your local climate and the specific vegetables you want to grow. Generally, spring is a popular time to start, as the weather warms up and the soil becomes workable. However, some vegetables, such as leafy greens and root crops, can be planted in the fall for a winter or early spring harvest. Consult your local planting calendar or agricultural extension office for specific recommendations for your region. Consider the last frost date in your area as a key indicator. Starting seeds indoors 6-8 weeks before the last frost can give you a head start on the growing season.
How much space do I need for a home vegetable garden?
The amount of space you need for a home vegetable garden depends on the types and quantities of vegetables you want to grow. Even a small space, such as a patio or balcony, can be used to grow herbs, leafy greens, and some vegetables in containers. A larger garden, such as a raised bed or in-ground plot, will allow you to grow a wider variety of vegetables and produce a larger harvest. As a general guideline, a 4×4 foot raised bed can be a good starting point for beginners. Remember to consider the mature size of the plants you choose and space them accordingly.
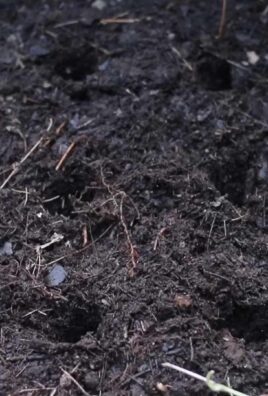
What kind of soil is best for a home vegetable garden?
The best kind of soil for a home vegetable garden is well-draining, fertile, and rich in organic matter. Loamy soil, which is a mixture of sand, silt, and clay, is ideal. However, most soils can be improved by adding compost, aged manure, or other organic amendments. Before planting, it’s a good idea to test your soil’s pH level and nutrient content. You can purchase a soil testing kit at your local garden center or send a sample to a soil testing laboratory. Aim for a pH level between 6.0 and 7.0 for most vegetables.
How often should I water my home vegetable garden?
The frequency of watering depends on the weather, the type of soil, and the specific vegetables you are growing. Generally, vegetables need about 1 inch of water per week. Water deeply and less frequently, rather than shallowly and more often. This encourages roots to grow deeper, making plants more drought-tolerant. Check the soil moisture regularly by sticking your finger about an inch into the soil. If it feels dry, it’s time to water. Avoid overwatering, which can lead to root rot. Consider using a soaker hose or drip irrigation system to deliver water directly to the roots of your plants.
What are some common pests and diseases that affect home vegetable gardens?
Common pests that affect home vegetable gardens include aphids, caterpillars, slugs, snails, and squash bugs. Common diseases include powdery mildew, blight, and root rot. To prevent pests and diseases, choose disease-resistant varieties of vegetables, practice good sanitation (remove dead leaves and debris), and water plants at the base to avoid wetting the foliage. If pests or diseases do occur, consider using organic pest control methods, such as insecticidal soap, neem oil, or Bacillus thuringiensis (Bt).
How do I fertilize my home vegetable garden?
Vegetables need nutrients to grow and produce a good harvest. Fertilize your home vegetable garden with compost, aged manure, or a balanced organic fertilizer. Apply fertilizer at planting time and then again every few weeks during the growing season. Follow the instructions on the fertilizer label carefully. Avoid over-fertilizing, which can damage plants. Consider using a slow-release fertilizer to provide a steady supply of nutrients over time.
What are some easy vegetables to grow for beginners?
Some easy vegetables to grow for beginners include lettuce, spinach, radishes, beans, zucchini, and tomatoes. These vegetables are relatively low-maintenance and can produce a good harvest even with minimal experience. Herbs, such as basil, mint, and chives, are also easy to grow and can add flavor to your meals. Start with a few easy vegetables and then gradually expand your garden as you gain experience.
How do I deal with weeds in my home vegetable garden?
Weeds compete with vegetables for water, nutrients, and sunlight. To control weeds in your home vegetable garden, mulch around your plants with straw, wood chips, or shredded leaves. Hand-pull weeds regularly, especially when they are small. Avoid using herbicides, which can harm your vegetables. Consider using a hoe to cultivate the soil and remove weeds.
How can I extend the growing season in my home vegetable garden?
There are several ways to extend the growing season in your home vegetable garden. You can start seeds indoors 6-8 weeks before the last frost. You can use row covers or cold frames to protect plants from frost. You can choose vegetables that are cold-tolerant, such as spinach, kale, and lettuce. You can also use succession planting to plant new crops every few weeks.
What are the benefits of growing my own vegetables?
Growing your own vegetables offers numerous benefits, including:
* **Fresh, flavorful produce:** Homegrown vegetables taste better than store-bought vegetables.
* **Healthier food:** You control what goes into your garden, ensuring that your vegetables are free from harmful pesticides and herbicides.
* **Cost savings:** You can save money on your grocery bills by growing your own vegetables.
* **Therapeutic value:** Gardening is a relaxing and rewarding activity.
* **Educational opportunity:** Gardening is a great way to teach children about where their food comes from.
* **Environmental benefits:** Gardening reduces your carbon footprint and promotes biodiversity.
Leave a Comment