
Hydrogen Peroxide Hacks: Unlock the Secrets to a Thriving Home Garden!
Have you ever looked at your garden and wished you had a magic wand to banish pests, boost growth, and generally make everything flourish? Well, while I can’t offer you a wand, I can offer you something just as powerful: hydrogen peroxide hacks! This unassuming household staple is a surprisingly versatile tool for any home gardener, and I’m thrilled to share some incredible DIY tricks that will transform your gardening game.
The use of hydrogen peroxide in gardening isn’t exactly new. Gardeners have been quietly using it for years, often passing down tips and tricks through generations. It’s a testament to the power of simple, effective solutions. But why is it so effective? Well, hydrogen peroxide breaks down into water and oxygen, providing a boost to your plants’ roots and helping to combat harmful bacteria and fungi.
In today’s world, where we’re all looking for sustainable and cost-effective ways to care for our plants, these hydrogen peroxide hacks are more relevant than ever. Whether you’re battling fungal infections, struggling with seed germination, or simply want to give your plants an extra boost, I’m confident that these DIY tricks will become your new go-to solutions. Get ready to discover the amazing potential of this simple compound and watch your garden thrive!
Unlocking the Power of Hydrogen Peroxide: DIY Hacks You Need to Know
Hydrogen peroxide! It’s that unassuming brown bottle in your medicine cabinet, right? But trust me, it’s so much more than just a first-aid antiseptic. I’ve discovered a ton of amazing uses for it around the house, and I’m excited to share my favorite DIY hacks with you. Get ready to be amazed by the cleaning, brightening, and even beauty benefits of this inexpensive powerhouse!
Hack 1: Whitening Laundry Like a Pro
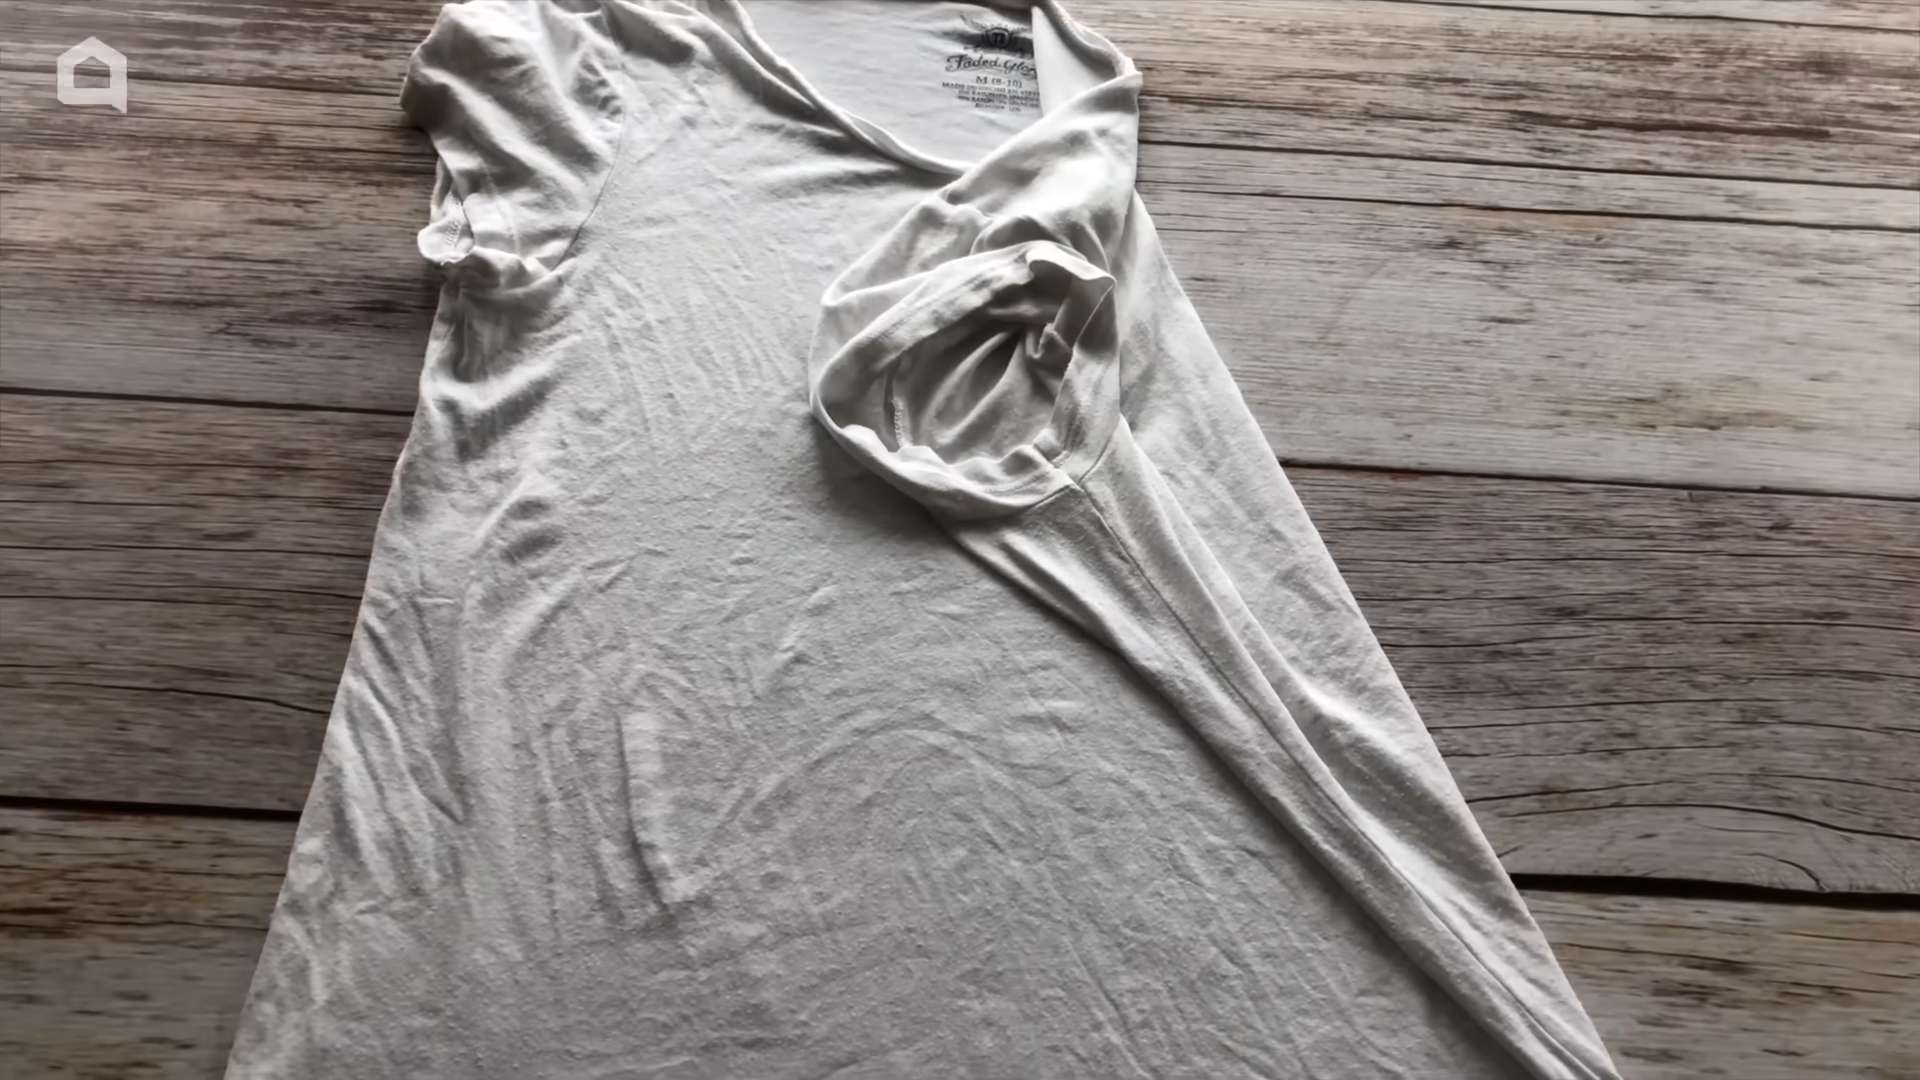
Tired of dingy whites? I was too! Bleach can be harsh and damaging, so I started using hydrogen peroxide as a gentler alternative. It works wonders!
What you’ll need:
* Hydrogen peroxide (3% solution)
* Laundry detergent
* Washing machine
Step-by-step instructions:
1. Pre-treat Stains: Before tossing your whites into the washing machine, tackle any stubborn stains. Pour a small amount of hydrogen peroxide directly onto the stain. Let it sit for about 10-15 minutes. For really tough stains, you can gently rub the fabric together to help the peroxide penetrate.
2. Add to the Wash: Fill your washing machine as usual, adding your regular laundry detergent.
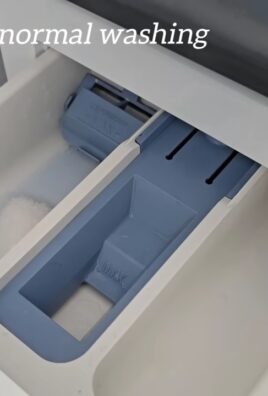
3. The Magic Ingredient: Now, add 1 cup of hydrogen peroxide to the washing machine along with your detergent. Pour it directly into the drum or the detergent dispenser.
4. Wash as Usual: Select your desired wash cycle (I usually use a warm water cycle for whites) and let the machine do its thing!
5. Dry as Usual: Once the wash cycle is complete, dry your clothes as you normally would. I prefer to hang my whites outside to dry in the sun for extra brightening power!
Important Notes:
* Always test hydrogen peroxide on a small, inconspicuous area of the fabric first to ensure it doesn’t cause any discoloration.
* Don’t mix hydrogen peroxide with bleach, as this can create harmful fumes.
* For heavily soiled items, you may need to repeat the process or soak the items in a solution of hydrogen peroxide and water before washing.
Hack 2: Sparkling Clean Bathroom Fixtures
Soap scum and hard water stains can make bathroom fixtures look dull and grimy. I’ve found that hydrogen peroxide is a fantastic way to restore their shine!
What you’ll need:
* Hydrogen peroxide (3% solution)
* Spray bottle
* Clean cloth or sponge
* Optional: Baking soda
Step-by-step instructions:
1. Prepare the Solution: Pour hydrogen peroxide into a spray bottle.
2. Spray and Soak: Spray the hydrogen peroxide directly onto the bathroom fixtures you want to clean, such as faucets, showerheads, and sinks. Let it sit for about 10-15 minutes to allow the peroxide to loosen the grime.
3. Scrub (if needed): For stubborn stains or buildup, you may need to gently scrub the fixtures with a clean cloth or sponge.
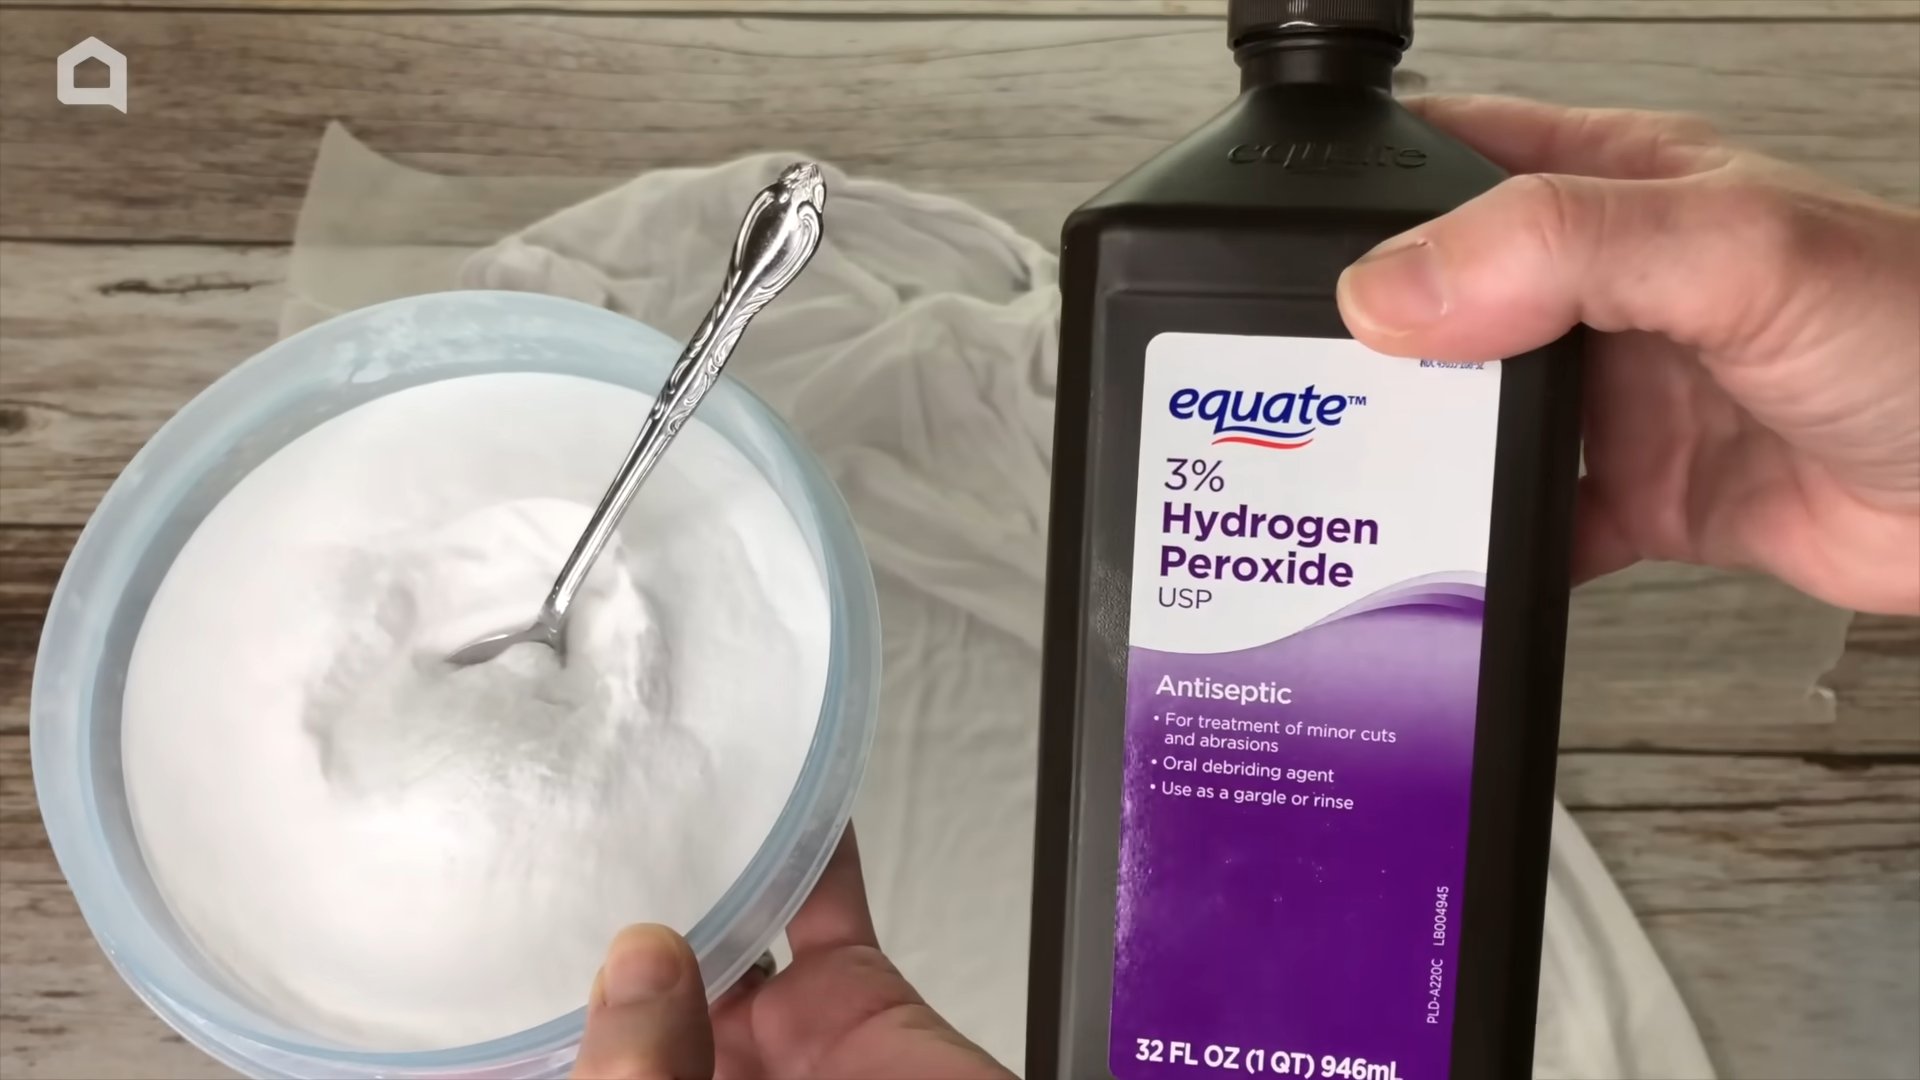
4. Baking Soda Boost (Optional): For extra cleaning power, create a paste of baking soda and hydrogen peroxide. Apply the paste to the fixtures, let it sit for a few minutes, and then scrub.
5. Rinse Thoroughly: Rinse the fixtures thoroughly with water to remove any remaining hydrogen peroxide or baking soda.
6. Dry and Shine: Dry the fixtures with a clean cloth to prevent water spots and reveal their sparkling shine!
Important Notes:
* Avoid using hydrogen peroxide on gold-plated fixtures, as it may damage the finish.
* Always test on a small, inconspicuous area first.
* For showerheads, you can soak them in a solution of hydrogen peroxide and water overnight to remove mineral deposits.
Hack 3: Disinfecting Cutting Boards and Kitchen Surfaces
Cutting boards can harbor bacteria, especially after cutting raw meat or poultry. Hydrogen peroxide is a safe and effective way to disinfect them.
What you’ll need:
* Hydrogen peroxide (3% solution)
* Spray bottle
* White vinegar
* Clean cloth or paper towels
Step-by-step instructions:
1. Clean the Surface: First, wash the cutting board or kitchen surface with soap and water to remove any food particles.
2. Spray with Hydrogen Peroxide: Spray the surface liberally with hydrogen peroxide.
3. Spray with White Vinegar: Next, spray the surface with white vinegar. Don’t worry, the combination is safe and effective!
4. Let it Sit: Allow the hydrogen peroxide and vinegar to sit on the surface for about 5-10 minutes to disinfect.
5. Wipe Clean: Wipe the surface clean with a clean cloth or paper towels.
6. Rinse (Optional): If desired, you can rinse the surface with water after disinfecting.
Important Notes:
* Always use separate cutting boards for raw meat and produce to prevent cross-contamination.
* Store hydrogen peroxide in a dark, cool place to prevent it from breaking down.
* This method is also great for disinfecting countertops, sinks, and other kitchen surfaces.
Hack 4: Brightening Nails Naturally
Say goodbye to stained nails! I love using hydrogen peroxide to brighten my nails after wearing dark nail polish.
What you’ll need:
* Hydrogen peroxide (3% solution)
* Cotton balls or pads
* Bowl of warm water
Step-by-step instructions:
1. Soak Cotton Balls: Soak cotton balls or pads in hydrogen peroxide.
2. Apply to Nails: Place the soaked cotton balls or pads on your nails, ensuring they are fully covered.
3. Let it Sit: Let the cotton balls or pads sit on your nails for about 2-3 minutes.
4. Rinse and Repeat: Remove the cotton balls or pads and rinse your nails with warm water. Repeat the process if needed.
5. Moisturize: After brightening your nails, apply a moisturizing lotion or cuticle oil to keep them hydrated.
Important Notes:
* Don’t leave the hydrogen peroxide on your nails for too long, as it can dry them out.
* Avoid using this method too frequently, as it can weaken your nails over time.
* You can also add a small amount of hydrogen peroxide to a bowl of warm water and soak your nails in the solution for a few minutes.
Hack 5: Cleaning Grout Like a Pro
Dirty grout lines can make your tile floors and walls look old and dingy. I’ve found that hydrogen peroxide is a fantastic way to clean and brighten grout.
What you’ll need:
* Hydrogen peroxide (3% solution)
* Spray bottle
* Old toothbrush or grout brush
* Optional: Baking soda
Step-by-step instructions:
1. Prepare the Area: Make sure the area you’re cleaning is well-ventilated.
2. Spray with Hydrogen Peroxide: Spray the hydrogen peroxide directly onto the grout lines.
3. Let it Sit: Let the hydrogen peroxide sit on the grout for about 10-15 minutes to allow it to penetrate and loosen the dirt and grime.
4. Scrub the Grout: Use an old toothbrush or grout brush to scrub the grout lines. Apply gentle pressure and work in small sections.
5. Baking Soda Boost (Optional): For extra cleaning power, create a paste of baking soda and hydrogen peroxide. Apply the paste to the grout lines, let it sit for a few minutes, and then scrub.
6. Rinse Thoroughly: Rinse the area thoroughly with water to remove any remaining hydrogen peroxide or baking soda.
7. Dry and A
Hydrogen peroxide! It’s that unassuming brown bottle in your medicine cabinet, right? But trust me, it’s so much more than just a first-aid antiseptic. I’ve discovered a ton of amazing uses for it around the house, and I’m excited to share my favorite DIY hacks with you. Get ready to be amazed by the cleaning, brightening, and even beauty benefits of this inexpensive powerhouse!
Hack 1: Whitening Laundry Like a Pro
Tired of dingy whites? I was too! Bleach can be harsh and damaging, so I started using hydrogen peroxide as a gentler alternative. It works wonders!
What you’ll need:
* Hydrogen peroxide (3% solution)
* Laundry detergent
* Washing machine
Step-by-step instructions:
1. Pre-treat Stains: Before tossing your whites into the washing machine, tackle any stubborn stains. Pour a small amount of hydrogen peroxide directly onto the stain. Let it sit for about 10-15 minutes. For really tough stains, you can gently rub the fabric together to help the peroxide penetrate.
2. Add to the Wash: Fill your washing machine as usual, adding your regular laundry detergent.
3. The Magic Ingredient: Now, add 1 cup of hydrogen peroxide to the washing machine along with your detergent. Pour it directly into the drum or the detergent dispenser.
4. Wash as Usual: Select your desired wash cycle (I usually use a warm water cycle for whites) and let the machine do its thing!
5. Dry as Usual: Once the wash cycle is complete, dry your clothes as you normally would. I prefer to hang my whites outside to dry in the sun for extra brightening power!
Important Notes:
* Always test hydrogen peroxide on a small, inconspicuous area of the fabric first to ensure it doesn’t cause any discoloration.
* Don’t mix hydrogen peroxide with bleach, as this can create harmful fumes.
* For heavily soiled items, you may need to repeat the process or soak the items in a solution of hydrogen peroxide and water before washing.
Hack 2: Sparkling Clean Bathroom Fixtures
Soap scum and hard water stains can make bathroom fixtures look dull and grimy. I’ve found that hydrogen peroxide is a fantastic way to restore their shine!
What you’ll need:
* Hydrogen peroxide (3% solution)
* Spray bottle
* Clean cloth or sponge
* Optional: Baking soda
Step-by-step instructions:
1. Prepare the Solution: Pour hydrogen peroxide into a spray bottle.
2. Spray and Soak: Spray the hydrogen peroxide directly onto the bathroom fixtures you want to clean, such as faucets, showerheads, and sinks. Let it sit for about 10-15 minutes to allow the peroxide to loosen the grime.
3. Scrub (if needed): For stubborn stains or buildup, you may need to gently scrub the fixtures with a clean cloth or sponge.
4. Baking Soda Boost (Optional): For extra cleaning power, create a paste of baking soda and hydrogen peroxide. Apply the paste to the fixtures, let it sit for a few minutes, and then scrub.
5. Rinse Thoroughly: Rinse the fixtures thoroughly with water to remove any remaining hydrogen peroxide or baking soda.
6. Dry and Shine: Dry the fixtures with a clean cloth to prevent water spots and reveal their sparkling shine!
Important Notes:
* Avoid using hydrogen peroxide on gold-plated fixtures, as it may damage the finish.
* Always test on a small, inconspicuous area first.
* For showerheads, you can soak them in a solution of hydrogen peroxide and water overnight to remove mineral deposits.
Hack 3: Disinfecting Cutting Boards and Kitchen Surfaces
Cutting boards can harbor bacteria, especially after cutting raw meat or poultry. Hydrogen peroxide is a safe and effective way to disinfect them.
What you’ll need:
* Hydrogen peroxide (3% solution)
* Spray bottle
* White vinegar
* Clean cloth or paper towels
Step-by-step instructions:
1. Clean the Surface: First, wash the cutting board or kitchen surface with soap and water to remove any food particles.
2. Spray with Hydrogen Peroxide: Spray the surface liberally with hydrogen peroxide.
3. Spray with White Vinegar: Next, spray the surface with white vinegar. Don’t worry, the combination is safe and effective!
4. Let it Sit: Allow the hydrogen peroxide and vinegar to sit on the surface for about 5-10 minutes to disinfect.
5. Wipe Clean: Wipe the surface clean with a clean cloth or paper towels.
6. Rinse (Optional): If desired, you can rinse the surface with water after disinfecting.
Important Notes:
* Always use separate cutting boards for raw meat and produce to prevent cross-contamination.
* Store hydrogen peroxide in a dark, cool place to prevent it from breaking down.
* This method is also great for disinfecting countertops, sinks, and other kitchen surfaces.
Hack 4: Brightening Nails Naturally
Say goodbye to stained nails! I love using hydrogen peroxide to brighten my nails after wearing dark nail polish.
What you’ll need:
* Hydrogen peroxide (3% solution)
* Cotton balls or pads
* Bowl of warm water
Step-by-step instructions:
1. Soak Cotton Balls: Soak cotton balls or pads in hydrogen peroxide.
2. Apply to Nails: Place the soaked cotton balls or pads on your nails, ensuring they are fully covered.
3. Let it Sit: Let the cotton balls or pads sit on your nails for about 2-3 minutes.
4. Rinse and Repeat: Remove the cotton balls or pads and rinse your nails with warm water. Repeat the process if needed.
5. Moisturize: After brightening your nails, apply a moisturizing lotion or cuticle oil to keep them hydrated.
Important Notes:
* Don’t leave the hydrogen peroxide on your nails for too long, as it can dry them out.
* Avoid using this method too frequently, as it can weaken your nails over time.
* You can also add a small amount of hydrogen peroxide to a bowl of warm water and soak your nails in the solution for a few minutes.
Hack 5: Cleaning Grout Like a Pro
Dirty grout lines can make your tile floors and walls look old and dingy. I’ve found that hydrogen peroxide is a fantastic way to clean and brighten grout.
What you’ll need:
* Hydrogen peroxide (3% solution)
* Spray bottle
* Old toothbrush or grout brush
* Optional: Baking soda
Step-by-step instructions:
1. Prepare the Area: Make sure the area you’re cleaning is well-ventilated.
2. Spray with Hydrogen Peroxide: Spray the hydrogen peroxide directly onto the grout lines.
3. Let it Sit: Let the hydrogen peroxide sit on the grout for about 10-15 minutes to allow it to penetrate and loosen the dirt and grime.
4. Scrub the Grout: Use an old toothbrush or grout brush to scrub the grout lines. Apply gentle pressure and work in small sections.
5. Baking Soda Boost (Optional): For extra cleaning power, create a paste of baking soda and hydrogen peroxide. Apply the paste to the grout lines, let it sit for a few minutes, and then scrub.
6. Rinse Thoroughly: Rinse the area thoroughly with water to remove any remaining hydrogen peroxide or baking soda.
7. Dry and Admire: Dry the area with a clean cloth or towel and admire your sparkling clean grout!
Important Notes:
* Always test hydrogen peroxide on a small, inconspicuous area of the grout first to ensure it doesn’t cause any discoloration.
* Wear gloves to protect your hands from the hydrogen peroxide.
* For heavily soiled grout, you may need to repeat the process or use a stronger cleaning solution.
Hack 6: Freshening Up Your Toothbrush
Did you know your toothbrush can harbor bacteria? I like to disinfect mine regularly with hydrogen peroxide.
What you’ll need:
* Hydrogen peroxide (3% solution)
* Small cup or glass
Step-by-step instructions:
1. Pour Hydrogen Peroxide: Pour a small amount of hydrogen peroxide into a small cup or glass.
2. Soak Toothbrush: Place your toothbrush head down into the hydrogen peroxide, ensuring the bristles are fully submerged.
3. Let it Soak: Let the toothbrush soak in the hydrogen peroxide for about 2-3 minutes.
4. Rinse Thoroughly: Remove the toothbrush and rinse it thoroughly with
Conclusion
So, there you have it! This deep dive into the world of hydrogen peroxide hacks has hopefully opened your eyes to the incredible versatility of this humble household staple. From tackling stubborn stains to boosting your beauty routine and even giving your garden a little TLC, hydrogen peroxide is truly a multi-tasking marvel.
But why is this DIY approach a must-try? Simply put, it’s effective, affordable, and often a gentler alternative to harsh chemical cleaners. Think about it: you can brighten your whites without the aggressive bleach fumes, disinfect surfaces without worrying about lingering residues, and even promote healthier plant growth with a simple diluted solution. The possibilities are genuinely exciting!
Beyond the hacks we’ve already explored, don’t be afraid to experiment and adapt these techniques to your specific needs. For instance, if you’re dealing with a particularly stubborn stain on colored fabric, test the hydrogen peroxide on an inconspicuous area first to ensure colorfastness. You could also add a few drops of essential oil, like lemon or lavender, to your hydrogen peroxide cleaning solutions for a more pleasant aroma. If you are using it for oral care, make sure to use a food grade hydrogen peroxide.
For those battling persistent acne, consider using a cotton swab to dab a small amount of diluted hydrogen peroxide directly onto blemishes. Just remember to moisturize afterward, as it can be drying. Gardeners might find that adding a tablespoon of hydrogen peroxide to their watering can helps aerate the soil and prevent root rot.
The key is to start with a low concentration (3% is readily available at most drugstores) and dilute it further as needed. Always exercise caution and wear gloves when dealing with hydrogen peroxide, especially in concentrated forms.
We genuinely believe that incorporating these hydrogen peroxide hacks into your daily routine will simplify your life and save you money. It’s a win-win!
Now, it’s your turn. We encourage you to try out these DIY tricks and discover the magic of hydrogen peroxide for yourself. Don’t just take our word for it – experience the difference firsthand.
And most importantly, we want to hear about your experiences! Did you find a particularly effective way to use hydrogen peroxide? Did you discover a new hack that we haven’t covered? Share your tips, tricks, and success stories in the comments below. Let’s create a community of hydrogen peroxide enthusiasts and learn from each other. Your insights could be invaluable to other readers, and together, we can unlock even more of the potential of this amazing compound. So go ahead, give it a try, and let us know what you think!
Frequently Asked Questions (FAQs)
What concentration of hydrogen peroxide should I use for these hacks?
The most common and readily available concentration of hydrogen peroxide is 3%, which is typically found in drugstores and supermarkets. This concentration is generally safe for most of the applications mentioned in this article, especially when diluted further. However, for certain applications, such as whitening teeth or treating wounds, it’s crucial to consult with a healthcare professional to determine the appropriate concentration and usage guidelines. Higher concentrations of hydrogen peroxide (e.g., 35%) are available, but they are significantly more potent and require extreme caution. These higher concentrations are typically used for industrial purposes and should only be handled by trained professionals. Always read the product label carefully and follow the manufacturer’s instructions. When in doubt, it’s always best to err on the side of caution and use a lower concentration.
Is hydrogen peroxide safe to use on all surfaces and fabrics?
While hydrogen peroxide is generally considered a safe and effective cleaning agent, it’s essential to exercise caution when using it on certain surfaces and fabrics. Always test hydrogen peroxide on an inconspicuous area first to ensure that it doesn’t cause discoloration or damage. Delicate fabrics, such as silk and wool, may be particularly susceptible to damage from hydrogen peroxide. Similarly, certain surfaces, such as painted wood or polished stone, may also be affected. Avoid using hydrogen peroxide on surfaces that are known to be sensitive to bleaching agents. For colored fabrics, it’s crucial to dilute the hydrogen peroxide significantly and test it on a hidden area before applying it to the entire garment. If you’re unsure about the compatibility of hydrogen peroxide with a particular surface or fabric, it’s always best to consult with a professional cleaner or refer to the manufacturer’s instructions.
Can I mix hydrogen peroxide with other cleaning agents?
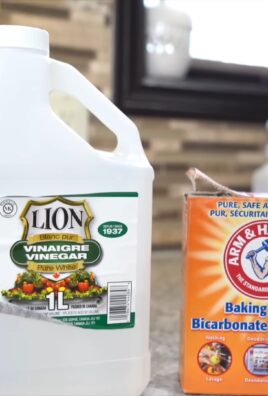
It’s generally not recommended to mix hydrogen peroxide with other cleaning agents, especially those containing ammonia or vinegar. Mixing hydrogen peroxide with ammonia can create toxic fumes that can be harmful to your health. Similarly, mixing hydrogen peroxide with vinegar can create peracetic acid, which is a corrosive substance that can irritate the skin, eyes, and respiratory system. Always use hydrogen peroxide on its own or in combination with water. If you’re using hydrogen peroxide to clean a surface that has already been treated with another cleaning agent, make sure to rinse the surface thoroughly with water before applying the hydrogen peroxide. This will help prevent any unwanted chemical reactions.
How should I store hydrogen peroxide?
Hydrogen peroxide should be stored in a cool, dark place, away from direct sunlight and heat. Exposure to light and heat can cause hydrogen peroxide to decompose, reducing its effectiveness. It’s also important to store hydrogen peroxide in its original container, as the container is designed to protect the solution from light and air. Keep hydrogen peroxide out of reach of children and pets. If you accidentally spill hydrogen peroxide, clean it up immediately with water.
What are the potential side effects of using hydrogen peroxide?
While hydrogen peroxide is generally considered safe when used properly, it can cause some side effects, especially if used in high concentrations or for prolonged periods. Common side effects include skin irritation, eye irritation, and bleaching of hair or skin. In rare cases, hydrogen peroxide can cause more serious side effects, such as burns or allergic reactions. If you experience any adverse effects after using hydrogen peroxide, discontinue use and consult with a healthcare professional. When using hydrogen peroxide for oral care, it’s important to avoid swallowing the solution, as it can cause nausea, vomiting, and abdominal pain. Always dilute hydrogen peroxide before using it on your skin or in your mouth.
Can hydrogen peroxide help with acne?
Yes, hydrogen peroxide can be used as a spot treatment for acne. Its antibacterial properties can help kill bacteria that contribute to acne breakouts. However, it’s important to use it sparingly and in a diluted form (3% or less) to avoid irritating or drying out the skin. Apply a small amount to the affected area using a cotton swab and leave it on for a few minutes before rinsing with water. Follow up with a moisturizer to prevent dryness. Avoid using hydrogen peroxide on open wounds or broken skin. If you have sensitive skin, it’s best to test it on a small area first to see how your skin reacts. If you experience any irritation, discontinue use.
How can hydrogen peroxide help with plant care?
Hydrogen peroxide can benefit plants in several ways. It can help aerate the soil, prevent root rot, and kill harmful bacteria and fungi. Dilute 1 tablespoon of 3% hydrogen peroxide in 1 gallon of water and use it to water your plants. This solution can also be used as a foliar spray to control fungal diseases. Hydrogen peroxide can also be used to disinfect gardening tools and pots.
Is food grade hydrogen peroxide different from regular hydrogen peroxide?
Yes, food-grade hydrogen peroxide is different from the regular 3% solution you find in drugstores. Food-grade hydrogen peroxide is typically a 35% solution and is intended for use as a disinfectant in food processing and packaging. It should be handled with extreme care and diluted properly before use. It is not recommended for internal use without the guidance of a healthcare professional. Regular 3% hydrogen peroxide is suitable for most of the DIY hacks mentioned in this article.

Leave a Comment