
Indoor Mushroom Growing Batches: Imagine harvesting fresh, flavorful mushrooms right from your kitchen! Forget those pricey grocery store finds – with a little know-how, you can cultivate your own delicious supply. For centuries, mushroom cultivation has been shrouded in mystery, with ancient cultures attributing magical properties to these fascinating fungi. From the elaborate cave systems of ancient China to the humble cellars of European farmers, people have long sought ways to harness the bounty of mushrooms.
But you don’t need to be an expert mycologist to enjoy the fruits (or rather, fungi!) of your labor. This DIY guide will demystify the process of growing your own indoor mushroom growing batches, even if you have limited space or experience. We’ll walk you through everything from selecting the right mushroom species to creating the ideal growing environment, ensuring a successful and rewarding harvest.
Why should you embark on this exciting journey? Because nothing beats the taste of homegrown mushrooms, and the satisfaction of nurturing your own food source is truly unparalleled. Plus, it’s a fantastic way to reduce your carbon footprint and add a touch of natural beauty to your home. So, let’s get started and transform your space into a thriving mushroom haven!
Growing Your Own Gourmet Mushrooms Indoors: A Beginner’s Guide
Hey there, fellow fungi fanatics! Ever dreamt of harvesting your own delicious, fresh mushrooms right in your home? Well, dream no more! I’m going to walk you through a simple, yet rewarding, DIY project: growing mushroom batches indoors. It’s easier than you think, and the taste of homegrown mushrooms is simply unbeatable.
Choosing Your Mushroom Variety
Before we dive in, let’s talk about mushroom types. Not all mushrooms are created equal, and some are much easier to grow indoors than others. For beginners, I highly recommend starting with these varieties:
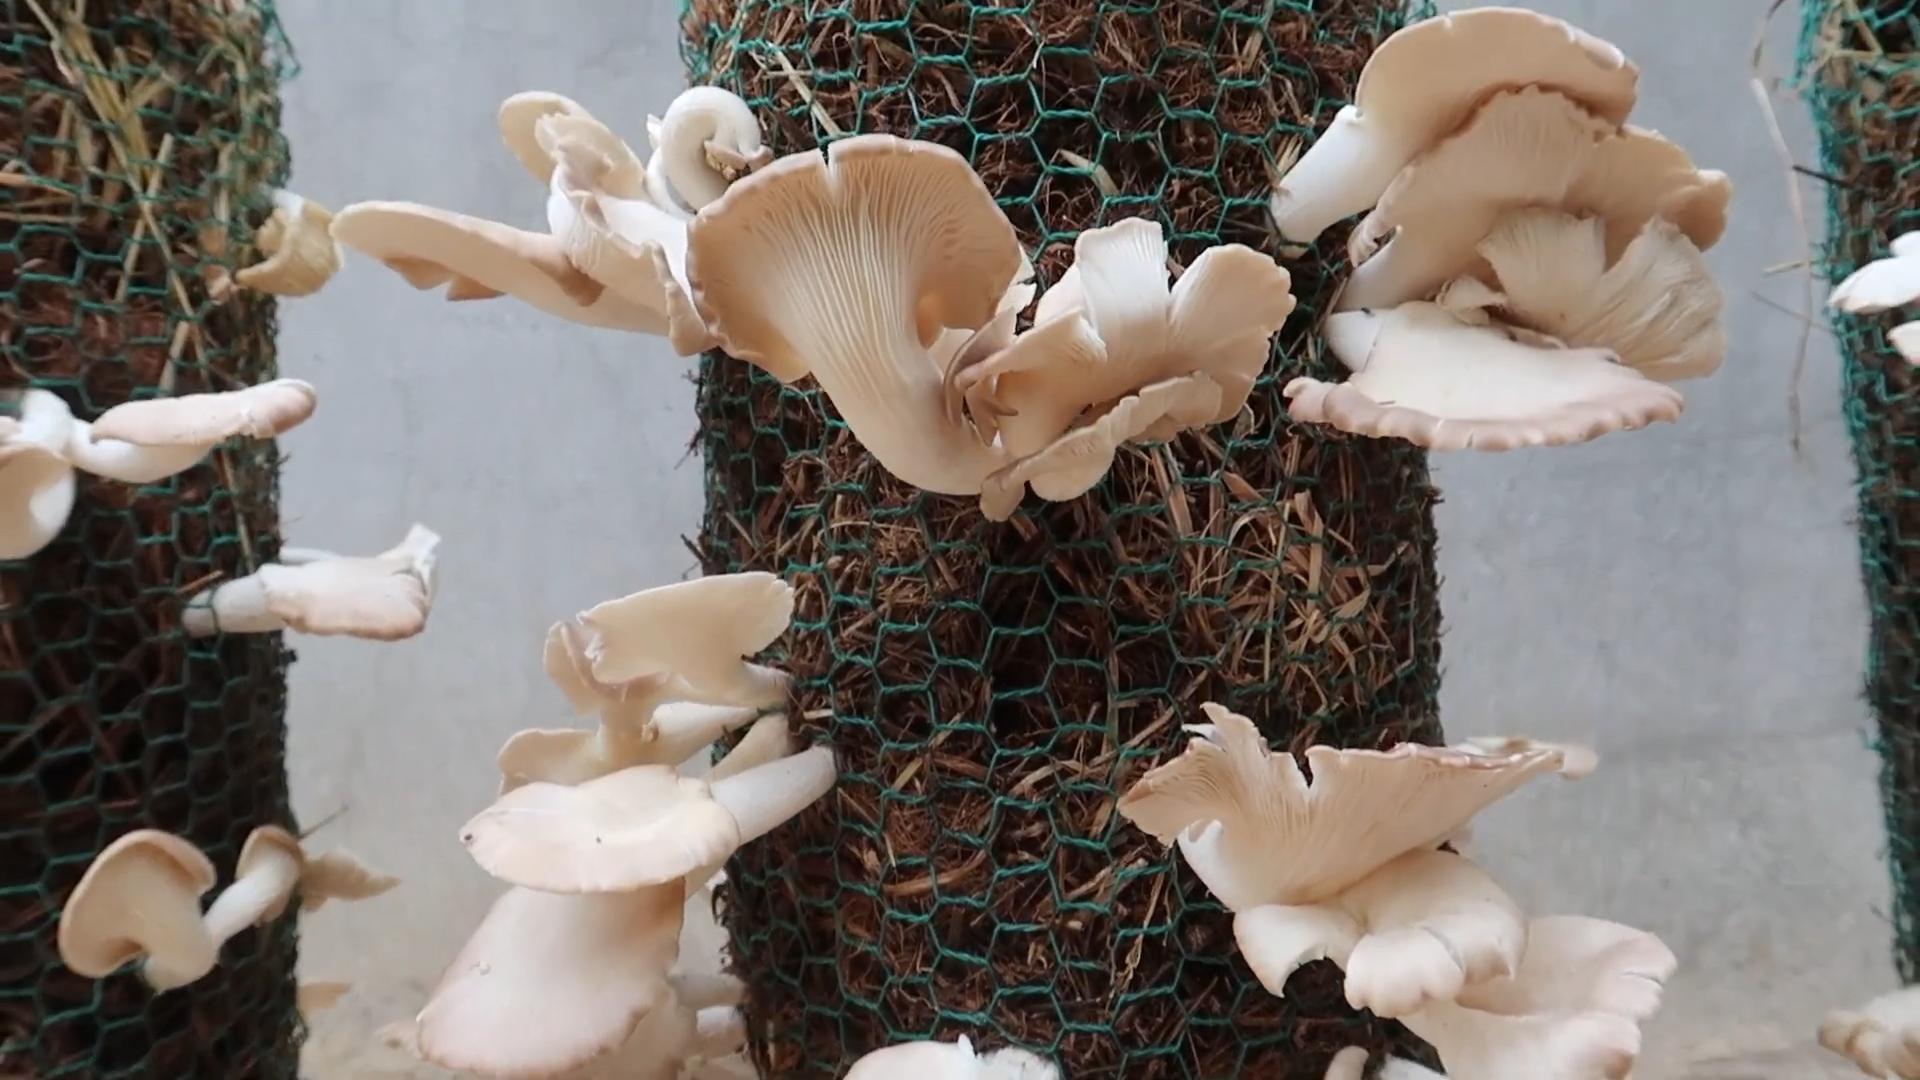
* Oyster Mushrooms (Pleurotus spp.): These are incredibly versatile, fast-growing, and relatively forgiving. They come in various colors like pearl, blue, and pink, adding a touch of visual appeal to your grow.
* Shiitake Mushrooms (Lentinula edodes): These are another popular choice, known for their rich, savory flavor. They take a bit longer to fruit than oyster mushrooms, but the wait is well worth it.
* Lion’s Mane (Hericium erinaceus): If you’re feeling a bit more adventurous, Lion’s Mane is a fantastic option. It has a unique, shaggy appearance and a delicate, seafood-like flavor.
Once you’ve chosen your mushroom, you’ll need to acquire mushroom spawn. Spawn is essentially mushroom “seeds” that have been cultivated on a substrate like grain or sawdust. You can purchase spawn online from reputable mushroom suppliers.
Gathering Your Supplies
Okay, now for the fun part – gathering our supplies! Here’s what you’ll need:
* Mushroom Spawn: Choose your desired mushroom variety and purchase spawn from a reliable source. Make sure it’s fresh and healthy-looking.
* Substrate: This is the material your mushrooms will grow on. For oyster mushrooms, pasteurized straw is an excellent choice. For shiitake and Lion’s Mane, hardwood sawdust is preferred. You can also use supplemented sawdust blocks, which are pre-mixed and ready to go.
* Growing Container: A plastic tub, bucket, or even a large bag will work. Just make sure it’s clean and has drainage holes if you’re using a tub or bucket.
* Spray Bottle: For misting your mushrooms to maintain humidity.
* Hydrogen Peroxide (3%): For sanitizing your work area and tools.
* Gloves: To prevent contamination.
* Optional: A humidity tent or greenhouse to help maintain optimal humidity levels.
Preparing Your Substrate
The substrate needs to be properly prepared to eliminate competing organisms and provide the mushrooms with the nutrients they need. The preparation method depends on the type of substrate you’re using.
Pasteurizing Straw (for Oyster Mushrooms)
1. Chop the Straw: Cut the straw into smaller pieces, about 2-4 inches long. This will make it easier to pack into your container and allow the mushroom mycelium to colonize it more effectively.
2. Heat the Water: Fill a large pot or container with water and heat it to around 160-180°F (71-82°C). You can use a thermometer to monitor the temperature.
3. Submerge the Straw: Place the chopped straw into the hot water and let it soak for about 1-2 hours. This will kill off any unwanted bacteria or fungi that could compete with your mushrooms.
4. Drain and Cool: Carefully drain the hot water from the straw and let it cool down to room temperature. You want the straw to be moist but not soaking wet. Squeeze out any excess water.
Preparing Sawdust (for Shiitake and Lion’s Mane)
If you’re using supplemented sawdust blocks, you can skip this step. If you’re using raw sawdust, you’ll need to sterilize it.
1. Mix Sawdust with Water: Combine the sawdust with water until it’s moist but not dripping. A good rule of thumb is to add enough water so that when you squeeze a handful of sawdust, only a few drops of water come out.
2. Pack into Bags or Jars: Pack the moistened sawdust into autoclavable bags or jars. Leave some headspace at the top.
3. Sterilize: Sterilize the bags or jars in a pressure cooker or autoclave at 15 PSI for 90 minutes. This will kill off any contaminants.
4. Cool Completely: Let the bags or jars cool completely before inoculating them with mushroom spawn.
Inoculating Your Substrate
Now comes the exciting part – introducing the mushroom spawn to the substrate!
1. Sanitize Your Work Area: Clean your work surface with a solution of hydrogen peroxide and water. This will help prevent contamination.
2. Wear Gloves: Put on a pair of clean gloves to avoid introducing any bacteria or fungi to the substrate.
3. Mix Spawn and Substrate: Open your bag of mushroom spawn and crumble it into small pieces. Mix the spawn thoroughly with the prepared substrate. A good ratio is about 5-10% spawn to substrate by weight.
4. Pack into Container: Pack the inoculated substrate into your growing container. Make sure it’s packed firmly but not too tightly.
5. Cover the Container: Cover the container with a lid or plastic wrap to help retain moisture.
Incubation
This is the period where the mushroom mycelium (the vegetative part of the mushroom) colonizes the substrate.
1. Find a Suitable Location: Place the container in a dark, warm, and humid location. The ideal temperature for most mushroom varieties is between 65-75°F (18-24°C).
2. Monitor Humidity: Keep the humidity level high, around 80-90%. You can mist the substrate regularly with a spray bottle to maintain humidity. If you’re using a humidity tent or greenhouse, this will be much easier.
3. Wait for Colonization: It will take several weeks for the mycelium to fully colonize the substrate. You’ll know it’s ready when the substrate is completely covered in a white, fuzzy growth.
Fruiting
Once the substrate is fully colonized, it’s time to trigger fruiting, which is when the mushrooms start to grow.
1. Introduce Light: Move the container to a location with indirect light. Mushrooms need light to fruit properly.
2. Increase Airflow: Increase the airflow around the container by opening the lid or plastic wrap a few times a day. This will help prevent the buildup of carbon dioxide, which can inhibit fruiting.
3. Maintain Humidity: Continue to mist the substrate regularly to maintain high humidity.
4. Lower Temperature (Optional): Some mushroom varieties, like shiitake, benefit from a slight drop in temperature to trigger fruiting. You can try moving the container to a cooler location.
5. Wait for Pins: After a few days or weeks, you should start to see small mushroom “pins” forming on the surface of the substrate. These are baby mushrooms!
Harvesting
The moment we’ve all been waiting for!
1. Harvest at the Right Time: Harvest your mushrooms when they are fully developed but before they start to drop spores. For oyster mushrooms, this is usually when the caps are fully expanded and the edges are still slightly curled under. For shiitake mushrooms, it’s when the caps are fully open and the gills are visible. For Lion’s Mane, it’s when the “teeth” are fully developed and starting to turn slightly brown.
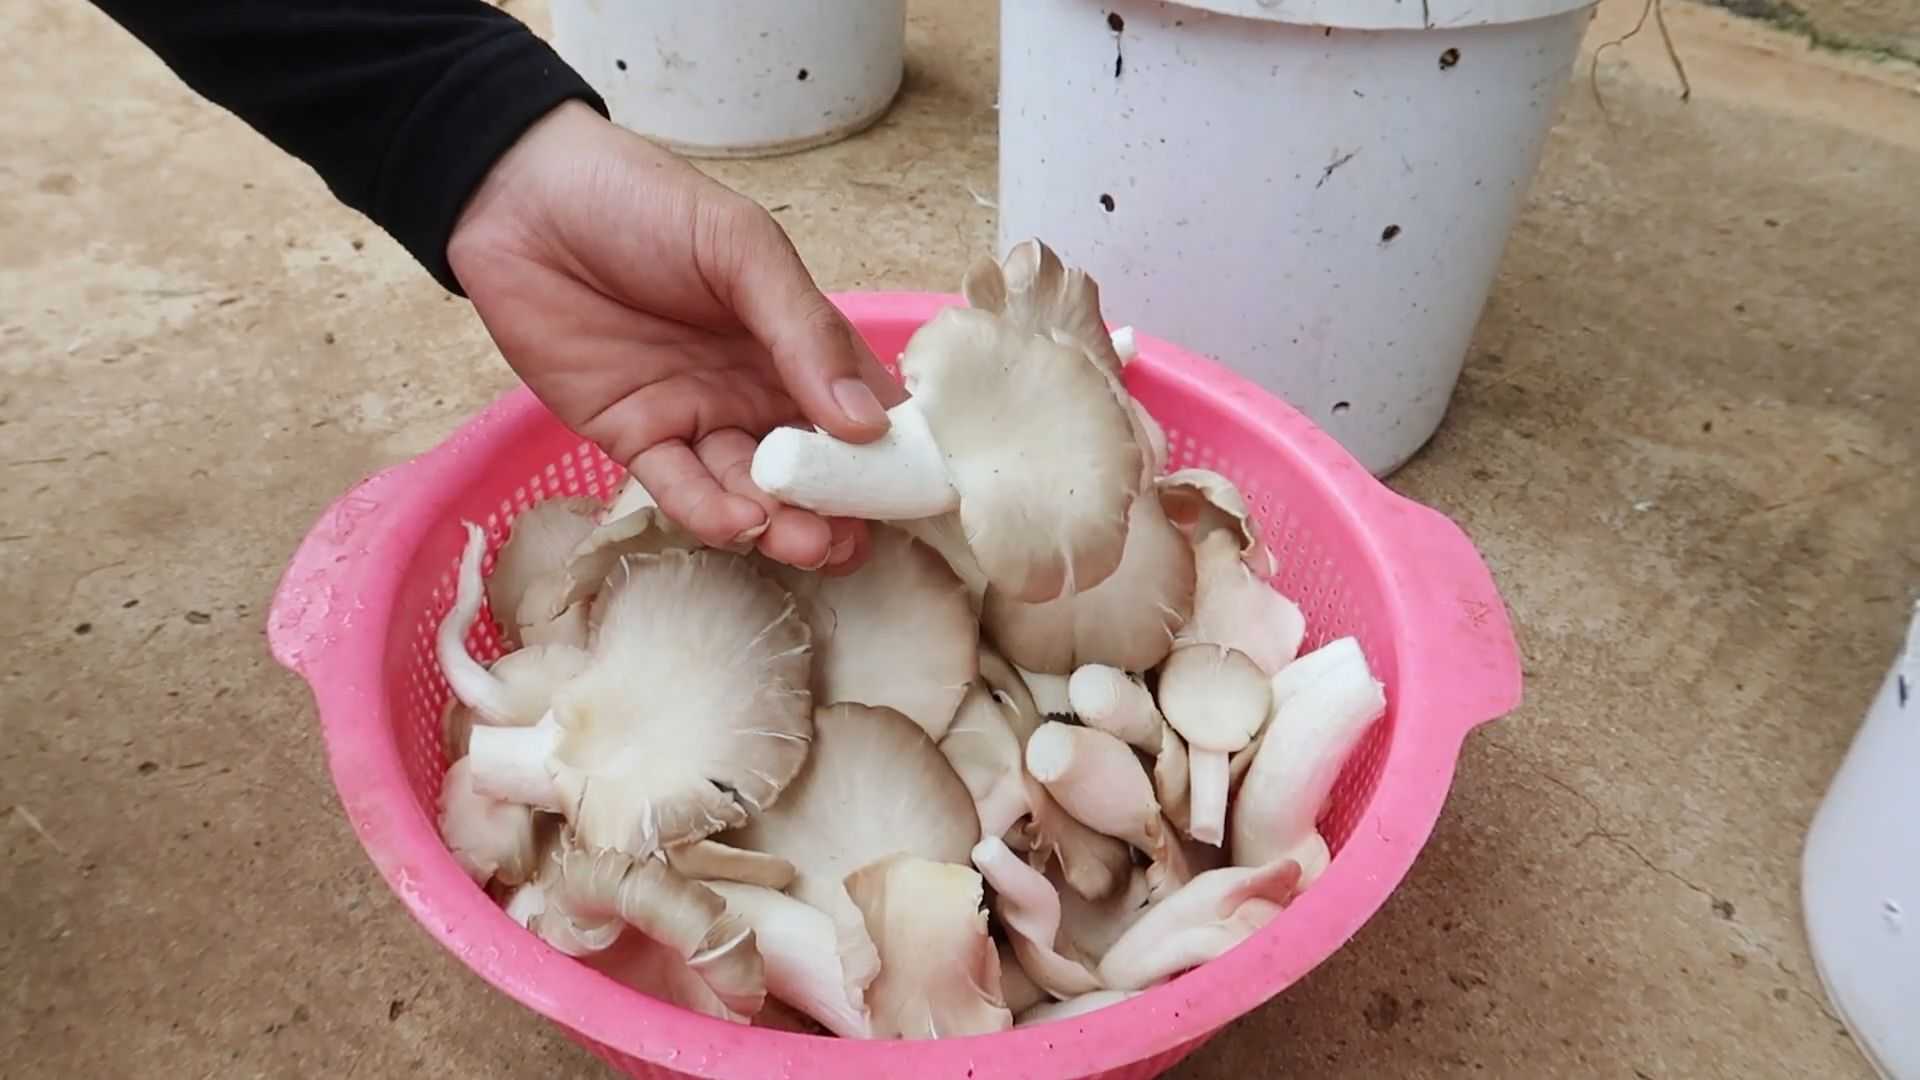
2. Harvest Carefully: Gently twist or cut the mushrooms off the substrate. Be careful not to damage the surrounding mycelium.
3. Enjoy Your Harvest: Cook your fresh mushrooms and enjoy their delicious flavor!
Second Flush and Beyond
After harvesting your first flush of mushrooms, you can often get a second, third, or even fourth flush from the same substrate.
1. Soak the Substrate: After harvesting, soak the substrate in water for 12-24 hours. This will rehydrate the mycelium and encourage it to produce more mushrooms.
2. Drain and Repeat: Drain the water and repeat the fruiting process. You may need to adjust the temperature and humidity to optimize fruiting for subsequent flushes.
Troubleshooting
Sometimes, things don’t go exactly as planned. Here are a few common problems and how to fix them:
* Contamination: If you see mold or other unwanted growth on your substrate, it’s likely contaminated. Unfortunately, there’s not much you can do at this point except discard the substrate and start over. To prevent contamination, make sure to sanitize your work area and tools thoroughly.
* Slow Colonization: If the mycelium is colonizing the substrate slowly, it could be due to low temperature or humidity. Make sure the temperature is within the ideal range and that the humidity is high.
Conclusion
So, there you have it! Cultivating your own indoor mushroom growing batches is not only achievable but also incredibly rewarding. Forget those expensive, pre-packaged mushroom kits that often yield disappointing results. This DIY method empowers you to take control of the entire process, from selecting your preferred mushroom variety to enjoying the unparalleled freshness of homegrown fungi.
Why is this a must-try? Because it’s more than just growing food; it’s an experience. It’s connecting with nature, learning about the fascinating life cycle of mushrooms, and ultimately, savoring the fruits (or rather, fungi) of your labor. The satisfaction of harvesting your first flush of oyster mushrooms, shiitakes, or even lion’s mane, knowing you nurtured them from start to finish, is truly unmatched. Plus, you’ll be amazed at how much better homegrown mushrooms taste compared to store-bought ones. The flavor is more intense, the texture is firmer, and the overall quality is simply superior.
But the benefits don’t stop there. Growing your own mushrooms is also a sustainable and eco-friendly practice. You’re reducing your carbon footprint by eliminating the need for transportation and packaging associated with commercially grown mushrooms. You’re also utilizing organic materials, like coffee grounds or straw, that might otherwise end up in landfills. It’s a win-win for you and the planet.
Looking for variations? Absolutely! Experiment with different substrates to see which ones work best for your chosen mushroom species. Coffee grounds are excellent for oyster mushrooms, while hardwood sawdust is ideal for shiitakes. You can also try adding supplements like wheat bran or gypsum to boost yields. Consider different growing containers as well. While buckets and bags are common, you can also use repurposed containers like plastic tubs or even old laundry baskets. Just make sure they’re clean and have adequate drainage.
Another exciting variation is to explore different mushroom varieties. While oyster mushrooms are a great starting point for beginners, don’t be afraid to branch out and try other species like shiitake, lion’s mane, or even more exotic varieties like reishi or maitake. Each mushroom has its own unique flavor profile and health benefits, so there’s always something new to discover.
Don’t be intimidated by the process. While it may seem complex at first, indoor mushroom growing is actually quite straightforward once you understand the basic principles. With a little patience, attention to detail, and a willingness to learn, you’ll be harvesting your own delicious mushrooms in no time.
So, what are you waiting for? Dive into the world of indoor mushroom growing batches and experience the joy of cultivating your own gourmet fungi. We encourage you to try this DIY trick and share your experiences with us! Let us know what varieties you’re growing, what substrates you’re using, and any tips or tricks you’ve discovered along the way. Share your photos and stories on social media using #HomegrownMushrooms and inspire others to join the fun. We can’t wait to see what you create!
Frequently Asked Questions (FAQ)
What are the best mushroom varieties to start with for indoor growing?
Oyster mushrooms are generally considered the easiest and most forgiving variety for beginners. They are fast-growing, tolerate a wide range of conditions, and can be grown on a variety of substrates, including coffee grounds, straw, and cardboard. Shiitake mushrooms are another popular choice, but they require a bit more patience and attention to detail. Lion’s mane is also gaining popularity due to its unique flavor and health benefits, but it can be slightly more challenging to cultivate. Ultimately, the best variety for you will depend on your experience level, available resources, and personal preferences. Research different varieties and choose one that aligns with your goals.
What is the best substrate for growing mushrooms indoors?
The best substrate depends on the mushroom variety you’re growing. Oyster mushrooms thrive on coffee grounds, straw, and cardboard. Shiitake mushrooms prefer hardwood sawdust. Lion’s mane can be grown on a mixture of hardwood sawdust and bran. It’s crucial to research the specific substrate requirements for your chosen mushroom variety to ensure optimal growth and yields. Proper substrate preparation, including pasteurization or sterilization, is also essential to eliminate competing organisms and create a favorable environment for mushroom colonization.
How do I pasteurize or sterilize my substrate?
Pasteurization and sterilization are crucial steps to eliminate competing molds and bacteria that can hinder mushroom growth. Pasteurization involves heating the substrate to a temperature that kills most harmful organisms without completely sterilizing it. This can be achieved by soaking the substrate in hot water (around 160-180°F) for 1-2 hours. Sterilization, on the other hand, involves heating the substrate to a higher temperature (around 250°F) for a longer period of time, typically using a pressure cooker. Sterilization is more effective at eliminating all organisms, but it can also be more time-consuming and energy-intensive. The choice between pasteurization and sterilization depends on the substrate and the mushroom variety you’re growing.
How long does it take to grow mushrooms indoors?
The time it takes to grow mushrooms indoors varies depending on the variety, substrate, and environmental conditions. Oyster mushrooms are among the fastest-growing, typically fruiting within 1-2 weeks after colonization. Shiitake mushrooms can take several months to colonize and fruit. Lion’s mane typically fruits within 2-3 weeks after colonization. Factors such as temperature, humidity, and light can also affect the growth rate. Maintaining optimal environmental conditions is crucial for maximizing yields and minimizing the time it takes to harvest your mushrooms.
What are the ideal temperature and humidity levels for growing mushrooms indoors?
The ideal temperature and humidity levels vary depending on the mushroom variety. Oyster mushrooms generally prefer temperatures between 60-75°F and humidity levels between 85-95%. Shiitake mushrooms prefer cooler temperatures between 50-65°F and humidity levels between 80-90%. Lion’s mane prefers temperatures between 65-75°F and humidity levels between 85-95%. Maintaining consistent temperature and humidity levels is crucial for successful mushroom cultivation. You can use a thermometer and hygrometer to monitor these conditions and adjust them as needed.
How much light do mushrooms need?
Mushrooms don’t need a lot of light. In fact, direct sunlight can be harmful. Indirect or ambient light is sufficient for most mushroom varieties. Light is primarily needed to trigger fruiting, not for photosynthesis like plants. A north-facing window or a shaded area is typically ideal.
How do I know when my mushrooms are ready to harvest?
The signs of maturity vary depending on the mushroom variety. Oyster mushrooms are typically ready to harvest when the caps are fully formed and the edges are still slightly curled downwards. Shiitake mushrooms are ready when the caps have flattened out and the gills are visible. Lion’s mane is ready when the spines are fully developed and have a slightly yellowish tint. It’s important to harvest your mushrooms at the right time to ensure optimal flavor and texture.
Can I reuse the substrate after harvesting mushrooms?
Yes, you can often get multiple flushes of mushrooms from the same substrate. After harvesting the first flush, soak the substrate in water for a few hours to rehydrate it. Then, return it to its growing environment and wait for the next flush to appear. The subsequent flushes may be smaller than the first, but they can still provide a significant yield. Eventually, the substrate will become depleted of nutrients and will no longer produce mushrooms. At that point, you can compost it and use it to enrich your garden soil.
What are some common problems with indoor mushroom growing and how can I prevent them?
Common problems include contamination from molds and bacteria, insufficient humidity, and improper temperature. To prevent contamination, sterilize or pasteurize your substrate properly and maintain a clean growing environment. To ensure adequate humidity, mist your mushrooms regularly and consider using a humidity tent or humidifier. To maintain proper temperature, choose a location that is consistently within the ideal range for your chosen mushroom variety. Regularly inspect your mushrooms for signs of disease or pests and take action promptly if you notice any problems.
Are there any health benefits to eating homegrown mushrooms?
Yes! Homegrown mushrooms, especially when grown organically, are packed with nutrients and offer a variety of health benefits. They are a good source of protein, fiber, vitamins, and minerals. They also contain antioxidants and compounds that may boost the immune system and have anti-inflammatory properties. Different mushroom varieties have different health benefits, so research the specific properties of the mushrooms you’re growing to learn more.
Leave a Comment