
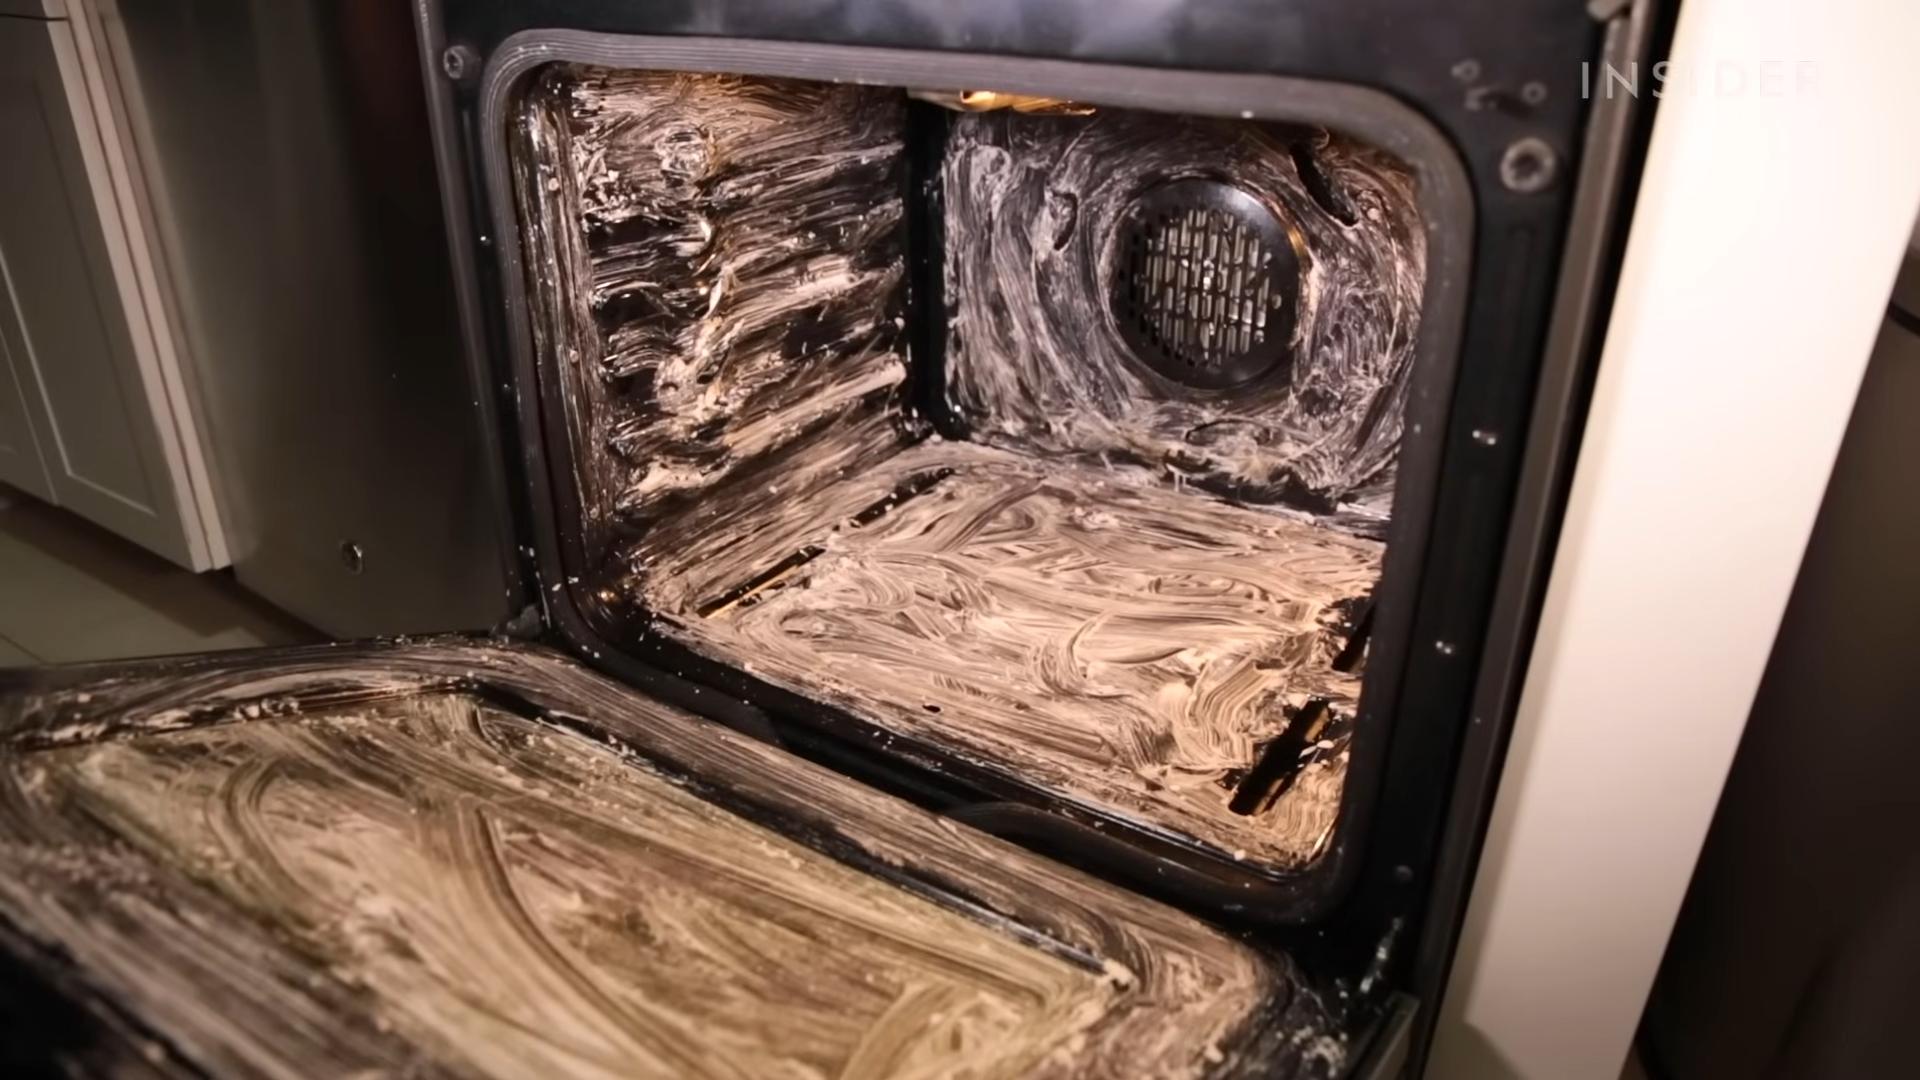
Easy Oven Cleaning Method: Is your oven looking less like a culinary haven and more like a burnt offering site? Don’t despair! I know the dread that comes with tackling that greasy, grimy mess. For generations, cleaning the oven has been a chore most of us put off for as long as humanly possible. In fact, in some cultures, oven cleaning was a ritualistic task, often associated with spring cleaning and renewal – a symbolic purging of the old to make way for the new.
But let’s be honest, who has time for all that elbow grease these days? That’s why I’m so excited to share this easy oven cleaning method with you – a DIY trick so simple, you’ll wonder why you haven’t been doing it all along! This isn’t just about aesthetics; a clean oven actually improves its efficiency, saving you energy and ensuring your food cooks evenly. Plus, it eliminates those nasty burnt smells that can linger in your kitchen.
Ready to ditch the harsh chemicals and endless scrubbing? Let’s dive into this game-changing DIY oven cleaning hack that will leave your oven sparkling and your kitchen smelling fresh!
Easy Oven Cleaning Method: The Baking Soda & Vinegar Power Couple
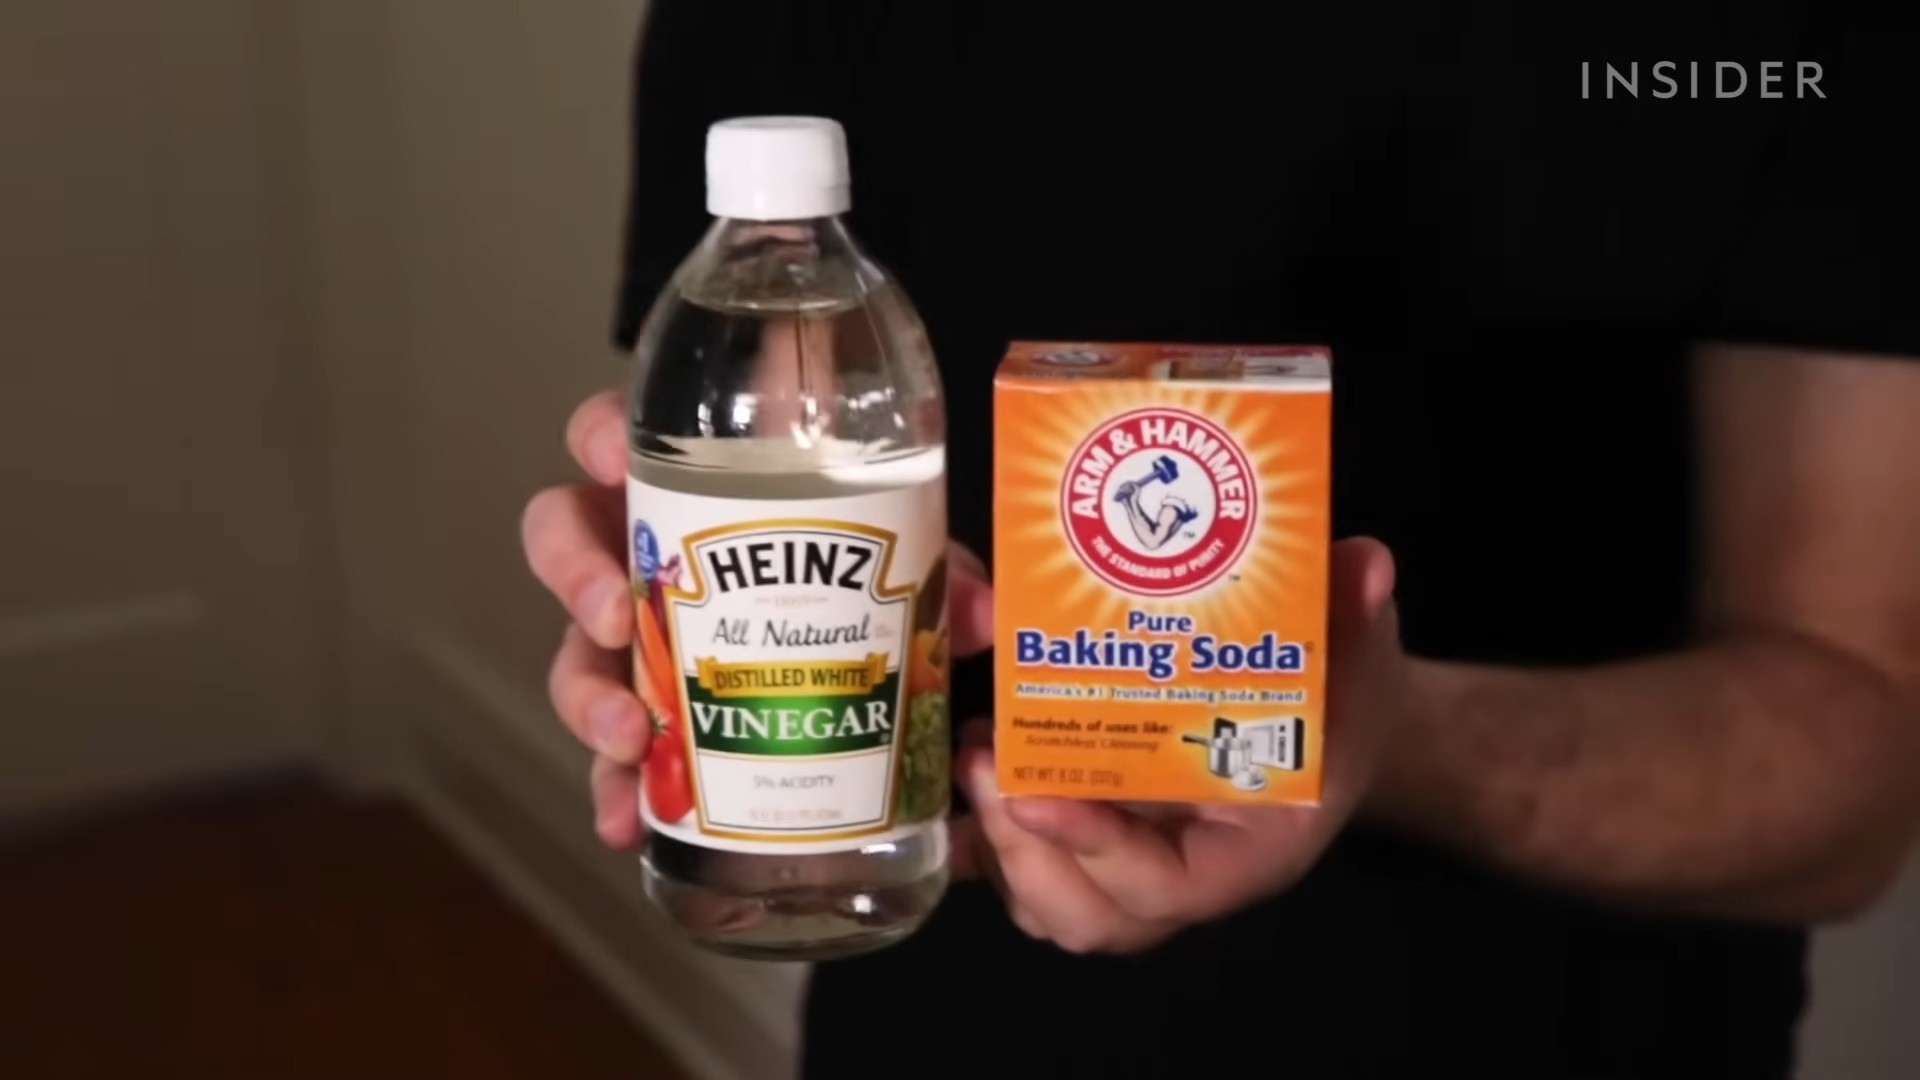
Okay, let’s be honest, cleaning the oven is probably on everyone’s list of least favorite chores. It’s grimy, it smells, and it feels like you’re battling baked-on food from the dawn of time. But fear not! I’ve got a super simple, surprisingly effective, and totally non-toxic method for getting your oven sparkling clean using just two ingredients you probably already have in your pantry: baking soda and vinegar.
This method is my go-to because it avoids harsh chemicals and fumes. Plus, it’s incredibly budget-friendly. So, ditch the expensive oven cleaners and let’s get started!
What You’ll Need:
* Baking Soda
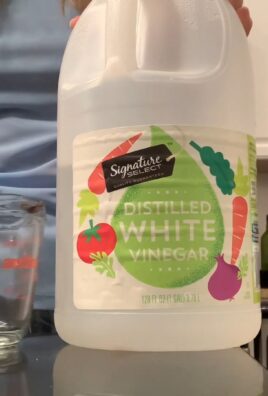
* White Vinegar
* Water
* Spray Bottle
* Rubber Gloves (trust me, you’ll want these!)
* Spatula or Scraper (plastic is best to avoid scratching)
* Sponge or Cloth
* Old Towels or Rags
* Small Bowl
Step-by-Step Instructions:
1. Prep Your Oven: First things first, remove everything from your oven. That includes racks, baking stones, thermometers, and anything else you might have stored in there. I usually give the racks a quick soak in hot, soapy water while I’m working on the oven interior. This helps loosen any baked-on grime.
2. Make the Baking Soda Paste: In your small bowl, mix together about ½ cup of baking soda with enough water to form a thick, spreadable paste. The consistency should be similar to frosting. You don’t want it too runny, or it won’t stick to the oven walls. I usually start with a few tablespoons of water and add more gradually until I get the right consistency.
3. Coat the Oven: Now, put on your rubber gloves (seriously, don’t skip this step – baking soda can be drying!) and generously spread the baking soda paste all over the inside of your oven. This includes the back, sides, top, bottom, and even the door. Avoid the heating elements! I find using my hands is the easiest way to get a good, even coating. Don’t be shy – really slather it on! The thicker the layer, the better it will work.
4. Let it Sit (Overnight is Best!): This is the most important part of the process: patience! Let the baking soda paste sit in your oven for at least 12 hours, or even better, overnight. The longer it sits, the more time it has to loosen the baked-on grime. I usually apply the paste before I go to bed and let it work its magic while I sleep. You’ll notice the paste will turn a brownish color as it absorbs the grease and grime. That’s a good sign!
5. Scrape Away the Grime: After the baking soda has had its time to work, grab your spatula or scraper and start scraping away the loosened grime. You’ll be surprised at how easily it comes off! I usually start at the top and work my way down. Have a trash can or bag nearby to collect the scrapings. This part can be a little messy, so be prepared.
6. Wipe Down the Oven: Once you’ve scraped away as much of the baking soda paste as possible, it’s time to wipe down the oven with a damp sponge or cloth. You’ll probably need to rinse your sponge frequently as it gets filled with baking soda residue. Keep wiping until you’ve removed all traces of the paste.
7. The Vinegar Magic: Now for the fun part! Pour some white vinegar into your spray bottle. Lightly spray the inside of your oven with vinegar. You’ll notice that the vinegar will react with any remaining baking soda, creating a foamy, bubbly reaction. This is perfectly normal and helps to loosen any stubborn grime that might still be clinging on.
8. Final Wipe Down: Once the bubbling has subsided, wipe down the oven one last time with a clean, damp sponge or cloth. Make sure to remove all traces of vinegar and baking soda.
9. Dry and Replace: Finally, dry the inside of your oven with an old towel or rag. Replace the oven racks and any other items you removed earlier.
Cleaning the Oven Racks:
While the baking soda paste is working its magic inside the oven, I tackle the racks. Here’s my method:
Okay, let’s be honest, cleaning the oven is probably on everyone’s list of least favorite chores. It’s grimy, it smells, and it feels like you’re battling baked-on food from the dawn of time. But fear not! I’ve got a super simple, surprisingly effective, and totally non-toxic method for getting your oven sparkling clean using just two ingredients you probably already have in your pantry: baking soda and vinegar.
This method is my go-to because it avoids harsh chemicals and fumes. Plus, it’s incredibly budget-friendly. So, ditch the expensive oven cleaners and let’s get started!
What You’ll Need:
* Baking Soda
* White Vinegar
* Water
* Spray Bottle
* Rubber Gloves (trust me, you’ll want these!)
* Spatula or Scraper (plastic is best to avoid scratching)
* Sponge or Cloth
* Old Towels or Rags
* Small Bowl
Step-by-Step Instructions:
1. Prep Your Oven: First things first, remove everything from your oven. That includes racks, baking stones, thermometers, and anything else you might have stored in there. I usually give the racks a quick soak in hot, soapy water while I’m working on the oven interior. This helps loosen any baked-on grime.
2. Make the Baking Soda Paste: In your small bowl, mix together about ½ cup of baking soda with enough water to form a thick, spreadable paste. The consistency should be similar to frosting. You don’t want it too runny, or it won’t stick to the oven walls. I usually start with a few tablespoons of water and add more gradually until I get the right consistency.
3. Coat the Oven: Now, put on your rubber gloves (seriously, don’t skip this step – baking soda can be drying!) and generously spread the baking soda paste all over the inside of your oven. This includes the back, sides, top, bottom, and even the door. Avoid the heating elements! I find using my hands is the easiest way to get a good, even coating. Don’t be shy – really slather it on! The thicker the layer, the better it will work.
4. Let it Sit (Overnight is Best!): This is the most important part of the process: patience! Let the baking soda paste sit in your oven for at least 12 hours, or even better, overnight. The longer it sits, the more time it has to loosen the baked-on grime. I usually apply the paste before I go to bed and let it work its magic while I sleep. You’ll notice the paste will turn a brownish color as it absorbs the grease and grime. That’s a good sign!
5. Scrape Away the Grime: After the baking soda has had its time to work, grab your spatula or scraper and start scraping away the loosened grime. You’ll be surprised at how easily it comes off! I usually start at the top and work my way down. Have a trash can or bag nearby to collect the scrapings. This part can be a little messy, so be prepared.
6. Wipe Down the Oven: Once you’ve scraped away as much of the baking soda paste as possible, it’s time to wipe down the oven with a damp sponge or cloth. You’ll probably need to rinse your sponge frequently as it gets filled with baking soda residue. Keep wiping until you’ve removed all traces of the paste.
7. The Vinegar Magic: Now for the fun part! Pour some white vinegar into your spray bottle. Lightly spray the inside of your oven with vinegar. You’ll notice that the vinegar will react with any remaining baking soda, creating a foamy, bubbly reaction. This is perfectly normal and helps to loosen any stubborn grime that might still be clinging on.
8. Final Wipe Down: Once the bubbling has subsided, wipe down the oven one last time with a clean, damp sponge or cloth. Make sure to remove all traces of vinegar and baking soda.
9. Dry and Replace: Finally, dry the inside of your oven with an old towel or rag. Replace the oven racks and any other items you removed earlier.
Cleaning the Oven Racks:
While the baking soda paste is working its magic inside the oven, I tackle the racks. Here’s my method:
1. Soak the Racks: Fill your bathtub (or a large utility sink) with hot, soapy water. Add a cup of dish soap. Place the oven racks in the water and let them soak for at least a few hours, or even overnight. The longer they soak, the easier it will be to remove the grime.
2. Scrub the Racks: After soaking, use a scrub brush or steel wool to scrub the racks clean. You might need to use a little elbow grease, but the soaking should have loosened most of the baked-on food.
3. Rinse and Dry: Rinse the racks thoroughly with clean water and dry them with a towel before placing them back in the oven.
Dealing with Stubborn Spots:
Sometimes, you might encounter some particularly stubborn spots that just won’t budge. Here are a few tips for dealing with them:
* More Baking Soda Paste: For really tough spots, apply a fresh layer of baking soda paste directly to the area and let it sit for a few more hours.
* Vinegar Soak: Soak a cloth or paper towel in vinegar and place it directly on the stubborn spot. Let it sit for a while to help loosen the grime.
* Gentle Scrubbing: Use a non-abrasive scrubbing pad or an old toothbrush to gently scrub the area. Avoid using anything too harsh that could scratch the oven’s surface.
Preventative Measures:
The best way to avoid having to spend hours cleaning your oven is to prevent it from getting too dirty in the first place. Here are a few tips:
* Line the Bottom: Place a sheet of aluminum foil or a baking sheet on the bottom rack of your oven to catch any drips or spills.
* Clean Up Spills Immediately: If something spills in your oven, clean it up as soon as possible before it has a chance to bake on.
* Regular Cleaning: Give your oven a quick wipe-down every few weeks to prevent grime from building up.
A Few Extra Tips and Tricks:
* Self-Cleaning Ovens: While this method is great for avoiding harsh chemicals, if you have a self-cleaning oven, you can use it occasionally. However, be aware that the self-cleaning cycle can produce strong odors and high heat, so make sure to ventilate your kitchen well.
* Oven Door Glass: To clean the oven door glass, you can use the same baking soda paste method. Apply the paste to the glass, let it sit for a while, and then wipe it clean. You can also use a glass cleaner for a streak-free finish.
* Ventilation: Even though this method is non-toxic, it’s still a good idea to ventilate your kitchen while you’re cleaning your oven. Open a window or turn on your exhaust fan.
* Patience is Key: Remember, the longer you let the baking soda paste sit, the easier it will be to remove the grime. So, be patient and let it work its magic!
And there you have it! A simple, effective, and non-toxic way to clean your oven using just baking soda and vinegar. I hope this method helps you keep your oven sparkling clean and makes this dreaded chore a little less painful. Happy cleaning!
Conclusion
So, there you have it! This easy oven cleaning method is more than just a cleaning hack; it’s a game-changer for anyone who dreads tackling that baked-on grime. We’ve all been there, staring into the abyss of a dirty oven, contemplating the hours of scrubbing and the harsh chemicals involved. But with this simple DIY trick, those days are over.
Why is this a must-try? Because it’s effective, affordable, and uses ingredients you likely already have in your pantry. Forget expensive oven cleaners filled with questionable chemicals. This method harnesses the power of steam and readily available ingredients to loosen even the most stubborn messes. It’s a safer, more eco-friendly alternative that delivers impressive results.
Beyond the basic method, there’s room for customization. For particularly tough stains, consider adding a few drops of your favorite essential oil, like lemon or tea tree, to the water mixture. These oils not only add a pleasant scent but also possess natural degreasing properties. You could also experiment with different ratios of water and vinegar to find what works best for your oven. Some people prefer a stronger vinegar solution, while others find a milder concentration sufficient.
Another variation involves pre-treating heavily soiled areas. Before starting the steam cleaning process, create a paste of baking soda and water and apply it directly to the problem spots. Let it sit for a few hours, or even overnight, to help break down the grime before you begin the steam cleaning. This can significantly reduce the amount of scrubbing required later.
This method isn’t just about cleaning; it’s about reclaiming your time and enjoying a sparkling clean oven without the hassle. Imagine the satisfaction of effortlessly wiping away years of accumulated grease and food splatters. Think of the delicious meals you’ll be inspired to create in your newly cleaned oven.
We wholeheartedly encourage you to give this easy oven cleaning method a try. It’s a simple, effective, and budget-friendly way to keep your oven looking its best. And once you’ve experienced the magic of steam cleaning, you’ll wonder why you didn’t try it sooner.
But don’t just take our word for it! We want to hear about your experiences. Did you find this method as effective as we did? Did you try any variations or modifications? Share your tips, tricks, and before-and-after photos in the comments below. Let’s create a community of clean oven enthusiasts and help each other conquer the dreaded oven cleaning chore! Your feedback is invaluable and will help others discover the benefits of this fantastic DIY cleaning solution. So go ahead, give it a try, and let us know what you think! We’re confident you’ll be amazed by the results.
Frequently Asked Questions (FAQ)
Q: Is this easy oven cleaning method safe for all types of ovens?
A: Generally, yes, this method is safe for most ovens, including electric and gas ovens. However, it’s always a good idea to consult your oven’s manual before trying any new cleaning method. Pay particular attention to any warnings about steam cleaning or using vinegar. If you have a self-cleaning oven, be sure to disable the self-cleaning function before using this method. Also, avoid spraying the heating elements directly with water or vinegar solution.
Q: How often should I use this easy oven cleaning method?
A: The frequency depends on how often you use your oven and how messy it gets. For ovens that are used frequently, a monthly cleaning is recommended. If you only use your oven occasionally, you may only need to clean it every few months. A good rule of thumb is to clean your oven whenever you notice a significant buildup of grease or food splatters. Regular cleaning will prevent grime from becoming too difficult to remove and will keep your oven performing optimally.
Q: What if I don’t have vinegar? Can I use something else?
A: While vinegar is a key ingredient in this method due to its acidity and degreasing properties, you can try substituting it with lemon juice. Lemon juice also contains citric acid, which can help to loosen grime. Use the same amount of lemon juice as you would vinegar. However, vinegar is generally more effective and readily available. If you don’t have either, you could try using a baking soda paste (baking soda mixed with water) and letting it sit on the stains for a longer period before wiping it away.
Q: My oven is really dirty. Will this method still work?
A: For heavily soiled ovens, you may need to repeat the process or pre-treat the stains. As mentioned earlier, creating a paste of baking soda and water and applying it to the problem areas before steam cleaning can significantly improve the results. You can also try increasing the amount of vinegar in the water mixture. Be patient and persistent, and you should be able to achieve a clean oven, even with stubborn grime.
Q: How long should I leave the water and vinegar mixture in the oven?
A: The recommended time is typically 20-30 minutes. This allows the steam to effectively loosen the grime. However, if your oven is particularly dirty, you can leave it in for up to an hour. Just be sure to keep an eye on the water level and add more if necessary.
Q: What kind of container should I use for the water and vinegar mixture?
A: Use an oven-safe dish or bowl. A glass baking dish or a metal bowl works well. Avoid using plastic containers, as they may melt or warp at high temperatures. Make sure the container is large enough to hold the water and vinegar mixture without overflowing.
Q: Is it necessary to wipe down the oven immediately after the steam cleaning?
A: Yes, it’s important to wipe down the oven while it’s still warm. The steam will have loosened the grime, making it easier to wipe away. If you wait too long, the grime may re-harden, making it more difficult to remove. Use a damp cloth or sponge to wipe down all surfaces of the oven, including the walls, racks, and door.
Q: Can I use this method on the oven door glass?
A: Yes, this method is safe to use on the oven door glass. The steam will help to loosen any baked-on food or grease. After the steam cleaning, wipe down the glass with a clean cloth or sponge. For stubborn stains, you can try using a glass cleaner.
Q: What if I still have some stubborn stains after using this method?
A: For any remaining stubborn stains, you can try using a non-abrasive scrubbing pad or a paste of baking soda and water. Apply the paste to the stain, let it sit for a few minutes, and then gently scrub it away. Avoid using harsh chemicals or abrasive cleaners, as they can damage the oven’s surface.
Q: Will this method eliminate odors from my oven?
A: Yes, the vinegar in this method can help to neutralize odors. You can also add a few drops of essential oil, such as lemon or lavender, to the water mixture to add a pleasant scent to your oven. After cleaning, leave the oven door open for a while to allow any remaining odors to dissipate.

Leave a Comment