
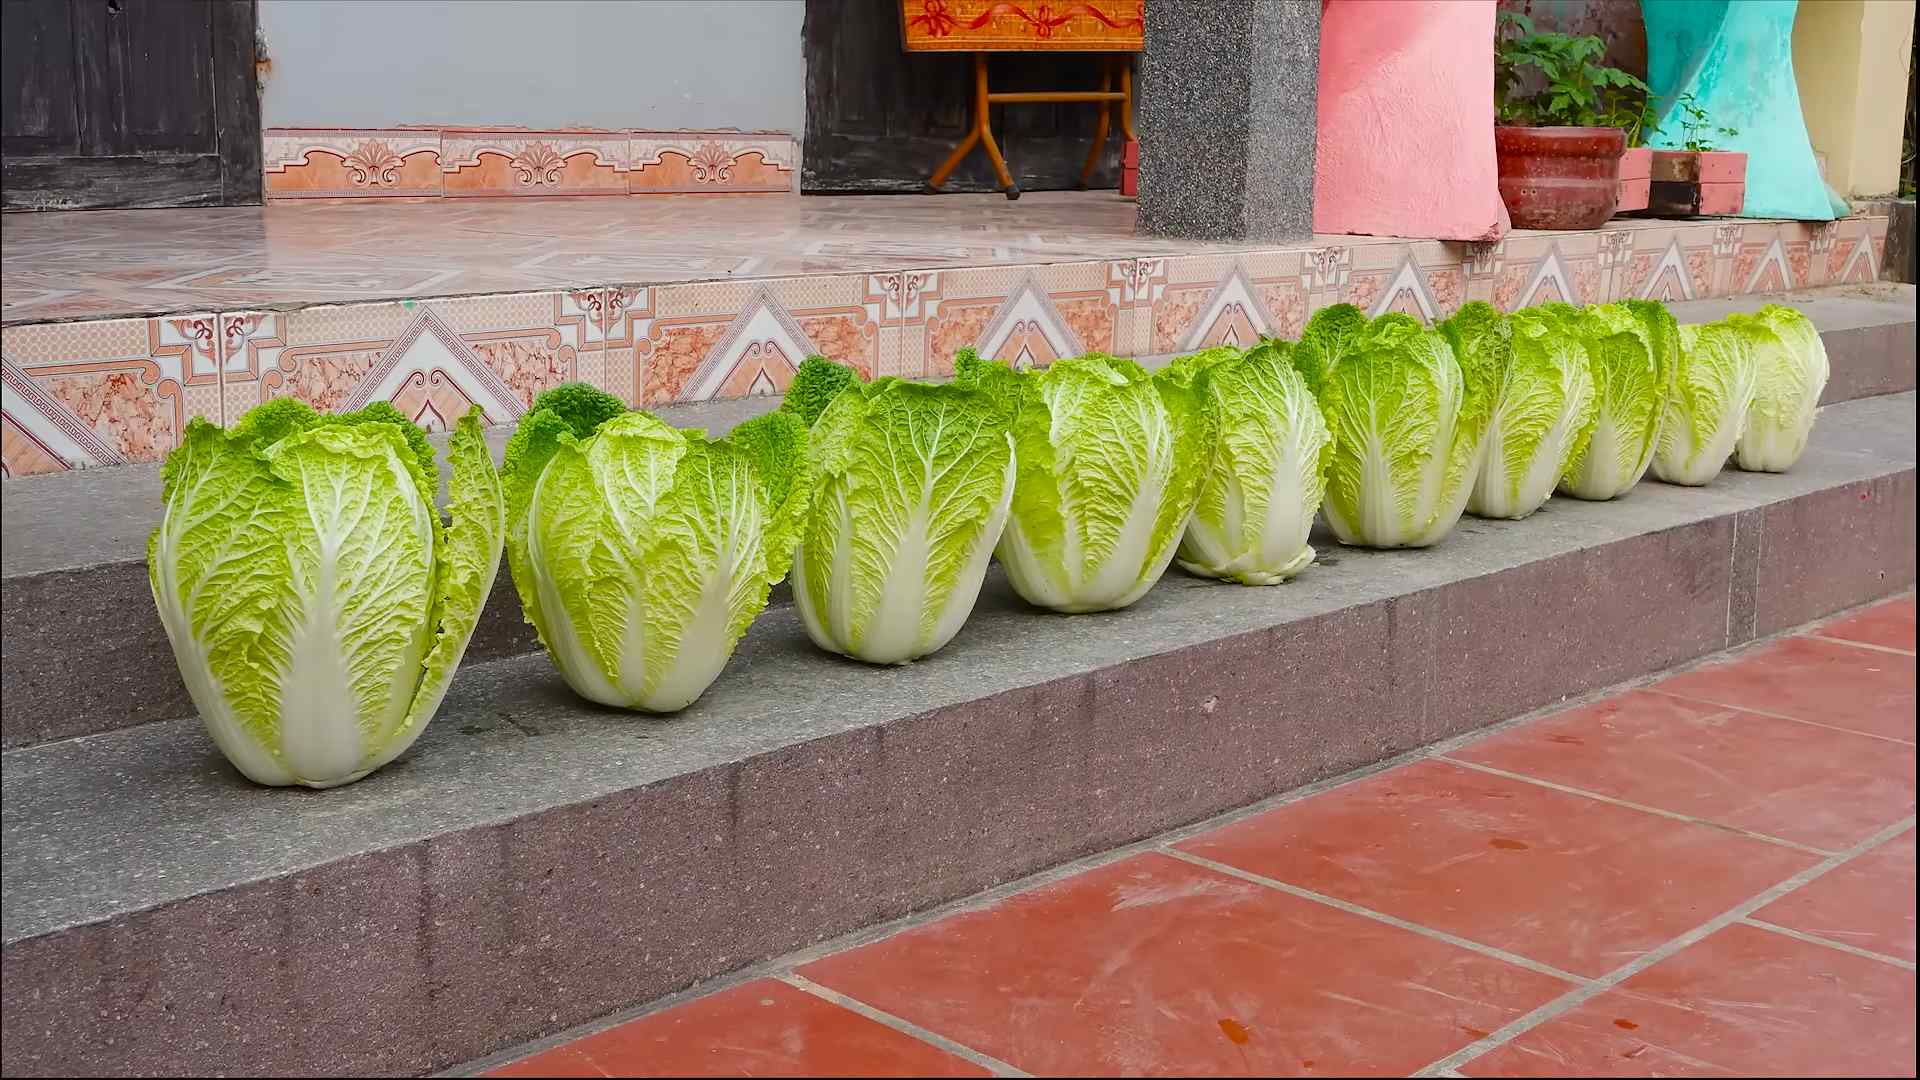
Napa Cabbage Small Space Gardening: Dreaming of fresh, crisp Napa cabbage but think you don’t have the room? Think again! I’m here to tell you that even with limited space, you can absolutely cultivate this delicious and versatile vegetable right at home. Forget those sprawling fields – we’re talking balconies, patios, and even sunny windowsills!
For centuries, Napa cabbage has been a staple in Asian cuisine, gracing tables with its delicate flavor and nutritional benefits. From kimchi to stir-fries, its versatility is unmatched. But what if you could skip the grocery store and harvest your own, knowing exactly where it came from and how it was grown? That’s the magic of home gardening!
In today’s world, where access to fresh, healthy produce can be a challenge, and space is often a premium, Napa Cabbage Small Space Gardening offers a practical and rewarding solution. I’ll guide you through simple, effective DIY tricks and hacks that will transform your tiny area into a thriving mini-farm. Imagine the satisfaction of harvesting your own Napa cabbage, knowing you nurtured it from seed to table. Let’s get started and unlock the secrets to growing this amazing vegetable, no matter how small your space may be!
Growing Napa Cabbage in Small Spaces: A DIY Guide
Hey there, fellow gardening enthusiasts! So, you’re itching to grow some delicious Napa cabbage but are short on space? Don’t worry, I’ve got you covered! I’ve been experimenting with small-space gardening for years, and Napa cabbage is surprisingly adaptable. This guide will walk you through everything you need to know to cultivate your own mini Napa cabbage patch, even if you only have a balcony or a tiny patio.
Choosing the Right Variety and Container
First things first, let’s talk about variety. While all Napa cabbages are relatively compact compared to other cabbage types, some are better suited for containers than others.
* Consider smaller varieties: Look for varieties like ‘Minuet’ or ‘Blues’ which are specifically bred to be more compact. These mature faster and take up less room.
* Check the days to maturity: Opt for varieties with shorter maturity times (around 60-70 days). This allows you to harvest sooner and potentially squeeze in another crop during the growing season.
* Container size matters: Napa cabbage needs room for its roots to develop. I recommend a container that’s at least 12 inches in diameter and 12 inches deep. A 5-gallon bucket works perfectly!
Preparing Your Container and Soil
Now that you’ve chosen your variety and container, it’s time to get your hands dirty! Proper soil preparation is crucial for healthy Napa cabbage growth.
* Drainage is key: Make sure your container has drainage holes. Napa cabbage hates sitting in soggy soil. If your container doesn’t have enough holes, drill a few more.
* Use a well-draining potting mix: Avoid using garden soil directly in your containers. It tends to compact and doesn’t drain well. Instead, opt for a high-quality potting mix specifically formulated for containers. I like to use a mix of peat moss, perlite, and vermiculite.
* Amend with compost: Compost is your best friend! It adds nutrients, improves drainage, and helps retain moisture. Mix in a generous amount of compost (about 1/3 of the total volume) into your potting mix.
* Consider adding slow-release fertilizer: Napa cabbage is a heavy feeder. Adding a slow-release fertilizer at planting time will provide a steady supply of nutrients throughout the growing season. Follow the instructions on the fertilizer package.
Planting Your Napa Cabbage
Alright, let’s get those seeds or seedlings in the ground!
* Starting from seeds: You can start Napa cabbage seeds indoors 4-6 weeks before the last expected frost. Sow the seeds about 1/4 inch deep in seed-starting trays or small pots. Keep the soil moist and warm (around 70°F). Once the seedlings have a few true leaves, you can transplant them into your container.
* Transplanting seedlings: If you’re using seedlings from a nursery, gently remove them from their containers and loosen the roots slightly. Dig a hole in your prepared potting mix that’s large enough to accommodate the root ball. Place the seedling in the hole and backfill with soil, gently firming it around the base of the plant.
* Spacing: If you’re planting multiple Napa cabbage plants in the same container, space them at least 12 inches apart. This will give them enough room to grow without overcrowding each other.
* Water thoroughly: After planting, water your Napa cabbage thoroughly until the water drains out of the bottom of the container.
Caring for Your Napa Cabbage
Now comes the ongoing care. Napa cabbage needs consistent attention to thrive.
* Watering: Napa cabbage needs consistent moisture, especially during hot weather. Water deeply whenever the top inch of soil feels dry to the touch. Avoid overwatering, as this can lead to root rot.
* Fertilizing: As I mentioned earlier, Napa cabbage is a heavy feeder. In addition to the slow-release fertilizer you added at planting time, you’ll need to supplement with liquid fertilizer every 2-3 weeks. Use a balanced fertilizer (e.g., 10-10-10) diluted to half strength.
* Sunlight: Napa cabbage needs at least 6 hours of sunlight per day. If you’re growing it indoors, make sure it’s placed near a sunny window or under grow lights.
* Pest control: Napa cabbage is susceptible to several pests, including cabbage worms, aphids, and flea beetles. Regularly inspect your plants for signs of infestation.
* Cabbage worms: These are green caterpillars that chew holes in the leaves. Handpick them off the plants or use Bacillus thuringiensis (Bt), a natural insecticide.
* Aphids: These are small, sap-sucking insects that can weaken the plants. Spray them off with a strong stream of water or use insecticidal soap.
* Flea beetles: These are tiny, jumping beetles that create small holes in the leaves. Cover your plants with row covers to prevent them from reaching the plants.
* Weed control: Keep your container free of weeds. Weeds compete with Napa cabbage for nutrients and water. Hand-pull any weeds that appear.
* Mulching: Adding a layer of mulch around your Napa cabbage plants can help retain moisture, suppress weeds, and regulate soil temperature. Use organic mulches like straw, shredded leaves, or wood chips.
Harvesting Your Napa Cabbage
The moment you’ve been waiting for! Harvesting your Napa cabbage at the right time is crucial for optimal flavor and texture.
* Check for firmness: Napa cabbage is ready to harvest when the head feels firm and compact. Gently squeeze the head to check for firmness.
* Harvest time: Typically, Napa cabbage is ready to harvest 60-80 days after planting, depending on the variety and growing conditions.
* Cut at the base: Use a sharp knife to cut the head of Napa cabbage at the base of the plant. Leave a few outer leaves on the plant to protect the cut surface.
* Storage: Store your harvested Napa cabbage in the refrigerator for up to 2 weeks. Wrap it loosely in plastic wrap or place it in a plastic bag.
Troubleshooting
Even with the best care, you might encounter some problems along the way. Here are a few common issues and how to address them:
* Yellowing leaves: This could be a sign of nutrient deficiency, overwatering, or underwatering. Check the soil moisture and fertilize if necessary.
* Stunted growth: This could be caused by poor soil, lack of sunlight, or pest infestation. Make sure your plants are getting enough sunlight and nutrients, and address any pest problems promptly.
* Bolting: Bolting is when the plant prematurely flowers, making the leaves bitter. This is usually caused by stress, such as hot weather or inconsistent watering. Choose bolt-resistant varieties and provide consistent care to prevent bolting.
Extending Your Harvest
Want to keep the Napa cabbage coming? Here are a few tips for extending your harvest:
* Succession planting: Plant new seeds or seedlings every 2-3 weeks to ensure a continuous supply of Napa cabbage throughout the growing season.
* Fall planting: Napa cabbage can also be grown as a fall crop in many regions. Plant seeds or seedlings in late summer for a fall harvest.
* Cold frames: Use cold frames to protect your Napa cabbage plants from frost and extend the growing season.
Section: Dealing with Common Pests and Diseases
Let’s dive deeper into those pesky pests and diseases that can plague your Napa cabbage. Knowing how to identify and manage them is key to a successful harvest.
Cabbage Worms: The Leafy Menace
These green caterpillars are the bane of many cabbage growers. They munch on leaves, leaving unsightly holes and potentially decimating your crop.
1. Handpicking: The most organic and immediate solution is simply picking them off! I like to do this in the early morning or evening when they’re most active. Wear gloves and dispose of them properly (don’t just toss them back into the garden!).
2. Bacillus thuringiensis (Bt): This is a naturally occurring bacteria that’s toxic to caterpillars but harmless to humans, pets, and beneficial insects. Apply it as a spray according to the product instructions. It’s most effective on young caterpillars.
3. Row Covers: Preventative measures are always best! Covering your plants with lightweight row covers will physically prevent cabbage moths (the adult form of cabbage worms) from laying their eggs on your plants.
4. Companion Planting: Some gardeners swear by companion planting to deter pests. Planting herbs like rosemary, thyme, or sage near your Napa cabbage may help repel cabbage moths.
Aphids: The Sap-Sucking Invaders
These tiny, soft-bodied insects suck the sap from plants, weakening them and causing distorted growth.
1. Strong Stream of Water: A simple yet effective method is to blast aphids off your plants with a strong stream of water from your garden

Conclusion
So, there you have it! Growing your own Napa cabbage, even in the most limited of spaces, is not only achievable but incredibly rewarding. This DIY small space gardening trick transforms balconies, patios, and even sunny windowsills into thriving miniature farms. Forget the expensive grocery store prices and often lackluster quality; with a little effort and this simple method, you can enjoy fresh, crisp, and delicious Napa cabbage whenever you desire.
Why is this a must-try? Because it empowers you to take control of your food source, reduces your carbon footprint, and connects you with the natural world, all within the confines of your own home. Imagine the satisfaction of harvesting your own Napa cabbage for a vibrant stir-fry, a refreshing salad, or a batch of homemade kimchi. The flavor is simply unmatched, and the pride in knowing you nurtured it from seed to table is an added bonus.
But the beauty of this DIY project lies in its adaptability. Feel free to experiment with different container sizes and materials. While we’ve focused on pots, consider using repurposed buckets, grow bags, or even vertical planters to maximize your space. You can also explore different Napa cabbage varieties. Some are more compact than others, making them ideal for extremely small spaces. For example, try ‘Blues’ or ‘Wong Bok’ for smaller heads.
Don’t be afraid to get creative with companion planting. Marigolds can help deter pests, while herbs like dill or chamomile can attract beneficial insects. Just be mindful of spacing and ensure your Napa cabbage receives adequate sunlight.
This DIY Napa cabbage small space gardening trick is more than just a gardening project; it’s an investment in your health, your well-being, and your connection to the environment. It’s a chance to learn, to experiment, and to reap the delicious rewards of your labor.
We wholeheartedly encourage you to give this a try. Start small, learn as you go, and don’t be discouraged by initial setbacks. Gardening is a journey, and every mistake is a valuable lesson.
Most importantly, we want to hear about your experiences! Share your photos, tips, and challenges in the comments below. Let’s build a community of small space gardeners and inspire others to embrace the joy of growing their own food. What varieties did you try? What challenges did you face, and how did you overcome them? Your insights could be invaluable to someone just starting out. So, grab your seeds, your soil, and your enthusiasm, and let’s get growing!
Frequently Asked Questions (FAQ)
What is the best time of year to plant Napa cabbage in a small space garden?
The best time to plant Napa cabbage depends on your climate. Napa cabbage is a cool-season crop, meaning it thrives in temperatures between 60°F and 70°F (15°C and 21°C). In most regions, this means planting in early spring or late summer for a fall harvest. Avoid planting during the hottest months of summer, as the heat can cause the cabbage to bolt (go to seed) prematurely, resulting in a bitter taste. If you live in a warmer climate, you may be able to grow Napa cabbage throughout the winter. Check your local climate data and frost dates to determine the optimal planting time for your area. Starting seeds indoors 4-6 weeks before the last expected frost can give you a head start on the growing season.
How much sunlight does Napa cabbage need when grown in a container?
Napa cabbage requires at least 6 hours of direct sunlight per day to thrive. When growing in a container, ensure your plant is placed in a location that receives ample sunlight. If you don’t have a spot that gets enough natural light, consider using grow lights to supplement. Rotate the container regularly to ensure all sides of the plant receive equal exposure to sunlight. Insufficient sunlight can lead to leggy growth and smaller, less dense heads of cabbage.
What type of soil is best for growing Napa cabbage in pots?
Napa cabbage prefers well-draining, fertile soil with a pH between 6.0 and 7.5. A good potting mix for containers should be lightweight and retain moisture without becoming waterlogged. You can create your own mix by combining equal parts of compost, peat moss (or coconut coir), and perlite or vermiculite. Compost provides essential nutrients, peat moss or coconut coir helps retain moisture, and perlite or vermiculite improves drainage. Avoid using garden soil in containers, as it can become compacted and doesn’t drain well.
How often should I water my container-grown Napa cabbage?
Water your Napa cabbage regularly, especially during hot and dry weather. The soil should be consistently moist but not soggy. Check the soil moisture by sticking your finger about an inch deep into the soil. If it feels dry, it’s time to water. Water deeply, allowing the water to drain out of the bottom of the container. Avoid overhead watering, as this can promote fungal diseases. Mulching around the base of the plant can help retain moisture and suppress weeds.
What are some common pests and diseases that affect Napa cabbage, and how can I prevent them?
Common pests that affect Napa cabbage include cabbage worms, aphids, flea beetles, and slugs. Diseases include clubroot, black rot, and downy mildew. To prevent pests and diseases, practice good garden hygiene, such as removing plant debris and weeds. Use row covers to protect young plants from pests. Inspect your plants regularly for signs of infestation or disease. If you find pests, handpick them off or use insecticidal soap or neem oil. For diseases, ensure good air circulation and avoid overhead watering. If you suspect clubroot, test your soil pH and amend it with lime if necessary. Crop rotation can also help prevent soilborne diseases.
How do I know when my Napa cabbage is ready to harvest?
Napa cabbage is typically ready to harvest 70-80 days after planting. The head should be firm and compact. To check for ripeness, gently squeeze the head. If it feels solid and dense, it’s ready to harvest. Use a sharp knife to cut the head from the base of the plant. You can also harvest individual leaves as needed, but this will slow down the overall growth of the head.
Can I grow Napa cabbage indoors year-round?
While it’s possible to grow Napa cabbage indoors, it can be challenging to provide the optimal conditions for growth. Napa cabbage requires a lot of sunlight, so you’ll likely need to supplement with grow lights. You’ll also need to ensure good air circulation and maintain a consistent temperature. If you have a sunny windowsill or a greenhouse, you may have more success growing Napa cabbage indoors. However, for most people, growing Napa cabbage outdoors during the cool season is the easiest and most rewarding option.
What are some good companion plants for Napa cabbage?
Good companion plants for Napa cabbage include:
* **Marigolds:** Deter pests like nematodes and cabbage moths.
* **Dill:** Attracts beneficial insects like ladybugs and lacewings, which prey on aphids.
* **Chamomile:** Attracts beneficial insects and can improve the flavor of cabbage.
* **Nasturtiums:** Act as a trap crop for aphids, drawing them away from the cabbage.
* **Aromatic herbs (rosemary, thyme, sage):** Repel cabbage moths and other pests.
* **Garlic and onions:** Repel pests and can help prevent fungal diseases.
Avoid planting Napa cabbage near other members of the brassica family (broccoli, cauliflower, kale), as they can attract the same pests and diseases.
How can I prevent my Napa cabbage from bolting?
Bolting (premature flowering) in Napa cabbage is usually caused by stress, such as heat, drought, or inconsistent watering. To prevent bolting, plant your Napa cabbage at the right time of year, when temperatures are cool. Provide consistent watering and avoid letting the soil dry out completely. Mulch around the base of the plant to help retain moisture and regulate soil temperature. Choose bolt-resistant varieties of Napa cabbage if available.
Can I save seeds from my Napa cabbage for future planting?
Yes, you can save seeds from your Napa cabbage, but it requires allowing the plant to bolt and produce flowers. However, Napa cabbage is an open-pollinated plant, meaning that the seeds may not produce plants that are identical to the parent plant. If you want to save seeds, choose healthy, vigorous plants and allow them to flower. Once the seed pods are dry and brown, harvest them and extract the seeds. Store the seeds in a cool, dry place until you’re ready to plant them. Keep in mind that Napa cabbage is a biennial, meaning it typically takes two years to produce seeds.
Leave a Comment