
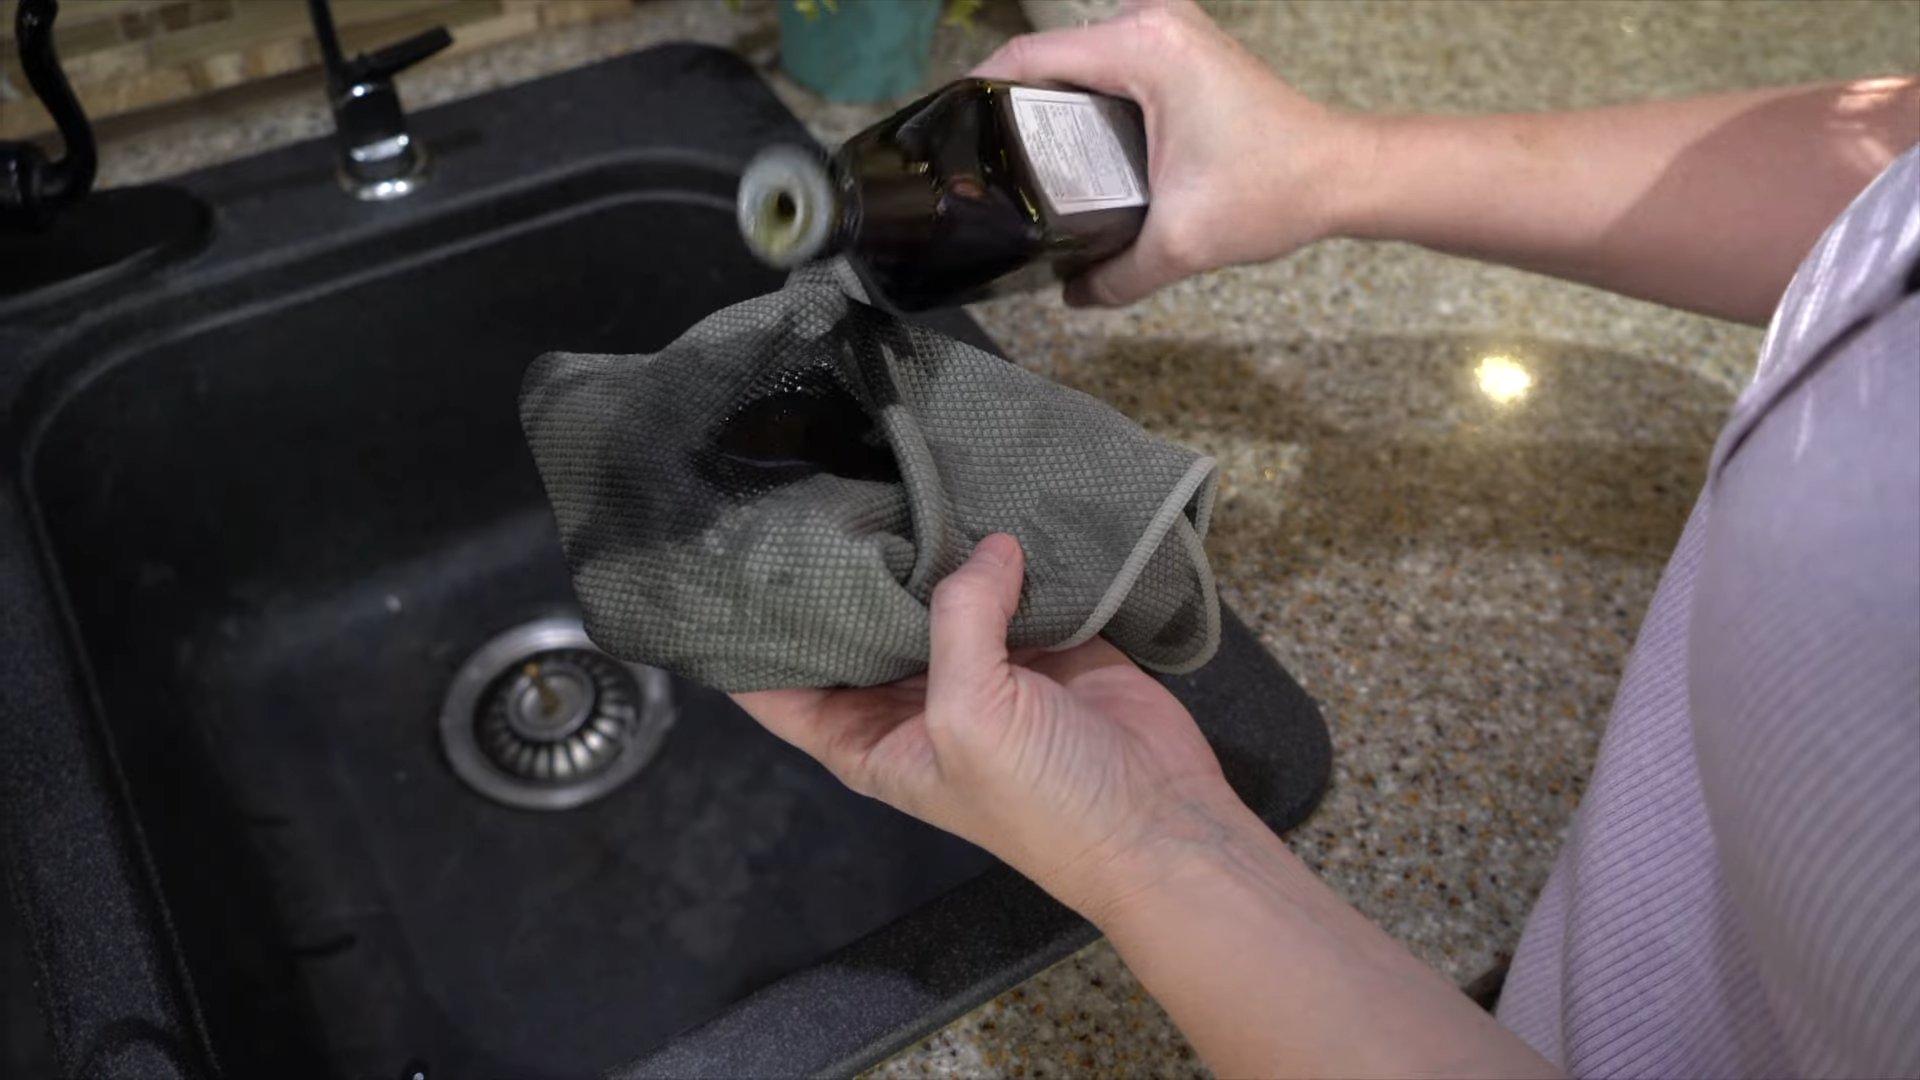
Olive oil kitchen cleaning: sounds a bit odd, doesn’t it? I know, I know, you’re probably thinking, “Olive oil? For cleaning? Isn’t that for salads and dipping bread?” But trust me on this one! For centuries, olive oil has been cherished not just for its culinary uses, but also for its incredible versatility. Think back to ancient civilizations – they used it for everything from skincare to lamp fuel. Now, we’re bringing that ancient wisdom into the 21st century, but this time, we’re using it to make our kitchens sparkle!
Let’s face it, keeping a kitchen clean can feel like a never-ending battle. Grease splatters, sticky countertops, dull stainless steel – the struggle is real! We’re constantly bombarded with expensive, chemical-laden cleaning products that promise the world but often leave behind a lingering odor and a hefty price tag. That’s where this DIY trick comes in. I’m going to show you how to harness the natural power of olive oil kitchen cleaning to achieve a gleaming, eco-friendly kitchen without breaking the bank. Not only is it effective, but it’s also a gentler alternative for your surfaces and your health. So, ditch the harsh chemicals and get ready to discover the surprising cleaning magic hidden in your pantry!
Growing Watermelons in Your Backyard: A Comprehensive DIY Guide
Hey there, fellow gardening enthusiasts! Ever dreamt of biting into a juicy, homegrown watermelon on a hot summer day? Well, dream no more! Growing watermelons in your backyard is totally achievable, even if you’re a beginner. It takes a little planning and effort, but trust me, the reward is absolutely worth it. I’m going to walk you through everything you need to know, from choosing the right variety to harvesting your sweet, refreshing prize.
Choosing the Right Watermelon Variety
First things first, let’s talk about watermelon varieties. Not all watermelons are created equal, and some are better suited for backyard gardens than others. Consider your climate, space, and personal preferences when making your selection.
* Space Savers: If you’re short on space, look for bush or dwarf varieties like ‘Bush Sugar Baby’ or ‘Garden Baby’. These compact plants produce smaller melons but still pack a flavorful punch.
* Classic Choices: For a more traditional watermelon experience, ‘Sugar Baby’ is a reliable choice. It’s relatively small, matures quickly, and has a classic sweet flavor.
* Heirloom Options: If you’re feeling adventurous, try an heirloom variety like ‘Moon and Stars’ (beautiful dark green rind with yellow spots) or ‘Blacktail Mountain’ (early maturing and cold-tolerant).
* Seedless Wonders: Seedless watermelons are a popular choice, but they require a bit more attention. You’ll need to plant a seeded variety alongside them for pollination. ‘Millionaire’ and ‘Crimson Trio’ are good options.
Preparing Your Garden Bed
Watermelons are heavy feeders, meaning they need a lot of nutrients to thrive. Proper soil preparation is crucial for a successful harvest.
* Sunlight is Key: Watermelons need at least 6-8 hours of direct sunlight per day. Choose a location in your yard that gets plenty of sunshine.
* Soil Matters: Watermelons prefer well-drained, sandy loam soil with a pH between 6.0 and 6.8. If your soil is heavy clay, amend it with plenty of organic matter like compost or well-rotted manure.
* Test Your Soil: A soil test can tell you what nutrients are lacking. You can purchase a soil test kit at most garden centers or send a sample to your local agricultural extension office.
* Amend, Amend, Amend: Based on your soil test results, amend your soil with the necessary nutrients. Watermelons benefit from a balanced fertilizer with nitrogen, phosphorus, and potassium. I like to use a slow-release fertilizer to provide a steady supply of nutrients throughout the growing season.
* Raised Beds (Optional): If you have poor drainage or compacted soil, consider growing your watermelons in raised beds. Raised beds warm up faster in the spring and provide excellent drainage.
Planting Your Watermelon Seeds or Seedlings
Now comes the fun part – planting! You can start your watermelon seeds indoors or direct sow them in your garden, depending on your climate and growing season.
Starting Seeds Indoors (Recommended for Cooler Climates)
1. Timing is Everything: Start your seeds indoors about 4-6 weeks before the last expected frost.
2. Choose Your Containers: Use peat pots or biodegradable containers to avoid disturbing the roots when transplanting.
3. Sowing the Seeds: Fill the containers with a seed-starting mix and sow 2-3 seeds per pot, about ½ inch deep.
4. Warmth and Moisture: Keep the soil consistently moist but not soggy. Place the containers in a warm location, ideally around 80-85°F (27-29°C). A heat mat can be helpful.
5. Light it Up: Once the seedlings emerge, provide them with plenty of light. A grow light is ideal, but a sunny windowsill can also work.
6. Thinning the Seedlings: Once the seedlings have a few true leaves, thin them to one strong seedling per pot.
7. Hardening Off: Before transplanting your seedlings outdoors, you’ll need to harden them off. This process gradually acclimates them to outdoor conditions. Start by placing the seedlings outdoors in a sheltered location for a few hours each day, gradually increasing the amount of time they spend outside over the course of a week.
Direct Sowing Seeds Outdoors (Suitable for Warmer Climates)
1. Wait for Warmth: Direct sow your watermelon seeds after the last expected frost when the soil temperature has warmed to at least 70°F (21°C).
2. Prepare the Planting Holes: Create small mounds of soil about 3-4 feet apart.
3. Sow the Seeds: Sow 4-5 seeds per mound, about ½ inch deep.
4. Water Gently: Water the mounds gently to avoid washing away the seeds.
5. Thin the Seedlings: Once the seedlings emerge, thin them to the strongest 2-3 seedlings per mound.
Transplanting Seedlings Outdoors
1. Choose a Cloudy Day: Transplant your seedlings on a cloudy day to minimize transplant shock.
2. Dig the Holes: Dig holes slightly larger than the root balls of your seedlings, spacing them 3-4 feet apart.
3. Gently Remove Seedlings: Carefully remove the seedlings from their containers, being careful not to damage the roots. If you used peat pots, you can plant the entire pot.
4. Plant and Water: Place the seedlings in the holes and backfill with soil. Water thoroughly.
5. Mulch it Up: Apply a layer of mulch around the plants to help retain moisture, suppress weeds, and regulate soil temperature. I like to use straw or shredded leaves.
Caring for Your Watermelon Plants
Once your watermelon plants are in the ground, it’s time to provide them with the care they need to thrive.
* Watering: Watermelons need consistent moisture, especially during fruit development. Water deeply and regularly, aiming for about 1-2 inches of water per week. Avoid overhead watering, which can promote fungal diseases. Drip irrigation or soaker hoses are ideal.
* Fertilizing: Side-dress your watermelon plants with a balanced fertilizer every 2-3 weeks. You can also use a liquid fertilizer diluted according to the package instructions.
* Weeding: Keep your garden bed free of weeds, which can compete with your watermelon plants for nutrients and water. Hand-pull weeds regularly or use a hoe.
* Vine Training (Optional): If you have limited space, you can train your watermelon vines to grow vertically on a trellis. This will require some pruning and tying.
* Pollination: Watermelons require pollination to produce fruit. Bees are the primary pollinators, so avoid using pesticides that could harm them. If you’re not seeing many bees in your garden, you can hand-pollinate the flowers. To do this, use a small paintbrush to transfer pollen from the male flowers (which have a long, thin stem) to the female flowers (which have a small, immature watermelon at the base).
* Protecting the Fruit: As your watermelons grow, you may want to protect them from pests and diseases. Place a piece of cardboard or straw under each melon to prevent it from rotting on the ground. You can also cover the melons with netting to protect them from birds and rodents.
Dealing with Pests and Diseases
Watermelons are susceptible to a few common pests and diseases. Here’s how to deal with them:
* Squash Bugs: These pests can suck the sap from your watermelon plants, causing them to wilt and die. Hand-pick squash bugs and their eggs (which are usually found on the undersides of leaves) or use an insecticidal soap.
* Cucumber Beetles: These beetles can transmit bacterial wilt, a deadly disease for watermelons. Control cucumber beetles with row covers or insecticides.
* Aphids: These small, sap-sucking insects can weaken your watermelon plants. Blast aphids off with a strong stream of water or use insecticidal soap.
* Powdery Mildew: This fungal disease causes a white, powdery coating on the leaves of your watermelon plants. Improve air circulation by pruning the vines and apply a fungicide if necessary.
* Anthracnose: This fungal disease causes dark, sunken lesions on the leaves and fruit of your watermelon plants. Avoid overhead watering and apply a fungicide if necessary.
Harvesting Your Watermelons
The moment you’ve been waiting for! Knowing when to harvest your watermelons can be tricky, but here are a few telltale signs:
* The Tendril Test: The tendril closest to the watermelon stem should be brown and dry.
* The Ground Spot: The spot where the watermelon rests on the ground (the ground spot) should be yellow or cream-colored.
* The Thump Test: Give the watermelon a
Conclusion
So, there you have it! This simple yet incredibly effective DIY trick using olive oil for kitchen cleaning is a game-changer. Forget harsh chemicals and expensive cleaners; with just a bottle of olive oil, you can achieve a sparkling clean and beautifully conditioned kitchen. We’ve shown you how to harness the natural power of olive oil to degrease, polish, and protect your kitchen surfaces, all while being kind to the environment and your wallet.
Why is this a must-try? Because it’s not just about cleaning; it’s about enhancing the longevity and beauty of your kitchen. Olive oil’s natural moisturizing properties prevent wood from drying out and cracking, while its gentle abrasive action removes grime without scratching delicate surfaces. Plus, the subtle sheen it leaves behind is simply gorgeous, giving your kitchen a warm and inviting glow.
Beyond the Basics: Variations and Suggestions
Don’t be afraid to experiment! Here are a few variations to tailor this DIY cleaning trick to your specific needs:
* **Lemon Infusion:** For an extra boost of cleaning power and a refreshing scent, infuse your olive oil with lemon peels. Simply add a few strips of lemon peel to a jar of olive oil and let it sit for a week before using.
* **Essential Oil Blend:** Add a few drops of your favorite essential oils, such as lavender, tea tree, or eucalyptus, to your olive oil for added antibacterial and aromatherapy benefits.
* **Vinegar Power:** For stubborn stains, create a cleaning solution of equal parts olive oil and white vinegar. The vinegar will help to cut through grease and grime, while the olive oil will protect and condition the surface.
* **Baking Soda Scrub:** For tougher cleaning jobs, make a paste of olive oil and baking soda. This gentle abrasive scrub is perfect for removing baked-on food from stovetops and ovens.
We are confident that once you try this method, you’ll be amazed by the results. It’s a simple, affordable, and eco-friendly way to keep your kitchen looking its best.
Now, it’s your turn! We encourage you to try this DIY olive oil kitchen cleaning trick and share your experience with us. Let us know what surfaces you cleaned, what variations you tried, and what results you achieved. Your feedback will help us refine this method and share it with even more people.
Embrace the Power of Olive Oil
This isn’t just a cleaning hack; it’s a testament to the power of natural ingredients. By using olive oil, you’re not only cleaning your kitchen but also making a conscious choice to reduce your reliance on harsh chemicals and embrace a more sustainable lifestyle. So, grab a bottle of olive oil and get ready to transform your kitchen into a sparkling clean and beautifully conditioned space. We can’t wait to hear about your success!
FAQ
Q: What kind of olive oil should I use for cleaning?
A: While extra virgin olive oil is excellent for cooking, you don’t need to use the most expensive kind for cleaning. Regular or light olive oil works just as well and is more cost-effective. The key is to ensure it’s pure olive oil without any additives.
Q: Can I use olive oil on all kitchen surfaces?
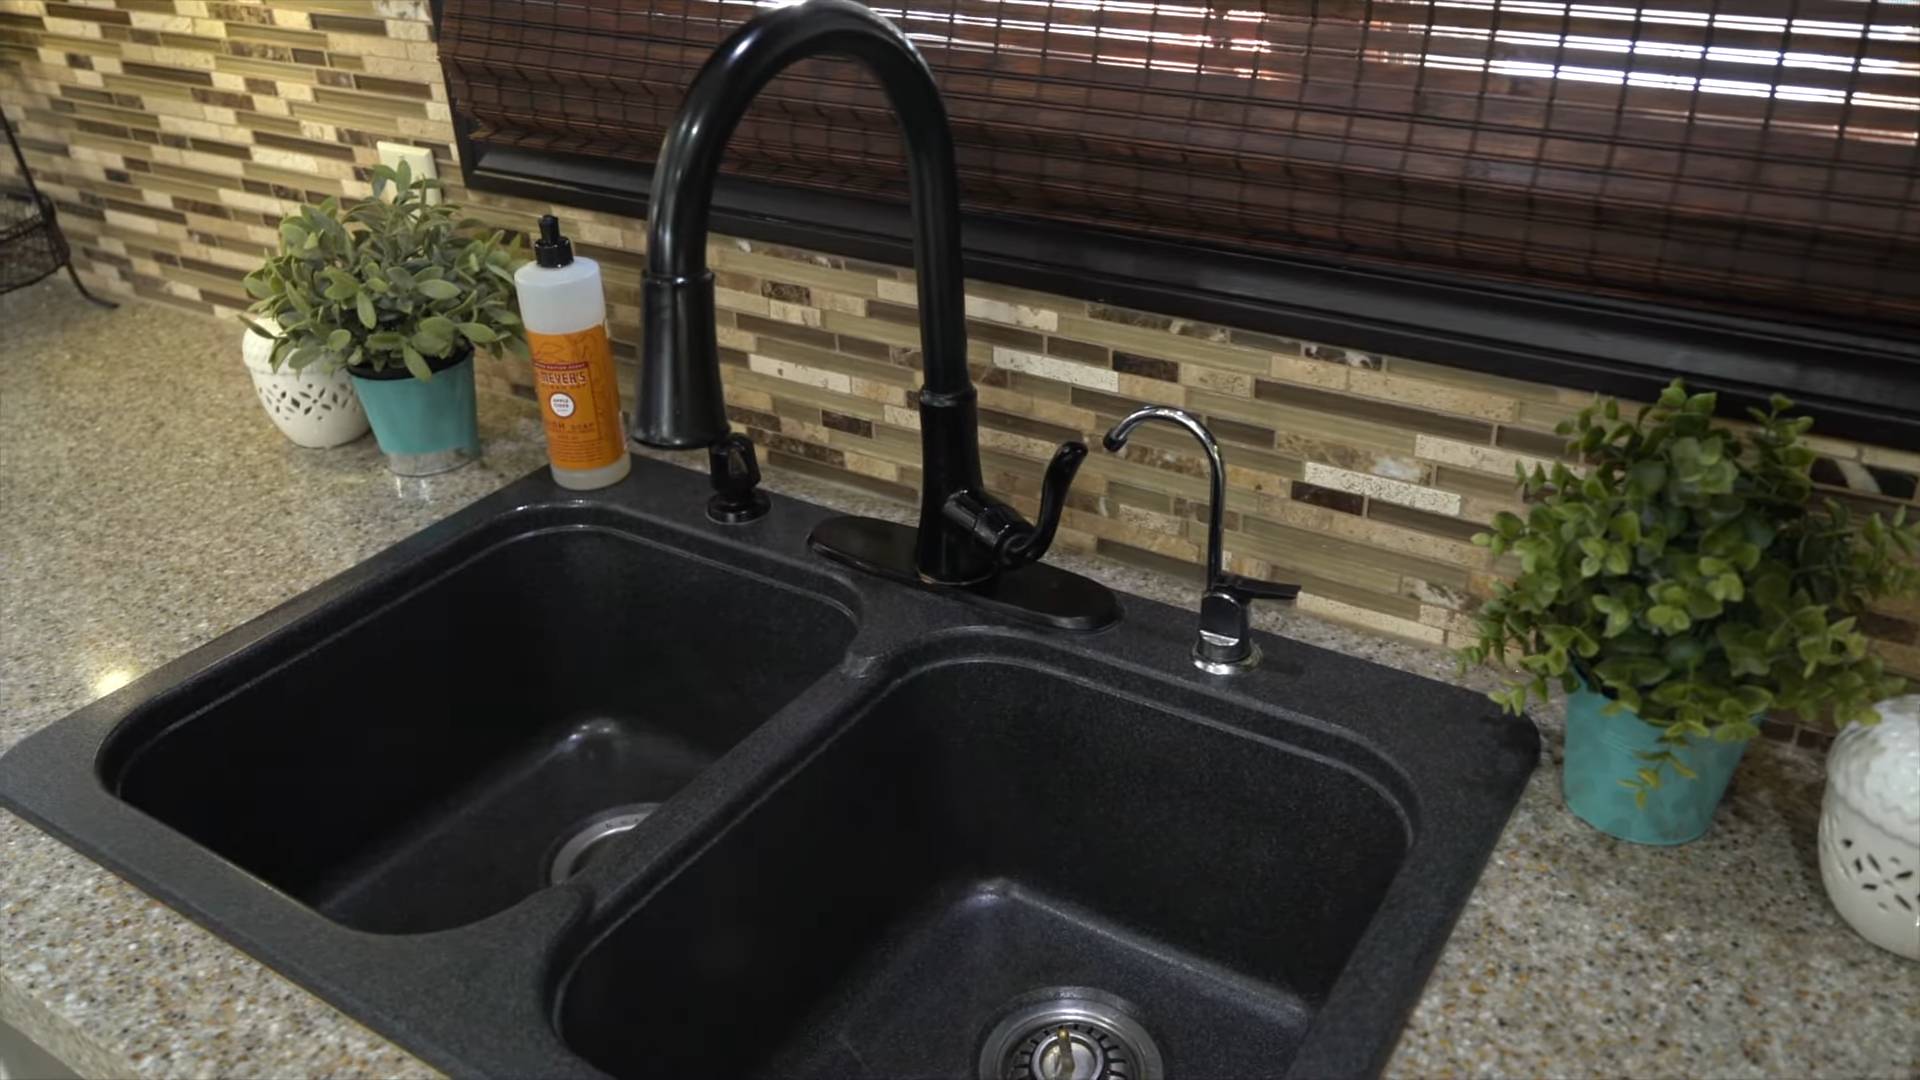
A: Olive oil is generally safe for most kitchen surfaces, including wood, stainless steel, granite, and ceramic. However, it’s always a good idea to test it on a small, inconspicuous area first to ensure it doesn’t cause any discoloration or damage. Avoid using olive oil on porous surfaces like unsealed grout, as it can be absorbed and become sticky.
Q: Will olive oil leave a greasy residue on my kitchen surfaces?
A: When used properly, olive oil should not leave a greasy residue. The key is to use a small amount and buff the surface thoroughly with a clean, dry cloth. This will remove any excess oil and leave a beautiful sheen. If you do notice a slight residue, simply wipe the surface again with a clean cloth.
Q: How often should I use olive oil to clean my kitchen?
A: The frequency of cleaning with olive oil depends on your individual needs and how often you use your kitchen. For general cleaning and polishing, once a week is usually sufficient. For areas that get particularly dirty, such as the stovetop or backsplash, you may need to clean them more frequently.
Q: Can I use olive oil to clean my kitchen appliances?
A: Yes, olive oil can be used to clean and polish many kitchen appliances, including stainless steel refrigerators, ovens, and dishwashers. Simply apply a small amount of olive oil to a clean cloth and wipe down the appliance. Buff with a dry cloth to remove any excess oil. Avoid using olive oil on appliance controls or electrical components.
Q: Is olive oil effective at removing stubborn stains and grease?
A: Olive oil is surprisingly effective at removing stubborn stains and grease, especially when combined with other natural cleaning agents like vinegar or baking soda. The oil helps to loosen the grime, while the vinegar or baking soda provides extra cleaning power. For tough stains, let the olive oil mixture sit for a few minutes before wiping it away.
Q: Can I use olive oil to clean my wooden cutting boards?
A: Yes, olive oil is excellent for cleaning and conditioning wooden cutting boards. It helps to prevent the wood from drying out and cracking, while also providing a protective barrier against bacteria. Simply apply a small amount of olive oil to the cutting board and rub it in with a clean cloth. Let it sit for a few minutes, then wipe away any excess oil.
Q: Does olive oil have any antibacterial properties?
A: While olive oil doesn’t have strong antibacterial properties on its own, it can help to create a clean and hygienic surface by removing dirt and grime that can harbor bacteria. For added antibacterial protection, you can combine olive oil with essential oils like tea tree or eucalyptus, which have known antibacterial properties.
Q: How do I store my olive oil cleaning solution?
A: If you’re making a larger batch of olive oil cleaning solution, store it in a clean, airtight container in a cool, dark place. This will help to prevent the oil from going rancid. You can also add a few drops of vitamin E oil to help preserve the oil.
Q: What are the benefits of using olive oil for kitchen cleaning compared to commercial cleaners?
A: There are several benefits to using olive oil for kitchen cleaning compared to commercial cleaners:
* **Eco-friendly:** Olive oil is a natural and biodegradable product, unlike many commercial cleaners that contain harsh chemicals that can harm the environment.
* **Non-toxic:** Olive oil is safe for you, your family, and your pets, unlike some commercial cleaners that can be toxic if ingested or inhaled.
* **Affordable:** Olive oil is often more affordable than commercial cleaners, especially if you already have it on hand.
* **Gentle:** Olive oil is gentle on surfaces and won’t scratch or damage them, unlike some abrasive commercial cleaners.
* **Moisturizing:** Olive oil has moisturizing properties that can help to protect and condition kitchen surfaces, such as wood and stainless steel.
Q: Can I use this olive oil kitchen cleaning method on my kitchen floors?
A: While you *can* use a very diluted olive oil solution on some kitchen floors, it’s generally not recommended as a primary cleaning method. Olive oil can make floors slippery if too much is used, and it can attract dirt and dust. If you choose to use it, dilute a very small amount of olive oil in a large bucket of warm water and test it on an inconspicuous area first. Mop the floor with the solution, then immediately dry it thoroughly with a clean, dry mop or cloth. Be extremely cautious to avoid slipping. For most kitchen floors, a dedicated floor cleaner is a safer and more effective option.


Leave a Comment