
Planting peanuts at home might sound like a whimsical dream, conjuring images of sprawling fields and a Southern harvest, but trust me, it’s totally achievable, even if you just have a small balcony or a sunny corner in your backyard! For generations, peanuts have been more than just a snack; they’re a symbol of resourcefulness and simple pleasures, deeply rooted in cultures around the world. From ancient South American civilizations to the American South, peanuts have nourished communities and inspired countless recipes.
But why should you consider planting peanuts at home? Well, imagine the satisfaction of harvesting your own homegrown peanuts, bursting with fresh, nutty flavor that store-bought varieties simply can’t match. Plus, it’s a fantastic way to connect with nature, learn about the growing process, and even get the kids involved in a fun and educational activity. In this article, I’m going to share some easy-to-follow DIY tricks and hacks that will make planting peanuts at home a breeze, regardless of your gardening experience. Get ready to dig in and discover the joy of growing your own peanut patch!
Growing Peanuts in Your Backyard: A Beginner’s Guide
Hey there, fellow gardening enthusiasts! Ever thought about growing your own peanuts? It’s surprisingly easy and incredibly rewarding. Imagine the satisfaction of harvesting your own homegrown peanuts, perfect for snacking, making peanut butter, or even adding to your favorite recipes. I’m going to walk you through the entire process, from choosing the right peanuts to enjoying your delicious harvest. Let’s get started!
Choosing Your Peanut Variety
Before we dive into the planting process, it’s important to choose the right peanut variety for your climate and growing conditions. There are four main types of peanuts, each with its own characteristics:
* Runner Peanuts: These are the most common type grown in the United States. They have a uniform size and shape, making them ideal for commercial peanut butter production. They typically mature in 120-130 days.
* Virginia Peanuts: These are the largest type of peanut and are often roasted and sold as gourmet snacks. They require a longer growing season, around 130-150 days.
* Spanish Peanuts: These peanuts have a reddish-brown skin and a distinctive nutty flavor. They are often used in candies and snacks. They mature relatively quickly, in about 110-120 days.
* Valencia Peanuts: These peanuts have three or more kernels per shell and are known for their sweet flavor. They are often boiled or roasted. They mature in about 90-110 days, making them a good choice for shorter growing seasons.
Choosing the Right Peanuts for Planting:
You can’t just grab any bag of roasted peanuts from the grocery store and expect them to sprout. You need raw, unsalted peanuts that haven’t been treated with any chemicals. The best place to find these is at a local garden center or online seed supplier. Look for peanuts specifically labeled for planting.
Preparing Your Planting Site
Peanuts need plenty of sunshine and well-drained soil to thrive. Here’s how to prepare your planting site:
* Sunlight: Choose a location that receives at least 6-8 hours of direct sunlight per day.
* Soil: Peanuts prefer sandy loam soil that is loose and well-draining. Avoid heavy clay soils, as they can become waterlogged and prevent the peanuts from developing properly.
* Soil pH: The ideal soil pH for peanuts is between 6.0 and 6.5. You can test your soil pH using a soil testing kit, which you can find at most garden centers.
* Amendments: If your soil is heavy or compacted, amend it with compost, aged manure, or other organic matter to improve drainage and fertility. Work the amendments into the soil to a depth of at least 6-8 inches.
* Weed Control: Remove any weeds from the planting area, as they can compete with the peanuts for nutrients and water.
Planting Your Peanuts
Now comes the fun part – planting your peanuts! Here’s a step-by-step guide:
1. Timing: Peanuts are warm-season crops and should be planted after the last frost when the soil temperature has warmed to at least 65°F (18°C). In most areas, this is typically in late spring or early summer.
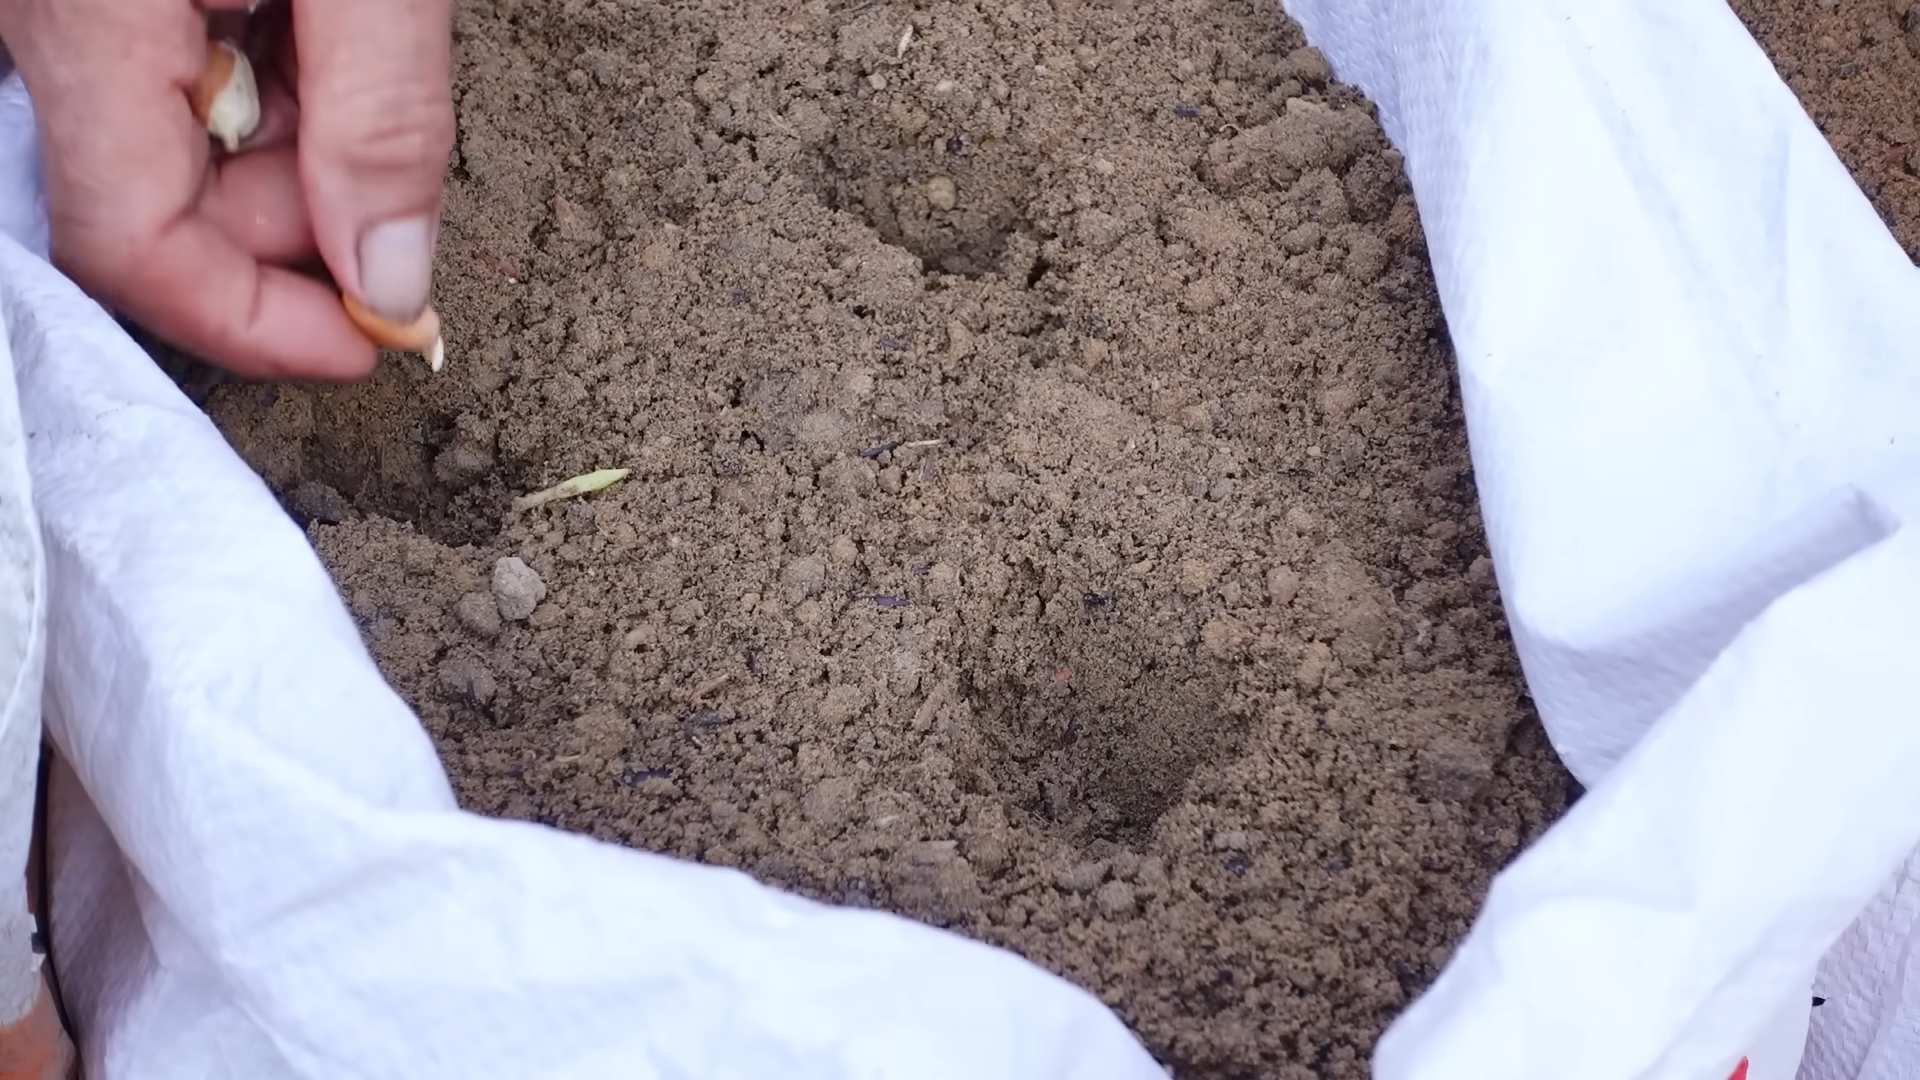
2. Shelling: Gently crack open the peanut shells and remove the kernels. Be careful not to damage the kernels, as this can reduce their germination rate. I usually crack them open over a bowl to catch any stray pieces.
3. Soaking (Optional): Soaking the peanut kernels in water for a few hours before planting can help to speed up germination. However, this step is not essential. I’ve had success both with and without soaking.
4. Planting Depth: Plant the peanut kernels about 1-2 inches deep and 6-8 inches apart in rows that are 2-3 feet apart.
5. Watering: Water the planting area thoroughly after planting to help the soil settle and provide moisture for germination.
Caring for Your Peanut Plants
Once your peanuts are planted, it’s important to provide them with the care they need to thrive.
1. Watering: Water your peanut plants regularly, especially during dry periods. Peanuts need about 1 inch of water per week. Avoid overwatering, as this can lead to fungal diseases. I usually check the soil moisture by sticking my finger about an inch deep. If it feels dry, it’s time to water.
2. Weeding: Keep the planting area free of weeds, as they can compete with the peanuts for nutrients and water. Hand-pull weeds carefully to avoid disturbing the peanut plants’ roots.
3. Fertilizing: Peanuts are legumes, which means they can fix nitrogen from the air. However, they still benefit from fertilization. Apply a balanced fertilizer (e.g., 10-10-10) at planting and again about 4-6 weeks later. Follow the instructions on the fertilizer package.
4. Hilling: As the peanut plants grow, they will produce “pegs” that grow downward into the soil. These pegs are where the peanuts will develop. To encourage peanut production, hill the soil around the base of the plants, covering the pegs with soil. This helps to protect the developing peanuts and provides them with a dark, moist environment. I usually do this a couple of times during the growing season.
5. Pest and Disease Control: Peanuts are generally resistant to pests and diseases, but they can be affected by certain problems, such as aphids, spider mites, and fungal diseases. Inspect your plants regularly for signs of pests or diseases and take appropriate action if necessary. Organic pest control methods, such as insecticidal soap or neem oil, can be effective for controlling aphids and spider mites. Fungicides can be used to control fungal diseases.
Harvesting Your Peanuts
Harvesting is the most exciting part of growing peanuts! Here’s how to know when it’s time to harvest and how to do it:
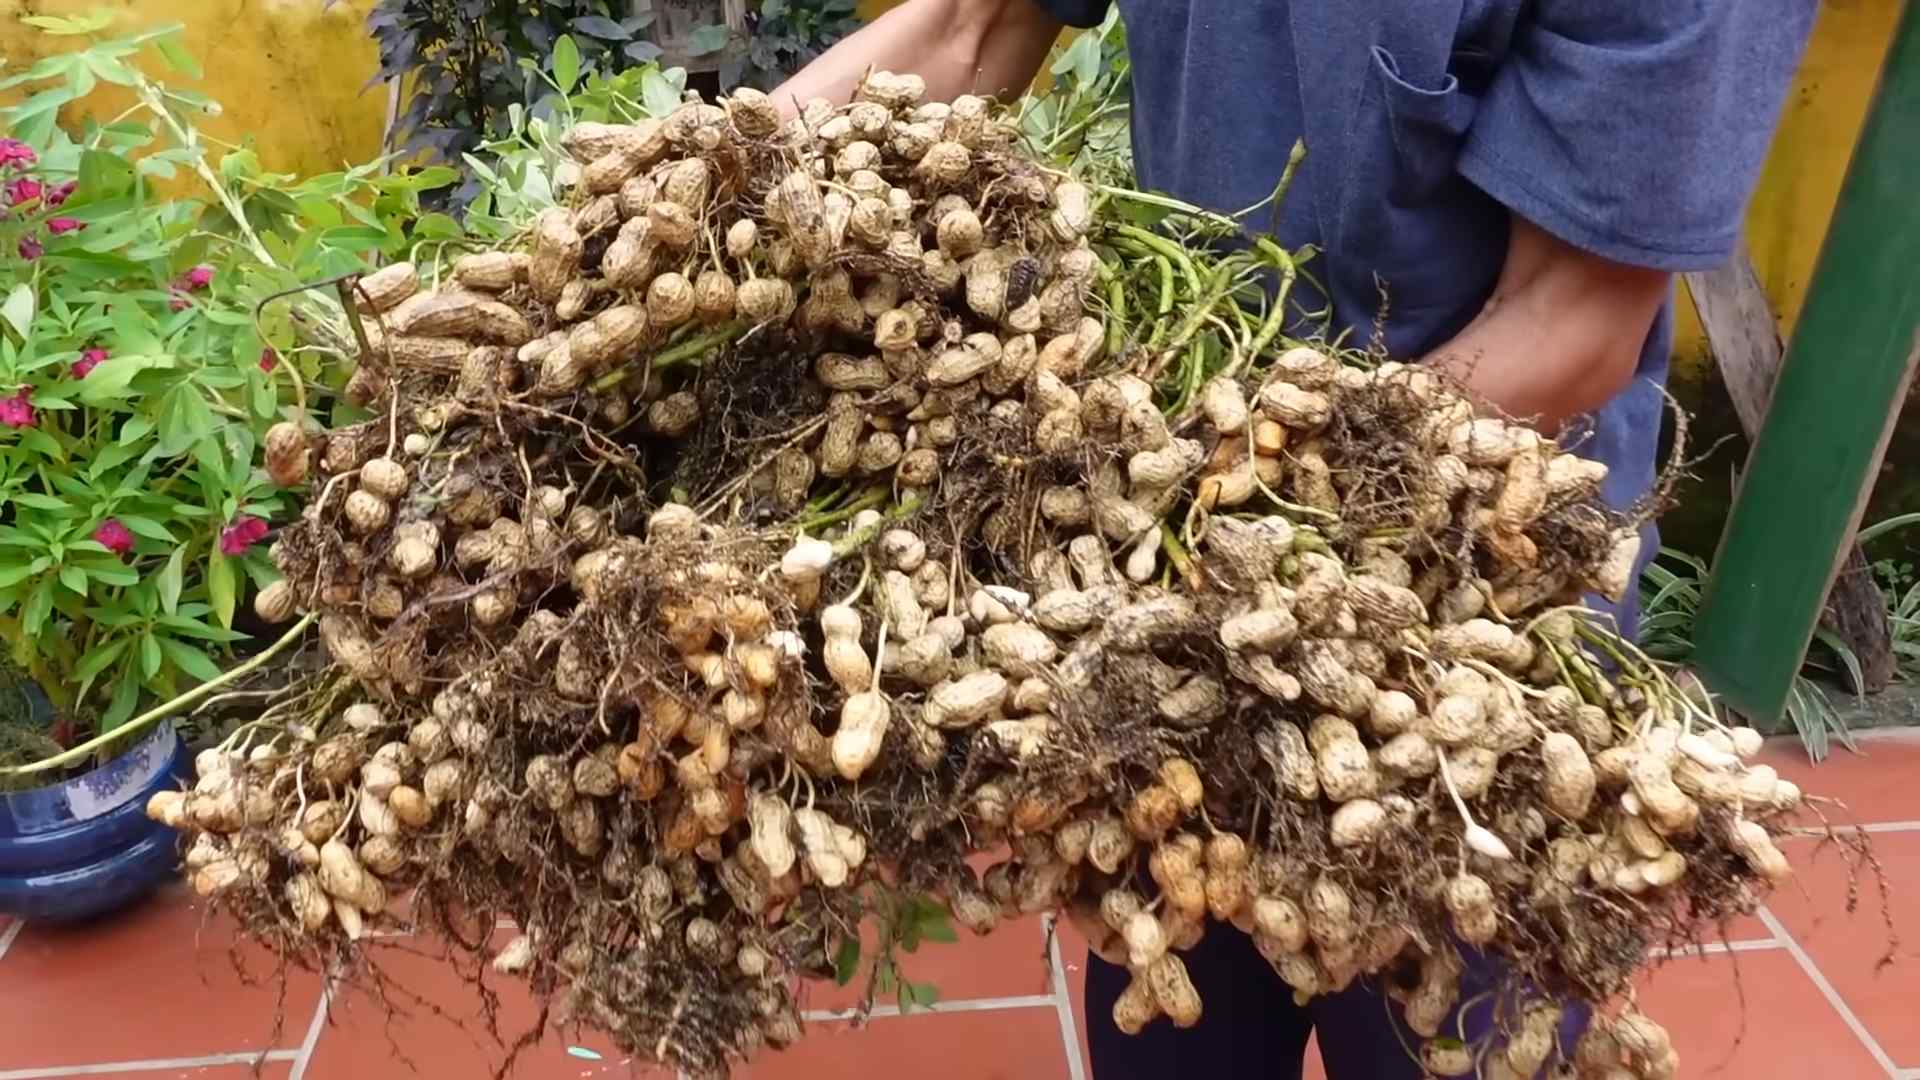
1. Timing: Peanuts are typically ready to harvest when the leaves begin to turn yellow and the plants start to die back. This usually occurs about 120-150 days after planting, depending on the variety. You can also check the peanuts themselves by digging up a few plants and inspecting the pods. The peanuts should be plump and the shells should be well-formed.
2. Digging: To harvest your peanuts, use a garden fork or shovel to carefully dig up the plants, being careful not to damage the peanuts. Gently shake off any excess soil.
3. Drying: After digging up the plants, hang them upside down in a well-ventilated area to dry for 2-4 weeks. This allows the peanuts to cure and develop their full flavor. I usually hang them in my garage or shed.
4. Threshing: Once the peanuts are dry, you can thresh them by hand or by using a peanut thresher. To thresh them by hand, simply pull the peanuts off the plants.
5. Storage: Store your harvested peanuts in a cool, dry place in airtight containers. They can be stored for several months.
Troubleshooting Common Problems
Even with the best care, you may encounter some problems when growing peanuts. Here are some common issues and how to address them:
* Poor Germination: If your peanut kernels don’t germinate, it could be due to several factors, such as cold soil, poor-quality seeds, or overwatering. Make sure the soil temperature is warm enough before planting, use fresh, high-quality seeds, and avoid overwatering.
* Yellowing Leaves: Yellowing leaves can be a sign of nutrient deficiency, overwatering, or disease. Check the soil pH and nutrient levels, adjust your watering schedule, and inspect the plants for signs of disease.
* Small Peanuts: Small peanuts can be caused by poor soil, insufficient water, or a short growing season. Amend your soil with compost or other organic matter, water your plants regularly, and choose a peanut variety that is suited to your climate.
* Pest Infestations: Aphids, spider mites, and other pests can damage peanut plants. Inspect your plants regularly and take appropriate action if necessary. Organic pest control methods, such as insecticidal soap or neem oil, can be effective for controlling these pests.
* Fungal Diseases: Fungal diseases, such as leaf spot and stem rot, can affect peanut plants. Avoid overwatering, provide good air circulation, and apply a fungicide if necessary.
Enjoying Your Homegrown Peanuts
Now that you’ve harvested your own peanuts, it’s time to enjoy the fruits (or rather, nuts) of your labor! Here are some ideas:
* Roasting: Roast your peanuts in the oven for a delicious and healthy snack. Preheat your oven to 350°F (175°C) and spread the peanuts in a single layer on a baking sheet. Roast for 15-20 minutes, or until they
Conclusion
So, there you have it! Planting peanuts at home is not only surprisingly simple, but it’s also incredibly rewarding. Imagine the satisfaction of harvesting your own homegrown peanuts, knowing exactly where they came from and how they were grown. Forget those bland, store-bought peanuts – get ready for a burst of fresh, nutty flavor that you just can’t replicate any other way.
This isn’t just about saving a few dollars; it’s about connecting with nature, learning a new skill, and enjoying the fruits (or rather, the legumes) of your labor. The process is therapeutic, the results are delicious, and the bragging rights are undeniable. Plus, it’s a fantastic project to involve kids in, teaching them about the life cycle of plants and the importance of sustainable food practices.
But the best part? The possibilities are endless! Once you’ve mastered the basics, you can experiment with different peanut varieties. Try growing Virginia peanuts for their large size and satisfying crunch, or go for Spanish peanuts for their sweeter flavor and higher oil content. You can even try roasting your homegrown peanuts with different spices and seasonings for a personalized snack that’s truly your own. Consider adding a touch of smoked paprika for a smoky kick, or a sprinkle of chili powder for a spicy treat.
And don’t limit yourself to just eating them as a snack! Use your homegrown peanuts to make homemade peanut butter, add them to stir-fries for extra crunch, or incorporate them into your favorite baking recipes. The only limit is your imagination.
We understand that trying something new can be a little daunting, but trust us, this is one DIY project that’s well worth the effort. The steps are straightforward, the materials are readily available, and the payoff is immense.
So, what are you waiting for? Grab some raw, unsalted peanuts, find a sunny spot in your garden (or even a large container on your balcony), and get planting! We’re confident that you’ll be amazed at how easy and enjoyable it is to grow your own peanuts.
We encourage you to embark on this peanut-growing adventure and share your experiences with us! Post photos of your peanut plants, tell us about your favorite peanut recipes, and let us know what challenges you encountered along the way. We’re all in this together, learning and growing (pun intended!) as a community. Let’s spread the joy of homegrown peanuts and inspire others to give it a try. Happy planting!
Frequently Asked Questions (FAQ)
What kind of peanuts should I use for planting?
The best peanuts to use for planting are raw, unsalted peanuts. Roasted or salted peanuts will not germinate. Look for peanuts specifically labeled as “seed peanuts” at your local garden center or online. These are guaranteed to be viable and free from any treatments that could inhibit growth. If you can’t find seed peanuts, you can use raw, unsalted peanuts from the grocery store, but be aware that the germination rate may be lower. Avoid peanuts that have been shelled for a long time, as they may have dried out too much.
When is the best time to plant peanuts?
Peanuts are warm-weather crops and require a long growing season of at least 120-150 days. The best time to plant peanuts is after the last frost, when the soil temperature has warmed to at least 65°F (18°C). In most regions, this is typically in late spring or early summer. You can start peanuts indoors 4-6 weeks before the last frost to get a head start, but be careful when transplanting them, as they don’t like to have their roots disturbed.
How much space do peanut plants need?
Peanut plants need plenty of space to spread out, as they grow both above and below ground. Space plants about 6-8 inches apart in rows that are 2-3 feet apart. This will allow them to receive adequate sunlight and air circulation, which is essential for healthy growth and peanut production. If you’re growing peanuts in containers, choose pots that are at least 12 inches in diameter and 12 inches deep.
What kind of soil is best for growing peanuts?
Peanuts prefer well-drained, sandy loam soil with a pH of 6.0 to 6.5. Avoid heavy clay soils, as they can become waterlogged and prevent the peanuts from developing properly. Before planting, amend the soil with compost or other organic matter to improve drainage and fertility. Peanuts are legumes, which means they can fix nitrogen from the air, so they don’t require a lot of nitrogen fertilizer. However, they do benefit from phosphorus and potassium, so consider adding a fertilizer that is high in these nutrients.
How often should I water peanut plants?
Peanut plants need consistent moisture, especially during flowering and pod development. Water deeply and regularly, especially during dry spells. Avoid overwatering, as this can lead to root rot. A good rule of thumb is to water when the top inch of soil feels dry to the touch. Mulching around the plants can help to retain moisture and suppress weeds.
How do I know when my peanuts are ready to harvest?
The best way to determine when your peanuts are ready to harvest is to check the maturity of the pods. About 120-150 days after planting, dig up a few plants and examine the pods. The pods should be plump and full, and the inside of the shells should be dark brown. If the shells are still white or light-colored, the peanuts are not yet mature. Another sign of maturity is yellowing leaves.
How do I harvest peanuts?
To harvest peanuts, carefully dig up the entire plant, being careful not to damage the pods. Shake off any excess soil and hang the plants upside down in a dry, well-ventilated place for 2-3 weeks to cure. This will allow the peanuts to dry out and develop their full flavor. Once the peanuts are dry, you can remove them from the plants and store them in an airtight container in a cool, dry place.
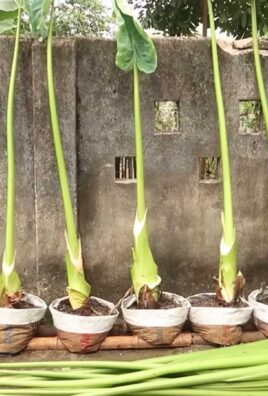
Can I grow peanuts in containers?
Yes, you can definitely grow peanuts in containers! Choose a large container that is at least 12 inches in diameter and 12 inches deep. Fill the container with well-draining potting mix and plant the peanuts as you would in the ground. Make sure the container receives plenty of sunlight and water regularly. Container-grown peanuts may not produce as many peanuts as those grown in the ground, but they can still provide a satisfying harvest.
Are there any common pests or diseases that affect peanut plants?
Peanut plants can be susceptible to a few pests and diseases, including aphids, spider mites, and leaf spot. Monitor your plants regularly and take action if you notice any signs of infestation or disease. Insecticidal soap or neem oil can be used to control aphids and spider mites. Leaf spot can be prevented by providing good air circulation and avoiding overhead watering.
Can I save seeds from my homegrown peanuts to plant next year?
Yes, you can save seeds from your homegrown peanuts to plant next year. Choose the largest and healthiest peanuts from your harvest and store them in an airtight container in a cool, dry place. Before planting, crack open the shells and inspect the peanuts. Discard any peanuts that are shriveled or discolored. Plant the peanuts as you would normally, and you should have a new crop of peanuts next year. This is a great way to continue your peanut-growing journey and become more self-sufficient.

Leave a Comment