
Propagate Plants June: Ever wished you could magically multiply your favorite plants without spending a fortune at the garden center? Well, you’re in luck! This June, I’m sharing some super easy and effective DIY tricks to help you propagate plants like a pro. Forget complicated setups and expensive equipment; we’re going back to basics with methods that are both budget-friendly and incredibly rewarding.
Plant propagation, in its essence, is an age-old practice. Historically, it’s been crucial for preserving plant varieties and ensuring food security. Think about ancient civilizations carefully nurturing and sharing cuttings of their most prized crops! Today, while we might not be relying on it for survival in the same way, the joy of creating new life from a single plant is still deeply satisfying. Plus, it’s a fantastic way to connect with nature and understand the fascinating processes that keep our green friends thriving.
But why should you learn to propagate plants June, specifically? Well, June is often a sweet spot for many plants, with the right balance of warmth and sunlight to encourage root development. This means higher success rates for your propagation efforts! And let’s be honest, who doesn’t want more plants? Whether you’re looking to expand your indoor jungle, fill your garden beds, or simply share the joy of gardening with friends, these DIY tricks will empower you to create an abundance of greenery. So, grab your gardening gloves, and let’s get started!
Propagating Plants Like a Pro: A June Guide
Hey plant lovers! June is prime time for plant propagation. The weather’s warm, the plants are actively growing, and success rates are generally high. I’m going to walk you through some of my favorite propagation methods, focusing on techniques that work especially well this month. Let’s get our hands dirty and multiply our green friends!
Choosing Your Propagation Method
Before we dive into the specifics, let’s quickly review some common propagation methods. The best method depends on the type of plant you’re working with.
* Stem Cuttings: This is probably the most popular and versatile method. You take a cutting from a stem, root it in water or soil, and voila – a new plant! Works great for herbs like basil and mint, as well as many houseplants like pothos and philodendron.
* Leaf Cuttings: Some plants, like succulents and snake plants, can be propagated from their leaves. It’s a slower process than stem cuttings, but super rewarding.
* Division: This involves separating a plant into multiple smaller plants, each with its own roots. Ideal for plants that grow in clumps, such as ferns, hostas, and peace lilies.
* Layering: This method encourages roots to form on a stem while it’s still attached to the parent plant. Once roots have formed, you can sever the stem and plant it as a new individual. Good for plants with long, flexible stems like climbing roses or raspberries.
* Air Layering: Similar to layering, but you encourage roots to form on a stem that’s not touching the ground. This is often used for larger, woody plants like ficus trees.
Stem Cuttings: The Easiest Way to Multiply Many Plants
Stem cuttings are my go-to method for a lot of plants. Here’s how I do it:
Materials You’ll Need:
* Sharp, clean pruning shears or a knife
* A glass or jar for water propagation (or a small pot with well-draining potting mix)
* Rooting hormone (optional, but it can speed up the process)
* A plastic bag or humidity dome (optional, to create a humid environment)
Step-by-Step Instructions:
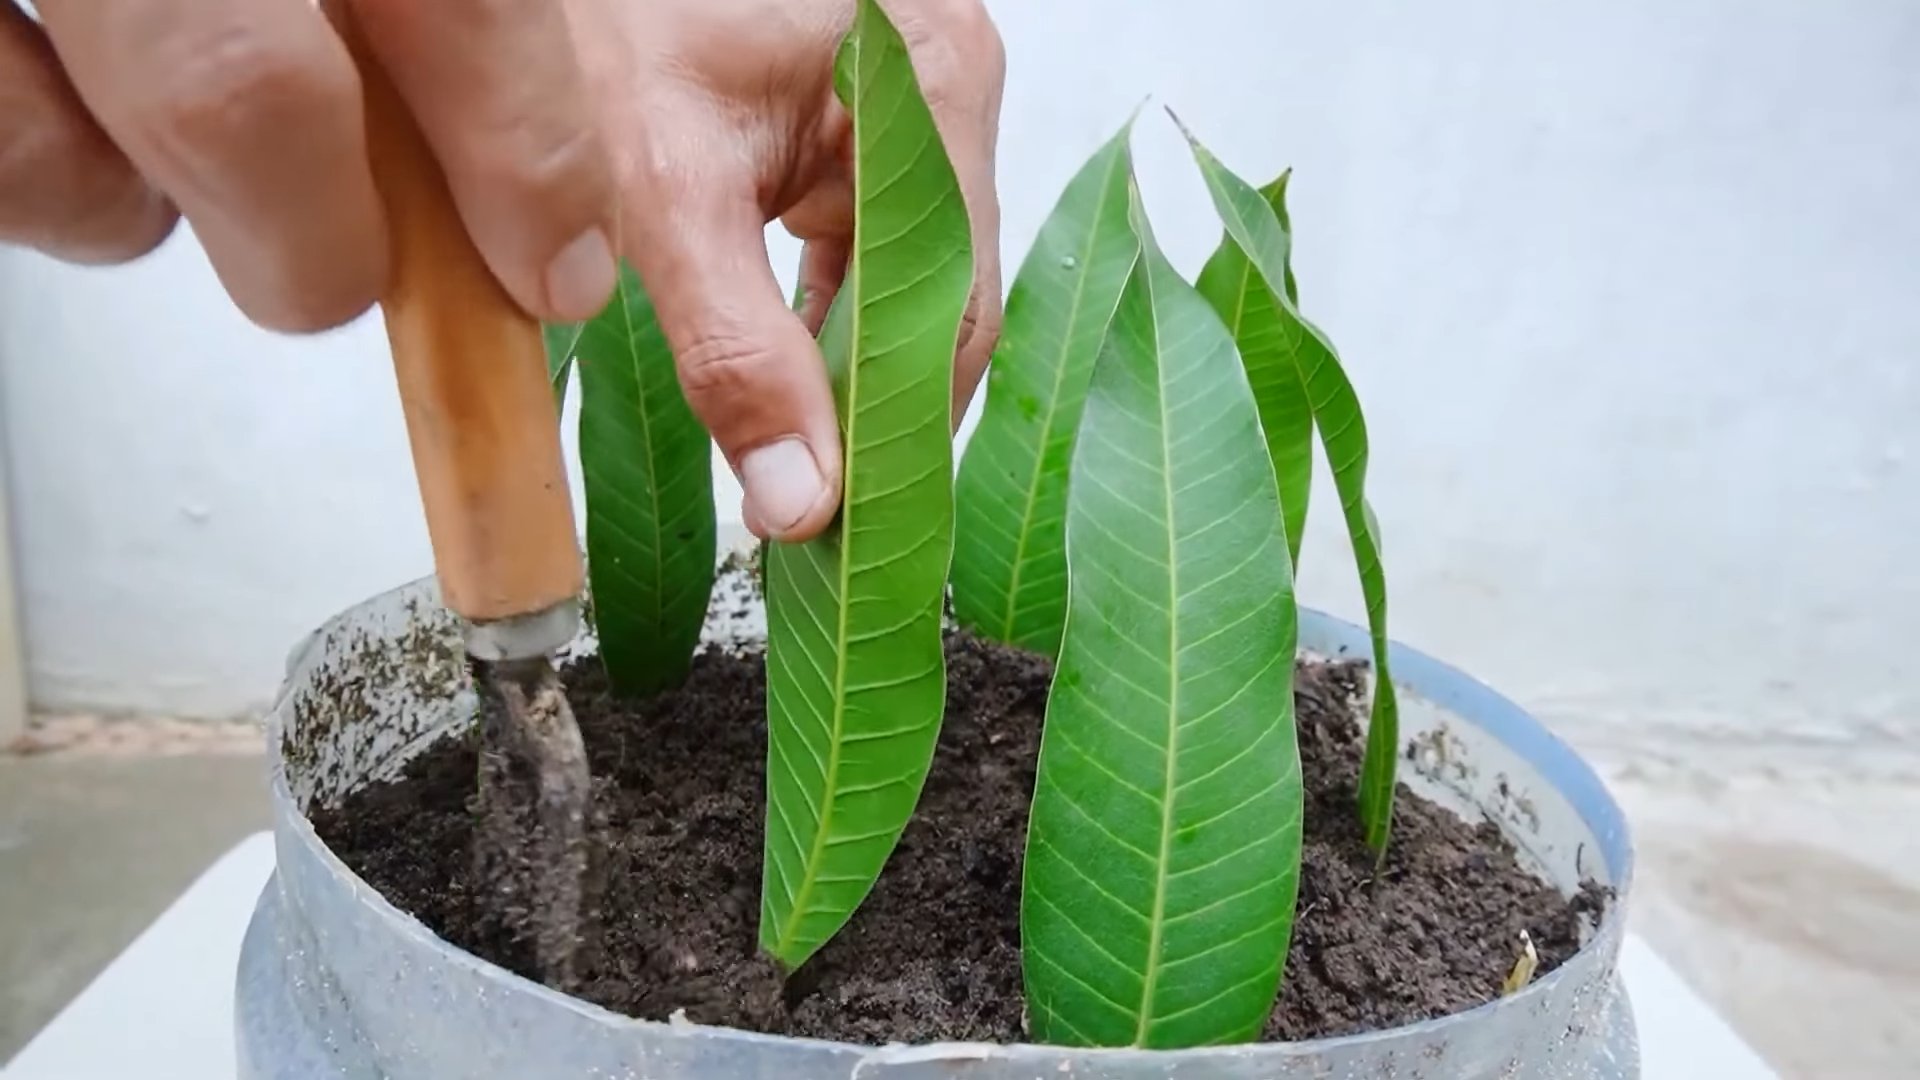
1. Select a Healthy Stem: Choose a healthy stem from your parent plant. Look for stems that are actively growing and free from pests or diseases.
2. Take the Cutting: Using your clean pruning shears or knife, make a cut just below a node (the point where leaves emerge from the stem). The cutting should be about 4-6 inches long.
3. Remove Lower Leaves: Remove the leaves from the bottom 1-2 inches of the cutting. This prevents them from rotting when submerged in water or buried in soil.
4. Apply Rooting Hormone (Optional): Dip the cut end of the stem in rooting hormone powder or liquid. This encourages root development. I find it especially helpful for plants that are a bit more challenging to root.
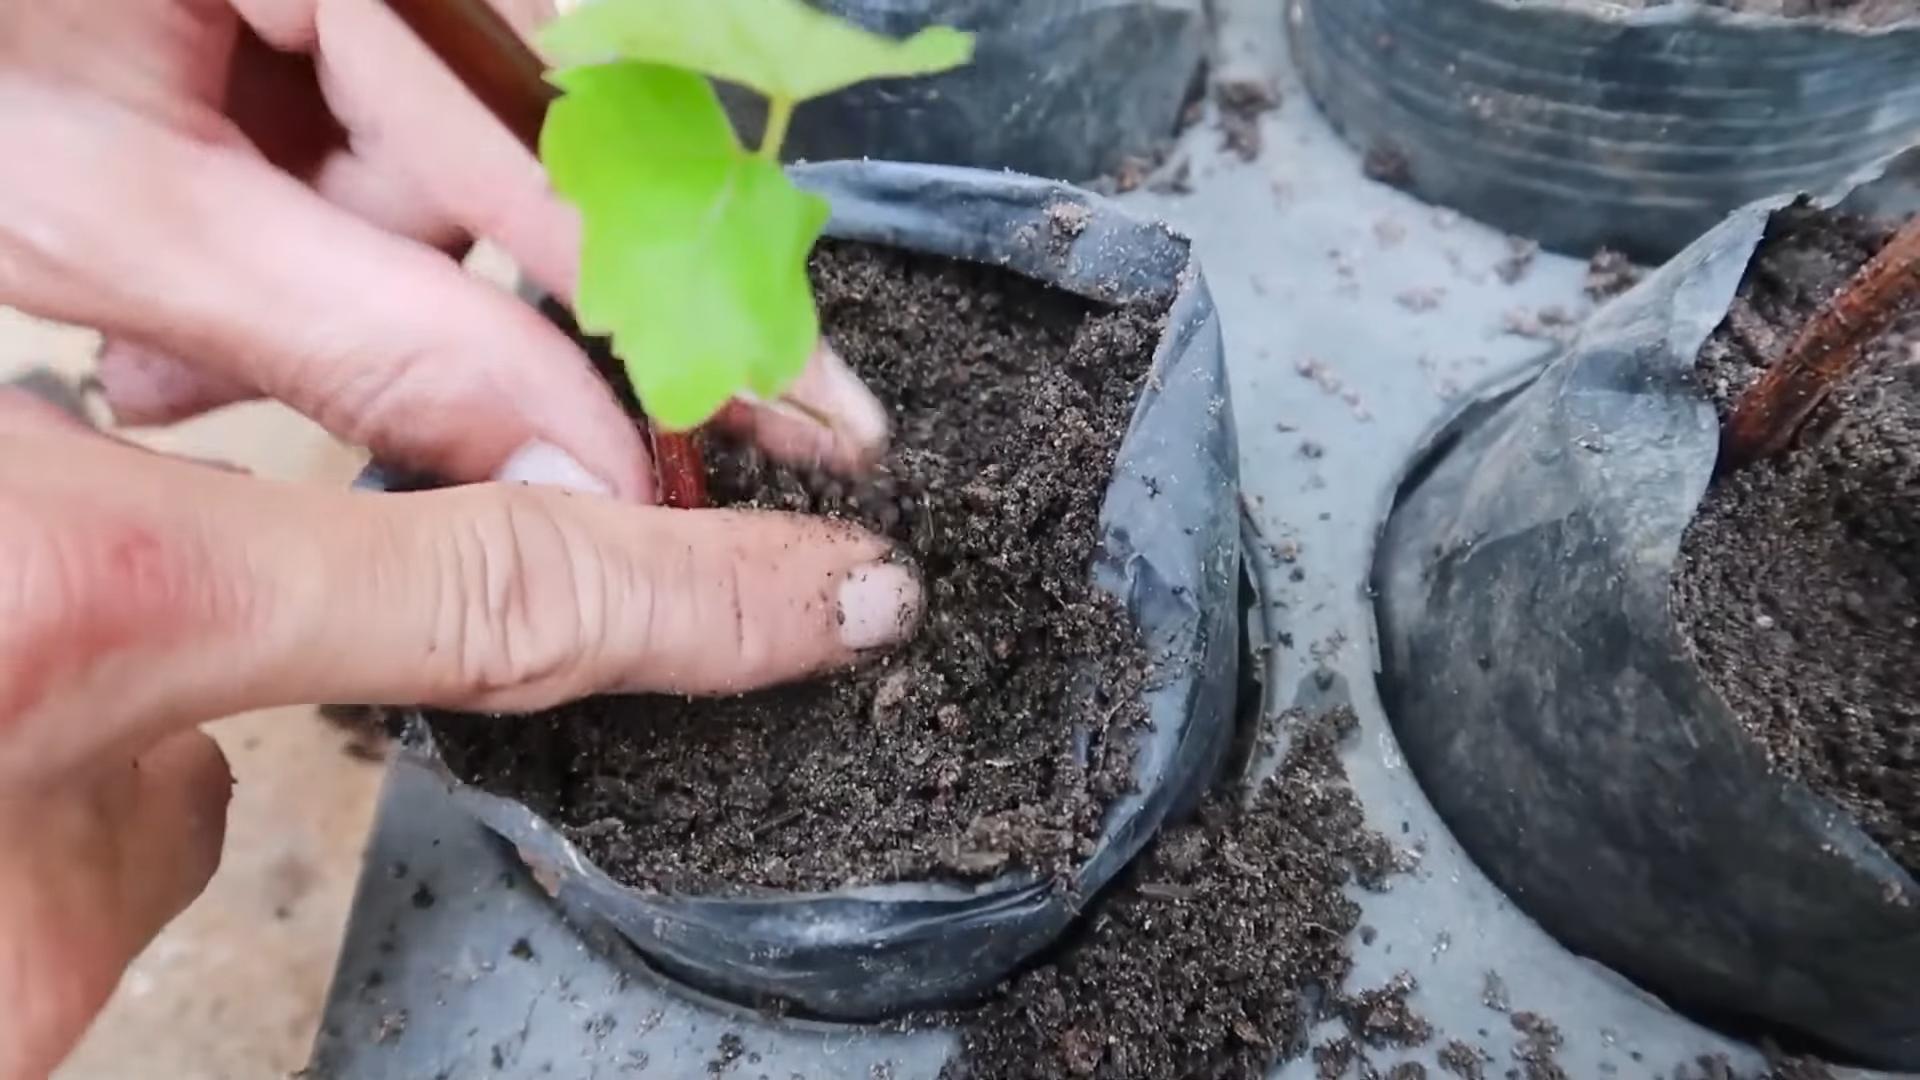
5. Rooting in Water: Place the cutting in a glass or jar filled with water. Make sure the bottom node is submerged, but the leaves are above the water line.
6. Rooting in Soil: Alternatively, you can plant the cutting directly into a small pot filled with well-draining potting mix. Moisten the soil thoroughly.
7. Create a Humid Environment (Optional): To increase humidity, you can cover the cutting with a plastic bag or place it under a humidity dome. This helps prevent the cutting from drying out before it can develop roots. Make sure to vent the bag or dome regularly to prevent mold growth.
8. Place in a Bright, Indirect Light: Place the cutting in a location with bright, indirect light. Avoid direct sunlight, which can scorch the leaves.
9. Change the Water Regularly (If Rooting in Water): Change the water every few days to keep it fresh and prevent bacterial growth.
10. Check for Root Development: After a few weeks, you should start to see roots developing. Once the roots are about an inch long (if rooting in water), you can transplant the cutting into a pot filled with potting mix. If rooting in soil, gently tug on the cutting after a few weeks. If you feel resistance, it means roots have formed.
11. Care for Your New Plant: Once your cutting has rooted and been transplanted, care for it as you would any other young plant. Water regularly, fertilize lightly, and provide plenty of bright, indirect light.
Leaf Cuttings: Multiplying Succulents and More
Leaf cuttings are a fun way to propagate certain plants, especially succulents. It takes a bit longer than stem cuttings, but it’s a great way to get a lot of new plants from a single leaf.
Materials You’ll Need:
* Healthy leaves from the parent plant
* A tray or pot filled with well-draining succulent or cactus mix
* A spray bottle filled with water
Step-by-Step Instructions:
1. Select Healthy Leaves: Choose healthy, plump leaves from your parent plant. Gently twist or snap the leaves off the stem. Make sure you get the entire leaf, including the base where it attaches to the stem.
2. Callus the Leaves: Allow the cut ends of the leaves to callus over for a few days. This helps prevent rot. You can simply lay the leaves on a paper towel in a dry, well-ventilated area.
3. Lay Leaves on Soil: Once the leaves have callused, lay them on top of a tray or pot filled with well-draining succulent or cactus mix.
4. Mist Regularly: Mist the soil lightly with water every few days. You want to keep the soil slightly moist, but not soggy.
5. Wait for Roots and New Growth: After a few weeks, you should start to see roots and tiny new plantlets forming at the base of the leaves.
6. Pot Up New Plants: Once the new plantlets are large enough to handle, you can gently separate them from the original leaf and pot them up into their own small pots. The original leaf will eventually wither and die.
7. Care for Your New Plants: Care for your new succulent plants as you would any other succulents. Provide plenty of sunlight, water sparingly, and use well-draining soil.
Division: Separating Clumping Plants
Division is a simple and effective way to propagate plants that grow in clumps. It’s like giving your plant a haircut and creating new plants at the same time!
Materials You’ll Need:
* A healthy, mature plant that grows in clumps
* A sharp knife or trowel
* New pots filled with appropriate potting mix
Step-by-Step Instructions:
1. Remove the Plant from its Pot: Gently remove the plant from its pot. If the plant is root-bound, you may need to loosen the roots with your fingers or a trowel.
2. Divide the Plant: Using a sharp knife or trowel, carefully divide the plant into multiple sections. Each section should have its own roots and foliage.
3. Pot Up the Divisions: Plant each division into its own pot filled with appropriate potting mix.
4. Water Thoroughly: Water the newly potted divisions thoroughly.
5. Care for Your New Plants: Care for your new plants as you would any other young plants. Water regularly, fertilize lightly, and provide plenty of bright, indirect light.
Layering: Rooting Stems While Still Attached
Layering is a great method for plants with long, flexible stems. It allows the stem to develop roots while still receiving nutrients from the parent plant.
Materials You’ll Need:
* A plant with long, flexible stems
* A sharp knife
* Rooting hormone (optional)
* A small pot filled with potting mix
* A rock or brick to hold the stem in place
Step-by-Step Instructions:
1. Choose a Flexible Stem: Select a long, flexible stem that can easily be bent down to the ground.
2. Make a Small Cut: Make a small cut on the underside of the stem where it will touch the soil. This encourages root development.
3. Apply Rooting Hormone (Optional): Apply rooting hormone to the cut area.
4. Bury the Stem: Bury the cut portion of the stem in a small pot filled with potting mix. Make sure the leaves above the buried section are still exposed to sunlight.
5. Secure the Stem: Use a rock or brick to hold the stem in place and ensure it stays in contact with the soil.
6. Water Regularly: Water the soil regularly to keep it moist.
7. Check for Root Development: After a few weeks, gently tug on the stem. If you feel resistance, it means roots have formed.
8. Sever the Stem: Once roots have formed, you
Conclusion
So, there you have it! Propagating plants in June, especially using the simple methods we’ve discussed, is not just a gardening activity; it’s a gateway to expanding your green space, saving money, and experiencing the sheer joy of nurturing new life. It’s a must-try for any plant enthusiast, regardless of experience level. The ease and affordability of these techniques make them accessible to everyone, and the rewards are immeasurable.
Think about it: instead of purchasing new plants, you can multiply your existing collection, filling your home and garden with vibrant greenery. Imagine the satisfaction of gifting a plant you’ve personally propagated to a friend or family member. It’s a gift that keeps on giving, a symbol of growth and care.
But the benefits extend beyond just aesthetics and cost savings. Propagating plants connects you more deeply with the natural world. It allows you to observe the intricate processes of plant growth and development firsthand. It’s a therapeutic activity that can reduce stress and improve your overall well-being.
Don’t be afraid to experiment with different propagation methods and plant varieties. Try propagating succulents from leaf cuttings, or herbs from stem cuttings. You can even try air layering for larger, more established plants. The possibilities are endless!
Consider these variations to enhance your propagation success:
* Rooting Hormones: While not always necessary, using a rooting hormone can significantly increase the success rate of your cuttings, especially for plants that are more difficult to propagate.
* Humidity Domes: Creating a humid environment around your cuttings can help prevent them from drying out before they develop roots. You can use a plastic bag, a clear container, or a commercially available humidity dome.
* Different Growing Mediums: Experiment with different growing mediums, such as perlite, vermiculite, or a mixture of peat moss and sand, to find what works best for your specific plant varieties.
* Water Propagation: Some plants, like pothos and spider plants, propagate easily in water. Simply place a cutting in a jar of water and wait for roots to develop before planting it in soil.
Remember, propagation is a learning process. Don’t be discouraged if your first attempt isn’t successful. Keep experimenting, keep learning, and keep growing!
We are confident that you’ll find propagating plants in June a rewarding and enjoyable experience. So, grab your gardening tools, gather your cuttings, and get ready to witness the magic of plant propagation.
We’d love to hear about your experiences! Share your successes, your challenges, and your tips in the comments below. Let’s create a community of plant propagators and inspire each other to grow more plants and share the joy of gardening. What are you waiting for? Start propagating plants today!
FAQ
What is the best time of day to take cuttings for propagation?
The best time to take cuttings is early in the morning, when the plant is most hydrated. This is because the plant has had all night to absorb water and hasn’t yet been exposed to the heat of the day, which can cause it to wilt. Taking cuttings in the morning ensures that they are turgid and full of moisture, increasing their chances of successful rooting. Avoid taking cuttings in the heat of the afternoon, as they may be stressed and dehydrated.
How long does it take for cuttings to root?
The time it takes for cuttings to root varies depending on the plant species, the propagation method used, and the environmental conditions. Some plants, like pothos and spider plants, can root in as little as a week or two in water. Other plants, like woody shrubs, may take several weeks or even months to root in soil. Generally, you can expect to see roots forming within 2-8 weeks. Be patient and provide the cuttings with the right conditions, such as adequate moisture, warmth, and light, to encourage root development.
What kind of soil should I use for propagating plants?
The ideal soil for propagating plants is a well-draining and sterile mix. A common mix is equal parts perlite and peat moss or coco coir. Perlite provides aeration, while peat moss or coco coir retains moisture. Sterility is important to prevent fungal diseases that can harm young cuttings. Avoid using garden soil, as it may contain pathogens and pests. You can also purchase commercially available seed starting mixes, which are specifically formulated for propagation.
How much light do cuttings need?
Cuttings need bright, indirect light to thrive. Avoid placing them in direct sunlight, as this can scorch the leaves and dry them out. A location near a window with filtered light is ideal. You can also use artificial grow lights to provide consistent light. The goal is to provide enough light for photosynthesis without causing stress to the cuttings.
How often should I water cuttings?
The frequency of watering depends on the propagation method and the environmental conditions. If you are propagating in water, change the water every few days to prevent the growth of algae and bacteria. If you are propagating in soil, keep the soil consistently moist but not waterlogged. Check the soil moisture regularly and water when the top inch feels dry to the touch. Avoid overwatering, as this can lead to root rot.
What if my cuttings start to rot?
If your cuttings start to rot, it’s important to take action quickly to prevent the rot from spreading. Remove any affected leaves or stems. If the rot is extensive, it may be necessary to discard the cutting. To prevent rot, ensure that the growing medium is well-draining and that the cuttings are not overwatered. You can also use a fungicide to protect the cuttings from fungal diseases.
Can I propagate plants from seeds in June?
Yes, June is a great time to propagate many plants from seeds. The warm weather and long days provide ideal conditions for germination and growth. However, it’s important to choose plants that are suitable for your climate and growing conditions. Start seeds indoors or outdoors, depending on the plant species and your local climate. Ensure that the seeds are planted in a well-draining soil mix and kept consistently moist.
What are some easy plants to propagate in June?
Some easy plants to propagate in June include:
* Pothos: Propagates easily from stem cuttings in water or soil.
* Spider Plant: Produces plantlets (spiderettes) that can be easily rooted.
* Succulents: Propagates from leaf or stem cuttings.
* Herbs: Many herbs, such as basil, mint, and rosemary, propagate easily from stem cuttings.
* Geraniums: Propagates from stem cuttings.
These plants are relatively forgiving and can tolerate a range of conditions, making them ideal for beginners.
Is it necessary to use rooting hormone?
While not always necessary, rooting hormone can significantly increase the success rate of propagation, especially for plants that are difficult to root. Rooting hormone contains auxins, which are plant hormones that stimulate root development. To use rooting hormone, dip the cut end of the cutting into the hormone powder or liquid before planting it in the growing medium. Follow the instructions on the product label.
How do I know when my cuttings are ready to be transplanted?
You’ll know your cuttings are ready to be transplanted when they have developed a healthy root system. This typically takes several weeks. Gently tug on the cutting to check for resistance. If you feel resistance, it means that roots have formed and are anchoring the cutting in the soil. You can also carefully remove the cutting from the growing medium to inspect the roots. The roots should be several inches long and well-branched. Once the cuttings have a strong root system, they can be transplanted into individual pots or into the garden.
Leave a Comment