
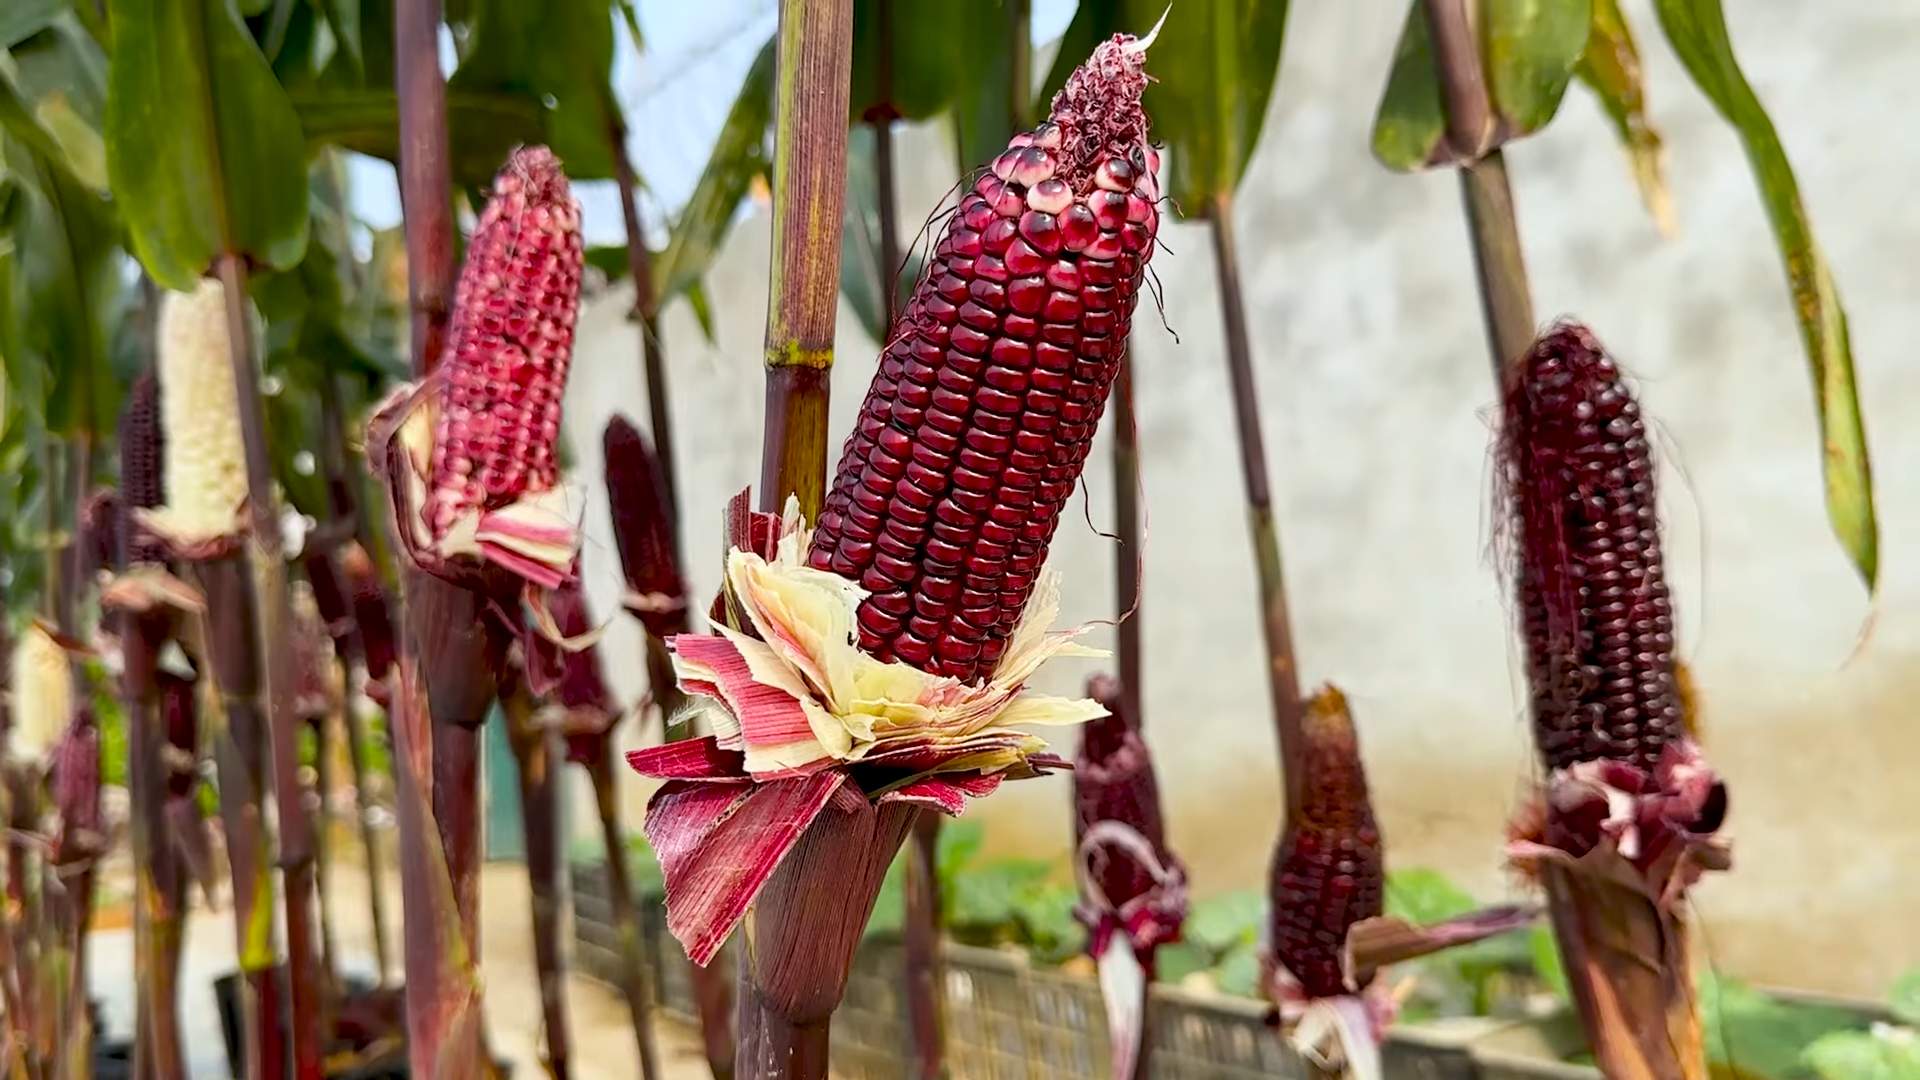
Rooftop Corn Growing DIY: Imagine stepping onto your rooftop and harvesting fresh, sweet corn – a taste of summer right in the heart of the city! Sounds like a dream, right? Well, it doesn’t have to be! This article is your ultimate guide to transforming your urban space into a thriving cornfield, no sprawling acres required.
Growing corn has deep roots (pun intended!) in human history. From its origins in ancient Mesoamerica, corn has been a staple crop, nourishing civilizations for millennia. While traditionally grown in vast fields, the spirit of innovation allows us to adapt this vital grain to even the most unconventional spaces.
Why should you try rooftop corn growing DIY? Well, beyond the sheer novelty and bragging rights, it’s a fantastic way to connect with nature, enjoy fresh produce, and even reduce your carbon footprint. Plus, with rising food costs and concerns about food security, growing your own food, even in a small space, is becoming increasingly important. This DIY project is perfect for anyone looking to add a touch of the countryside to their urban life. I’m excited to share all the tips and tricks I’ve learned to make your rooftop corn garden a success!
DIY Rooftop Corn Growing: A Beginner’s Guide
Hey there, fellow gardening enthusiasts! Ever dreamt of having fresh, homegrown corn right in the heart of the city? Well, I’m here to tell you it’s totally possible, even if all you have is a rooftop! Growing corn on a rooftop might seem a little unconventional, but with the right planning and a little elbow grease, you can enjoy the sweet taste of success (and delicious corn on the cob!). This guide will walk you through every step, from choosing the right variety to harvesting your golden bounty. Let’s get started!
Choosing the Right Corn Variety
Not all corn is created equal, especially when it comes to rooftop gardening. You’ll want to select varieties that are well-suited for container growing and shorter growing seasons. Here’s what I recommend:
* **Consider shorter-stalked varieties:** Taller corn varieties can become top-heavy and susceptible to wind damage on a rooftop. Look for varieties labeled as “dwarf” or “compact.”
* **Opt for early-maturing types:** These varieties will mature faster, giving you a quicker harvest and reducing the risk of weather-related issues.
* **Choose varieties suited to your climate:** Research which corn varieties thrive in your specific region. Local nurseries are a great resource for this information.
* **Some good options to consider:** ‘On Deck’, ‘Trinity’, ‘Golden Bantam’ (a classic!), and ‘Early Sunglow’.
Gathering Your Supplies
Before you start planting, you’ll need to gather all the necessary materials. Trust me, having everything on hand will make the process much smoother.
* **Large containers:** Corn needs plenty of space for its roots to grow. I recommend using containers that are at least 24 inches in diameter and 24 inches deep. Think large plastic tubs, half whiskey barrels, or even repurposed trash cans (just make sure they’re clean and have drainage holes!).
* **High-quality potting mix:** Don’t skimp on the potting mix! Use a well-draining mix that’s rich in organic matter. Avoid using garden soil, as it can become compacted in containers.
* **Corn seeds:** Obviously! Purchase your chosen corn variety from a reputable seed supplier.
* **Slow-release fertilizer:** Corn is a heavy feeder, so a slow-release fertilizer will provide a steady supply of nutrients throughout the growing season. Look for a fertilizer with a balanced NPK ratio (nitrogen, phosphorus, and potassium).
* **Watering can or hose:** Essential for keeping your corn plants hydrated.
* **Mulch:** Mulch helps retain moisture, suppress weeds, and regulate soil temperature. Straw, wood chips, or shredded bark are all good options.
* **Stakes or supports (optional):** If you’re growing a taller variety or live in a windy area, you may need to provide support for your corn plants.
* **Bird netting (optional):** Birds love to snack on corn seedlings, so netting can help protect your plants in their early stages.
Planting Your Corn
Now for the fun part! Planting your corn is relatively straightforward, but there are a few key things to keep in mind.
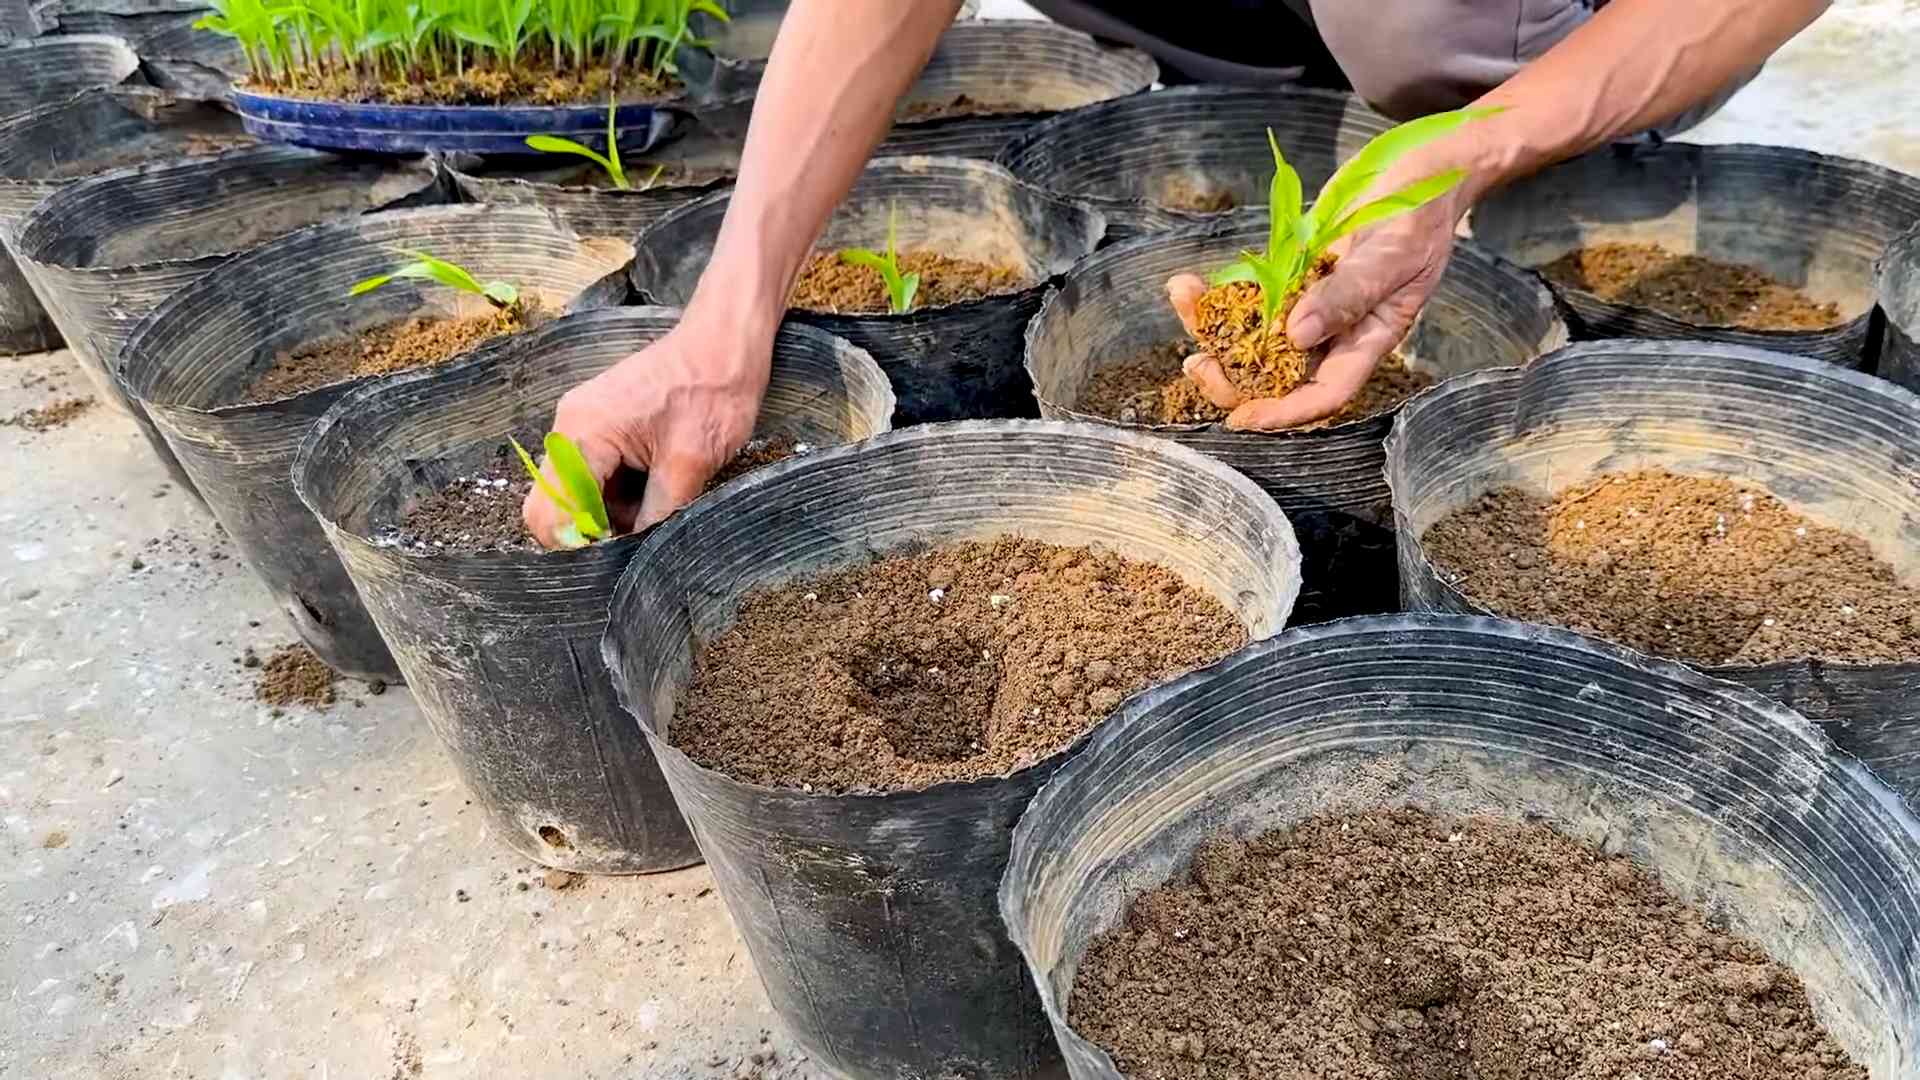
1. **Prepare your containers:** Fill your containers with the high-quality potting mix, leaving a few inches of space at the top.
2. **Plant the seeds:** Sow the corn seeds directly into the potting mix, spacing them about 6-8 inches apart. Plant the seeds about 1-2 inches deep.
3. **Water thoroughly:** After planting, water the containers thoroughly until the soil is evenly moist.
4. **Add slow-release fertilizer:** Sprinkle the slow-release fertilizer over the soil surface, following the instructions on the fertilizer package.
5. **Mulch the soil:** Apply a layer of mulch around the base of the corn plants to help retain moisture and suppress weeds.
6. **Consider companion planting:** Plant beans or squash around the base of the corn. The beans will fix nitrogen in the soil, benefiting the corn, and the squash will help suppress weeds. This is a classic “Three Sisters” planting technique.
Caring for Your Corn Plants
Once your corn plants are established, it’s important to provide them with the proper care to ensure a healthy and productive harvest.
1. **Water regularly:** Corn needs consistent moisture, especially during hot weather. Water deeply whenever the top inch of soil feels dry to the touch. Aim to water in the morning to allow the foliage to dry before nightfall, which can help prevent fungal diseases.
2. **Fertilize as needed:** Even with slow-release fertilizer, you may need to supplement with liquid fertilizer during the growing season. Use a balanced liquid fertilizer every few weeks, following the instructions on the fertilizer package.
3. **Pollination is key:** Corn is wind-pollinated, so you’ll need to ensure that the pollen from the tassels (the male flowers at the top of the plant) reaches the silks (the female flowers that emerge from the developing ears of corn). If you’re growing corn in a sheltered location with little wind, you can hand-pollinate by gently shaking the tassels over the silks. You can also cut the tassels and gently brush them against the silks. Do this in the morning when the pollen is most active.
4. **Watch out for pests and diseases:** Keep an eye out for common corn pests like corn earworms, aphids, and spider mites. Treat infestations promptly with insecticidal soap or neem oil. Also, be aware of potential diseases like corn smut and rust. Remove any infected plants to prevent the spread of disease.
5. **Provide support if needed:** If your corn plants are becoming top-heavy or are susceptible to wind damage, provide support by staking them or using tomato cages.
6. **Weed regularly:** Remove any weeds that emerge in the containers to prevent them from competing with your corn plants for nutrients and water.
Harvesting Your Corn
The moment you’ve been waiting for! Harvesting your corn at the peak of ripeness is crucial for the best flavor.
1. **Check for ripeness:** The silks will turn brown and dry, and the ears will feel plump and full. You can also gently peel back the husk and puncture a kernel with your fingernail. If the liquid that comes out is milky, the corn is ready to harvest. If it’s clear, it needs more time.
2. **Harvest carefully:** To harvest, grasp the ear firmly and twist it downward. The ear should snap off easily from the stalk.
3. **Enjoy your harvest:** Freshly harvested corn is best eaten right away. You can grill it, boil it, roast it, or use it in your favorite recipes.
4. **Store any extra corn:** If you have more corn than you can eat, you can store it in the refrigerator for a few days or freeze it for longer storage. To freeze corn, blanch the ears in boiling water for a few minutes, then cool them in ice water. Cut the kernels off the cob and store them in freezer bags.
Troubleshooting Common Problems
Even with the best planning, you might encounter some challenges along the way. Here are some common problems and how to address them:
* **Poor pollination:** If your corn ears are not filling out properly, it could be due to poor pollination. Try hand-pollinating or planting more corn plants closer together to increase the chances of pollination.
* **Stunted growth:** Stunted growth can be caused by a variety of factors, including nutrient deficiencies, lack of water, or pest infestations. Make sure you’re providing your corn plants with adequate water and fertilizer, and check for pests regularly.
* **Wind damage:** Strong winds can damage corn plants, especially taller varieties. Provide support for your plants with stakes or tomato cages, and consider planting them in a sheltered location.
* **Pest infestations:** Common corn pests like corn earworms, aphids, and spider mites can damage your plants and reduce your harvest. Treat infestations promptly with insecticidal soap or neem oil.
* **Disease:** Corn smut and rust are common corn diseases that can affect your plants. Remove any infected plants to prevent the spread of disease.
Extra Tips for Rooftop Corn Success
Here are a few extra tips to help you maximize your rooftop corn harvest:
* **Choose a sunny location:** Corn needs at least 6-8 hours of sunlight per day to thrive.
* **Protect your plants from the wind:** Rooftops can be windy, so protect your corn plants from the wind by planting them in a sheltered location or using windbreaks.
* **Monitor your plants regularly:** Check your corn plants regularly for signs of pests, diseases, or nutrient deficiencies.
* **Don’t be afraid to experiment:** Gardening is all about learning and experimenting. Try different corn varieties, planting techniques, and fertilizers to see what works best for you.
* **Enjoy the process:** Growing your own corn on a rooftop is a rewarding experience. Take the time to enjoy the process and appreciate the fruits (or rather, vegetables!) of your labor.
Growing corn on a rooftop is a fun and rewarding project that can provide you with fresh, homegrown corn all season long. With a little planning and effort, you can enjoy the sweet taste of success (and delicious corn
Conclusion
So, there you have it! Transforming your rooftop into a thriving cornfield might sound like a whimsical dream, but with a little planning and effort, it’s entirely achievable. This **rooftop corn growing DIY** project isn’t just about producing fresh, delicious corn; it’s about embracing sustainable practices, connecting with nature in an urban environment, and experiencing the immense satisfaction of growing your own food from seed to table.
Why is this a must-try? Beyond the obvious benefit of having access to incredibly fresh corn, consider the environmental impact. You’re reducing your carbon footprint by minimizing transportation needs, utilizing otherwise unused space, and potentially even contributing to improved air quality in your immediate surroundings. Plus, it’s a fantastic conversation starter and a unique way to impress your friends and neighbors!
But the benefits don’t stop there. Growing your own corn allows you to control every aspect of the process, from choosing organic seeds to avoiding harmful pesticides. You’ll know exactly what’s going into your food, ensuring the highest quality and nutritional value. And let’s be honest, there’s nothing quite like the taste of homegrown corn, bursting with sweetness and flavor that you simply can’t find in store-bought varieties.
Looking for variations? Absolutely! Consider companion planting to enhance your corn’s growth and deter pests naturally. Beans, squash, and cucumbers are classic companions for corn, forming a symbiotic relationship that benefits all three. Experiment with different varieties of corn to find your favorites. From sweet corn to popcorn to ornamental corn, the possibilities are endless. You could even try succession planting, staggering your planting dates to ensure a continuous harvest throughout the growing season.
Another exciting variation is to integrate vertical gardening techniques. While corn primarily grows upwards, you can utilize trellises or other support structures to maximize space and create a visually stunning rooftop garden. This is particularly useful if you have limited rooftop space but still want to enjoy a substantial corn harvest.
Don’t be afraid to get creative with your container choices as well. While large containers are essential for providing adequate root space, you can repurpose old barrels, troughs, or even build your own raised beds to suit your specific needs and aesthetic preferences. Just remember to ensure proper drainage to prevent waterlogging.
We wholeheartedly encourage you to embark on this rewarding **rooftop corn growing DIY** adventure. It’s a project that offers a multitude of benefits, from fresh, homegrown produce to a deeper connection with nature. The learning process is incredibly enriching, and the sense of accomplishment you’ll feel when you harvest your first ears of corn is truly unparalleled.
So, grab your seeds, gather your supplies, and get ready to transform your rooftop into a corn-growing oasis. We’re confident that you’ll be amazed by the results. And most importantly, we want to hear about your experience! Share your photos, tips, and challenges with us in the comments below. Let’s build a community of rooftop corn growers and inspire others to embrace sustainable urban gardening. We can’t wait to see what you create! Happy growing!
FAQ
Q: How much sunlight does rooftop corn need?
A: Corn is a sun-loving plant and requires at least 6-8 hours of direct sunlight per day to thrive. Choose a location on your rooftop that receives ample sunlight throughout the growing season. If your rooftop is partially shaded, consider using reflective materials to bounce sunlight onto your corn plants. Insufficient sunlight can lead to stunted growth, reduced yields, and poor-quality corn.
Q: What size containers are best for growing corn on a rooftop?
A: Corn plants have extensive root systems, so large containers are essential. We recommend using containers that are at least 18-24 inches in diameter and depth. This will provide adequate space for the roots to develop and support the plant’s growth. You can use individual containers for each plant or group several plants together in larger troughs or raised beds. Make sure the containers have drainage holes to prevent waterlogging.
Q: What type of soil should I use for rooftop corn growing?
A: Corn prefers well-draining, fertile soil that is rich in organic matter. A good potting mix specifically formulated for vegetables is ideal. You can also amend your soil with compost, aged manure, or other organic materials to improve its fertility and drainage. Avoid using heavy clay soils, as they can become waterlogged and inhibit root growth. Regularly test your soil’s pH and nutrient levels to ensure optimal growing conditions. A slightly acidic to neutral pH (around 6.0-7.0) is generally preferred.
Q: How often should I water my rooftop corn plants?
A: Corn requires consistent moisture, especially during hot weather and periods of rapid growth. Water deeply and regularly, ensuring that the soil is evenly moist but not waterlogged. Check the soil moisture level regularly by sticking your finger into the soil. If the top inch feels dry, it’s time to water. Avoid watering the foliage directly, as this can increase the risk of fungal diseases. Drip irrigation or soaker hoses are excellent options for providing consistent and efficient watering.
Q: What kind of fertilizer should I use for rooftop corn?
A: Corn is a heavy feeder and requires regular fertilization to support its growth and development. Use a balanced fertilizer with a higher nitrogen content during the early stages of growth to promote leafy growth. As the plants begin to tassel and form ears, switch to a fertilizer with a higher phosphorus and potassium content to support ear development. Follow the instructions on the fertilizer packaging carefully and avoid over-fertilizing, as this can damage the plants. Organic fertilizers, such as compost tea or fish emulsion, are also excellent options for providing nutrients to your corn plants.
Q: How do I prevent pests and diseases from affecting my rooftop corn?
A: Prevention is key when it comes to managing pests and diseases in your rooftop corn garden. Start by choosing disease-resistant varieties of corn. Regularly inspect your plants for signs of pests or diseases, such as aphids, corn earworms, or fungal infections. Remove any affected leaves or plants promptly to prevent the spread of the problem. Companion planting can also help deter pests naturally. For example, planting marigolds near your corn can help repel aphids. If you need to use pesticides, choose organic options that are safe for beneficial insects and the environment. Ensure good air circulation around your plants to reduce the risk of fungal diseases.
Q: How do I know when my rooftop corn is ready to harvest?
A: The timing of harvest depends on the variety of corn you are growing. Generally, sweet corn is ready to harvest about 20-25 days after the silks emerge. The silks should be brown and dry, but still slightly moist. The kernels should be plump and milky when you puncture them with your fingernail. Popcorn is typically harvested later, when the kernels are hard and dry. The husks should be completely dry and brown. To harvest, simply twist the ear of corn downwards and pull it away from the stalk.
Q: Can I grow different varieties of corn together on my rooftop?
A: While it’s possible to grow different varieties of corn together, it’s important to be aware of the potential for cross-pollination. If you’re growing sweet corn, it’s best to isolate it from other types of corn, such as popcorn or field corn, to prevent the kernels from becoming starchy or losing their sweetness. You can isolate different varieties by planting them at least 250 feet apart or by staggering their planting dates so that they don’t tassel at the same time.
Q: What are some common problems I might encounter when growing corn on a rooftop, and how can I solve them?
A: Some common problems include:
* **Stunted growth:** This can be caused by insufficient sunlight, poor soil fertility, or inadequate watering. Ensure your plants are getting enough sunlight, fertilize regularly, and water deeply.
* **Pest infestations:** Monitor your plants regularly and take action promptly to control pests.
* **Fungal diseases:** Ensure good air circulation and avoid overwatering. Use organic fungicides if necessary.
* **Poor pollination:** Hand-pollinate your corn plants if necessary by gently shaking the tassels to release pollen onto the silks.
* **Lodging (falling over):** Provide support for your corn plants with stakes or trellises, especially in windy conditions.
Q: Is rooftop corn growing really worth the effort?
A: Absolutely! While it requires some initial investment and ongoing care, the rewards of growing your own corn on a rooftop are well worth the effort. The taste of homegrown corn is unparalleled, and the satisfaction of harvesting your own food is incredibly rewarding. Plus, you’re contributing to a more sustainable lifestyle and connecting with nature in a unique and meaningful way. The **rooftop corn growing DIY** project is a fantastic way to transform your urban space into a productive and beautiful garden.


Leave a Comment