
Rooftop kale gardening routine: Imagine stepping onto your rooftop, not to escape the city, but to embrace a vibrant, edible oasis. Forget endless grocery store trips for wilted greens! What if I told you that a thriving kale patch, bursting with nutrients and flavor, could be just steps away, transforming your urban space into a personal farm-to-table experience?
For centuries, rooftop gardens have been a symbol of resourcefulness and connection to nature, from the Hanging Gardens of Babylon to the modern-day urban farming movement. Today, with increasing concerns about food security and sustainability, the allure of growing your own food, especially in limited spaces, is stronger than ever. And kale, with its resilience and nutritional powerhouse status, is the perfect candidate for your rooftop adventure.
But let’s be honest, starting a rooftop garden, especially with kale, can feel daunting. Where do you begin? What are the secrets to success? That’s where this DIY guide comes in! I’m going to share my tried-and-true rooftop kale gardening routine, packed with practical tips and hacks to help you cultivate a flourishing kale crop, even if you’re a complete beginner. From choosing the right containers and soil to mastering watering and pest control, I’ll walk you through every step, ensuring you enjoy a bountiful harvest of fresh, delicious kale right outside your door. Get ready to unleash your inner urban farmer!
Rooftop Kale Gardening: A Beginner’s Guide to Growing Your Own Greens!
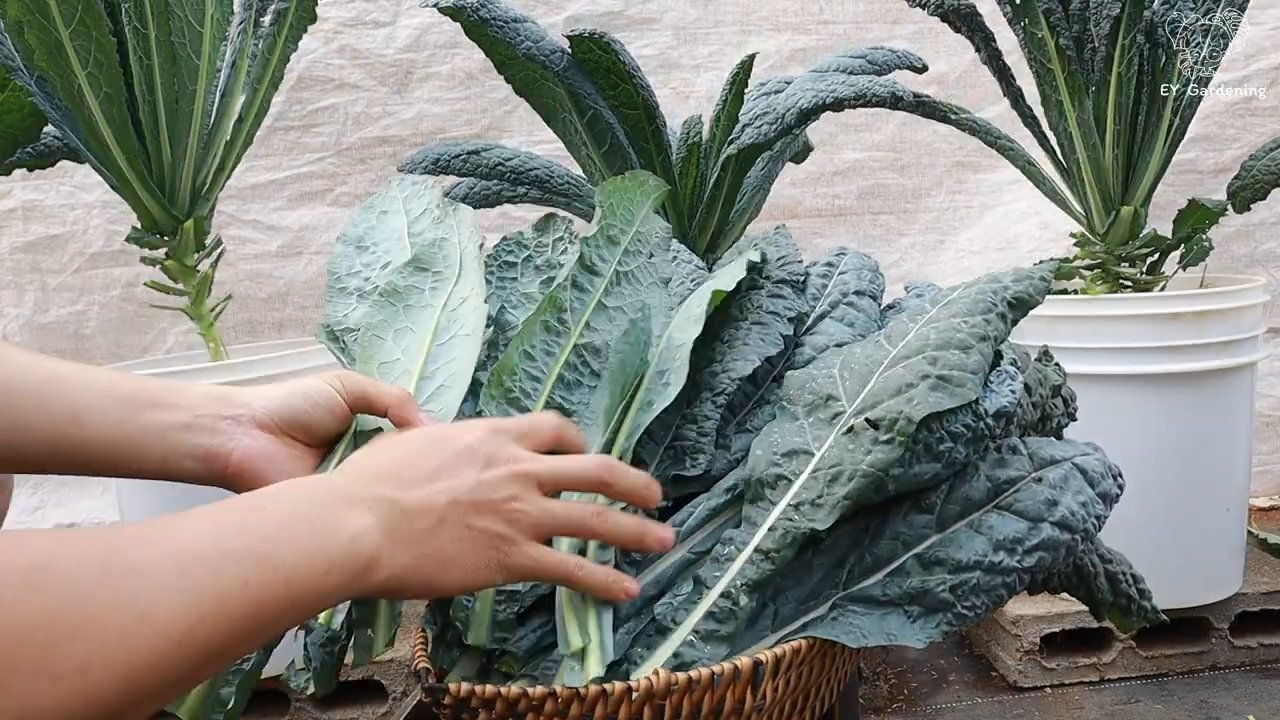
Hey there, fellow gardening enthusiasts! I’m so excited to share my rooftop kale gardening routine with you. Growing kale on your rooftop is surprisingly easy and rewarding. Imagine fresh, vibrant kale just steps away from your kitchen – perfect for smoothies, salads, or a quick sauté. Let’s dive in!
Choosing the Right Kale Variety
Before we get our hands dirty, let’s talk kale varieties. Not all kale is created equal, especially when it comes to rooftop gardening. Here are a few of my favorites:
* Dwarf Blue Curled Vates: This is a compact variety, perfect for containers. It’s also super cold-hardy, which is a bonus if you live in an area with harsh winters.
* Lacinato (Dinosaur) Kale: Known for its dark, almost black-green leaves and slightly bumpy texture, Lacinato kale has a milder, sweeter flavor than some other varieties. It’s also quite ornamental!
* Red Russian Kale: This variety has beautiful reddish-purple stems and flat, fringed leaves. It’s slightly sweeter than curly kale and adds a pop of color to your rooftop garden.
* Redbor Kale: If you want a kale that’s as beautiful as it is delicious, Redbor is your answer. Its deeply ruffled leaves turn a vibrant purple in cooler weather.
Setting Up Your Rooftop Garden
Okay, now for the fun part! Setting up your rooftop garden is crucial for success. Here’s what you’ll need:
* Containers: Choose containers that are at least 12 inches deep and wide. Kale needs room for its roots to grow. I prefer using fabric pots because they allow for better drainage and aeration.
* Potting Mix: Don’t use garden soil in your containers! It’s too heavy and doesn’t drain well. Instead, opt for a high-quality potting mix specifically designed for containers. Look for one that contains peat moss, perlite, and vermiculite.
* Sunlight: Kale needs at least 6 hours of sunlight per day. Choose a spot on your rooftop that gets plenty of sun.
* Water Source: Make sure you have easy access to a water source. You’ll need to water your kale regularly, especially during hot weather.
* Fertilizer: Kale is a heavy feeder, so you’ll need to fertilize it regularly. I like to use a balanced organic fertilizer.
* Tools: You’ll need a trowel, gardening gloves, and a watering can or hose.
Step-by-Step Planting Guide
Alright, let’s get planting! Here’s my step-by-step guide to planting kale in containers:
1. Prepare Your Containers: Fill your containers with potting mix, leaving about an inch of space at the top.
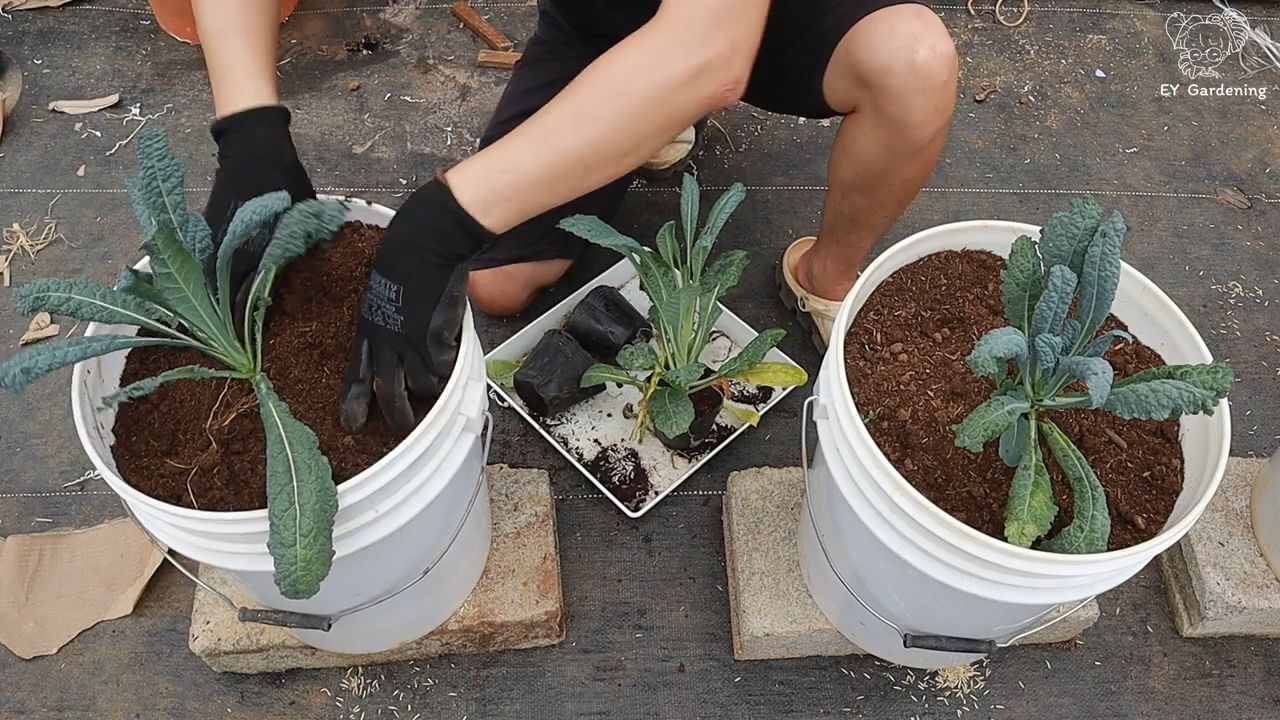
2. Sow Your Seeds (or Transplant Seedlings): You can either start your kale from seed or buy seedlings from a local nursery. If you’re starting from seed, sow the seeds about 1/4 inch deep and 1 inch apart. If you’re transplanting seedlings, gently remove them from their containers and plant them at the same depth they were growing in before. Space the seedlings about 12 inches apart.
3. Water Thoroughly: After planting, water your kale thoroughly. Make sure the water drains out of the bottom of the container.
4. Mulch (Optional): Add a layer of mulch around your kale plants to help retain moisture and suppress weeds. I like to use straw or shredded leaves.
Watering and Fertilizing Your Kale
Watering and fertilizing are essential for healthy kale growth. Here’s my routine:
* Watering: Water your kale regularly, especially during hot weather. The soil should be consistently moist, but not soggy. Check the soil moisture by sticking your finger into the soil. If the top inch feels dry, it’s time to water.
* Fertilizing: Fertilize your kale every 2-3 weeks with a balanced organic fertilizer. Follow the instructions on the fertilizer package. You can also use a liquid fertilizer, such as fish emulsion, every week.
Dealing with Pests and Diseases
Even on a rooftop, pests and diseases can sometimes be a problem. Here’s how I deal with them:
* Aphids: Aphids are small, sap-sucking insects that can infest kale plants. You can control them by spraying your plants with a strong stream of water or by using insecticidal soap.
* Cabbage Worms: Cabbage worms are green caterpillars that can eat holes in kale leaves. You can control them by handpicking them off your plants or by using Bacillus thuringiensis (Bt), a natural insecticide.
* Flea Beetles: Flea beetles are small, jumping beetles that can damage kale leaves. You can control them by covering your plants with row covers or by using insecticidal soap.
* Downy Mildew: Downy mildew is a fungal disease that can cause yellow spots on kale leaves. You can prevent downy mildew by providing good air circulation and avoiding overhead watering. If you see signs of downy mildew, remove the affected leaves and spray your plants with a fungicide.
Harvesting Your Kale
Harvesting is the most rewarding part of growing kale! Here’s how I do it:
* When to Harvest: You can start harvesting kale leaves when they are about 6-8 inches long.
* How to Harvest: Harvest the outer leaves first, leaving the inner leaves to continue growing. You can harvest kale leaves continuously throughout the growing season.
* Storage: Store kale leaves in the refrigerator for up to a week. Wash and dry the leaves before storing them.
Troubleshooting Common Problems
Even with the best care, you might encounter some problems while growing kale. Here are a few common issues and how to fix them:
* Yellowing Leaves: Yellowing leaves can be a sign of nutrient deficiency, overwatering, or underwatering. Check the soil moisture and fertilize your plants if necessary.
* Stunted Growth: Stunted growth can be caused by poor soil, lack of sunlight, or pests. Make sure your kale is planted in a high-quality potting mix and gets at least 6 hours of sunlight per day. Check for pests and treat them accordingly.
* Bitter Taste: Kale can sometimes taste bitter, especially in hot weather. To reduce bitterness, harvest your kale in the morning or evening when it’s cooler. You can also blanch the leaves in boiling water for a few minutes before cooking them.
My Personal Rooftop Kale Routine: A Week-by-Week Breakdown
To give you a better idea of how I manage my rooftop kale garden, here’s a typical week-by-week breakdown:
* Monday: Check the soil moisture and water if necessary. Inspect the plants for pests and diseases.
* Tuesday: Nothing special, just enjoying the view of my growing kale!
* Wednesday: Fertilize the kale with a liquid fertilizer (fish emulsion).
* Thursday: Check the soil moisture and water if necessary.
* Friday: Harvest any mature kale leaves for a weekend salad or smoothie.
* Saturday: Enjoy the fruits (or rather, vegetables) of my labor!
* Sunday: Relax and admire my thriving rooftop garden.
Tips for Maximizing Your Kale Harvest
Want to get the most out of your rooftop kale garden? Here are a few extra tips:
* Succession Planting: Plant new kale seeds or seedlings every few weeks to ensure a continuous harvest throughout the growing season.
* Companion Planting: Plant kale with companion plants like marigolds, nasturtiums, and garlic to deter pests.
* Pruning: Prune off any yellowing or damaged leaves to encourage new growth.
* Overwintering: In mild climates, you can overwinter your kale plants by protecting them from frost. Cover them with a layer of mulch or a cold frame.
Delicious Ways to Use Your Rooftop Kale
Now that you’re growing your own kale, let’s talk about how to use it! Here are a few of my favorite recipes:
* Kale Salad: Massage kale leaves with olive oil, lemon juice, and salt. Add your favorite toppings, such as avocado, nuts, and seeds.
* Kale Smoothie: Blend kale with fruit, yogurt, and juice for a healthy and delicious smoothie.
* Kale Chips: Toss kale leaves with olive oil and salt. Bake at 350°F (175°C) until crispy.
* Sautéed Kale: Sauté kale with garlic, olive oil, and red pepper flakes.
* Kale Soup: Add kale to your favorite soup recipe for a boost of nutrients.
Why Rooftop Kale Gardening is Awesome
Growing kale on your rooftop is not only easy and rewarding, but it also has several other
Conclusion
So, there you have it! Transforming your rooftop into a thriving kale garden isn’t just a whimsical dream; it’s an achievable reality with a little planning and dedication. We’ve walked you through the essential steps, from selecting the right containers and soil to mastering the art of watering and pest control. But why is this DIY rooftop kale gardening routine a must-try?
Firstly, consider the unparalleled freshness. Imagine stepping onto your roof and harvesting vibrant, nutrient-packed kale leaves just moments before adding them to your salad, smoothie, or stir-fry. The taste and texture are simply unmatched by anything you can find in a grocery store. Secondly, think about the environmental benefits. You’re reducing your carbon footprint by growing your own food, minimizing transportation needs, and potentially reducing your reliance on commercially grown produce that may involve harmful pesticides.
Beyond the practical advantages, rooftop kale gardening offers a unique sense of accomplishment and connection to nature. Nurturing these plants from tiny seedlings to leafy greens is incredibly rewarding, providing a therapeutic escape from the hustle and bustle of daily life. It’s a chance to reconnect with the earth, even in the heart of the city.
But don’t stop there! Feel free to experiment with different kale varieties. Try growing curly kale, dinosaur kale (lacinato), or Russian kale to add variety to your harvest. You can also companion plant your kale with herbs like rosemary, thyme, or sage to deter pests and enhance the flavor of your greens. Consider adding marigolds around the perimeter of your containers to naturally repel aphids and other unwanted visitors.
For those with limited rooftop space, consider vertical gardening techniques. Stacked planters, hanging baskets, or even repurposed pallets can be used to maximize your growing area and create a visually stunning kale display.
We encourage you to embrace this DIY rooftop kale gardening routine and embark on your own urban farming adventure. Don’t be afraid to experiment, learn from your mistakes, and adapt the techniques to suit your specific environment and preferences. The key is to start small, stay consistent, and enjoy the process.
And most importantly, we want to hear about your experiences! Share your photos, tips, and challenges in the comments below. Let’s create a community of rooftop kale gardeners who can learn from each other and inspire others to embrace sustainable urban living. Your success story could be the inspiration someone else needs to start their own rooftop garden. So, grab your gardening gloves, head to your rooftop, and let the kale growing begin! We are confident that you will find this DIY rooftop kale gardening routine to be a rewarding and delicious experience.
Frequently Asked Questions (FAQ)
What kind of containers are best for rooftop kale gardening?
The best containers for rooftop kale gardening are those that are durable, well-draining, and appropriately sized. Consider the weight of the container when filled with soil and plants, especially if you have weight restrictions on your rooftop. Plastic containers are lightweight and affordable, but terracotta pots offer better drainage and a more aesthetically pleasing look. Fabric pots are also a great option as they allow for excellent aeration and drainage, preventing root rot. Ensure that your containers have drainage holes to prevent waterlogging. A good size for kale is at least 12 inches in diameter and 12 inches deep per plant. Larger containers are always better, as they provide more room for root growth and retain moisture more effectively.
What type of soil should I use for growing kale on my rooftop?
Kale thrives in well-draining, nutrient-rich soil with a slightly acidic to neutral pH (around 6.0 to 7.0). Avoid using garden soil directly in containers, as it can become compacted and poorly drained. Instead, opt for a high-quality potting mix specifically formulated for container gardening. You can also create your own soil mix by combining equal parts of compost, peat moss (or coconut coir), and perlite or vermiculite. Compost provides essential nutrients, peat moss or coconut coir helps retain moisture, and perlite or vermiculite improves drainage. Consider adding a slow-release fertilizer to your soil mix to provide a steady supply of nutrients throughout the growing season.
How often should I water my rooftop kale plants?
Watering frequency depends on several factors, including the weather, the size of your containers, and the type of soil you’re using. Generally, kale plants need consistent moisture, but avoid overwatering, which can lead to root rot. Check the soil moisture regularly by sticking your finger about an inch into the soil. If it feels dry, it’s time to water. Water deeply until water drains out of the drainage holes. During hot, dry weather, you may need to water daily, while during cooler, wetter periods, you may only need to water every few days. Consider using a soaker hose or drip irrigation system to provide consistent and efficient watering.
How do I protect my rooftop kale plants from pests and diseases?
Rooftop kale plants can be susceptible to various pests and diseases, including aphids, cabbage worms, flea beetles, and fungal diseases. Regularly inspect your plants for signs of infestation or disease. Handpick any visible pests, such as cabbage worms, and dispose of them properly. Use insecticidal soap or neem oil to control aphids and other soft-bodied insects. Cover your plants with row covers to prevent pests from accessing them. Ensure good air circulation around your plants to prevent fungal diseases. Remove any infected leaves promptly to prevent the spread of disease. Consider companion planting with herbs like rosemary, thyme, or sage to deter pests naturally.
Can I grow kale on my rooftop year-round?
Whether you can grow kale on your rooftop year-round depends on your climate. Kale is a cool-season crop that can tolerate frost and even light snow. In mild climates, you can grow kale throughout the year. In colder climates, you can extend the growing season by using cold frames, greenhouses, or row covers to protect your plants from freezing temperatures. Kale can also be grown indoors under grow lights during the winter months. Choose cold-hardy kale varieties, such as Siberian kale or Red Russian kale, for winter growing.
How do I harvest kale from my rooftop garden?
Harvest kale leaves when they are about 6-8 inches long. Start harvesting from the outer leaves, leaving the inner leaves to continue growing. This allows the plant to produce new leaves throughout the growing season. Use a sharp knife or scissors to cut the leaves close to the stem. Avoid tearing the leaves, as this can damage the plant. Wash the harvested leaves thoroughly before using them. Kale leaves are best used fresh, but they can also be stored in the refrigerator for several days.
What are some creative ways to use my rooftop-grown kale?
Rooftop-grown kale can be used in a variety of delicious and nutritious ways. Add it to salads, smoothies, soups, stews, and stir-fries. Sauté it with garlic and olive oil for a simple and flavorful side dish. Bake kale chips for a healthy snack. Use it as a filling for omelets or frittatas. Blend it into pesto. Add it to pasta sauces. The possibilities are endless! Experiment with different recipes and find your favorite ways to enjoy your homegrown kale.
Leave a Comment