
Grow Butternut Squash like a pro, even if you’re a beginner! Have you ever dreamed of harvesting your own delicious, creamy butternut squash right from your backyard? Imagine the satisfaction of serving a homemade butternut squash soup made with ingredients you nurtured from seed to table. It’s easier than you think, and this DIY guide is packed with simple tricks and hacks to help you succeed.
Butternut squash has a rich history, dating back thousands of years in Central and South America. It was a staple food for indigenous populations and has since become a beloved ingredient worldwide, celebrated for its versatility and nutritional benefits. For centuries, gardeners have been perfecting the art of cultivating this winter squash, and now, I’m excited to share some of their secrets with you!
In today’s world, where fresh, healthy produce can be expensive and sometimes hard to find, learning to grow butternut squash at home is more valuable than ever. Not only will you save money, but you’ll also have the peace of mind knowing exactly where your food comes from and how it was grown. Plus, gardening is a fantastic way to relieve stress, connect with nature, and enjoy the fruits (or vegetables!) of your labor. So, let’s dive in and discover the easy DIY tricks that will have you harvesting a bountiful crop of butternut squash in no time!
Supercharge Your Scrub Daddy: Genius Cleaning Hacks You Need to Know!
Okay, friends, let’s talk about the Scrub Daddy. You know, that smiley-faced sponge that’s taken the cleaning world by storm? I’m obsessed, and I’m willing to bet you are too (or will be soon!). But did you know there’s a whole world of Scrub Daddy hacks out there that can make your cleaning life even easier? I’m going to share some of my favorite tips and tricks for getting the most out of this amazing little sponge. Get ready to be amazed!
Hack #1: The Freezer Trick – Say Goodbye to Stubborn Gunk!
This is one of my absolute favorite hacks because it’s so simple and effective. Sometimes, you’re dealing with really sticky, stubborn messes – think dried-on food, hardened glue, or even chewing gum. That’s where the freezer comes in!
Why it works: Freezing the Scrub Daddy makes it incredibly rigid and abrasive. This allows you to scrape away the mess without damaging the surface underneath.
What you’ll need:
* Your trusty Scrub Daddy
* A freezer
Step-by-step instructions:
1. Wet the Scrub Daddy: Just a little bit of water is fine. You don’t want it soaking wet.
2. Pop it in the freezer: Place the damp Scrub Daddy in the freezer for at least 2 hours, or even overnight for really tough messes.
3. Get scraping: Once frozen solid, take it out and use it to scrape away the stubborn gunk. You’ll be surprised how easily it comes off!
4. Rinse and repeat: Rinse the Scrub Daddy under warm water to remove any debris. If the mess is particularly stubborn, you might need to repeat the freezing and scraping process.
Pro Tip: This works wonders on candle wax spills! Just freeze the Scrub Daddy and gently scrape away the hardened wax.
Hack #2: Microwave Magic – Sanitizing Your Scrub Daddy
Let’s face it, our Scrub Daddies can get a little… funky. They’re constantly exposed to food particles and bacteria. Luckily, there’s a super easy way to sanitize them using your microwave!
Why it works: The microwave’s heat kills bacteria and germs, leaving your Scrub Daddy fresh and clean.
What you’ll need:
* Your Scrub Daddy
* A microwave-safe bowl
* Water
* Optional: Lemon juice or vinegar
Step-by-step instructions:
1. Rinse the Scrub Daddy: Give it a good rinse under warm water to remove any loose debris.
2. Place in a bowl: Put the Scrub Daddy in a microwave-safe bowl.
3. Add water: Fill the bowl with enough water to completely submerge the Scrub Daddy.
4. Optional: Add lemon juice or vinegar: Adding a tablespoon of lemon juice or vinegar can help to further disinfect and deodorize the sponge.
5. Microwave: Microwave on high for 1-2 minutes. Be careful when removing the bowl, as it will be hot!
6. Cool and squeeze: Let the bowl cool slightly before carefully removing the Scrub Daddy. Squeeze out any excess water.
7. Let it dry: Allow the Scrub Daddy to air dry completely before using it again.
Important Note: Never microwave a dry Scrub Daddy! This could cause it to melt or even catch fire. Always make sure it’s thoroughly wet.
Hack #3: The Dishwasher Deep Clean
Another great way to sanitize your Scrub Daddy is by tossing it in the dishwasher!
Why it works: The high heat and powerful detergents in your dishwasher will kill bacteria and remove built-up grime.
What you’ll need:
* Your Scrub Daddy
* A dishwasher
Step-by-step instructions:
1. Rinse the Scrub Daddy: As always, give it a good rinse to remove any loose debris.
2. Place in the dishwasher: Place the Scrub Daddy on the top rack of your dishwasher. Make sure it’s secure and won’t fall through.
3. Run a normal cycle: Run your dishwasher as you normally would.
4. Let it dry: Once the cycle is complete, remove the Scrub Daddy and let it air dry completely.
Pro Tip: I like to do this once a week to keep my Scrub Daddy in tip-top shape.
Hack #4: Scrub Daddy as a Paint Scraper
Okay, this one might sound a little unconventional, but trust me, it works! The firm texture of the Scrub Daddy makes it surprisingly effective at removing dried paint splatters from various surfaces.
Why it works: The FlexTexture material is abrasive enough to lift the paint without scratching the surface underneath.
What you’ll need:
* Your Scrub Daddy
* Warm water
* Optional: Mild dish soap
Step-by-step instructions:
1. Wet the Scrub Daddy: Dampen the Scrub Daddy with warm water. For tougher paint splatters, you can add a drop or two of mild dish soap.
2. Gently scrub: Gently scrub the paint splatter in a circular motion. Apply light pressure at first, increasing it gradually as needed.
3. Rinse and repeat: Rinse the Scrub Daddy and the surface you’re cleaning frequently. Repeat the scrubbing process until the paint is removed.
4. Dry the surface: Once the paint is gone, dry the surface with a clean cloth.
Important Note: Always test this method on an inconspicuous area first to ensure it doesn’t damage the surface. This works best on smooth, non-porous surfaces like glass, tile, and metal.
Hack #5: Reviving Dull Stainless Steel
Stainless steel can be a pain to keep clean and shiny. Fingerprints, water spots, and food splatters can quickly make it look dull and grimy. But fear not, the Scrub Daddy is here to help!
Why it works: The unique texture of the Scrub Daddy gently polishes the stainless steel, removing surface imperfections and restoring its shine.
What you’ll need:
* Your Scrub Daddy
* Warm water
* Baking soda
* Clean, dry cloth
Step-by-step instructions:
1. Make a paste: Mix a small amount of baking soda with warm water to create a thick paste.
2. Apply the paste: Apply the baking soda paste to the stainless steel surface.
3. Gently scrub: Using a damp Scrub Daddy, gently scrub the surface in the direction of the grain.
4. Rinse thoroughly: Rinse the surface thoroughly with warm water to remove all traces of the baking soda paste.
5. Dry and polish: Dry the surface with a clean, dry cloth. For extra shine, you can buff the surface with a microfiber cloth.
Pro Tip: This works great on stainless steel sinks, appliances, and cookware.
Hack #6: Cleaning Your Grill Grates
Grill grates can be notoriously difficult to clean. Burnt-on food and grease can be a real pain to remove. But with a little elbow grease and your trusty Scrub Daddy, you can get those grates sparkling clean!
Why it works: The abrasive texture of the Scrub Daddy is perfect for scrubbing away burnt-on food and grease from grill grates.
What you’ll need:
* Your Scrub Daddy
* Warm water
* Dish soap
* Grill brush (optional)
Step-by-step instructions:
1. Preheat the grill: Preheat your grill on high for about 15 minutes to burn off any loose debris.
2. Turn off the grill: Turn off the grill and let it cool slightly.
3. Scrub with a grill brush (optional): If your grill grates are heavily soiled, you can use a grill brush to remove any large chunks of food.
4. Wet the Scrub Daddy: Wet the Scrub Daddy with warm water and add a squirt of dish soap.
5. Scrub the grates: Scrub the grill grates thoroughly with the Scrub Daddy, focusing on areas with burnt-on food and grease.
6. Rinse and repeat: Rinse the Scrub Daddy and the grill grates frequently. Repeat the scrubbing process until the grates are clean.
7. Dry the grates: Dry the grill grates with a clean cloth or paper towels.
Safety First: Always wear heat-resistant gloves when cleaning grill grates, even after the grill has cooled down.
Hack #7: Cleaning Car Wheels
Believe it or not, your Scrub Daddy can even help you clean your car wheels! Brake dust and road grime can quickly make your wheels look dull and dirty.
Why it works: The Scrub Daddy’s texture is gentle enough not to scratch your
Conclusion
So, there you have it! Growing your own butternut squash isn’t just a fun gardening project; it’s a gateway to incredibly flavorful and nutritious meals, a sustainable practice, and a deeply rewarding experience. We’ve walked you through the entire process, from selecting the perfect seeds to harvesting your bountiful crop. But why is this DIY trick a must-try?
Firstly, the taste difference is undeniable. Store-bought butternut squash, while convenient, often lacks the vibrant sweetness and rich, nutty flavor of homegrown varieties. When you grow your own, you control the entire process, ensuring optimal ripeness and freshness. Imagine the delight of serving a butternut squash soup made with squash you nurtured from a tiny seed!
Secondly, you’re contributing to a more sustainable lifestyle. By growing your own food, you reduce your reliance on commercially grown produce, which often involves long-distance transportation and potentially harmful pesticides. You’ll be minimizing your carbon footprint and enjoying the satisfaction of knowing exactly where your food comes from.
Thirdly, it’s incredibly cost-effective. While there’s an initial investment in seeds and potentially some soil amendments, the yield from even a few butternut squash plants can be substantial, saving you money in the long run. Plus, you can save seeds from your best squash to plant the following year, creating a self-sustaining cycle.
But the benefits don’t stop there! Growing butternut squash is a fantastic way to connect with nature, get some exercise, and learn new skills. It’s a project that the whole family can enjoy, fostering a sense of accomplishment and appreciation for the natural world.
Ready to take your butternut squash game to the next level? Consider these variations:
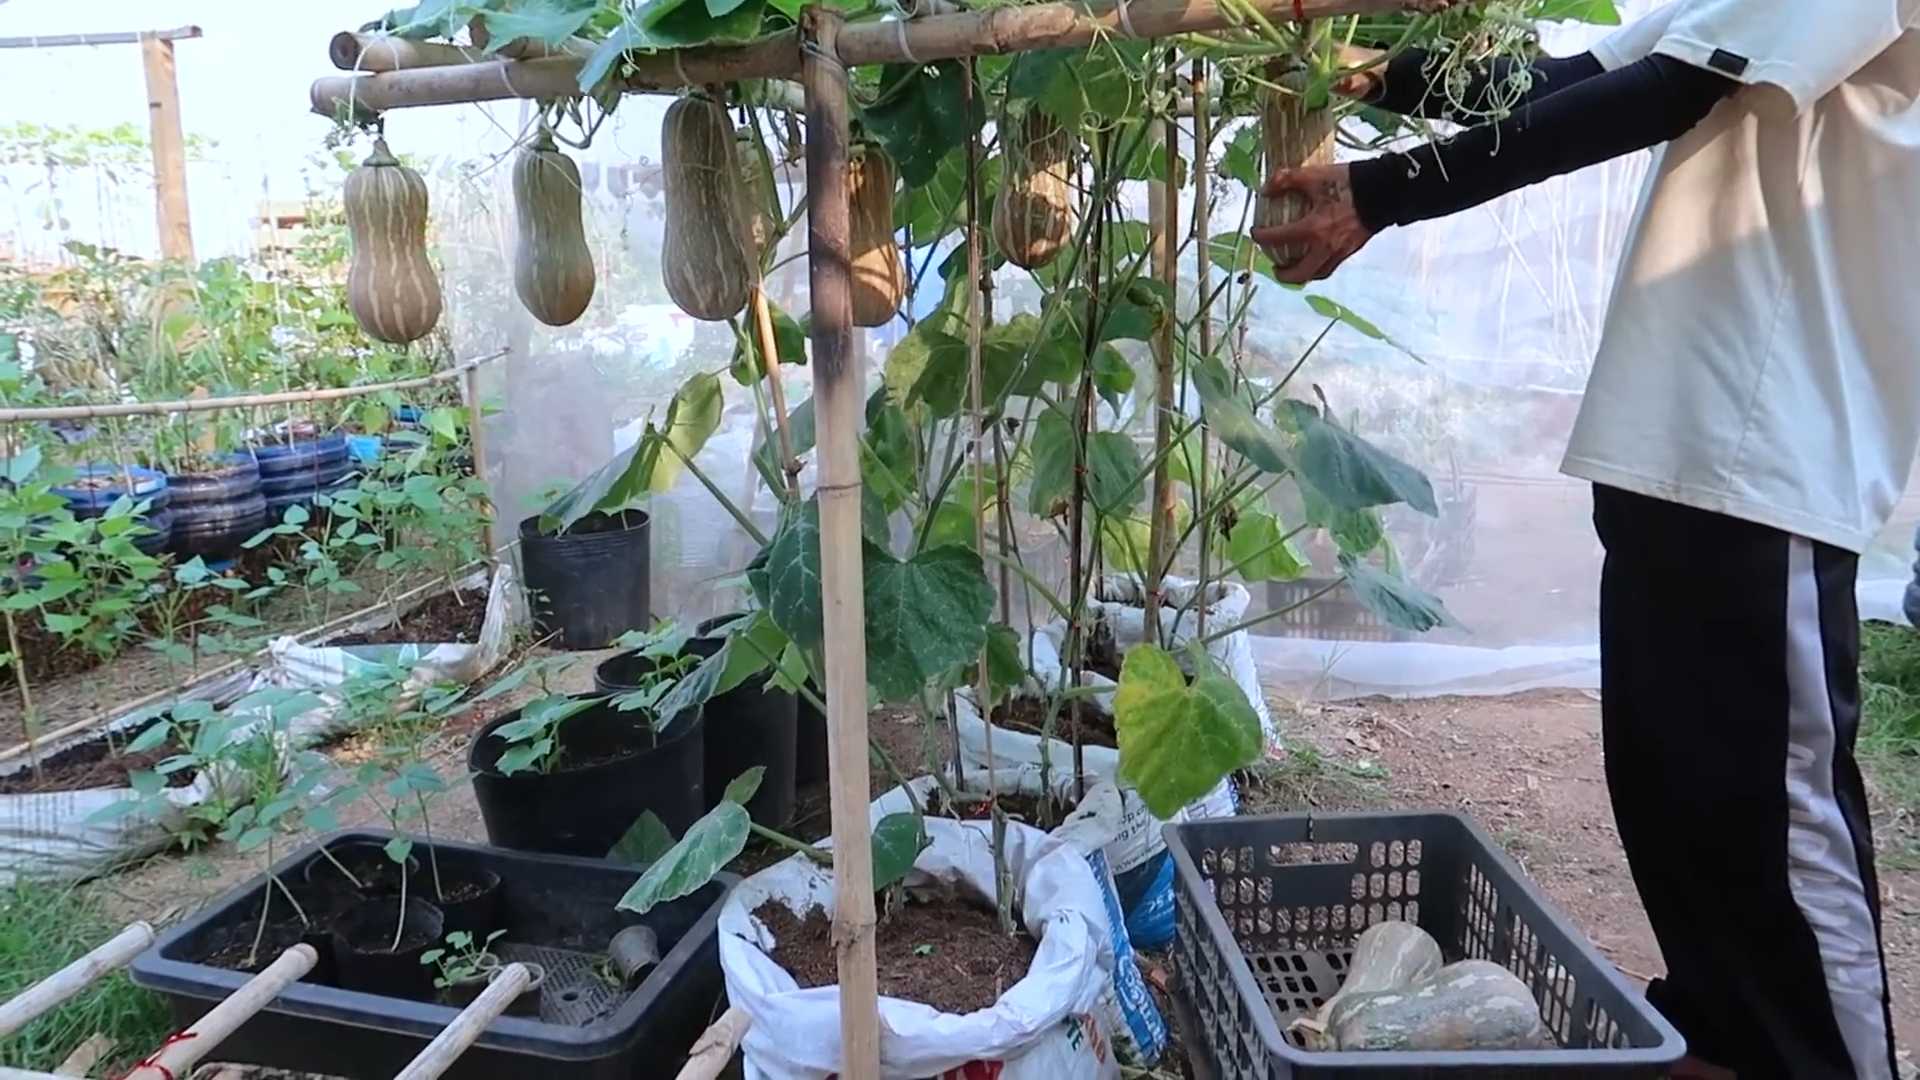
* Vertical Growing: If you’re short on space, try training your butternut squash vines to grow vertically on a trellis or fence. This not only saves space but also improves air circulation, reducing the risk of disease.
* Companion Planting: Plant beneficial companion plants like marigolds, nasturtiums, or basil near your butternut squash to deter pests and attract pollinators.
* Heirloom Varieties: Explore different heirloom butternut squash varieties, such as ‘Waltham Butternut’ or ‘Butterscotch PMT’, for unique flavors and textures.
* Roasting the Seeds: Don’t throw away the seeds! Roasted butternut squash seeds are a delicious and nutritious snack. Simply toss them with olive oil, salt, and your favorite spices, then roast them in the oven until crispy.
We’re confident that you’ll find growing your own butternut squash to be a rewarding and enjoyable experience. Don’t be afraid to experiment, learn from your mistakes, and most importantly, have fun!
We encourage you to try this DIY trick and share your experiences with us. What varieties did you grow? What challenges did you face? What delicious recipes did you create? Share your photos and stories in the comments below! Let’s build a community of butternut squash enthusiasts and inspire others to embrace the joys of homegrown produce. We can’t wait to hear about your butternut squash adventures!
Frequently Asked Questions (FAQ)
What are the best conditions for growing butternut squash?
Butternut squash thrives in warm weather and requires full sun (at least 6-8 hours per day). The ideal soil temperature for germination is between 65°F and 75°F (18°C and 24°C). The soil should be well-draining and rich in organic matter. Amend your soil with compost or aged manure before planting to provide essential nutrients. Butternut squash also needs consistent moisture, especially during fruit development. Water deeply and regularly, but avoid overhead watering, which can lead to fungal diseases.
How long does it take for butternut squash to grow?
From planting to harvest, butternut squash typically takes between 90 and 120 days, depending on the variety and growing conditions. You’ll know your butternut squash is ready to harvest when the skin is hard, the color is a deep tan, and the stem is dry and corky. A good test is to try and pierce the skin with your fingernail; if it’s difficult to do so, the squash is ripe.
What are common pests and diseases that affect butternut squash?
Several pests and diseases can affect butternut squash, including squash bugs, squash vine borers, powdery mildew, and squash mosaic virus. Squash bugs can be controlled by handpicking them off the plants or using insecticidal soap. Squash vine borers can be a more challenging pest; preventative measures include wrapping the base of the stems with foil or netting to prevent the moths from laying their eggs. Powdery mildew is a fungal disease that can be prevented by ensuring good air circulation around the plants and avoiding overhead watering. If powdery mildew does occur, treat it with a fungicide specifically labeled for use on squash. Squash mosaic virus is a viral disease that can cause stunted growth and distorted fruit; there is no cure, so prevention is key. Use disease-free seeds and control aphids, which can transmit the virus.
How do I store butternut squash after harvesting?
Proper storage is crucial for extending the shelf life of your butternut squash. After harvesting, cure the squash by leaving it in a warm, sunny location for about a week. This allows the skin to harden and helps to heal any minor cuts or bruises. Once cured, store the butternut squash in a cool, dry, and well-ventilated place, such as a basement or pantry. The ideal storage temperature is between 50°F and 55°F (10°C and 13°C). Under these conditions, butternut squash can last for several months. Avoid storing butternut squash near apples or pears, as these fruits release ethylene gas, which can cause the squash to ripen and spoil more quickly.
Can I grow butternut squash in containers?
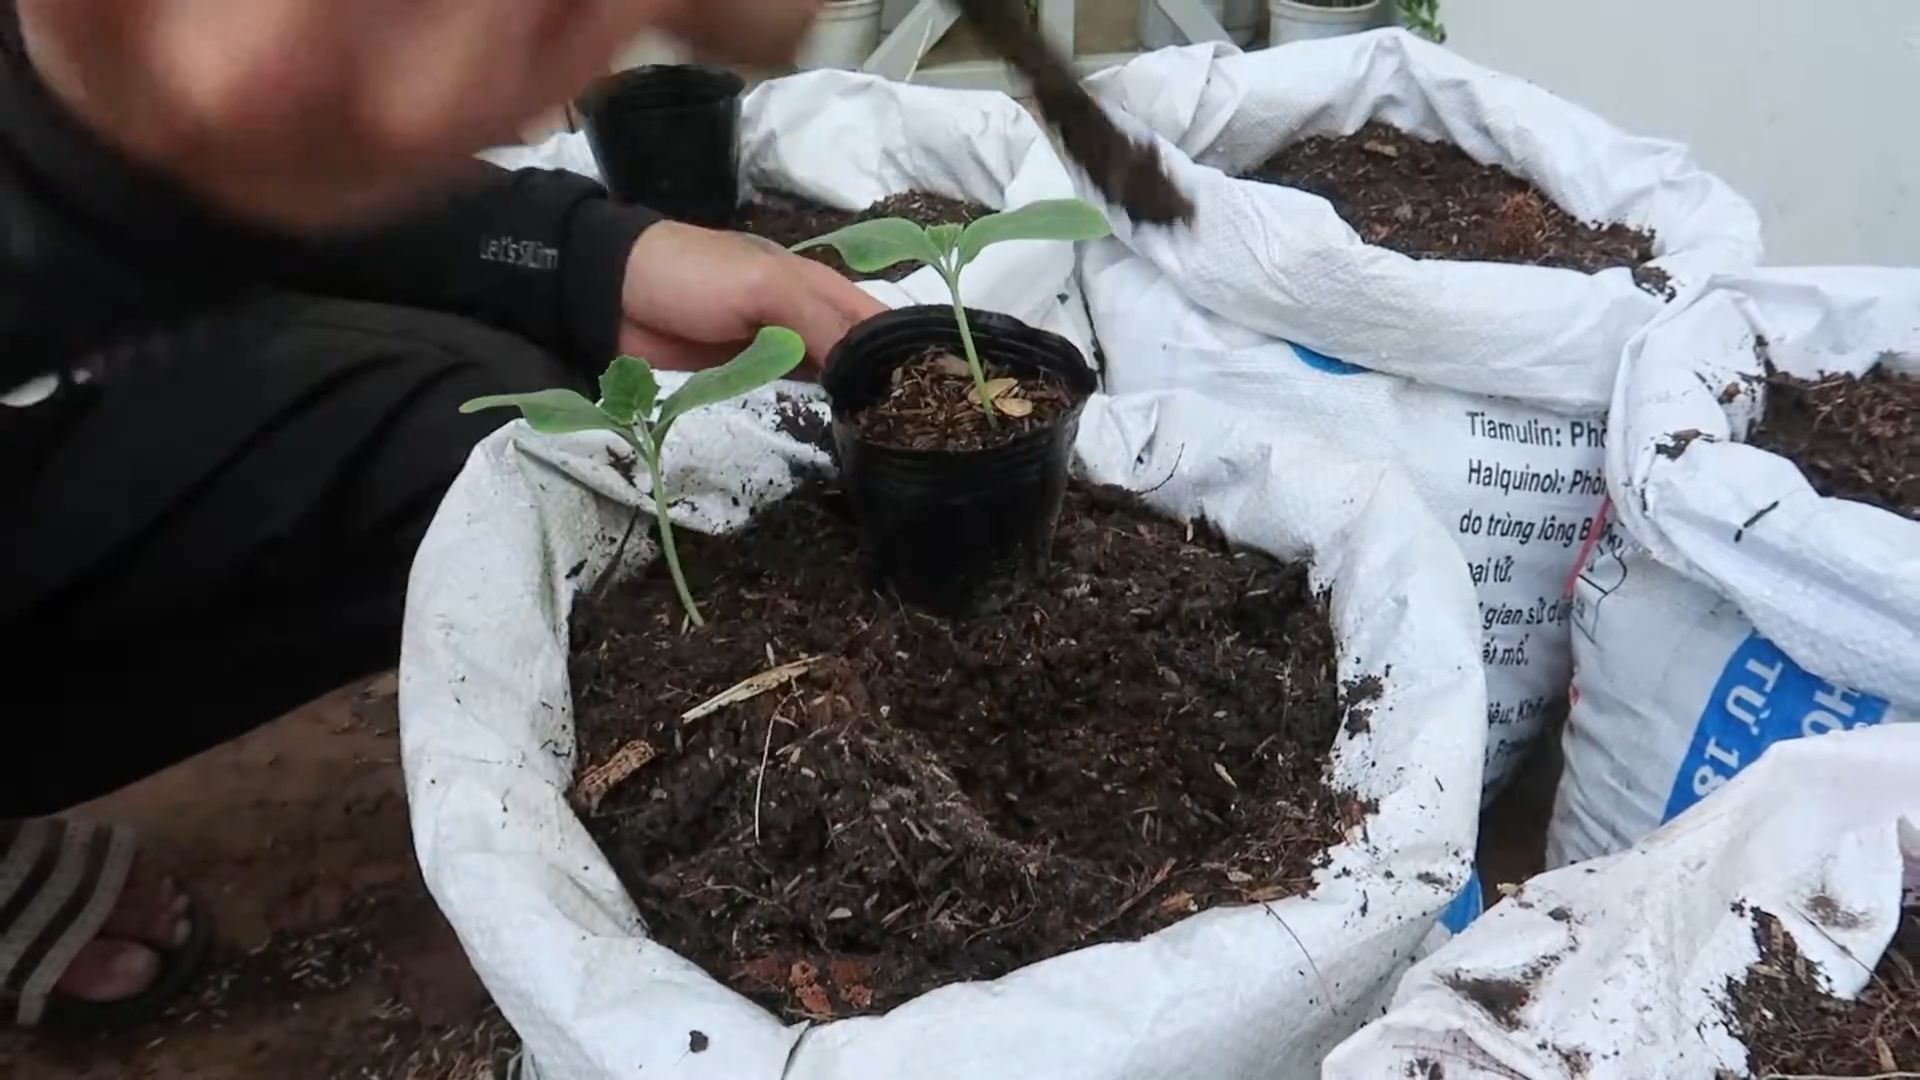
Yes, you can grow butternut squash in containers, but you’ll need a large container (at least 20 gallons) to accommodate the plant’s extensive root system. Choose a container with good drainage and fill it with a high-quality potting mix. You’ll also need to provide a trellis or other support for the vines to climb. Container-grown butternut squash may require more frequent watering and fertilization than those grown in the ground.
How do I pollinate butternut squash if I don’t see many bees?
Butternut squash relies on pollinators, primarily bees, to produce fruit. If you’re not seeing many bees in your garden, you may need to hand-pollinate the flowers. To do this, identify the male and female flowers. Male flowers have a long, thin stem, while female flowers have a small, immature squash at the base. In the early morning, use a small paintbrush or cotton swab to collect pollen from the male flower and transfer it to the stigma of the female flower. Repeat this process for several days to ensure successful pollination.
What are some creative ways to use homegrown butternut squash?
The possibilities are endless! Beyond the classic butternut squash soup, try roasting it with herbs and spices, pureeing it into a creamy pasta sauce, adding it to salads, or using it as a filling for ravioli or empanadas. You can also use butternut squash to make bread, muffins, or even pie. Don’t forget to roast the seeds for a healthy and delicious snack! Experiment with different flavor combinations and find your favorite ways to enjoy your homegrown butternut squash.

Leave a Comment