
Terrace guava tree planting might seem daunting, especially if you’re picturing sprawling orchards rather than your cozy outdoor space. But trust me, growing your own delicious guavas on your terrace is totally achievable, and incredibly rewarding! Imagine plucking a sun-ripened guava, bursting with tropical flavor, right from your own little tree – that’s the dream we’re chasing today.
Guava trees have a rich history, deeply rooted in tropical and subtropical cultures around the world. From ancient medicinal uses to being a symbol of abundance and good fortune, guavas have been cherished for centuries. Now, you can bring a piece of that history and a touch of the tropics to your own home.
Why should you embark on this terrace guava tree planting adventure? Well, beyond the sheer joy of homegrown fruit, it’s about taking control of your food source, enjoying fresher, healthier produce, and adding a vibrant, green touch to your living space. Plus, let’s be honest, store-bought guavas just don’t compare to the flavor explosion of a tree-ripened one. In this article, I’ll share my favorite DIY tricks and hacks to ensure your terrace guava tree thrives, even in limited space. Get ready to get your hands dirty and enjoy the sweet rewards!
Guavenbaum auf der Terrasse pflanzen: Dein DIY-Leitfaden
Hey Gartenfreunde! Ich liebe Guaven. Diese tropischen Früchte sind nicht nur super lecker, sondern auch reich an Vitaminen. Und das Beste? Du kannst deinen eigenen Guavenbaum sogar auf der Terrasse ziehen! Klingt kompliziert? Keine Sorge, ich zeige dir, wie es geht. Mit dieser Schritt-für-Schritt-Anleitung wird dein Guavenbaum bald prächtig gedeihen.
Was du brauchst: Die Materialliste
Bevor wir loslegen, solltest du sicherstellen, dass du alles griffbereit hast. Hier ist eine Liste der Dinge, die du benötigst:
* Guavenbaum-Setzling: Am besten wählst du eine Sorte, die für den Anbau im Topf geeignet ist. Frage in deiner Gärtnerei nach Zwergsorten oder Sorten, die sich gut beschneiden lassen.
* Großer Topf: Der Topf sollte mindestens 50 cm Durchmesser haben und über Abzugslöcher verfügen. Guavenbäume brauchen Platz für ihre Wurzeln.
* Hochwertige Blumenerde: Verwende eine gut durchlässige Blumenerde, die reich an Nährstoffen ist. Du kannst auch spezielle Zitruspflanzenerde verwenden, da Guaven ähnliche Bedürfnisse haben.
* Drainagematerial: Blähton, Kies oder Tonscherben eignen sich hervorragend, um Staunässe zu vermeiden.
* Gartenschere: Zum Beschneiden des Baumes.
* Gießkanne: Zum Bewässern.
* Dünger: Ein Langzeitdünger oder ein Flüssigdünger speziell für Obstbäume.
* Mulch: Rindenmulch oder Pinienrinde helfen, die Feuchtigkeit im Boden zu halten und Unkraut zu unterdrücken.
* Handschuhe: Zum Schutz deiner Hände.
* Optional: Rankhilfe: Je nach Sorte kann eine Rankhilfe sinnvoll sein, um den Baum zu stützen.
Schritt-für-Schritt-Anleitung: So pflanzt du deinen Guavenbaum
Jetzt geht’s ans Eingemachte! Folge diesen Schritten, um deinen Guavenbaum erfolgreich auf der Terrasse zu pflanzen:
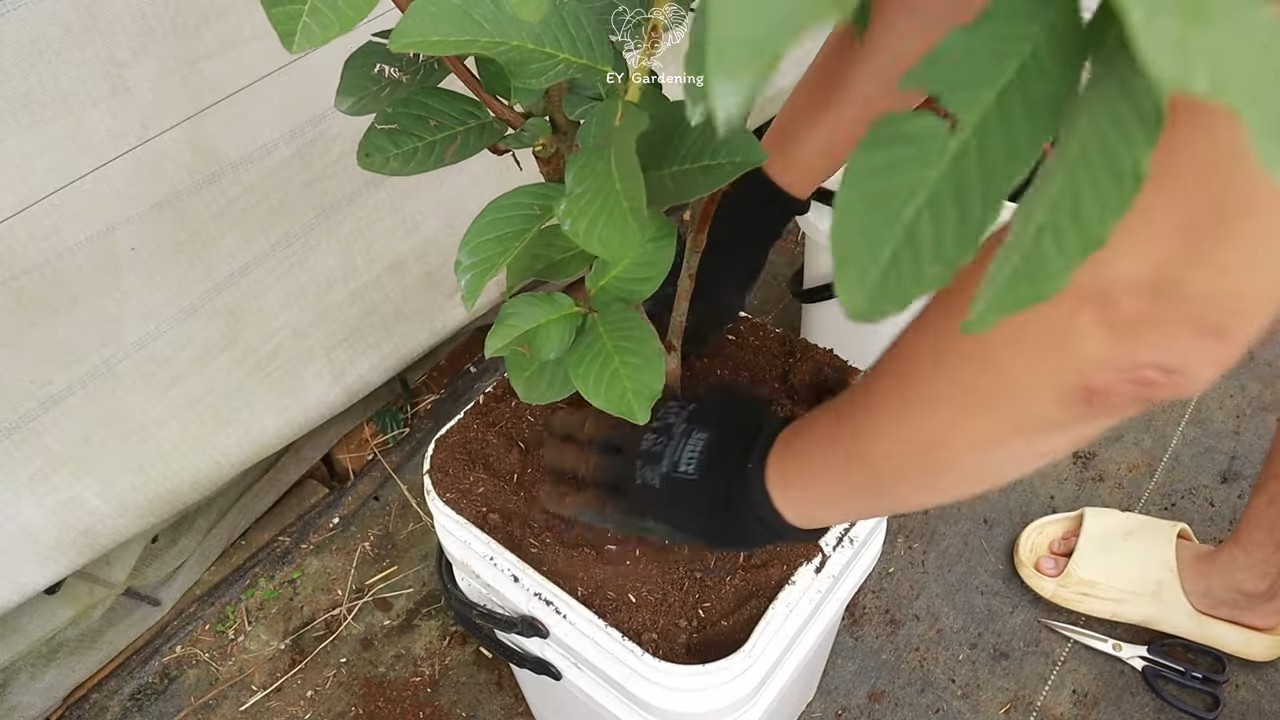
1. Den Topf vorbereiten: Zuerst legen wir eine Schicht Drainagematerial (Blähton, Kies oder Tonscherben) auf den Boden des Topfes. Das sorgt dafür, dass das Wasser gut abfließen kann und die Wurzeln nicht faulen. Eine Schicht von etwa 5-10 cm ist ideal.
2. Erde einfüllen: Fülle den Topf mit Blumenerde, aber lass noch etwas Platz nach oben. Etwa 5-10 cm sollten frei bleiben, damit du später noch gießen kannst, ohne dass die Erde überschwappt.
3. Den Setzling vorbereiten: Nimm den Guavenbaum-Setzling vorsichtig aus seinem Anzuchttopf. Lockere die Wurzeln etwas auf, indem du sie leicht mit den Fingern auseinanderziehst. Das hilft dem Baum, sich besser im neuen Topf zu verwurzeln.
4. Den Baum einsetzen: Setze den Setzling mittig in den Topf. Achte darauf, dass der Wurzelballen etwa auf gleicher Höhe mit der Oberfläche der Erde im Topf ist. Fülle den Topf mit Erde auf und drücke sie leicht an.
5. Angießen: Gieße den Baum gründlich an, bis das Wasser aus den Abzugslöchern läuft. Das hilft, die Erde zu setzen und die Wurzeln mit Feuchtigkeit zu versorgen.
6. Mulchen: Verteile eine Schicht Mulch (Rindenmulch oder Pinienrinde) um den Stamm des Baumes. Das hilft, die Feuchtigkeit im Boden zu halten und Unkraut zu unterdrücken. Achte darauf, dass der Mulch den Stamm nicht berührt, um Fäulnis zu vermeiden.
7. Standort wählen: Stelle den Topf an einen sonnigen Standort. Guavenbäume lieben die Sonne und brauchen mindestens 6 Stunden Sonnenlicht pro Tag, um gut zu wachsen und Früchte zu tragen. Ein windgeschützter Platz ist ideal, um den Baum vor starken Böen zu schützen.
Pflege deines Guavenbaums: So bleibt er gesund und glücklich
Ein Guavenbaum braucht regelmäßige Pflege, um zu gedeihen. Hier sind ein paar Tipps, wie du ihn gesund und glücklich hältst:
* Gießen: Gieße den Baum regelmäßig, besonders während der Wachstumsperiode und an heißen Tagen. Die Erde sollte immer leicht feucht sein, aber nicht nass. Vermeide Staunässe, da dies zu Wurzelfäule führen kann. Überprüfe die Feuchtigkeit der Erde, indem du deinen Finger etwa 2-3 cm tief in die Erde steckst. Wenn sie sich trocken anfühlt, ist es Zeit zu gießen.
* Düngen: Dünge den Baum regelmäßig mit einem Langzeitdünger oder einem Flüssigdünger speziell für Obstbäume. Befolge die Anweisungen auf der Verpackung. Während der Wachstumsperiode (Frühling und Sommer) solltest du den Baum häufiger düngen als im Herbst und Winter.
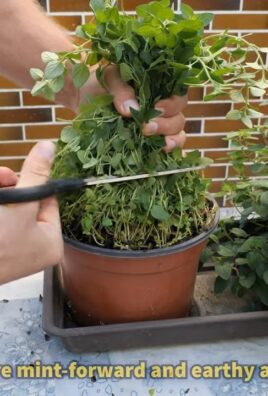
* Beschneiden: Beschneide den Baum regelmäßig, um seine Form zu erhalten und die Fruchtbildung zu fördern. Entferne abgestorbene oder kranke Äste. Der beste Zeitpunkt zum Beschneiden ist im späten Winter oder frühen Frühling, bevor das neue Wachstum beginnt.
* Überwintern: Guavenbäume sind nicht winterhart und müssen vor Frost geschützt werden. Stelle den Topf an einen hellen, kühlen Ort, z.B. in einen Wintergarten oder ein Gewächshaus. Gieße den Baum weniger während der Wintermonate. Wenn du keinen geeigneten Ort zum Überwintern hast, kannst du den Baum auch mit einem Vlies abdecken, um ihn vor Frost zu schützen.
* Schädlinge und Krankheiten: Achte auf Schädlinge wie Blattläuse oder Spinnmilben. Bei Bedarf kannst du biologische Schädlingsbekämpfungsmittel verwenden. Guavenbäume können auch von Pilzkrankheiten befallen werden. Achte auf Anzeichen wie braune Flecken auf den Blättern und behandle den Baum bei Bedarf mit einem Fungizid.
Häufige Probleme und Lösungen
Auch wenn du alles richtig machst, können manchmal Probleme auftreten. Hier sind ein paar häufige Probleme und wie du sie lösen kannst:
* Gelbe Blätter: Gelbe Blätter können ein Zeichen für Überwässerung, Nährstoffmangel oder Schädlingsbefall sein. Überprüfe die Feuchtigkeit der Erde und dünge den Baum bei Bedarf. Untersuche die Blätter auf Schädlinge und behandle sie gegebenenfalls.
* Keine Früchte: Wenn dein Guavenbaum keine Früchte trägt, kann das an mangelnder Bestäubung, unzureichendem Sonnenlicht oder Nährstoffmangel liegen. Stelle sicher, dass der Baum genügend Sonnenlicht bekommt und dünge ihn regelmäßig. Du kannst auch versuchen, die Blüten von Hand zu bestäuben, indem du mit einem Pinsel Pollen von einer Blüte zur anderen überträgst.
* Wurzelfäule: Wurzelfäule wird durch Staunässe verursacht. Achte darauf, dass der Topf über Abzugslöcher verfügt und die Erde gut durchlässig ist. Gieße den Baum weniger und vermeide Staunässe.
Zusätzliche Tipps für den Erfolg
Hier sind noch ein paar zusätzliche Tipps, die dir helfen können, deinen Guavenbaum erfolgreich auf der Terrasse zu ziehen:
* Verwende Regenwasser: Regenwasser ist weicher als Leitungswasser und enthält keine schädlichen Chemikalien. Es ist ideal zum Gießen von Guavenbäumen.
* Drehe den Topf regelmäßig: Drehe den Topf regelmäßig, damit der Baum gleichmäßig von allen Seiten Sonnenlicht bekommt.
* Sei geduldig: Es kann einige Jahre dauern, bis dein Guavenbaum Früchte trägt. Sei geduldig und gib nicht auf!
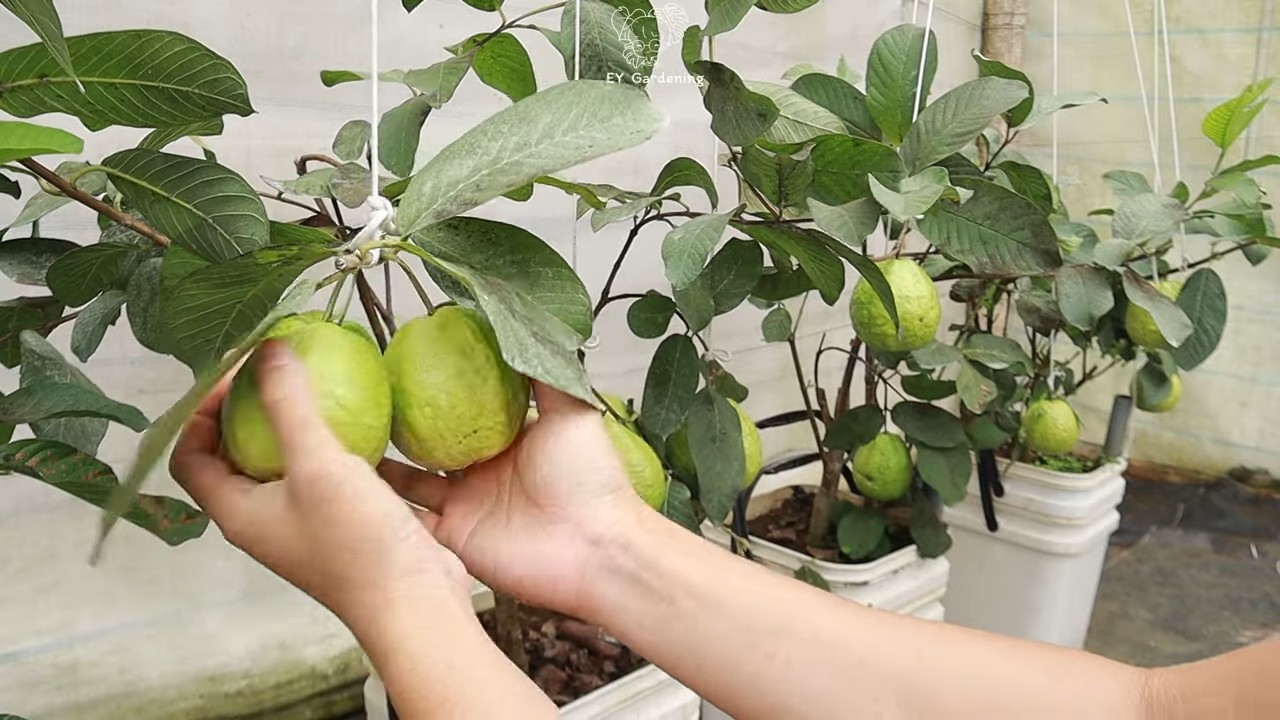
Guaven ernten: Der Lohn deiner Mühe
Wenn dein Guavenbaum Früchte trägt, ist das ein tolles Gefühl! Die Früchte sind reif, wenn sie sich leicht vom Baum lösen lassen und einen angenehmen Duft verströmen. Die Farbe der Früchte kann je nach Sorte variieren.
Genieße deine selbstgezogenen Guaven! Du kannst sie frisch essen, zu Saft verarbeiten oder in Desserts verwenden. Sie sind nicht nur lecker, sondern auch super gesund!
Ich hoffe, diese Anleitung hat dir geholfen, deinen eigenen Guavenbaum auf der Terrasse zu pflanzen. Viel Erfolg und viel Spaß beim Gärtnern!
Conclusion
So, there you have it! Transforming your terrace into a guava-filled paradise is not only achievable but also incredibly rewarding. This DIY terrace guava tree planting guide offers a simple, cost-effective, and deeply satisfying way to enjoy fresh, homegrown guavas right outside your door. Forget the store-bought varieties that often lack the vibrant flavor and nutritional punch of a tree-ripened guava. With a little effort and the right approach, you can cultivate your own personal guava oasis.
Why is this DIY trick a must-try? Because it empowers you to control the entire process, from selecting the perfect guava variety to nurturing its growth with organic methods. You’ll know exactly what goes into your fruit, ensuring a healthier and more flavorful harvest. Plus, the act of planting and caring for a tree is inherently therapeutic, connecting you with nature and providing a sense of accomplishment. Imagine stepping onto your terrace each morning, greeted by the sweet aroma of guava blossoms and the promise of delicious fruit to come.
But the benefits extend beyond just the fruit itself. A guava tree on your terrace can provide shade, attract beneficial insects, and enhance the overall aesthetic appeal of your outdoor space. It’s a sustainable and eco-friendly way to add beauty and functionality to your home.
Ready to take your terrace guava tree planting to the next level? Consider these variations:
* Espalier Guava: Train your guava tree to grow flat against a wall or fence. This is a great option for maximizing space and creating a visually stunning focal point.
* Grafted Varieties: Experiment with different grafted guava varieties to enjoy a wider range of flavors and fruit sizes. Look for varieties that are known for their disease resistance and adaptability to container growing.
* Companion Planting: Plant herbs and flowers around your guava tree to attract pollinators and deter pests. Marigolds, basil, and lavender are excellent choices.
* Vertical Gardening: Incorporate vertical gardening elements around your guava tree to create a lush and vibrant green wall. This can help to insulate your terrace and create a more private and relaxing space.
We encourage you to embrace this DIY project and experience the joy of growing your own guavas. Don’t be afraid to experiment and adapt the techniques to suit your specific needs and preferences. The most important thing is to get started and learn along the way.
And now, we want to hear from you! Have you tried planting a guava tree on your terrace? What challenges did you face, and what successes did you achieve? Share your experiences, tips, and photos in the comments below. Let’s create a community of guava enthusiasts and inspire others to embark on this rewarding journey. Your insights could be invaluable to someone just starting out. Let’s all learn from each other and make our terraces guava paradises!
Frequently Asked Questions (FAQ)
What is the best time of year to plant a guava tree on my terrace?
The ideal time to plant a guava tree is during the late spring or early summer, after the last frost has passed. This gives the tree ample time to establish its roots before the onset of winter. However, in warmer climates with mild winters, you can plant a guava tree at any time of year, as long as you provide adequate protection from extreme temperatures. Avoid planting during periods of intense heat or heavy rainfall.
What size pot should I use for my terrace guava tree?
Start with a pot that is at least 24 inches in diameter and 24 inches deep. As the tree grows, you may need to transplant it into a larger pot. Choose a pot made of a durable material such as terracotta or plastic, and ensure that it has adequate drainage holes to prevent waterlogging. The size of the pot will also depend on the variety of guava you choose. Dwarf varieties can thrive in smaller containers, while larger varieties will require more space.
What type of soil is best for guava trees?
Guava trees prefer well-draining soil that is rich in organic matter. A good potting mix for guava trees should consist of equal parts of garden soil, compost, and perlite or vermiculite. Avoid using heavy clay soil, as it can retain too much moisture and lead to root rot. You can also amend the soil with a slow-release fertilizer to provide essential nutrients for the tree’s growth. The pH level of the soil should be slightly acidic to neutral, ideally between 6.0 and 7.0.
How often should I water my terrace guava tree?
Water your guava tree regularly, especially during the growing season. The frequency of watering will depend on the climate, the size of the pot, and the age of the tree. As a general rule, water the tree when the top inch of soil feels dry to the touch. Avoid overwatering, as this can lead to root rot. During the winter months, reduce the frequency of watering. Ensure proper drainage to prevent water from accumulating at the bottom of the pot.
How much sunlight does a guava tree need?
Guava trees need at least 6-8 hours of direct sunlight per day to thrive. Place your guava tree in a sunny location on your terrace where it will receive plenty of sunlight. If you live in a hot climate, provide some afternoon shade to protect the tree from scorching. Insufficient sunlight can lead to poor fruit production and stunted growth.
How do I fertilize my terrace guava tree?
Fertilize your guava tree regularly during the growing season with a balanced fertilizer that is specifically formulated for fruit trees. Follow the instructions on the fertilizer label for application rates. You can also use organic fertilizers such as compost tea or fish emulsion. Avoid fertilizing during the winter months when the tree is dormant. Regular fertilization is crucial for promoting healthy growth and abundant fruit production.
How do I prune my terrace guava tree?
Prune your guava tree regularly to maintain its shape, remove dead or diseased branches, and encourage fruit production. The best time to prune guava trees is during the late winter or early spring, before new growth begins. Remove any branches that are crossing or rubbing against each other, as well as any suckers that are growing from the base of the tree. Pruning also helps to improve air circulation and sunlight penetration, which can reduce the risk of disease.
How do I protect my guava tree from pests and diseases?
Monitor your guava tree regularly for signs of pests and diseases. Common pests that can affect guava trees include aphids, mealybugs, and scale insects. You can control these pests with insecticidal soap or neem oil. Common diseases that can affect guava trees include anthracnose and root rot. Prevent these diseases by providing good air circulation, avoiding overwatering, and using disease-resistant varieties. Regular inspection and prompt treatment are essential for maintaining the health of your guava tree.
How long does it take for a guava tree to produce fruit?
Guava trees typically start producing fruit within 2-4 years of planting. The exact time will depend on the variety of guava, the growing conditions, and the age of the tree. Grafted guava trees tend to produce fruit sooner than seedling trees. To encourage fruit production, provide your guava tree with plenty of sunlight, water, and fertilizer. Proper pruning can also help to stimulate fruit production.
Can I grow a guava tree indoors?
While it is possible to grow a guava tree indoors, it can be challenging. Guava trees need a lot of sunlight, which can be difficult to provide indoors. You will also need to ensure that the tree receives adequate humidity and ventilation. If you choose to grow a guava tree indoors, select a dwarf variety and place it in a sunny location near a window. You may also need to supplement with artificial lighting.
Leave a Comment