
Unusual Onion Growing Methods: Ready to ditch the same old gardening routine and unlock the secrets to a truly bountiful onion harvest? I’m so excited to share some game-changing techniques that will have you growing onions like a pro, even if you’re a complete beginner! Forget everything you thought you knew about planting these pungent bulbs, because we’re about to dive into some seriously unconventional, yet incredibly effective, approaches.
Onions have been a culinary staple for millennia, with evidence of their cultivation dating back to ancient Egypt and beyond. They were even revered for their medicinal properties and symbolic significance in various cultures. But while the basic principles of onion growing have remained relatively consistent, there’s always room for innovation!
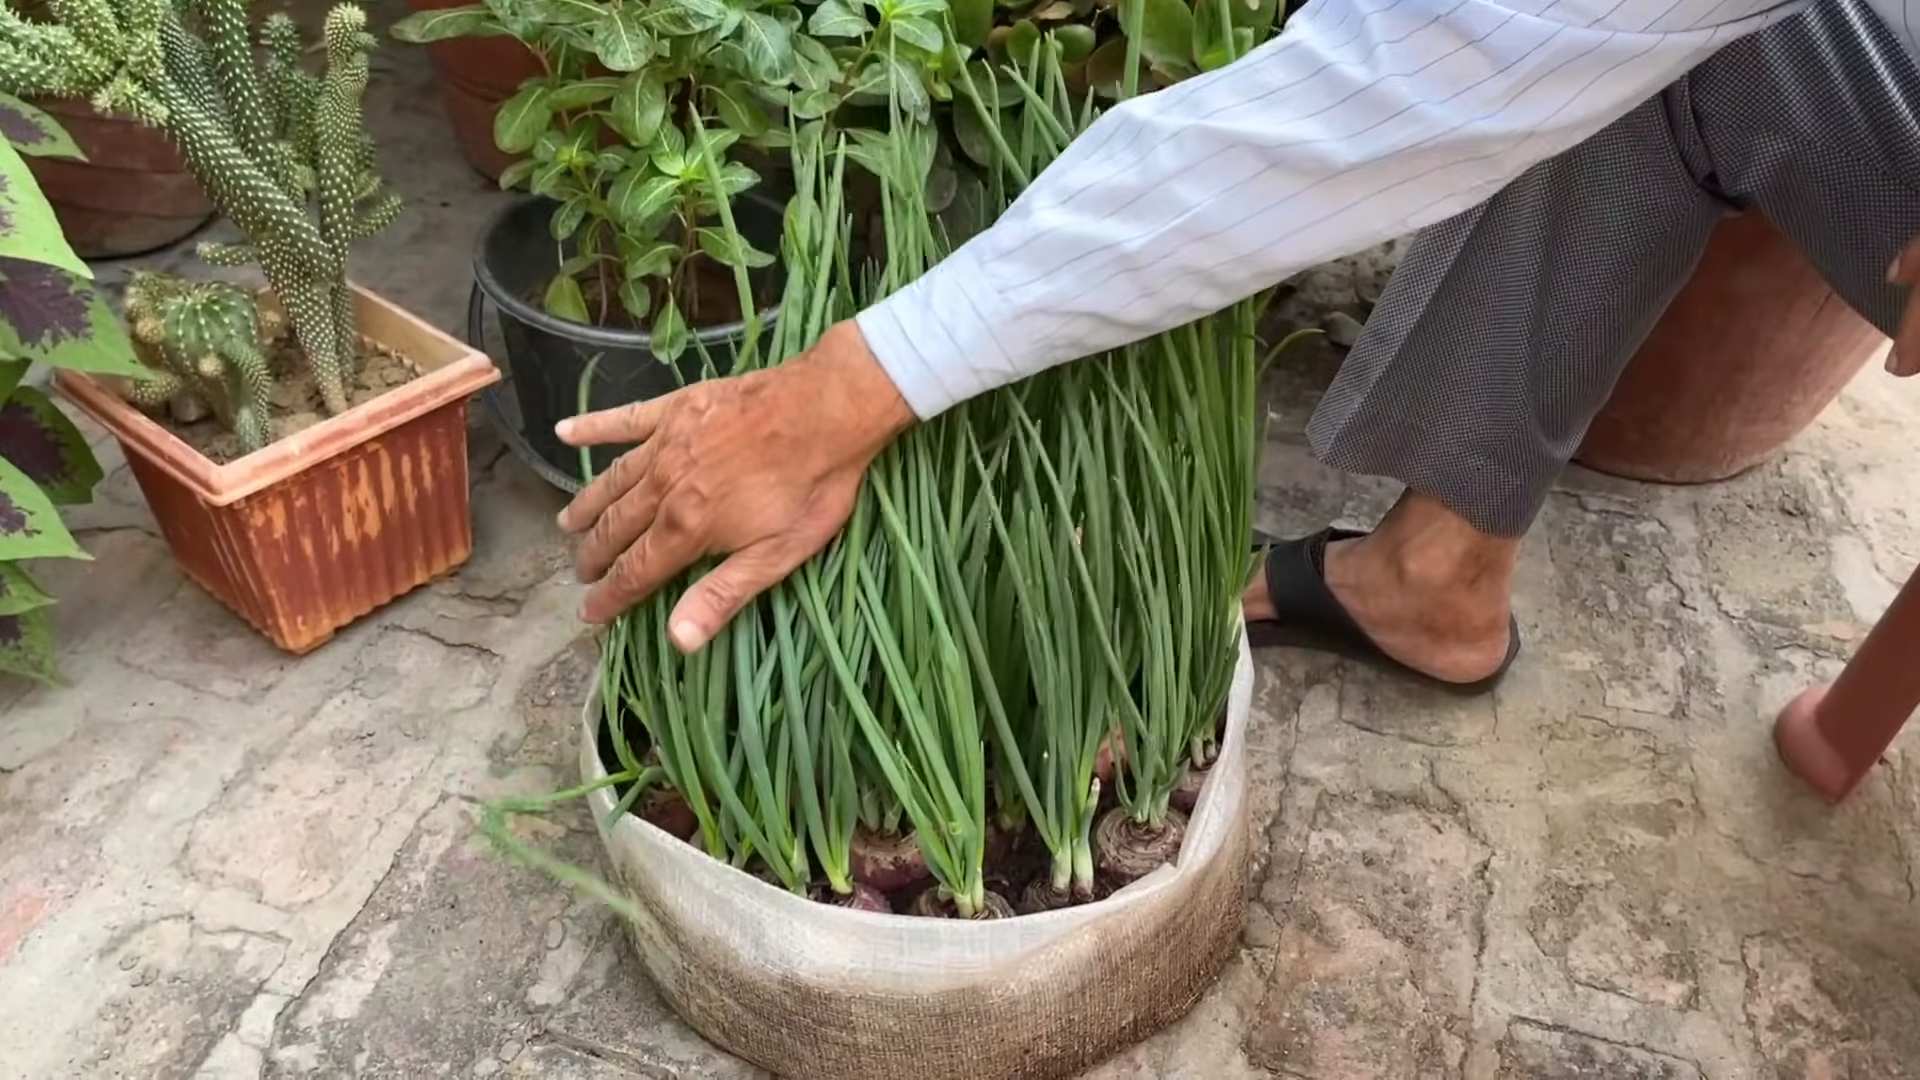
Let’s face it, traditional onion growing can be a bit… predictable. But what if I told you there are ways to boost your yields, extend your growing season, and even combat common pests and diseases, all with a few clever tweaks? This DIY guide is packed with practical tips and tricks that will help you maximize your onion patch, regardless of your space or experience level. Whether you’re dealing with poor soil, limited sunlight, or just want to try something new, these unusual onion growing methods are guaranteed to revolutionize your gardening game. So, grab your gloves, and let’s get started!
DIY Coffee Bean Jewelry: A Step-by-Step Guide
Hey there, fellow craft enthusiasts! Ever wondered what to do with those leftover coffee beans besides brewing a delicious cup? Well, I’ve got a fun and unique project for you: creating stunning coffee bean jewelry! This guide will walk you through the process of making beautiful necklaces, earrings, and even bracelets using coffee beans. Get ready to unleash your inner artist and create some truly one-of-a-kind pieces.
Materials You’ll Need
Before we dive in, let’s gather all the necessary materials. Trust me, having everything organized beforehand will make the whole process much smoother and enjoyable.
* Coffee Beans: Roasted coffee beans are a must! Choose your favorite type – dark roast, light roast, or even a blend. The size and shape of the beans will influence the final look of your jewelry. I personally love using a variety of sizes for a more textured effect.
* Jewelry Findings: This includes things like:
* Jump Rings: These small metal rings connect different components of your jewelry.
* Head Pins/Eye Pins: These are used to create dangles and connect beads or coffee beans.
* Earring Hooks: For making earrings, of course! Choose your preferred style – fish hook, lever back, etc.
* Necklace Chains: Select a chain length and style that suits your taste.
* Clasps: To secure your necklaces and bracelets. Lobster clasps and toggle clasps are popular choices.
* Crimp Beads/Tubes: Used to secure wire in place, especially for bracelets.
* Jewelry Pliers: You’ll need a few different types of pliers:
* Round Nose Pliers: For creating loops and curves in wire.
* Chain Nose Pliers: For gripping and manipulating small components.
* Wire Cutters: For cutting wire and head pins.
* Drill and Small Drill Bits: A rotary tool like a Dremel is ideal, but a small hand drill can also work. You’ll need drill bits small enough to create holes in the coffee beans without splitting them. I recommend starting with a very small bit and gradually increasing the size if needed.
* Strong Adhesive: Epoxy resin or a strong craft glue like E6000 is essential for securing the coffee beans to jewelry findings if you choose not to drill.
* Varnish or Sealant (Optional): This will protect the coffee beans and give them a glossy finish. Polyurethane varnish works well.
* Beading Wire (For Bracelets): Choose a strong and flexible beading wire.
* Work Surface: Protect your work area with a mat or some scrap paper.
* Safety Glasses: Especially important when drilling!
* Toothpicks or Skewers: For applying glue precisely.
* Paper Towels: For cleaning up spills.
Drilling the Coffee Beans
This is arguably the most crucial step, so pay close attention! Drilling the beans allows you to string them together or attach them to head pins.
1. Prepare Your Workspace: Set up your drill and ensure you have good lighting. Put on your safety glasses!
2. Choose Your Bean: Select a coffee bean that’s relatively intact and free of cracks.
3. Mark the Drilling Point: Use a pen or marker to mark the spot where you want to drill the hole. I usually aim for the center of the bean or near one of the ends, depending on the desired effect.
4. Start Drilling: Hold the coffee bean firmly with your fingers (be careful!) or use a small clamp. Start drilling slowly and gently. Apply even pressure and let the drill bit do the work. Avoid forcing it, as this can cause the bean to crack.
5. Drill Through: Continue drilling until you’ve created a hole all the way through the bean.
6. Repeat: Repeat steps 2-5 for as many coffee beans as you need for your project.
7. Clean Up: Use a small brush or toothpick to remove any coffee bean dust from the holes.
Important Tip: Practice on a few spare coffee beans first to get a feel for the drilling process. This will help you avoid cracking or damaging your good beans.
Creating Coffee Bean Earrings
Let’s start with a simple project: coffee bean earrings! These are quick to make and look absolutely adorable.
1. Prepare Your Beans: Drill holes in two coffee beans, one for each earring.
2. Attach Head Pins: Insert a head pin through the hole in each coffee bean.
3. Create a Loop: Using round nose pliers, grasp the end of the head pin and bend it into a loop. Make sure the loop is closed tightly to prevent the coffee bean from slipping off.
4. Attach Earring Hooks: Open the loop on the earring hook using chain nose pliers. Attach the coffee bean dangle to the earring hook and close the loop securely.
5. Repeat: Repeat steps 2-4 for the second earring.
6. Finishing Touches (Optional): You can add small beads or charms to the earring hooks for extra flair.
Variations:
* Stacked Beans: Use multiple coffee beans on each earring, stacking them on the head pin before creating the loop.
* Dangling Chains: Attach small chains to the bottom of the coffee bean dangle for a more dramatic look.
* Different Earring Hook Styles: Experiment with different earring hook styles to find one that you like best.
Crafting a Coffee Bean Necklace
Now, let’s move on to a slightly more complex project: a coffee bean necklace. There are several ways to create a coffee bean necklace, so I’ll outline a few different options.
Option 1: Simple Stringing
This is the easiest method, perfect for beginners.
1. Prepare Your Beans: Drill holes in all the coffee beans you’ll need for your necklace. The number of beans will depend on the desired length of the necklace.
2. String the Beans: Thread the coffee beans onto a necklace chain or a piece of strong cord.
3. Attach a Clasp: Attach a clasp to each end of the chain or cord using jump rings. Make sure the jump rings are closed securely.
Option 2: Wire-Wrapped Necklace
This method involves wrapping wire around each coffee bean to create a more secure and decorative connection.
1. Prepare Your Beans: Drill holes in all the coffee beans you’ll need.
2. Cut Wire: Cut a length of wire (about 4-6 inches) for each coffee bean.
3. Wrap the Wire: Thread the wire through the hole in the coffee bean. Bend the wire in half and twist it around itself just above the bean.
4. Create Loops: Use round nose pliers to create a loop at the end of each wire.
5. Connect the Beans: Connect the coffee beans together by linking the loops.
6. Attach a Clasp: Attach a clasp to each end of the necklace using jump rings.
Option 3: Glue-On Pendant
If you prefer not to drill, you can glue a coffee bean to a pendant bail.
1. Choose a Pendant Bail: Select a pendant bail that’s large enough to accommodate the coffee bean.
2. Apply Glue: Apply a small amount of strong adhesive to the back of the coffee bean.
3. Attach to Bail: Press the coffee bean firmly onto the pendant bail and hold it in place until the glue sets.
4. Attach to Chain: Thread the pendant onto a necklace chain.
Variations:
* Add Beads: Incorporate beads of different sizes and colors into your necklace design.
* Use Different Chain Styles: Experiment with different chain styles to find one that complements the coffee beans.
* Create a Focal Point: Use a larger or more decorative coffee bean as a focal point in the center of the necklace.
Designing a Coffee Bean Bracelet
Finally, let’s create a coffee bean bracelet. This is a fun and versatile project that can be customized to your personal style.
1. Prepare Your Beans: Drill holes in all the coffee beans you’ll need for your bracelet. The number of beans will depend on the desired length of the bracelet.
2. String the Beans: Thread the coffee beans onto a piece of beading wire.
3. Add Crimp Beads: Add a crimp bead to each end of the beading wire.
4. Attach a Clasp: Thread the wire through one side of the clasp, then back through the crimp bead. Use crimping pliers to flatten the crimp bead and secure the wire.
5. Trim Excess Wire: Trim any excess wire
Conclusion
So, there you have it! Stepping outside the traditional planting methods and embracing these unusual onion growing methods can truly revolutionize your gardening game. We’ve explored techniques that maximize space, improve yields, and even offer a bit of horticultural fun. From the vertical charm of onion towers to the symbiotic benefits of companion planting, these approaches offer a fresh perspective on cultivating this essential vegetable.
Why is this a must-try? Because it’s about more than just growing onions; it’s about optimizing your garden, experimenting with innovative techniques, and ultimately, enjoying a more bountiful harvest. Imagine the satisfaction of pulling plump, healthy onions from a space-saving tower or witnessing the enhanced growth spurred by strategic companion planting. These methods aren’t just about efficiency; they’re about fostering a deeper connection with your garden and unlocking its full potential.
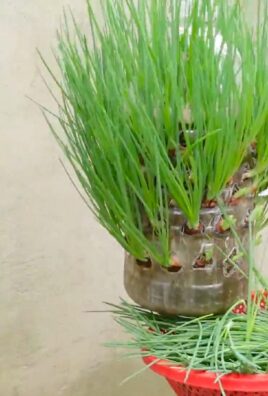
Consider these suggestions and variations to tailor these methods to your specific needs and preferences. For onion towers, experiment with different materials for construction, such as repurposed plastic bottles or stacked tires. Adjust the spacing between onions based on the variety you’re growing, giving larger varieties more room to thrive. When it comes to companion planting, research which plants offer the most significant benefits to your onions in your specific climate and soil conditions. Garlic, carrots, and chamomile are often cited as excellent companions, but local variations may exist. You can also try intercropping onions with fast-growing greens like lettuce or spinach to maximize space utilization.
Don’t be afraid to get creative and adapt these unusual onion growing methods to your unique gardening style. The key is to observe your plants closely, monitor their growth, and make adjustments as needed. Gardening is an ongoing learning process, and these techniques offer a fantastic opportunity to expand your knowledge and skills.
We are confident that incorporating these methods will lead to a more productive and enjoyable gardening experience. The beauty of these approaches lies in their adaptability. Whether you’re a seasoned gardener or just starting out, there’s a variation that will suit your skill level and available resources. The potential for increased yields, space optimization, and overall garden health makes these unusual onion growing methods a worthwhile investment of your time and effort.
Now, it’s your turn! We encourage you to try these unusual onion growing methods in your own garden. Document your progress, experiment with different variations, and most importantly, share your experiences with us. Let us know what worked, what didn’t, and any creative adaptations you came up with. Your insights will help other gardeners discover the joys and benefits of these innovative techniques. Share your photos and stories on our social media channels or in the comments section below. Let’s build a community of passionate gardeners who are pushing the boundaries of traditional cultivation and embracing the exciting world of unusual onion growing methods. We can’t wait to hear about your success!
FAQ
What are the main benefits of using unusual onion growing methods?
The primary benefits include increased yields, optimized space utilization, improved soil health, and enhanced pest control. Techniques like onion towers allow you to grow more onions in a smaller area, while companion planting can deter pests and diseases naturally. These methods also encourage experimentation and a deeper understanding of plant interactions.
Are these methods suitable for beginner gardeners?
Yes, many of these methods are suitable for beginners. While some, like constructing a complex onion tower, might require a bit more effort, others, such as simple companion planting, are easy to implement. Start with a less complex method and gradually explore more advanced techniques as you gain experience. The key is to research and understand the basic principles before diving in.
What type of onions are best suited for these methods?
Most onion varieties can be grown using these methods, but some may be better suited than others. Smaller to medium-sized varieties tend to thrive in onion towers, while larger varieties might benefit more from companion planting in traditional garden beds. Consider the size and growth habit of the onion variety when choosing a method. Also, consider the climate and growing season in your area when selecting onion varieties.
How often should I water onions grown using these methods?
Watering frequency depends on several factors, including the method used, the climate, and the soil type. Onions grown in towers may dry out more quickly than those grown in the ground, so they might require more frequent watering. Check the soil moisture regularly and water when the top inch feels dry. Avoid overwatering, as this can lead to root rot.
What are some common problems I might encounter, and how can I address them?
Common problems include pest infestations, diseases, and nutrient deficiencies. Companion planting can help deter pests, while proper watering and soil drainage can prevent diseases. If you notice signs of nutrient deficiencies, such as yellowing leaves, amend the soil with compost or a balanced fertilizer. Regularly inspect your plants for any signs of problems and address them promptly.
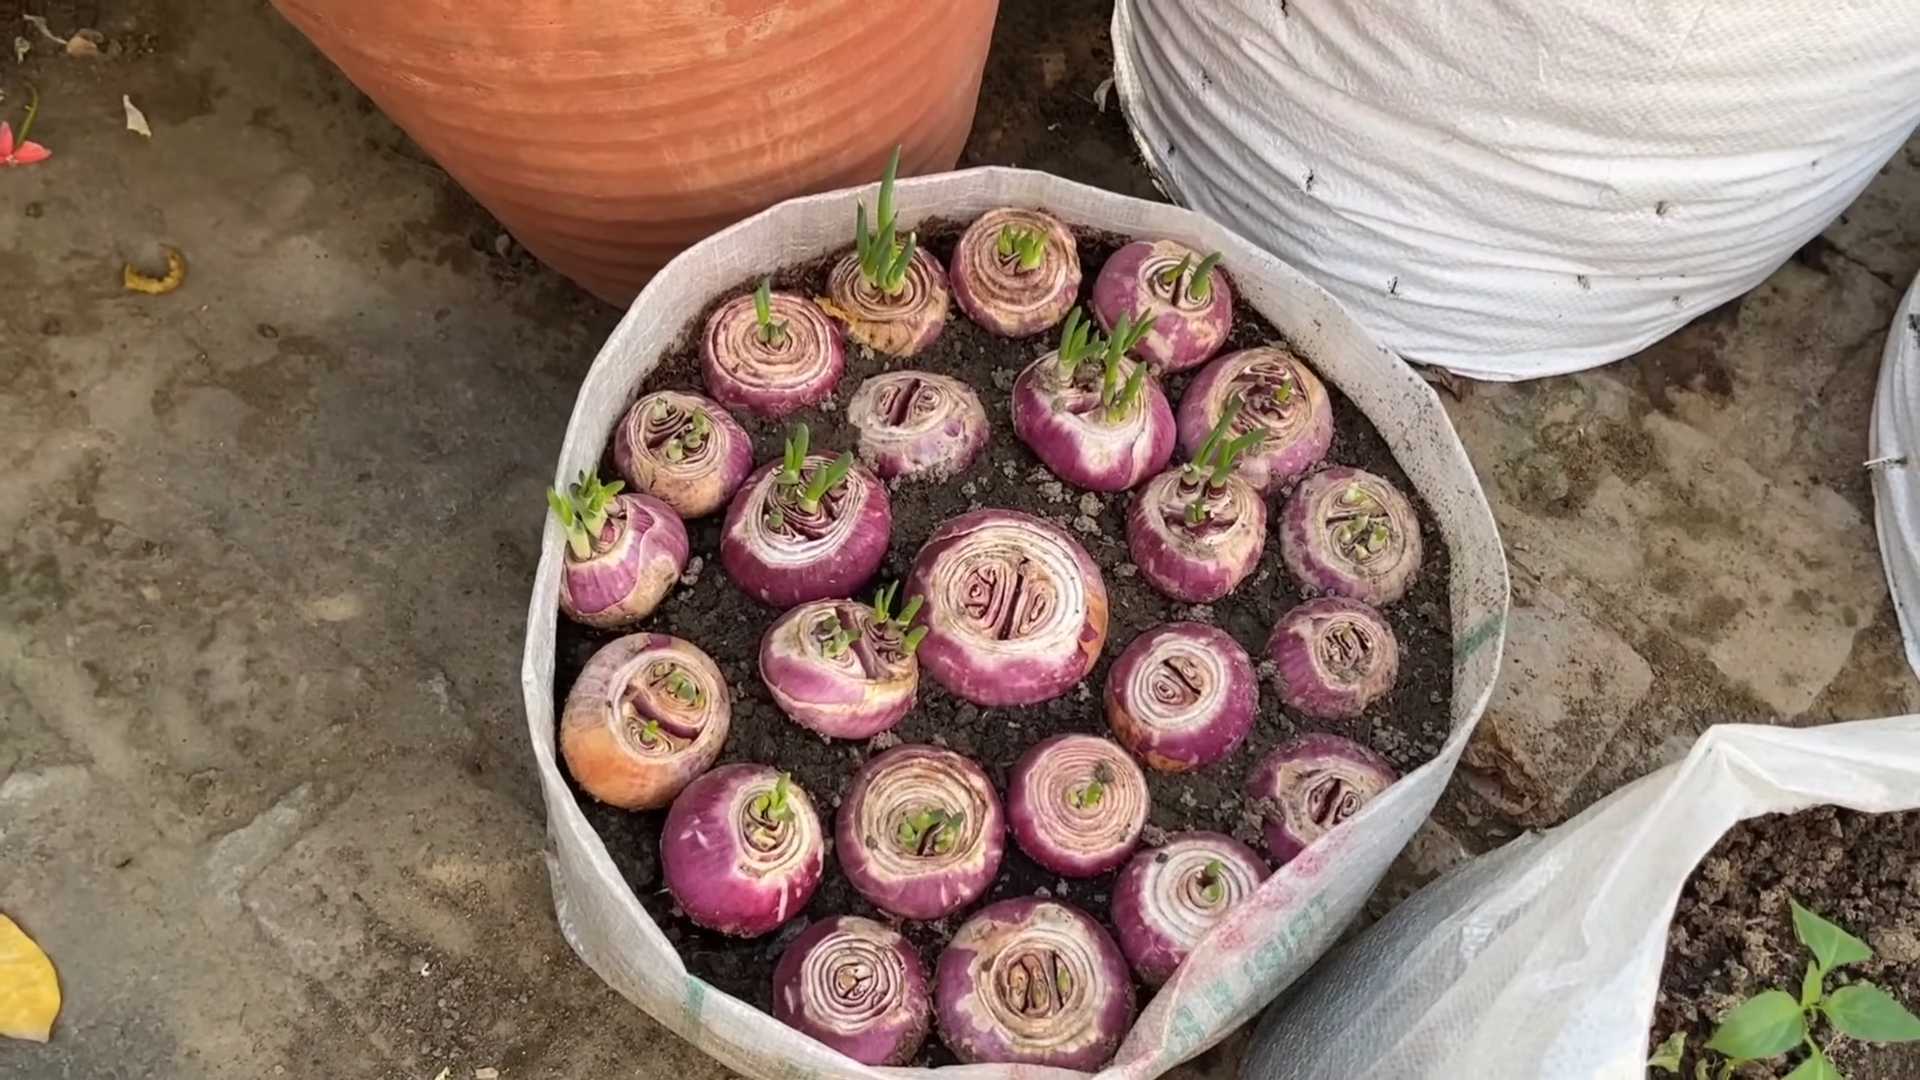
Can I use these methods in containers or raised beds?
Yes, these methods can be adapted for use in containers or raised beds. Onion towers can be constructed in containers, and companion planting can be implemented in raised beds. Ensure that the containers or raised beds are large enough to accommodate the onions and their companion plants. Also, use a well-draining potting mix or soil.
What are some good companion plants for onions?
Excellent companion plants for onions include carrots, garlic, chamomile, marigolds, and lettuce. Carrots deter onion flies, while onions deter carrot flies. Garlic has similar pest-repelling properties. Chamomile attracts beneficial insects, while marigolds deter nematodes. Lettuce provides ground cover and helps retain moisture.
How do I know when my onions are ready to harvest?
Onions are typically ready to harvest when the tops begin to fall over and turn yellow or brown. You can also check the size of the bulbs. If they are plump and well-formed, they are likely ready to harvest. Gently pull the onions from the soil and allow them to cure in a dry, well-ventilated place for a week or two before storing them.
How do I store onions after harvesting?
After curing, store onions in a cool, dry, and well-ventilated place. Braiding the tops together and hanging them is a traditional method of storage. You can also store them in mesh bags or crates. Avoid storing onions near potatoes, as they can cause each other to spoil more quickly. Properly stored onions can last for several months.
What if I don’t have a lot of space for a traditional garden?
That’s precisely where these unusual onion growing methods shine! Techniques like onion towers and container gardening are perfect for small spaces, such as balconies, patios, or even indoor growing setups. You can still enjoy a bountiful harvest of fresh onions even if you don’t have access to a large garden. Vertical gardening, in particular, is a game-changer for urban gardeners.
Leave a Comment