
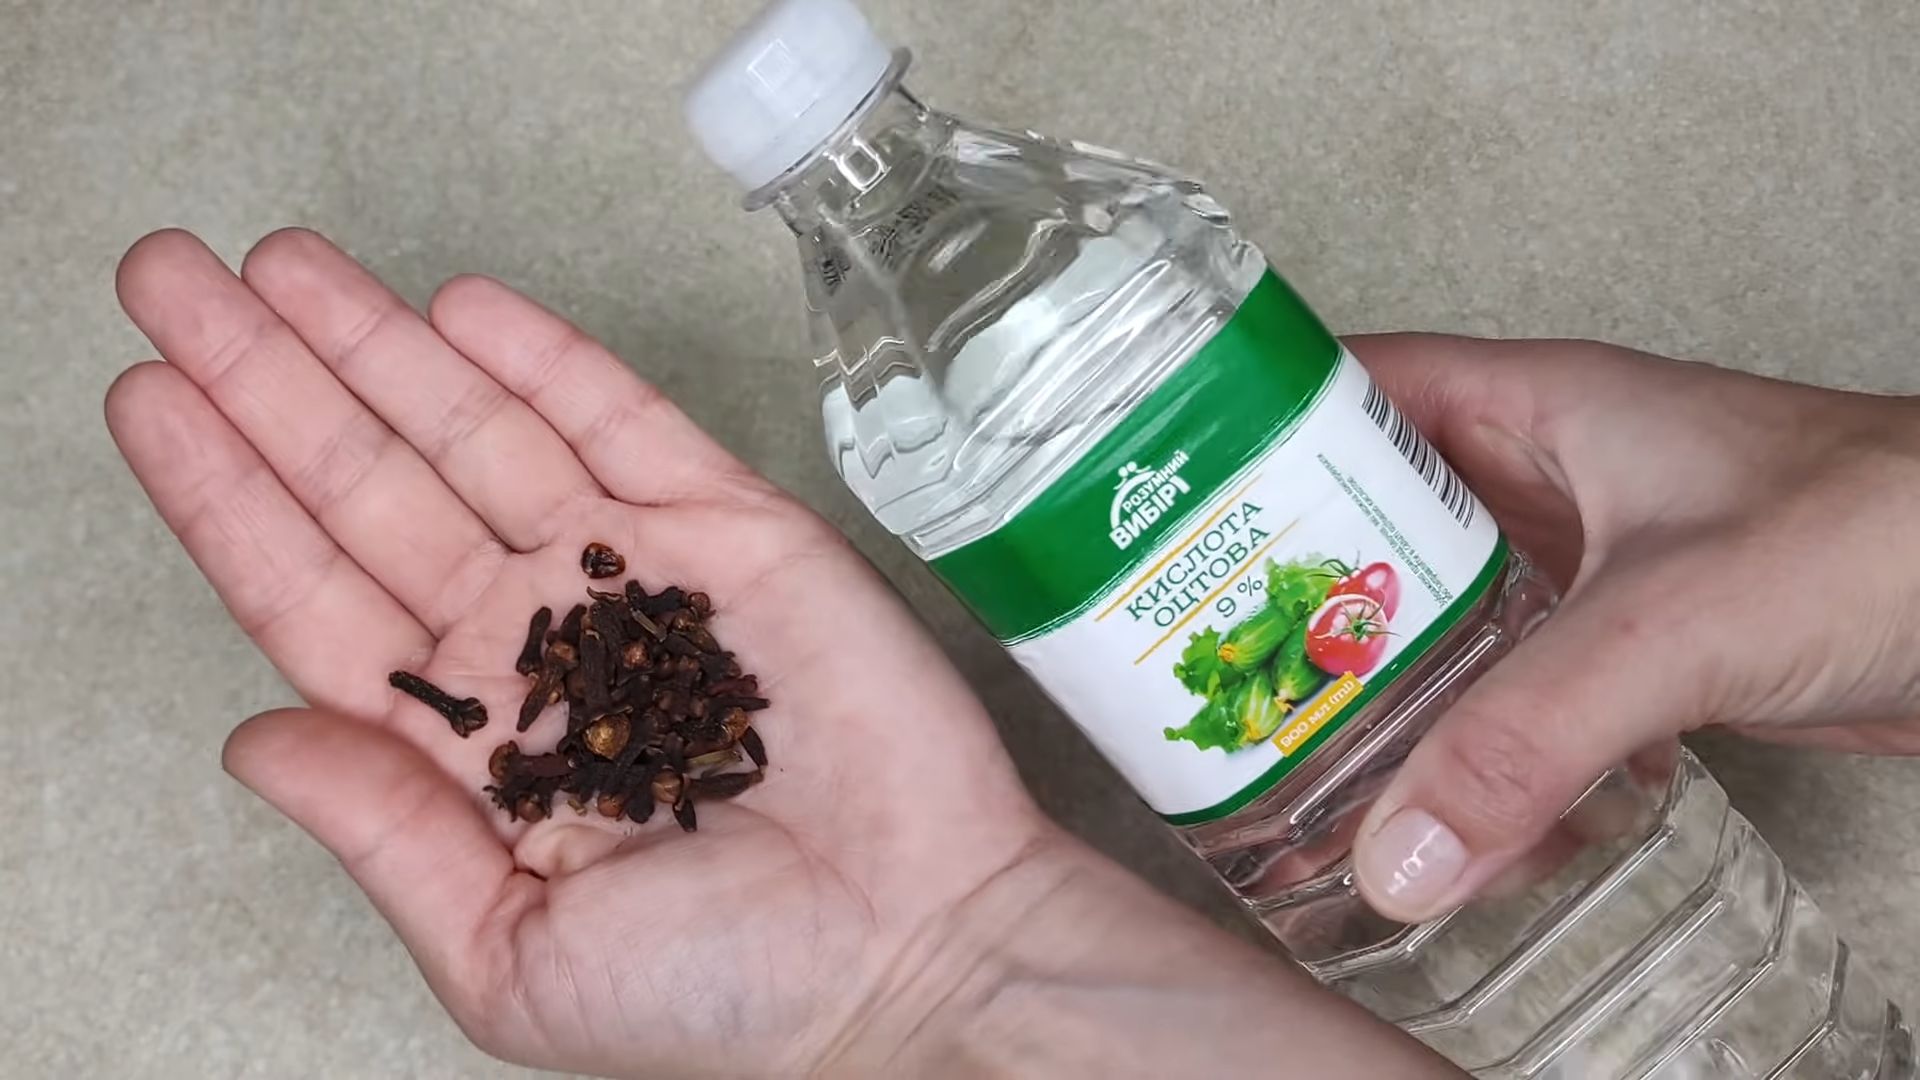
Vinegar and cloves benefits are more than just a fragrant kitchen staple; they’re a secret weapon for a thriving, pest-free garden! Have you ever dreamt of strolling through your backyard oasis, admiring vibrant blooms and bountiful harvests, without the constant worry of pesky insects ruining your hard work? I know I have! For centuries, gardeners have sought natural, effective ways to protect their plants, and the combination of vinegar and cloves offers a time-tested solution rooted in traditional practices.
Think back to your grandmother’s garden, where she might have used simple, readily available ingredients to keep her plants healthy. This DIY trick is a modern take on those age-old methods. In a world increasingly concerned with harsh chemicals and their impact on the environment, embracing natural alternatives like vinegar and cloves is not only smart but also responsible. This article will show you how to harness the incredible vinegar and cloves benefits to create a safe and effective pest repellent, saving you money and protecting your precious plants. Let’s dive in and unlock the secrets to a healthier, happier garden, naturally!
Growing Chili Peppers Like a Pro: My Foolproof DIY Guide
Okay, chili pepper enthusiasts, gather ’round! I’m about to share my tried-and-true method for growing a bumper crop of fiery chilies, even if you think you have a “brown thumb.” This isn’t just about throwing some seeds in the ground and hoping for the best. We’re going to dive deep into the process, from seed starting to harvesting, ensuring you get the hottest, most flavorful peppers possible. Let’s get started!
Choosing Your Chili Pepper Variety
Before we even think about soil, we need to decide what kind of heat we’re craving. The world of chili peppers is vast and varied, ranging from mild and fruity to face-meltingly hot. Here’s a quick rundown to get you thinking:
* Bell Peppers: Okay, these aren’t technically chilies, but they’re a great starting point if you’re new to growing peppers. They’re sweet, mild, and perfect for stuffing.
* Poblano: These are mild to medium heat, with a rich, earthy flavor. Perfect for chili rellenos!
* Jalapeño: A classic! Medium heat, versatile, and great for pickling, salsa, or adding a kick to your favorite dishes.
* Serrano: Hotter than jalapeños, with a bright, fresh flavor. Use sparingly!
* Cayenne: These are hot and spicy, perfect for making your own chili powder or hot sauce.
* Habanero: Now we’re talking serious heat! Fruity and floral, but proceed with caution.
* Scotch Bonnet: Similar to habaneros in heat and flavor, but with a slightly different profile.
* Ghost Pepper (Bhut Jolokia): Extremely hot! Only for the truly adventurous.
* Carolina Reaper: The current world record holder for hottest pepper. Handle with extreme care!
My tip: Start with a few different varieties to see what you like best. I always grow jalapeños, cayennes, and something a little more exotic like habaneros or scotch bonnets.
Phase 1: Starting Your Chili Pepper Seeds Indoors
Chili peppers need a long growing season, so starting them indoors is crucial, especially if you live in a cooler climate. I usually start my seeds about 8-10 weeks before the last expected frost.
What you’ll need:
* Chili pepper seeds (obviously!)
* Seed starting trays or small pots
* Seed starting mix (this is important! Regular potting soil is too heavy)
* A spray bottle
* A heat mat (optional, but highly recommended)
* A grow light (also optional, but will give you stronger seedlings)
* A humidity dome (or plastic wrap)
Step-by-step instructions:
1. Prepare your seed starting trays: Fill your seed starting trays or small pots with seed starting mix. Gently tap the trays to settle the soil.
2. Sow the seeds: Make a small indentation (about 1/4 inch deep) in the center of each cell or pot. Drop 1-2 seeds into each indentation. Cover the seeds with seed starting mix and gently pat down.
3. Water gently: Use a spray bottle to mist the soil thoroughly. You want the soil to be moist, but not soggy.
4. Provide warmth: Place the seed starting trays on a heat mat. Chili pepper seeds germinate best in warm temperatures (around 80-85°F).
5. Maintain humidity: Cover the seed starting trays with a humidity dome or plastic wrap. This will help to keep the soil moist and create a humid environment, which is ideal for germination.
6. Provide light: If you’re using a grow light, position it a few inches above the seed starting trays. If you’re not using a grow light, place the trays in a sunny window.
7. Monitor and water: Check the soil moisture daily. If the soil feels dry, mist it with a spray bottle.
8. Wait patiently: Chili pepper seeds can take anywhere from 7-21 days to germinate, depending on the variety and the temperature.
9. Remove the humidity dome: Once the seedlings emerge, remove the humidity dome or plastic wrap.
10. Thin the seedlings: If you planted more than one seed per cell or pot, thin the seedlings to one per cell or pot. Choose the strongest seedling and snip off the others at the soil line.
11. Keep the light on: Continue to provide light for 14-16 hours per day.
12. Water regularly: Water the seedlings when the soil feels dry to the touch.
13. Fertilize lightly: Once the seedlings have their first true leaves (the leaves that look like miniature versions of the adult leaves), start fertilizing them with a diluted liquid fertilizer. I like to use a balanced fertilizer (like 20-20-20) diluted to half strength.
Phase 2: Transplanting Your Chili Pepper Seedlings
Once your seedlings are a few inches tall and have a few sets of true leaves, it’s time to transplant them into larger pots. This will give them more room to grow and develop a strong root system.
What you’ll need:
* Larger pots (at least 4 inches in diameter)
* Potting soil (a good quality potting soil is fine for this stage)
* A trowel
* Water
Step-by-step instructions:
1. Prepare the pots: Fill the larger pots with potting soil.
2. Gently remove the seedlings: Carefully remove the seedlings from their seed starting trays or small pots. Be gentle, as the roots are delicate. I like to use a small trowel to loosen the soil around the edges of the pot.
3. Transplant the seedlings: Make a small hole in the center of each pot. Place the seedling in the hole and gently backfill with potting soil.
4. Water thoroughly: Water the seedlings thoroughly after transplanting.
5. Provide light: Continue to provide light for 14-16 hours per day.
6. Fertilize regularly: Continue to fertilize the seedlings with a diluted liquid fertilizer every 1-2 weeks.
Phase 3: Hardening Off Your Chili Pepper Seedlings
Before you can plant your chili pepper seedlings outdoors, you need to “harden them off.” This process gradually acclimates the seedlings to the outdoor environment, preventing them from being shocked by the sun, wind, and temperature changes.
Step-by-step instructions:
1. Start slowly: On the first day, place the seedlings outdoors in a sheltered location (like a porch or patio) for just an hour or two.
2. Increase the time gradually: Each day, increase the amount of time that the seedlings spend outdoors by an hour or two.
3. Protect from harsh conditions: If the weather is particularly windy, sunny, or cold, bring the seedlings back indoors.
4. After a week or two: After a week or two of hardening off, the seedlings should be ready to be planted outdoors.
Phase 4: Planting Your Chili Peppers Outdoors
Now for the fun part! Planting your chili peppers in their final home.
What you’ll need:
* Your hardened-off chili pepper seedlings
* A sunny location (at least 6-8 hours of sunlight per day)
* Well-drained soil
* Compost or other organic matter
* A trowel
* Water
* Mulch (optional)
* Stakes or cages (optional, but recommended for taller varieties)
Step-by-step instructions:
1. Choose a sunny location: Chili peppers need plenty of sunlight to thrive. Choose a location that gets at least 6-8 hours of sunlight per day.
2. Prepare the soil: Chili peppers prefer well-drained soil that is rich in organic matter. Amend the soil with compost or other organic matter before planting.
3. Dig the holes: Dig holes that are slightly larger than the root balls of the seedlings. Space the holes about 18-24 inches apart, depending on the variety.
4. Plant the seedlings: Gently remove the seedlings from their pots and place them in the holes. Backfill with soil and gently pat down.
5. Water thoroughly: Water the seedlings thoroughly after planting.
6. Mulch (optional): Apply a layer of mulch around the plants to help retain moisture and suppress weeds.
7. Stake or cage (optional): If you’re growing taller varieties of chili peppers, you may want to stake or cage them to provide support.
Phase 5: Caring for Your Chili Pepper Plants
Once your chili peppers
Conclusion
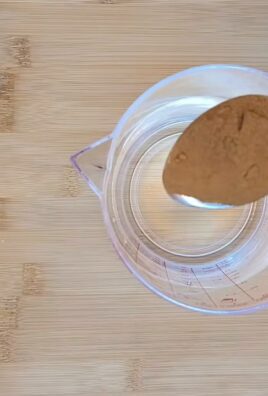
So, there you have it! This simple yet powerful DIY trick of infusing vinegar with cloves is more than just a kitchen experiment; it’s a gateway to a healthier, more aromatic, and naturally clean home. We’ve explored the incredible vinegar and cloves benefits, from their potent antimicrobial properties to their ability to banish unwanted odors and even deter pesky insects. It’s a cost-effective, eco-friendly alternative to harsh chemical cleaners and air fresheners, and it’s incredibly easy to make.
But the real magic lies in its versatility. Feel free to experiment with different types of vinegar. White vinegar is a workhorse for cleaning, while apple cider vinegar adds a slightly sweeter note and boasts its own set of health benefits. You can also adjust the clove concentration to suit your preferences. For a more intense aroma, add a few extra cloves. For a milder scent, reduce the quantity.
Consider adding other complementary ingredients to further customize your infused vinegar. A few sprigs of rosemary or lavender can enhance the fragrance and add extra antiseptic properties. Orange or lemon peels can provide a citrusy boost and help cut through grease. A cinnamon stick can introduce a warm, spicy aroma, perfect for the fall and winter months.
This DIY trick isn’t just about creating a cleaning solution; it’s about embracing a more sustainable and mindful lifestyle. It’s about taking control of the ingredients you use in your home and reducing your reliance on harmful chemicals. It’s about harnessing the power of nature to create a healthier and more pleasant environment for yourself and your loved ones.
We wholeheartedly encourage you to try this simple yet transformative DIY trick. Experience the vinegar and cloves benefits firsthand and discover the many ways it can improve your home and well-being. Once you’ve given it a try, we’d love to hear about your experience! Share your variations, your successes, and any challenges you encountered in the comments below. Let’s build a community of DIY enthusiasts who are passionate about natural cleaning and sustainable living. Your insights could inspire others to embrace this simple yet powerful solution and unlock the incredible potential of vinegar and cloves. Don’t hesitate to share your unique twists and creative applications – the possibilities are truly endless!
Frequently Asked Questions (FAQs)
What type of vinegar is best for infusing with cloves?
White vinegar is generally considered the best option for cleaning purposes due to its high acidity and neutral scent. It’s a powerful disinfectant and degreaser, making it ideal for tackling tough stains and grime. Apple cider vinegar is another popular choice, offering a slightly milder scent and additional health benefits. However, its darker color may stain some surfaces, so it’s best to test it in an inconspicuous area first. You can also experiment with other types of vinegar, such as red wine vinegar or rice vinegar, but keep in mind that their distinct aromas may affect the final scent of your infused vinegar.
How long should I infuse the vinegar with cloves?
For optimal results, it’s recommended to infuse the vinegar with cloves for at least two weeks. This allows the cloves to fully release their essential oils and beneficial compounds into the vinegar. You can infuse it for longer, up to a month or even longer, for a more potent infusion. Store the mixture in a cool, dark place during the infusion process to prevent degradation of the essential oils.
Can I use ground cloves instead of whole cloves?
While you can use ground cloves, whole cloves are generally preferred for infusing vinegar. Whole cloves release their essential oils more slowly and evenly, resulting in a more balanced and flavorful infusion. Ground cloves, on the other hand, may release their oils too quickly, leading to a potentially overpowering scent and a cloudy appearance. Additionally, ground cloves can leave a residue in the vinegar, which may require filtering before use.
What are some specific uses for vinegar infused with cloves?
The possibilities are endless! Here are a few ideas:
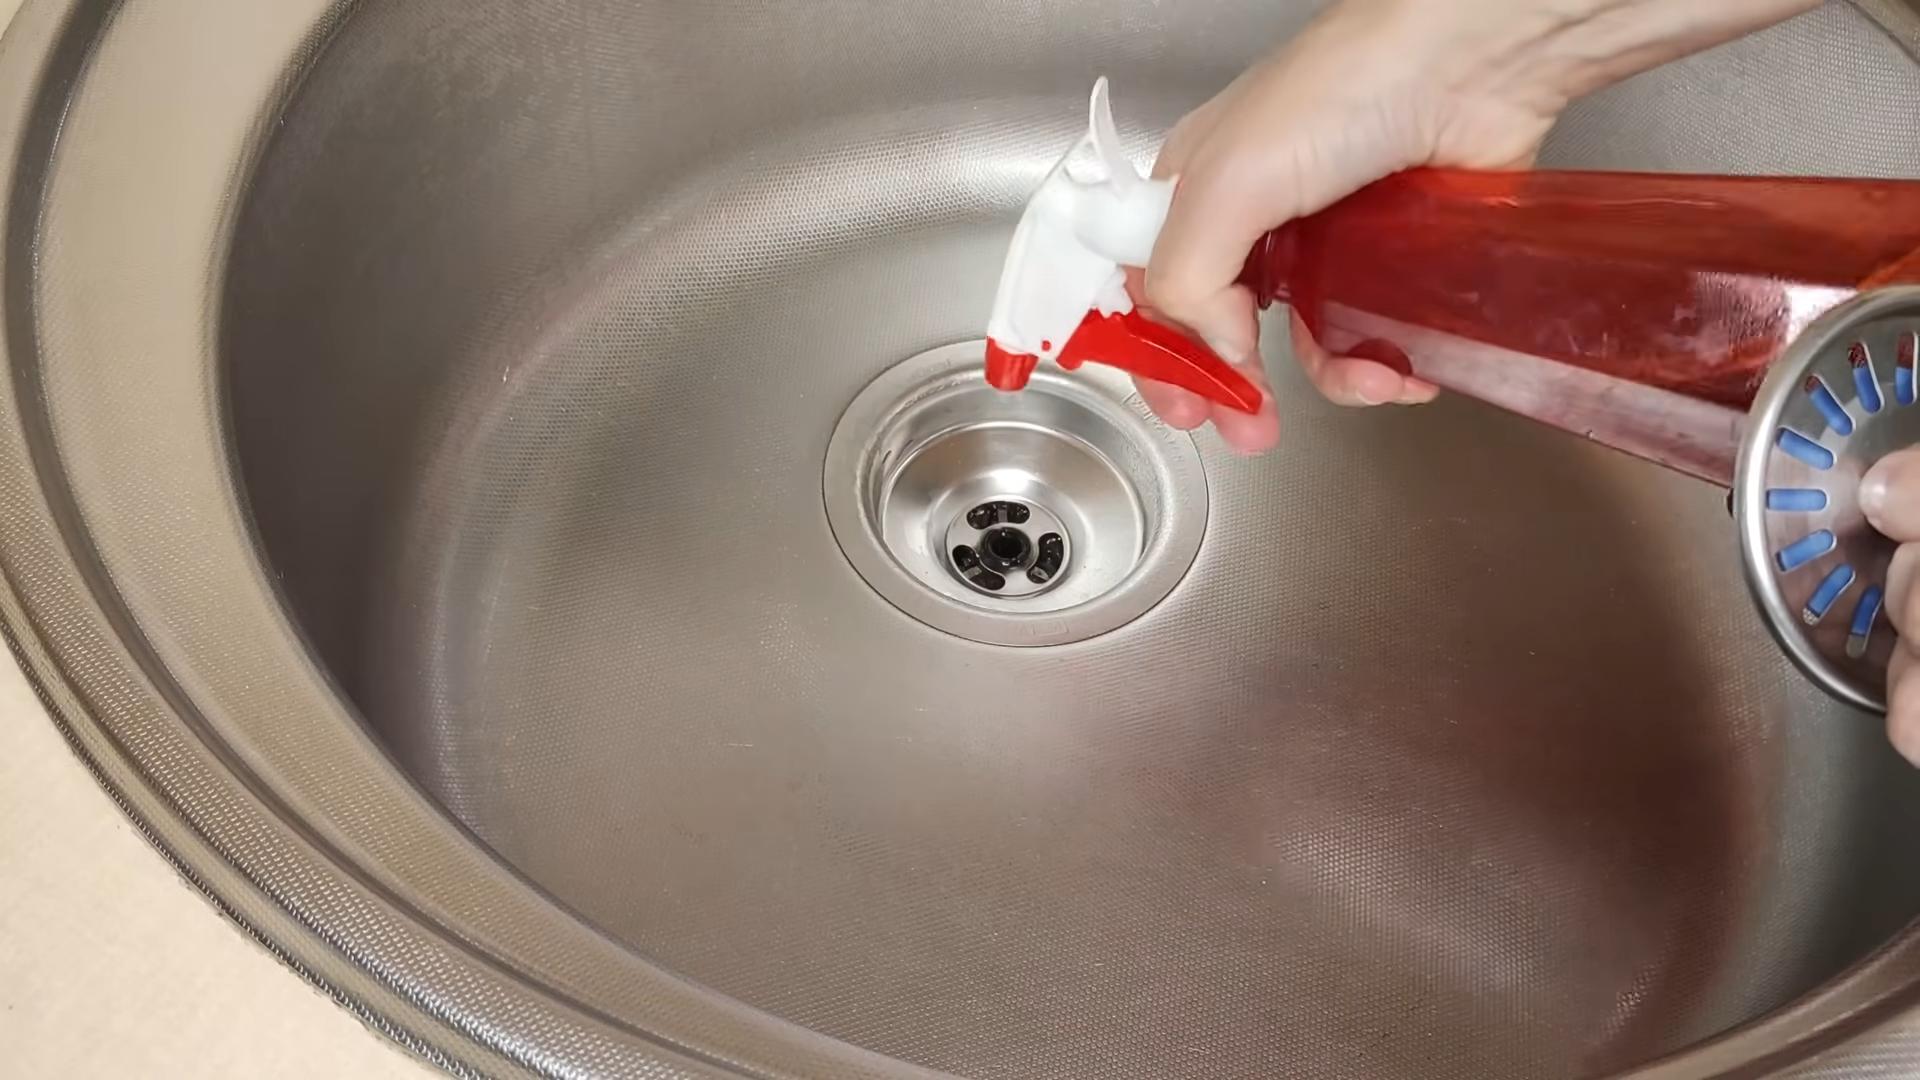
* **All-purpose cleaner:** Dilute the infused vinegar with water (usually a 1:1 ratio) and use it to clean countertops, sinks, toilets, and other surfaces.
* **Air freshener:** Pour the infused vinegar into a spray bottle and spritz it around your home to eliminate odors and freshen the air.
* **Insect repellent:** Spray the infused vinegar around windows and doors to deter insects.
* **Laundry booster:** Add a cup of infused vinegar to your laundry to brighten whites, remove odors, and soften fabrics.
* **Weed killer:** Spray undiluted infused vinegar on weeds to kill them naturally.
* **Fruit fly trap:** Pour a small amount of infused vinegar into a jar and cover it with plastic wrap. Poke a few holes in the plastic wrap to trap fruit flies.
Is vinegar infused with cloves safe to use on all surfaces?
While vinegar is generally safe to use on most surfaces, it’s important to exercise caution when using it on certain materials. Avoid using vinegar on marble, granite, and other natural stone surfaces, as it can etch and damage them. It’s also best to avoid using vinegar on waxed wood, as it can strip the wax finish. Always test the infused vinegar in an inconspicuous area before using it on a larger surface.
How should I store the infused vinegar?
Store the infused vinegar in a cool, dark place in an airtight container. This will help to preserve its potency and prevent the essential oils from degrading. The infused vinegar can last for several months, or even longer, if stored properly.
Can I reuse the cloves after infusing the vinegar?
While the cloves will have released most of their essential oils during the infusion process, you can still reuse them in other ways. You can add them to potpourri, use them to make a spice blend, or even add them to your compost pile.
Are there any precautions I should take when using vinegar infused with cloves?
While vinegar is generally safe, it’s important to avoid contact with your eyes. If you do get vinegar in your eyes, rinse them thoroughly with water. It’s also a good idea to wear gloves when cleaning with vinegar, especially if you have sensitive skin. As with any cleaning product, keep vinegar out of reach of children and pets.
Can I add essential oils to the vinegar and clove mixture?
Absolutely! Adding essential oils can enhance the scent and therapeutic properties of your infused vinegar. Some popular choices include lavender, lemon, eucalyptus, and tea tree oil. Add a few drops of your favorite essential oil to the infused vinegar after it has been strained.
What if my infused vinegar becomes cloudy?
Cloudiness in your infused vinegar is usually harmless and is often caused by the release of pectin from the cloves. It doesn’t affect the effectiveness of the vinegar. You can strain the vinegar through a coffee filter or cheesecloth to remove the cloudiness if desired.
Leave a Comment