
Wooden Board Cleaner: Are your beautiful wooden cutting boards looking a little worse for wear? Don’t despair! Before you think about tossing them out and buying new ones, I’m here to share some amazing DIY tricks that will breathe new life into your cherished kitchen companions. This isn’t just about cleaning; it’s about preserving a piece of culinary history.
For centuries, wooden boards have been essential tools in kitchens around the world. From simple breadboards to elaborate butcher blocks, they represent a connection to traditional food preparation. But with constant use, they can accumulate stains, odors, and even bacteria. That’s where a good wooden board cleaner comes in handy!
Let’s face it, nobody wants to chop vegetables on a surface that’s harboring hidden nasties. Store-bought cleaners can be expensive and often contain harsh chemicals. That’s why I’m so excited to show you how to create your own effective and affordable cleaning solutions using ingredients you probably already have in your pantry. These DIY tricks are not only budget-friendly but also environmentally conscious, allowing you to keep your wooden boards sparkling clean and safe for years to come. Get ready to roll up your sleeves and discover the secrets to a spotless and healthy kitchen!

DIY Wooden Cutting Board Cleaner and Restorer
Hey there, fellow DIY enthusiasts! I’m so excited to share my go-to method for cleaning and restoring wooden cutting boards. We all know how essential these boards are in the kitchen, but they can quickly become breeding grounds for bacteria and develop unsightly stains and knife marks. Don’t worry, though! With a few simple ingredients and a little elbow grease, you can bring your beloved wooden cutting board back to life. This method is all-natural, food-safe, and incredibly effective. Let’s get started!
What You’ll Need: The Arsenal of Clean
Before we dive in, let’s gather our supplies. This is a pretty straightforward process, and you probably already have most of these items in your pantry.
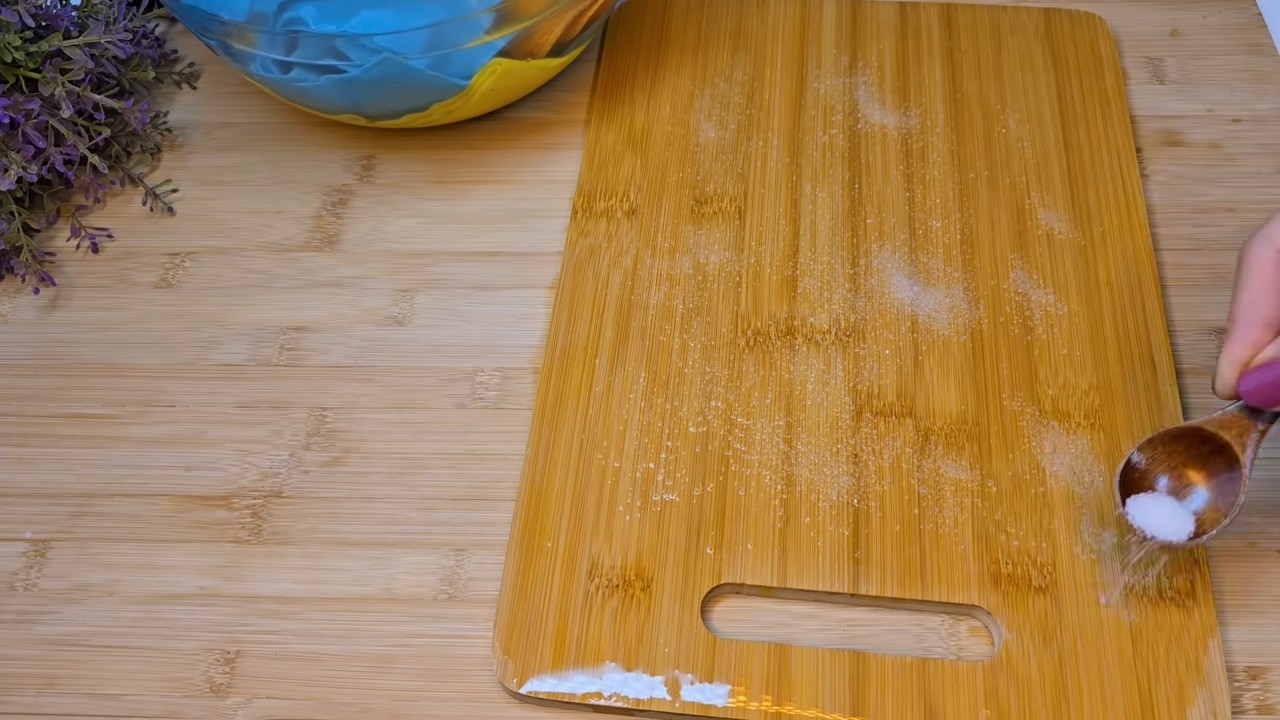
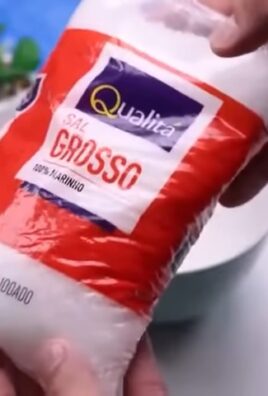
* Coarse Salt: This acts as a gentle abrasive to scrub away food particles and stains. I prefer kosher salt, but any coarse salt will do.
* Lemon: The acidity of the lemon helps to disinfect and deodorize the board. Plus, it smells amazing!
* White Vinegar: Another fantastic disinfectant and cleaning agent. It’s a powerhouse for removing stubborn stains.
* Baking Soda: This helps to neutralize odors and provides a bit of extra scrubbing power.
* Food-Grade Mineral Oil: This is crucial for rehydrating the wood and preventing it from cracking. Don’t use cooking oils, as they can go rancid.
* Beeswax (Optional): If you want to create a cutting board conditioner for extra protection, you’ll need beeswax.
* Clean Rags or Paper Towels: For wiping and cleaning.
* Scrub Brush or Sponge: To help scrub the board.
* Small Bowl: For mixing the baking soda paste.
* Double Boiler or Microwave-Safe Bowl (Optional): For melting beeswax.
* Cheese Grater (Optional): For grating beeswax.
Step-by-Step Cleaning and Restoration
Okay, now for the fun part! Follow these steps to give your wooden cutting board a thorough cleaning and restoration.
1. Initial Scrub with Salt and Lemon:
* First, sprinkle a generous amount of coarse salt all over the surface of your cutting board. Don’t be shy!
* Next, cut a lemon in half. Use one half to scrub the salt into the board in a circular motion. Squeeze the lemon as you go to release its juice.
* Really put some muscle into it! The salt will act as an abrasive, lifting away dirt and grime, while the lemon disinfects and deodorizes.
* Continue scrubbing for about 5-10 minutes, paying extra attention to any stained or heavily used areas.
* Once you’re satisfied, rinse the board thoroughly with warm water. Make sure to remove all traces of salt and lemon.
* Pat the board dry with a clean rag or paper towel.
2. Vinegar Rinse (For Extra Disinfection):
* This step is optional, but I highly recommend it for extra disinfection, especially if you’ve been cutting raw meat or poultry.
* Simply pour a generous amount of white vinegar over the entire surface of the cutting board.
* Let it sit for about 5 minutes. The vinegar will help to kill any remaining bacteria.
* Rinse the board thoroughly with warm water and pat it dry.
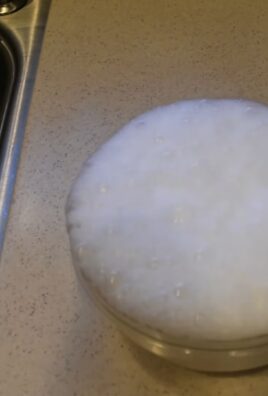
3. Baking Soda Paste (For Stubborn Stains and Odors):
* If your cutting board has stubborn stains or lingering odors, this step is a lifesaver.
* In a small bowl, mix baking soda with a little bit of water to form a thick paste.
* Apply the paste to the affected areas of the cutting board.
* Let it sit for about 15-20 minutes. The baking soda will help to absorb odors and lift away stains.
* Scrub the paste into the board with a scrub brush or sponge.
* Rinse the board thoroughly with warm water and pat it dry.
4. Drying the Board:
* This is a crucial step! You need to make sure the board is completely dry before applying mineral oil.
* Stand the board upright on its side to allow air to circulate.
* Let it dry completely, which can take anywhere from a few hours to overnight, depending on the humidity.
* Important: Never put a wet wooden cutting board in the dishwasher or leave it submerged in water. This can cause it to warp and crack.
Rehydrating and Protecting the Wood: The Mineral Oil Treatment
Now that our cutting board is clean and dry, it’s time to rehydrate the wood with mineral oil. This will prevent it from drying out, cracking, and absorbing unwanted odors.
1. Applying the Mineral Oil:
* Pour a generous amount of food-grade mineral oil onto the surface of the cutting board.
* Use a clean rag or paper towel to spread the oil evenly over the entire board, including the edges and sides.
* Don’t be afraid to really saturate the wood. A dry board will soak up the oil like a sponge.
* Let the oil sit for at least a few hours, or even overnight. This will allow the oil to penetrate deep into the wood fibers.
* After the oil has had time to soak in, wipe off any excess oil with a clean rag or paper towel. You don’t want the board to feel greasy.
2. Repeat as Needed:
* For a brand new cutting board, I recommend applying mineral oil several times in the first few weeks.
* After that, you can apply mineral oil as needed, whenever the board starts to look dry or feels rough to the touch.
* A good rule of thumb is to oil your cutting board at least once a month, or more often if you use it frequently.
Optional: Creating a Cutting Board Conditioner with Beeswax
If you want to take your cutting board protection to the next level, you can create a simple cutting board conditioner with beeswax and mineral oil. This will provide an extra layer of protection against moisture and wear.
1. Melting the Beeswax:
* You’ll need about 1 part beeswax to 4 parts mineral oil. For example, if you’re using 1 cup of mineral oil, you’ll need 1/4 cup of beeswax.
* Grate the beeswax using a cheese grater. This will help it melt more quickly and evenly.
* Place the grated beeswax and mineral oil in a double boiler or a microwave-safe bowl.
* If using a double boiler, heat over low heat until the beeswax is completely melted.
* If using a microwave, heat in 30-second intervals, stirring in between, until the beeswax is completely melted. Be careful not to overheat the mixture.
2. Applying the Conditioner:
* Let the mixture cool slightly until it’s warm but not hot.
* Pour a small amount of the conditioner onto the surface of the cutting board.
* Use a clean rag or paper towel to spread the conditioner evenly over the entire board.
* Let the conditioner sit for at least a few hours, or even overnight.
* Wipe off any excess conditioner with a clean rag or paper towel.
Maintaining Your Clean and Restored Cutting Board
Now that you’ve put in the effort to clean and restore your wooden cutting board, it’s important to maintain it properly to keep it in good condition for years to come.
* Wash your cutting board after each use: Use warm, soapy water and a scrub brush or sponge.
* Dry your cutting board thoroughly: Stand it upright on its side to allow air to circulate.
* Avoid using harsh chemicals or abrasive cleaners: These can damage the wood.
Hey there, fellow DIY enthusiasts! I’m so excited to share my go-to method for cleaning and restoring wooden cutting boards. We all know how essential these boards are in the kitchen, but they can quickly become breeding grounds for bacteria and develop unsightly stains and knife marks. Don’t worry, though! With a few simple ingredients and a little elbow grease, you can bring your beloved wooden cutting board back to life. This method is all-natural, food-safe, and incredibly effective. Let’s get started!
What You’ll Need: The Arsenal of Clean
Before we dive in, let’s gather our supplies. This is a pretty straightforward process, and you probably already have most of these items in your pantry.
* Coarse Salt: This acts as a gentle abrasive to scrub away food particles and stains. I prefer kosher salt, but any coarse salt will do.
* Lemon: The acidity of the lemon helps to disinfect and deodorize the board. Plus, it smells amazing!
* White Vinegar: Another fantastic disinfectant and cleaning agent. It’s a powerhouse for removing stubborn stains.
* Baking Soda: This helps to neutralize odors and provides a bit of extra scrubbing power.
* Food-Grade Mineral Oil: This is crucial for rehydrating the wood and preventing it from cracking. Don’t use cooking oils, as they can go rancid.
* Beeswax (Optional): If you want to create a cutting board conditioner for extra protection, you’ll need beeswax.
* Clean Rags or Paper Towels: For wiping and cleaning.
* Scrub Brush or Sponge: To help scrub the board.
* Small Bowl: For mixing the baking soda paste.
* Double Boiler or Microwave-Safe Bowl (Optional): For melting beeswax.
* Cheese Grater (Optional): For grating beeswax.
Step-by-Step Cleaning and Restoration
Okay, now for the fun part! Follow these steps to give your wooden cutting board a thorough cleaning and restoration.
1. Initial Scrub with Salt and Lemon:
* First, sprinkle a generous amount of coarse salt all over the surface of your cutting board. Don’t be shy!
* Next, cut a lemon in half. Use one half to scrub the salt into the board in a circular motion. Squeeze the lemon as you go to release its juice.
* Really put some muscle into it! The salt will act as an abrasive, lifting away dirt and grime, while the lemon disinfects and deodorizes.
* Continue scrubbing for about 5-10 minutes, paying extra attention to any stained or heavily used areas.
* Once you’re satisfied, rinse the board thoroughly with warm water. Make sure to remove all traces of salt and lemon.
* Pat the board dry with a clean rag or paper towel.
2. Vinegar Rinse (For Extra Disinfection):
* This step is optional, but I highly recommend it for extra disinfection, especially if you’ve been cutting raw meat or poultry.
* Simply pour a generous amount of white vinegar over the entire surface of the cutting board.
* Let it sit for about 5 minutes. The vinegar will help to kill any remaining bacteria.
* Rinse the board thoroughly with warm water and pat it dry.
3. Baking Soda Paste (For Stubborn Stains and Odors):
* If your cutting board has stubborn stains or lingering odors, this step is a lifesaver.
* In a small bowl, mix baking soda with a little bit of water to form a thick paste.
* Apply the paste to the affected areas of the cutting board.
* Let it sit for about 15-20 minutes. The baking soda will help to absorb odors and lift away stains.
* Scrub the paste into the board with a scrub brush or sponge.
* Rinse the board thoroughly with warm water and pat it dry.
4. Drying the Board:
* This is a crucial step! You need to make sure the board is completely dry before applying mineral oil.
* Stand the board upright on its side to allow air to circulate.
* Let it dry completely, which can take anywhere from a few hours to overnight, depending on the humidity.
* Important: Never put a wet wooden cutting board in the dishwasher or leave it submerged in water. This can cause it to warp and crack.
Rehydrating and Protecting the Wood: The Mineral Oil Treatment
Now that our cutting board is clean and dry, it’s time to rehydrate the wood with mineral oil. This will prevent it from drying out, cracking, and absorbing unwanted odors.
1. Applying the Mineral Oil:
* Pour a generous amount of food-grade mineral oil onto the surface of the cutting board.
* Use a clean rag or paper towel to spread the oil evenly over the entire board, including the edges and sides.
* Don’t be afraid to really saturate the wood. A dry board will soak up the oil like a sponge.
* Let the oil sit for at least a few hours, or even overnight. This will allow the oil to penetrate deep into the wood fibers.
* After the oil has had time to soak in, wipe off any excess oil with a clean rag or paper towel. You don’t want the board to feel greasy.
2. Repeat as Needed:
* For a brand new cutting board, I recommend applying mineral oil several times in the first few weeks.
* After that, you can apply mineral oil as needed, whenever the board starts to look dry or feels rough to the touch.
* A good rule of thumb is to oil your cutting board at least once a month, or more often if you use it frequently.
Optional: Creating a Cutting Board Conditioner with Beeswax
If you want to take your cutting board protection to the next level, you can create a simple cutting board conditioner with beeswax and mineral oil. This will provide an extra layer of protection against moisture and wear.
1. Melting the Beeswax:
* You’ll need about 1 part beeswax to 4 parts mineral oil. For example, if you’re using 1 cup of mineral oil, you’ll need 1/4 cup of beeswax.
* Grate the beeswax using a cheese grater. This will help it melt more quickly and evenly.
* Place the grated beeswax and mineral oil in a double boiler or a microwave-safe bowl.
* If using a double boiler, heat over low heat until the beeswax is completely melted.
* If using a microwave, heat in 30-second intervals, stirring in between, until the beeswax is completely melted. Be careful not to overheat the mixture.
2. Applying the Conditioner:
* Let the mixture cool slightly until it’s warm but not hot.
* Pour a small amount of the conditioner onto the surface of the cutting board.
* Use a clean rag or paper towel to spread the conditioner evenly over the entire board.
* Let the conditioner sit for at least a few hours, or even overnight.
* Wipe off any excess conditioner with a clean rag or paper towel.
Maintaining Your Clean and Restored Cutting Board
Now that you’ve put in the effort to clean and restore your wooden cutting board, it’s important to maintain it properly to keep it in good condition for years to come.
* Wash your cutting board after each use: Use warm, soapy water and a scrub brush or sponge.
* Dry your cutting board thoroughly: Stand it upright on its side to allow air to circulate.
* Avoid using harsh chemicals or abrasive cleaners: These can damage the wood.
* Reapply mineral oil regularly: This will keep the wood hydrated and prevent it from cracking.
* Sanitize your cutting board regularly: You can use a solution of white vinegar and water or a commercially available cutting board sanitizer.
* Replace your cutting board when it becomes heavily worn or damaged: Even with proper care, wooden cutting boards will eventually need to be replaced.
Important Considerations:
* Wood Type: This method works well for most wooden cutting boards, including those made from maple, walnut, cherry, and bamboo. However, be extra cautious with softer woods, as they may be more prone to scratching.
* Allergies: If you have any allergies to lemons or beeswax, be sure to take precautions or substitute with alternative ingredients. For example, you can use a different citrus fruit or skip the beeswax altogether.
* Safety: Always use caution when working with hot liquids or sharp objects.
And there you have it! A comprehensive guide to cleaning and restoring your wooden cutting board. I hope you found this helpful. With a little bit of care and attention, you can keep
Conclusion
So, there you have it! This simple, yet incredibly effective, DIY wooden board cleaner is a game-changer for anyone who values a clean and hygienic kitchen. We’ve walked you through the easy steps, highlighted the benefits, and hopefully, convinced you that ditching harsh chemicals for a natural solution is the way to go.
Why is this a must-try? Because it’s not just about cleaning; it’s about preserving your wooden boards. Commercial cleaners often contain ingredients that can dry out the wood, leading to cracks and a shorter lifespan. Our DIY cleaner, on the other hand, gently cleans while helping to maintain the wood’s natural oils, keeping it supple and resistant to bacteria. Plus, you know exactly what’s going onto your boards – no hidden chemicals or mystery ingredients!
Beyond the basic recipe, feel free to experiment! For a more intense clean, especially after working with raw meat, you can add a few drops of tea tree oil to the mixture. Tea tree oil is a natural antiseptic and will provide an extra layer of protection. Another variation involves using lemon juice instead of vinegar for a brighter, citrusy scent. Just remember that lemon juice can have a slight bleaching effect, so test it on an inconspicuous area first. You could also infuse your vinegar with herbs like rosemary or thyme for a subtle, natural fragrance that will linger on your boards.
This DIY wooden board cleaner is not just a cleaner; it’s an investment in the longevity and hygiene of your kitchen tools. It’s a small change that can make a big difference, both for your health and for the environment.
We are confident that once you try this DIY wooden board cleaner, you’ll never go back to store-bought alternatives. It’s cost-effective, eco-friendly, and incredibly effective. But don’t just take our word for it! We encourage you to give it a try and see the results for yourself.
And most importantly, we want to hear about your experience! Did you try any variations? Did you find it as effective as we did? Share your tips, tricks, and feedback in the comments below. Let’s build a community of clean, green, and happy kitchens! Your insights could help others discover the joy of natural cleaning and the satisfaction of knowing exactly what’s touching their food. So go ahead, give it a whirl, and let us know what you think! We can’t wait to hear from you.
Frequently Asked Questions (FAQ)
What types of wooden boards can I use this cleaner on?
This DIY wooden board cleaner is safe and effective for most types of wooden cutting boards and serving boards. This includes boards made from hardwoods like maple, walnut, cherry, and beech, as well as softer woods like pine. However, it’s always a good idea to test the cleaner on a small, inconspicuous area first, especially if you have a board with a unique finish or treatment. Avoid using this cleaner on boards that are explicitly labeled as “not suitable for cleaning with vinegar or acidic solutions.” If you are unsure, consult the manufacturer’s instructions or contact the manufacturer directly.
How often should I clean my wooden boards with this DIY cleaner?
The frequency of cleaning depends on how often you use your wooden boards. For boards used daily, we recommend cleaning them after each use with soap and water, followed by a deeper clean with this DIY wooden board cleaner at least once a week. If you’ve used your board to cut raw meat, poultry, or fish, it’s crucial to clean it immediately with the DIY cleaner to prevent the spread of bacteria. For boards used less frequently, a monthly deep clean should suffice. Always allow your boards to dry completely after cleaning to prevent warping or cracking.
Can I use this cleaner on butcher blocks?
Yes, this DIY cleaner is generally safe to use on butcher blocks. However, butcher blocks often have a specific oil finish to protect the wood. The vinegar in the cleaner might strip some of that oil over time. Therefore, after cleaning your butcher block with this DIY solution, it’s essential to re-oil it with a food-grade mineral oil or butcher block oil. This will help to maintain the wood’s moisture and prevent it from drying out and cracking. Follow the oil manufacturer’s instructions for proper application.
What if my wooden board has a strong odor after cutting onions or garlic?
The vinegar in this DIY wooden board cleaner is excellent at neutralizing odors. However, for particularly stubborn smells like onion or garlic, you can create a paste of baking soda and water and apply it to the affected area. Let the paste sit for 15-20 minutes before rinsing it off with warm water. Then, proceed with the DIY wooden board cleaner as usual. The baking soda will help to absorb the lingering odors, leaving your board fresh and clean.
How do I prevent my wooden boards from warping or cracking?
Proper care and maintenance are crucial for preventing warping or cracking in wooden boards. Avoid soaking your boards in water for extended periods, as this can cause the wood to swell and warp. Always dry your boards thoroughly after washing, preferably by standing them upright to allow air to circulate on all sides. Regularly oiling your boards with food-grade mineral oil or butcher block oil will help to keep the wood moisturized and prevent it from drying out and cracking. Store your boards in a dry, well-ventilated area, away from direct sunlight or heat sources.
Can I use essential oils other than tea tree oil in this cleaner?
Yes, you can experiment with other essential oils in this cleaner, but always choose oils that are food-safe and have antibacterial properties. Lemon, grapefruit, and eucalyptus essential oils are good options. However, use essential oils sparingly, as some can be quite potent. A few drops are usually sufficient. Always research the safety of any essential oil before using it on a surface that will come into contact with food. If you have any allergies or sensitivities to essential oils, avoid using them altogether.
Is it safe to use this cleaner on wooden utensils?
Yes, this DIY cleaner is safe to use on wooden utensils such as spoons, spatulas, and salad servers. The same principles apply as with wooden boards: clean them after each use, avoid soaking them in water, and oil them regularly to prevent drying and cracking. Pay particular attention to the areas where the utensil comes into contact with food, ensuring that they are thoroughly cleaned and sanitized.
What if I don’t have vinegar? Can I substitute it with something else?
While vinegar is the most effective and readily available ingredient for this DIY wooden board cleaner, you can substitute it with lemon juice in a pinch. Lemon juice has similar antibacterial and deodorizing properties. However, keep in mind that lemon juice is more acidic than vinegar and may have a slight bleaching effect on some woods. Therefore, it’s essential to test it on an inconspicuous area first. If you don’t have either vinegar or lemon juice, you can use a mild dish soap diluted in water, but it won’t be as effective at sanitizing and deodorizing the board.
Leave a Comment